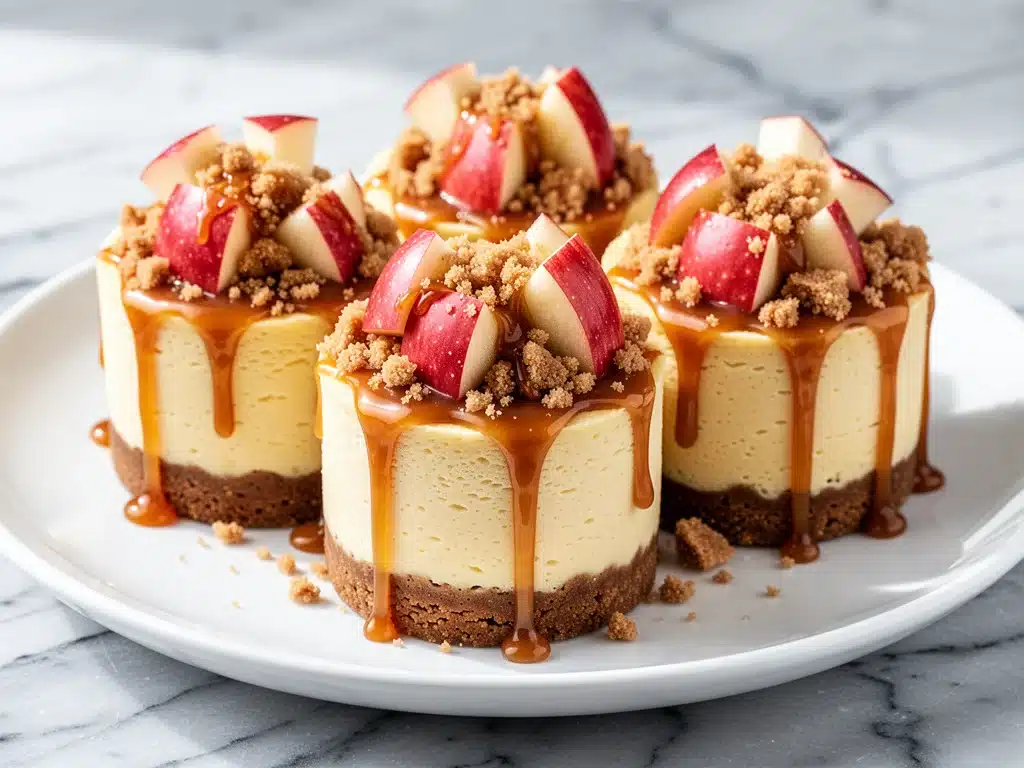
Last Tuesday, I was staring at a half-empty fridge at 7:30 PM, feeling that familiar Wednesday evening dread. You know the one. The kids are hungry, my husband just walked in from work, and the last thing I wanted to do was fire up the oven for a forty-minute bake. But I also didn’t want to serve cereal for dessert. Again. So, I raided the pantry and threw together what I thought would be a mediocre snack. Twenty minutes later, we had three small cups of creamy, salty-sweet goodness sitting on the counter, and my daughter asked me to make them every single night. That’s when I realized: sometimes the best desserts are the ones that don’t require a timer or a cleanup of a dozen bowls.
That accidental Tuesday snack became my new holy grail: no-bake salted caramel apple cheesecake cups. I’ve made them probably fifteen times since then, tweaking the ratio of cream cheese to caramel until it was absolutely perfect. They’re the ultimate weeknight savior because they’re ready in the time it takes to peel an apple, they don’t heat up the kitchen, and they look fancy enough to serve guests but simple enough for a random Tuesday treat. If you’ve ever felt guilty about skipping dessert because you’re “too tired,” this recipe is your permission slip to keep things easy and delicious.
I love that these individual cups let everyone customize their own portion. Some people want more apple, some want extra caramel drizzle, and honestly, I’m usually the one stealing the ones with the most crunch. It’s a win-win. Plus, they’re naturally gluten-free if you skip the cookie crust, which is a huge bonus for my gluten-sensitive neighbor who always drops by for coffee. I’ve tested this recipe with both graham crackers and crushed pretzels, and both work beautifully. It’s versatile, forgiving, and tastes like autumn in a glass.
Why You’ll Love This No-Bake Salted Caramel Apple Cheesecake
There are about ten reasons I keep making these cups, but here are the big ones that will change your weeknight dessert game forever.
Zero Oven Required — Seriously, if you can open a package of cream cheese and slice an apple, you can make this. I’ve made these on days when the house was already 80 degrees, and I refused to turn on the oven. Your kitchen stays cool, and you save energy. It’s a total win.
Ready in 15 Minutes — From fridge to fork is literally 15 minutes if you have your ingredients prepped. I’m talking active time. The chilling happens while you’re doing other things. I usually start these while the pasta is boiling for dinner. By the time we sit down to eat, they’re almost ready to go.
Individual Portions — No fighting over the last slice of pie. Each person gets their own cup, which means no guilt about eating “just one more bite” when you’ve already had dessert. It’s perfect for portion control without feeling like you’re on a diet.
Make-Ahead Friendly — These actually taste better the next day. The flavors meld together, and the crust softens just enough to be chewy but still crunchy. I make these on Sunday afternoons and keep them in the fridge for the entire week. It’s my secret weapon for busy school nights.
Gluten-Free Option — If you swap the graham crackers for crushed gluten-free cookies or even a nut crust, this is naturally gluten-free. I love that I can make one batch for everyone, or modify it easily. My gluten-free sister-in-law requests these specifically now.
Seasonal Versatility — While apples are perfect in fall, I’ve made these with berries in summer and pears in winter. It’s a template, not a rule. I keep it flexible because life is unpredictable.
This is my go-to when I need a dessert that feels special but requires zero effort. No complicated techniques, no weird ingredients you can’t find at the corner store, just reliable, delicious food that makes everyone happy. It’s comfort food without the commitment.
Ingredients You’ll Need
Here’s the best part: you probably have most of this already. I’m particular about three ingredients here, and I’ll tell you exactly why they matter.
For the Crust
Graham crackers (1 ½ cups / 150g, crushed) — I use regular honey graham crackers for that classic sweetness. If you want a saltier crunch, try crushed pretzels. They pair amazingly with the caramel. Make sure they’re fine crumbs, not chunks. A food processor works best, but you can put them in a bag and crush them with a rolling pin if you’re in a hurry.
Unsalted butter (4 tablespoons / 57g, melted) — This binds the crust. Use real butter, not margarine. The flavor difference is noticeable. Melt it in the microwave in 15-second bursts so you don’t burn it.
Granulated sugar (1 tablespoon) — Just a touch to help the crust brown slightly and add sweetness. Optional if your graham crackers are already sweet, but I always add it.
For the Cheesecake Layer
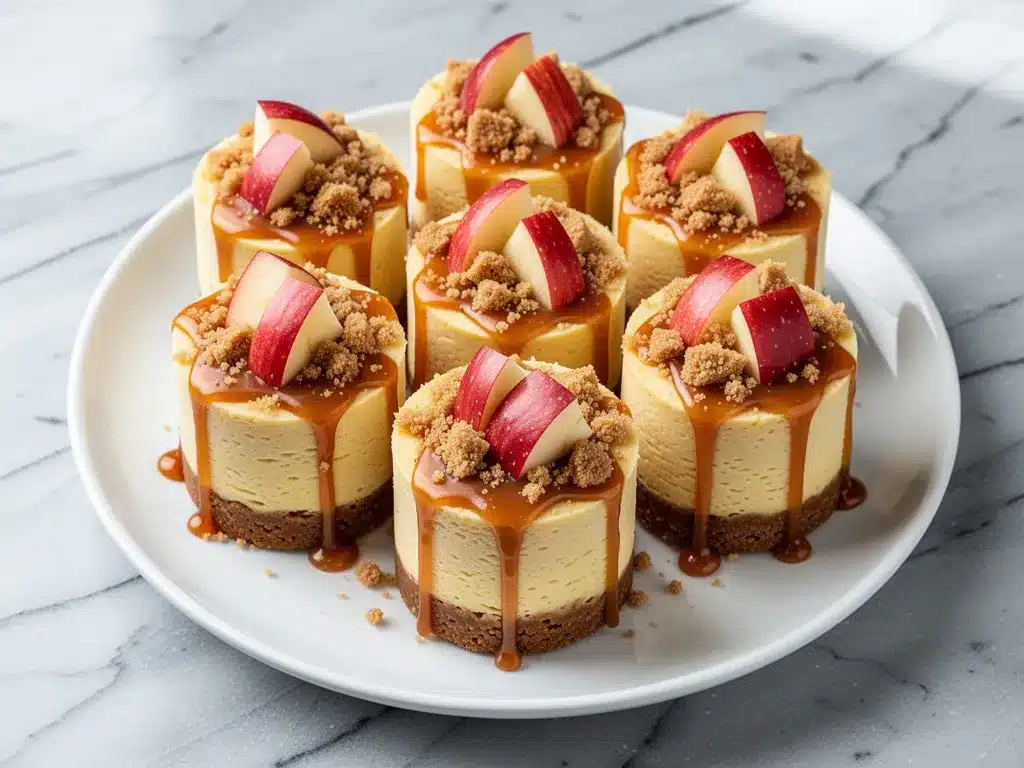
Full-fat cream cheese (8 ounces / 225g, softened) — This is non-negotiable. Light cream cheese won’t set properly and will taste watery. Let it sit on the counter for 30 minutes before you start. Softened cream cheese blends smoothly; cold cream cheese leaves lumps that no amount of beating will fix.
Heavy cream (½ cup / 120ml, cold) — This gives the cheesecake its airy, mousse-like texture. Don’t use milk or half-and-half. You need the fat content to whip properly. Keep it cold until the last second.
Confectioners’ sugar (¼ cup / 30g) — Also known as powdered sugar. It dissolves instantly, unlike granulated sugar, which might leave gritty bits in your smooth cheesecake. Sift it if it’s clumpy.
Vanilla extract (1 teaspoon) — Use real vanilla, not imitation. It makes a huge difference in flavor depth. I use pure vanilla bean paste if I have it, but regular extract works fine.
For the Toppings
Apples (2 medium, like Honeycrisp or Fuji) — I use Honeycrisp because they’re crisp and hold their shape. Gala works too, but avoid Red Delicious—they’re mealy. Peel them if you’re serving picky eaters, but the skin adds color and nutrients, so I usually leave it on.
Store-bought caramel sauce (½ cup / 120ml) — I know making caramel from scratch is nice, but for a weeknight recipe, store-bought is a lifesaver. I like the brand Smucker’s or Kraft. It’s consistent and saves 20 minutes of stirring. You can make your own, but it’s not necessary.
Salt (a pinch of flaky sea salt) — This is the secret. The salt on top cuts through the sweetness and makes the caramel flavor pop. Maldon sea salt is great, but any flaky salt works.
Optional: Chopped walnuts or pecans — For extra crunch and richness. I add these sometimes for texture variety.
Equipment Needed
You don’t need fancy equipment for this. Here’s what I actually use.
Mixing bowls — Two medium bowls. One for the crust, one for the cheesecake. I use glass bowls because I can see what’s mixing, but plastic works too.
Electric hand mixer or stand mixer — Essential for getting the cream cheese smooth and whipping the heavy cream. I use a hand mixer because it’s easier to clean. A whisk works, but you’ll need strong arms.
Food processor or zip-top bag — For crushing the graham crackers. A food processor is faster, but a bag and a rolling pin is fine if you’re being lazy.
Measuring cups and spoons — Standard stuff. Dollar store versions work fine.
Small jars or cups — I use 6-ounce mason jars, ramekins, or even disposable plastic cups for kids. Any small container with a flat bottom works. I like clear glass because you can see the layers.
Paring knife — For slicing the apples. A sharp knife makes clean cuts without bruising the fruit.
Spatula — For scraping the bowl and spreading the cheesecake. Silicone spatulas are best because they get every bit of mixture.
How to Make It: Step-by-Step
Alright, let’s make this! I’m walking you through exactly how I do it, including the little tricks I’ve picked up.
Step 1: Prep the Crust (5 minutes)
Crush your graham crackers into fine crumbs. If using a food processor, pulse until they look like wet sand. If using a bag, seal it tight and roll over it with a rolling pin until there are no big chunks. In a small bowl, mix the crumbs with the melted butter and sugar. Stir until it looks like wet sand. If you squeeze it, it should hold together. If it’s too dry, add another teaspoon of butter. If it’s too wet, add more crumbs.
Step 2: Press Into Cups (3 minutes)
Take about 2 tablespoons of the crumb mixture for each cup. Press it firmly into the bottom using the back of a spoon or a small measuring cup. You want an even, compact layer. Don’t be shy with the pressure—this keeps the crust from falling apart when you eat it. Repeat for all your cups.
Step 3: Make the Cheesecake Filling (5 minutes)
In a large bowl, beat the softened cream cheese with the confectioners’ sugar and vanilla extract until completely smooth. This is crucial. Scrape down the sides of the bowl and beat for another minute to ensure there are no lumps. In a separate cold bowl, whip the heavy cream until stiff peaks form. This means when you lift the beaters, the cream stands up straight. Don’t over-whip it into butter!
Step 4: Fold It Together (2 minutes)
Gently fold the whipped cream into the cream cheese mixture. Use a spatula and fold from the bottom up, like you’re mixing a salad. Do this until just combined. Over-mixing will deflate the cream and make the filling dense. You want it light and airy.
Step 5: Assemble the Cups (5 minutes)
Spoon or pipe the cheesecake mixture into the prepared cups, leaving a little space at the top. Smooth the top with a spoon. If you have piping bags, this looks fancy, but a spoon works perfectly fine. I usually just scoop it in.
Step 6: Add the Apples and Caramel (5 minutes)
Peel and dice the apples into small cubes, about ½-inch pieces. Toss them with a tiny squeeze of lemon juice if you want to prevent browning, though they usually don’t brown much in the time it takes to eat them. Spoon the apple cubes on top of the cheesecake. Drizzle generously with caramel sauce. Finish with a pinch of flaky salt. The salt should be visible on top.
Step 7: Chill and Serve
Place the cups in the fridge for at least 30 minutes to set. If you can wait an hour, even better. The crust will firm up, and the flavors will meld. Serve cold. They keep well in the fridge for up to 3 days.
Total Time: About 20 minutes active, plus chilling time.
Expert Tips & Tricks
Here’s everything I’ve learned from making this dozens of times. These tips will save you from my mistakes.
Softened Cream Cheese is Key
I cannot stress this enough. If your cream cheese is cold, you will have lumps. I learned this the hard way with a grainy cheesecake that looked awful. Cut the block into small cubes and let it sit on the counter for 30 minutes before you start. If you forget, microwave it in 5-second bursts, checking frequently, until it’s soft but not melted.
Don’t Skip the Salt
The salt isn’t just for garnish. It balances the sweetness of the caramel and sugar. Without it, the dessert tastes flat and overly sweet. I use flaky sea salt because it adds a nice crunch and visual appeal. Regular table salt works, but it dissolves faster and doesn’t look as pretty.
Choose the Right Apple
Not all apples are created equal. I avoid Red Delicious because they’re mealy and bland. Honeycrisp, Fuji, and Granny Smith are my favorites. Granny Smith adds a nice tartness that cuts the sweetness, while Honeycrisp is sweet and crisp. Slice them small so they’re easy to eat with a spoon.
Whip the Cream Properly
Your bowl and beaters should be cold. If you’re in a warm kitchen, put the bowl in the fridge for 10 minutes before whipping. This helps the cream hold its shape longer. If the cream is too warm, it won’t whip up stiff peaks, and your cheesecake will be soupy.
Make-Ahead Strategy
These are perfect for meal prep. Make them on Sunday and store them in the fridge. They last up to 3 days. The crust might get a little softer over time, but it’s still good. If you’re making them ahead, add the fresh apple slices right before serving to keep them crisp. The caramel can be added ahead of time.
Common Mistakes (and how to avoid them)
Mistake: Cheesecake is too runny. Fix: You didn’t whip the cream enough, or the cream cheese wasn’t smooth. Make sure the cream holds stiff peaks, and beat the cream cheese until it’s silky.
Mistake: Crust falls apart. Fix: You didn’t press it firmly enough, or there wasn’t enough butter. Use enough butter to make it clump when squeezed.
Mistake: Apples turn brown. Fix: Toss them with a little lemon juice or serve immediately. They brown slowly, so it’s not a huge deal if they sit for a bit.
Variations & Substitutions
Once you’ve nailed the basic version, here’s how you can mix it up. I’ve tried all of these.
Pretzel Crust
Swap graham crackers for crushed salted pretzels. This makes the crust salty and crunchy, which pairs perfectly with the sweet caramel. It’s my husband’s favorite version.
Gluten-Free
Use gluten-free graham crackers or almond flour for the crust. Everything else is naturally gluten-free. I’ve used Kinnikinnick brand gluten-free crackers, and they work great.
Dairy-Free
Replace cream cheese with a dairy-free alternative like Kite Hill or Forager. Use coconut cream instead of heavy cream. It will be richer and have a coconut flavor, which is actually delicious. Use dairy-free caramel sauce.
Vegan
Use the dairy-free cream cheese and coconut cream. Add a tablespoon of maple syrup for sweetness if needed. It’s not exactly the same, but it’s still tasty. My vegan friend likes it with extra caramel.
Berry Version
Swap apples for fresh strawberries or blueberries. They add a bright, tart flavor. I love this version in summer. The berries look beautiful against the white cheesecake.
Chocolate Version
Add 2 tablespoons of cocoa powder to the cheesecake mixture. It turns it into a chocolate cheesecake cup. I drizzle chocolate sauce instead of caramel. It’s like a mini dessert bar in a cup.
Different Nuts
Instead of walnuts, try toasted pecans or pistachios. Pecans add a buttery flavor, and pistachios add a nice color contrast. Toasting the nuts first brings out their flavor.
Serving & Storage
How to Serve:
I usually serve these straight from the fridge. They’re cold and refreshing. But here are other ways I’ve enjoyed them:
Side Dishes:
These are desserts, so they don’t need sides. But if you’re serving them after dinner, pair them with a cup of hot tea or coffee. The bitterness of coffee cuts the sweetness perfectly. I also like to serve them with a glass of cold milk.
Toppings Bar:
When I have guests, I put out extra caramel, flaky salt, and chopped nuts. Everyone customizes their cup. It’s fun and interactive.
Storage Instructions:
Refrigerator: Store in an airtight container for up to 3 days. The crust will soften slightly, but it’s still good. If the apples are added, they might release some juice, so eat them within 2 days for best texture.
Freezing: Honestly, these don’t freeze well. The cream cheese and whipped cream can separate and become grainy when thawed. The apples also get mushy. I recommend making them fresh or storing in the fridge for up to 3 days.
Meal Prep: Make the crust and cheesecake filling ahead. Store them separately. Assemble right before serving. This keeps the crust crunchy and the apples fresh. I do this when I’m busy during the week.
Pro tip: If you’re making these for a party, assemble them in a large dish and slice the apples on top right before serving. It looks impressive and saves time.
Nutrition Information
I’m not a nutritionist, but here’s the breakdown if you’re tracking. This is per cup, based on 6 servings.
| Nutrient | Amount |
|---|---|
| Calories | 320 |
| Protein | 4g |
| Carbs | 35g |
| Fiber | 1g |
| Sugar | 28g |
| Fat | 18g |
| Saturated Fat | 11g |
| Sodium | 180mg |
What’s Good: It’s a small portion, so it’s easier to control. The apples add some fiber and vitamins. It’s much lighter than a whole cake.
What to Know: It’s higher in sugar from the caramel and graham crackers. If you’re watching sugar, use less caramel or sugar-free alternatives. It contains dairy and gluten (unless modified).
My Take: Look, this is a treat. It’s sweet and rich. It’s not a health food. But it’s better than store-bought cupcakes, and it feels homemade. When I want to make it lighter, I use less caramel and more apples. But usually? I just enjoy a cup and move on.
Final Thoughts
So that’s my go-to no-bake salted caramel apple cheesecake cup! I’ve probably talked your ear off at this point, but when you make a recipe this often, you have a lot to say about it. This has saved weeknight desserts more times than I can count. It’s my answer to “what’s for dessert?” when I’m tired, don’t want to bake, and still want something that tastes really good. My kids are happy, my husband’s happy, and I’m happy because I’m not stressed about cooking.
Make it yours! Try different apples, swap the crust, or add different toppings. The best recipes are the ones you adapt to your family’s tastes. If you make this, drop a comment and let me know what you think! I love hearing how recipes turn out in your kitchen. And if something doesn’t work, tell me that too—I’m here to help troubleshoot.
Happy cooking! And I hope your kitchen smells half as good as mine does right now. If you’re looking for more easy desserts, check out my pomegranate honey cheesecake bars for a holiday twist, or try these apple challah bread pudding for a warmer, baked option. Both are fantastic if you have a bit more time on your hands.
Frequently Asked Questions
Can I use Greek yogurt instead of cream cheese?
You can, but the texture will be different. Greek yogurt is tangier and lighter. I’ve tried it, and it’s good, but it’s not as rich or creamy as cream cheese. If you use it, mix it with a little heavy cream to add richness. It’s a healthier option, but less indulgent.
My cheesecake is too runny—what happened?
Usually means you didn’t whip the cream enough, or the cream cheese wasn’t smooth. Make sure the cream holds stiff peaks, and beat the cream cheese until it’s silky. Also, make sure you’re using full-fat cream cheese, not light. Light cream cheese has more water and won’t set properly.
Can I make this ahead for a dinner party?
Absolutely! Make the crust and cheesecake filling up to 2 days ahead. Store them in the fridge. Assemble right before serving. If you add the apples ahead, they might get soggy, so I recommend adding fresh apples right before serving. It saves you stress during the party.
Why did my crust fall apart?
You didn’t use enough butter, or you didn’t press it firmly enough. The butter binds the crumbs. Make sure the mixture looks like wet sand and holds together when squeezed. Press it firmly into the bottom of the cup. If it’s too dry, add another teaspoon of butter.
Can I use homemade caramel sauce?
Yes! Homemade caramel is delicious. Just make sure it’s cooled to room temperature before drizzling. If it’s too hot, it will melt the cheesecake. Store-bought is easier, but homemade tastes richer. I like to add a pinch of sea salt to my homemade caramel for extra flavor.
How do I store leftovers?
Store in an airtight container in the fridge for up to 3 days. The crust will soften slightly, but it’s still good. If the apples are added, they might release some juice, so eat them within 2 days for best texture. Do not freeze, as the texture will change.
Can I use a different type of apple?
Yes, but choose crisp apples. Honeycrisp, Fuji, and Granny Smith are my favorites. Avoid Red Delicious because they’re mealy. You can also use pears, but they’re softer. Slice them small so they’re easy to eat with a spoon.
Pin This Recipe!


No-Bake Salted Caramel Apple Cheesecake Cups
- Total Time: 45 minutes
- Yield: 6 servings 1x
Description
These easy no-bake cheesecake cups combine a buttery graham cracker crust with a creamy, airy cheesecake filling, topped with crisp apples, salted caramel sauce, and flaky sea salt. Ready in just 15 minutes of active time, they are the perfect weeknight dessert that requires no oven.
Ingredients
- 1 ½ cups (150g) graham crackers, crushed into fine crumbs
- 4 tablespoons (57g) unsalted butter, melted
- 1 tablespoon granulated sugar
- 8 ounces (225g) full-fat cream cheese, softened
- ½ cup (120ml) heavy cream, cold
- ¼ cup (30g) confectioners’ sugar
- 1 teaspoon vanilla extract
- 2 medium apples (Honeycrisp or Fuji), peeled and diced
- ½ cup (120ml) store-bought caramel sauce
- Pinch of flaky sea salt
- Optional: Chopped walnuts or pecans
Instructions
- Crush graham crackers into fine crumbs. Mix with melted butter and sugar until the texture resembles wet sand.
- Press about 2 tablespoons of the crumb mixture firmly into the bottom of each small jar or cup to form the crust.
- In a large bowl, beat the softened cream cheese, confectioners’ sugar, and vanilla extract until completely smooth.
- In a separate cold bowl, whip the heavy cream until stiff peaks form.
- Gently fold the whipped cream into the cream cheese mixture until just combined.
- Spoon the cheesecake filling into the prepared cups, smoothing the top.
- Top with diced apples, drizzle generously with caramel sauce, and finish with a pinch of flaky sea salt.
- Chill in the refrigerator for at least 30 minutes to set before serving.
Notes
Ensure cream cheese is fully softened to avoid lumps. Use cold heavy cream for best whipping results. The dessert keeps well in the fridge for up to 3 days, but fresh apples are best added right before serving to maintain crunch. Do not freeze as the texture may become grainy.
- Prep Time: 15 minutes
- Cook Time: 0 minutes
- Category: Dessert
- Cuisine: American
Nutrition
- Serving Size: 1 cup
- Calories: 320
- Sugar: 28
- Sodium: 180
- Fat: 18
- Saturated Fat: 11
- Carbohydrates: 35
- Fiber: 1
- Protein: 4
Keywords: no-bake, cheesecake, salted caramel, apple dessert, weeknight dessert, gluten-free option, easy dessert, fall dessert


