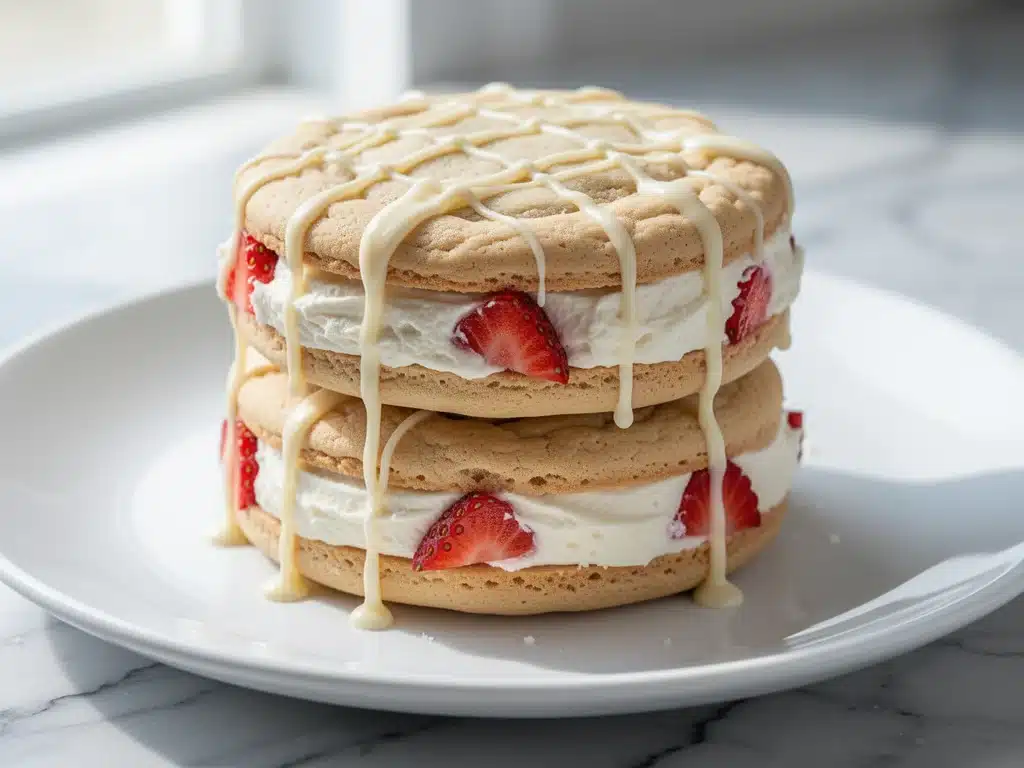
It was supposed to be a quick bake. Just something simple to take to the neighborhood potluck on Saturday afternoon. I had three hours to kill before my husband’s soccer tournament, and I wanted to bring something that looked fancy but didn’t require a culinary degree. So, I pulled out a box of cookie mix, a tub of cream cheese, and a jar of strawberry jam. I figured, why not?
Fast forward two hours. I’m standing in the kitchen, covered in flour, staring at a tray of what can only be described as architectural disasters. The cookies spread too much. The filling oozed out the sides like a broken heart. And the white chocolate drizzle? It had hardened into jagged, sticky shards that I couldn’t even pick up without breaking my nails.
But here’s the thing about failure in the kitchen: it’s usually just a lesson in disguise. I scraped those disasters into the trash (okay, I ate one anyway, and it was actually pretty good, but it was messy) and started over. This time, I stopped guessing. I looked up how real cheesecake cookies are made. I learned about chilling the dough. I figured out the perfect ratio of jam to cream cheese so it wouldn’t leak. I adjusted the baking time so the edges stayed soft but the centers set.
When I pulled the second batch out of the oven, the smell was intoxicating. Vanilla, warm butter, and that sharp, tangy strawberry scent. I lined them up on a cooling rack, waited for them to cool just enough to handle, and then did the drizzle. The result? These creamy strawberry cheesecake cookie sandwiches. They are soft, chewy, tangy, sweet, and incredibly photogenic. I brought them to the potluck, and they were gone in twelve minutes. People were asking for the recipe before I even finished my plate of potato salad.
That was three months ago. I’ve made these at least six times since. They’re my go-to for last-minute hostess gifts, my children’s birthday party treats, and my personal “I need a hug” dessert. If you’ve ever struggled with cookie sandwiches that fall apart or fillings that are too runny, this is the one. It’s the version that actually works. And trust me, once you taste the contrast between the buttery vanilla cookie and that tangy cheesecake center, you’ll be making them for everyone you know.
Why You’ll Love This Recipe
There are about ten reasons I keep coming back to these strawberry cheesecake cookie sandwiches, but if you’re looking for the big ones, here’s what makes them special.
They Taste Like Real Cheesecake — I’m not talking about that artificial strawberry flavor you get in cheap candies. These cookies use real cream cheese and a hint of lemon juice to get that authentic tang. It’s the same flavor profile as a slice of New York cheesecake, but in a portable, handheld form. My neighbor, who is obsessed with that place in the city with the long lines, said these were “just as good” and “way easier.”
Perfectly Mess-Free (Mostly) — The biggest issue with cookie sandwiches is the filling sliding out when you bite into them. I’ve spent years tweaking this recipe to get the consistency just right. The cream cheese mixture is thick enough to hold its shape but soft enough to spread. Plus, the white chocolate drizzle acts like a sealant, keeping everything in place. You can actually pick these up without getting cream cheese on your shirt. (I speak from experience.)
Impressive But Actually Easy — These look like they came from a high-end bakery. They have that professional, polished look with the neat drizzle and the sandwich structure. But the truth? It’s basically a standard sugar cookie recipe with a cream cheese filling. If you can mix batter and spread frosting, you can make these. I’ve walked my teenage niece through the whole process over FaceTime, and she nailed it the first time.
Great for Meal Prep — Unlike delicate pastries that need to be eaten the same day, these cookies actually get better after sitting in an airtight container for a day or two. The cookies soften slightly, and the flavors meld together. I usually make a double batch on Sunday, store them in the fridge, and pull them out throughout the week for after-school snacks. They stay fresh for up to a week.
Customizable to Any Occasion — While strawberry is my absolute favorite, the base recipe is a blank canvas. Swap the jam for raspberry, switch the white chocolate to dark chocolate, or add a sprinkle of poppy seeds to the dough. I’ve made these with blueberry jam for a summer picnic, and they were a hit. They’re versatile enough for any season.
This recipe has completely changed my dessert game. It’s my answer to “what should I bring?” when I’m stressed, and it’s my comfort food when I’m tired. No complicated techniques, no weird ingredients, just reliable, delicious cookies that make everyone happy.
Ingredients You’ll Need
Here’s the best part: you probably have most of this already. These cookies rely on simple, pantry-friendly ingredients, but a few specifics make all the difference between “okay” and “amazing.”
For the Cookie Dough
Unsalted Butter (1 cup / 226g, softened) — This is non-negotiable. I use salted butter for savory dishes, but for cookies, unsalted lets you control the saltiness. Make sure it’s softened to room temperature. If it’s too cold, it won’t cream properly. If it’s melted, your cookies will spread into flat discs. I leave it out on the counter for about an hour before starting.
Granulated Sugar (1 cup / 200g) — For a chewier cookie, you can swap half of this for brown sugar, but I prefer all granulated for this specific recipe. It gives those cookies a slightly crisp edge and a tender center. Don’t skip this step of creaming it with the butter—it adds air and structure.
Light Brown Sugar (½ cup / 100g) — I actually add a little brown sugar to the dough for depth of flavor and moisture. It keeps the cookies from drying out in the fridge. If you’re out, you can use all white sugar, but the texture will be slightly crisper.
Large Eggs (2) — Room temperature eggs blend into the dough more evenly. Cold eggs can cause the butter to seize up. Crack them into a small bowl first to check for shells, then add.
Vanilla Extract (2 teaspoons) — Use real vanilla, not imitation. The difference is huge in a dessert where vanilla is a primary flavor. I keep a bottle of Nielsen-Massey in my pantry. It’s pricey, but a little goes a long way.
All-Purpose Flour (2 ½ cups / 315g) — Spoon and level your flour. Don’t scoop it directly from the bag, or you’ll pack it down and end up with dry, crumbly cookies. I use the spoon-into-cup method and then level it off with a knife.
Baking Powder (1 teaspoon) — And a half teaspoon of baking soda. Check your leavening agents if your cookies have been flat in the past. Old baking powder won’t give them that little lift.
Salt (½ teaspoon) — Essential to balance the sweetness. Don’t skip it, even if you like sweet cookies.
For the Cream Cheese Filling
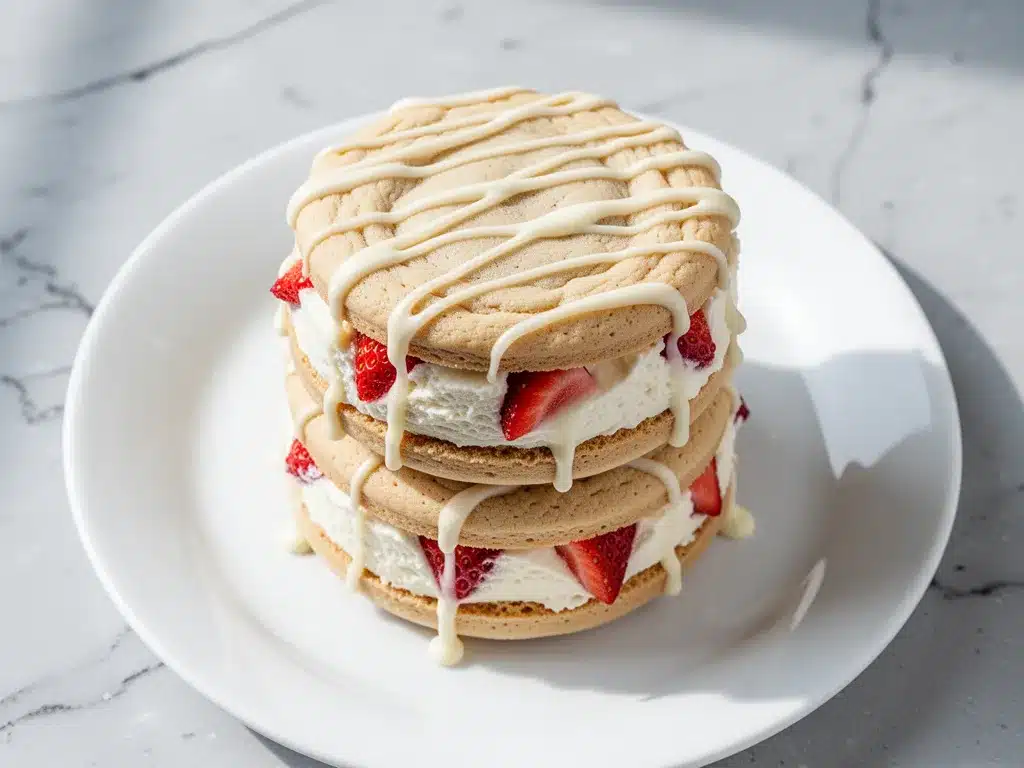
Block Cream Cheese (8 oz / 225g, softened) — Not the spreadable kind in a tub. Block cream cheese has less water and holds its shape better. If you use the tub kind, your filling will be too runny and will leak out of the cookies. Let it sit on the counter for 30 minutes until it’s soft enough to mash with a fork.
Powdered Sugar (½ cup / 60g) — This dissolves easily into the cream cheese, creating a smooth, pipeable consistency. If you use granulated sugar, you’ll get gritty little grains in your filling.
Strawberry Jam or Preserves (½ cup) — I use a high-quality seedless jam for a smooth texture. If you like seeds, use preserves. The key is to make sure it’s not too watery. If your jam looks runny, cook it in a small saucepan for 5 minutes to reduce it, then let it cool completely. Water is the enemy of cookie sandwiches.
Lemon Juice (1 teaspoon) — Just a splash. It brightens the flavor of the cream cheese and cuts through the richness. It’s the secret ingredient that makes it taste like “cheesecake” rather than just “sweet cream.”
For the White Chocolate Drizzle
White Chocolate Chips (1 cup / 170g) — I prefer chips over chunks because they melt more evenly. Look for chips with a good cocoa butter content. Cheap ones with vegetable oil can seize up and become grainy.
Coconut Oil or Butter (1 tablespoon) — This thins the chocolate just enough to make it drizzle-able. Coconut oil keeps it vegan-friendly if you use dairy-free chocolate chips. Butter adds a richer flavor. I usually use butter.
Optional: Dried Strawberry Bits — For extra texture and visual appeal, I sprinkle some crushed freeze-dried strawberries on top of the wet drizzle. It adds a tart crunch and looks beautiful.
Equipment Needed
You don’t need fancy equipment for this. Here’s what I actually use.
Electric Mixer — Handheld or stand mixer. Creaming the butter and sugar by hand is possible, but it takes about 10 minutes of arm work. I use my hand mixer because it’s faster and gives a more consistent texture. If you’re doing it by hand, just be prepared for a workout.
Baking Sheets — Two standard half-sheet pans. I use the heavy-duty ones because they conduct heat evenly. Lighter, flimsy pans can cause the bottoms to burn before the tops are done.
Parchment Paper — Line your baking sheets. This is non-negotiable for easy cleanup and even baking. Silpat mats work too, but I like the reliability of parchment.
Offset Spatula — For spreading the filling. The curved edge makes it easy to get into the corners of the cookie sandwich without tearing it.
Ziplock Bags — I use these as makeshift piping bags. Just put the filling in a bag, snip off one corner, and pipe it onto the cookies. It’s much cleaner than using a spoon.
Small Saucepan or Microwave-Safe Bowl — For melting the white chocolate. I prefer the microwave in 20-second intervals, stirring in between. It’s faster and less likely to burn than the stove.
Cooling Racks — Essential. You need to cool the cookies completely before assembling, or the heat will melt the filling and make a mess. I have two racks, which helps me batch the process efficiently.
Offset Spatula — For the drizzle. It helps you spread the chocolate evenly without digging into the cookie.
How to Make It: Step-by-Step
Alright, let’s make these! I’m walking you through exactly how I do it, including the little tricks I’ve picked up along the way.
Step 1: Prep Your Dough (10 minutes)
Start by preheating your oven to 350°F (175°C). Line two baking sheets with parchment paper. In a large bowl, beat the softened butter, granulated sugar, and brown sugar together until light and fluffy. This should take about 3-4 minutes. The mixture should look pale and creamy. If it looks yellow and dense, you didn’t cream it enough.
Add the eggs one at a time, beating well after each addition. Scrape down the sides of the bowl with a spatula to ensure everything is incorporated. Stir in the vanilla extract.
Step 2: Mix the Dry Ingredients (2 minutes)
In a separate medium bowl, whisk together the flour, baking powder, baking soda, and salt. This ensures the leavening agents are evenly distributed, so you don’t get bitter spots of baking soda in your finished cookies.
Step 3: Combine Wet and Dry (2 minutes)
Gradually add the dry ingredients to the wet ingredients. Mix on low speed or use a spatula until just combined. Do not overmix. Once the flour disappears, stop. Overmixing develops gluten, which makes cookies tough instead of tender. The dough should be soft but not sticky. If it’s too sticky, add a tablespoon of flour. If it’s too dry, add a tablespoon of milk.
Step 4: Chill the Dough (Crucial Step!)
Here’s the secret most people skip: chill the dough. Cover the bowl with plastic wrap and refrigerate for at least 30 minutes, or up to 24 hours. Chilling solidifies the fat, which prevents the cookies from spreading too much. It also allows the flour to hydrate, resulting in a deeper, more complex flavor. I often chill the dough overnight so I can bake them fresh in the morning.
Step 5: Bake the Cookies (12-14 minutes)
Take the dough out of the fridge. Scoop about 1.5 tablespoons of dough per cookie. Roll them into balls and place them on the prepared baking sheets, spacing them about 2 inches apart. They will spread, so give them room. Bake for 12-14 minutes, or until the edges are lightly golden but the centers still look slightly soft and puffy. They will firm up as they cool. Do not overbake them, or they’ll be dry. Let them cool on the baking sheet for 5 minutes, then transfer to a wire rack to cool completely.
Step 6: Make the Filling (5 minutes)
While the cookies cool, make the cream cheese filling. In a medium bowl, beat the softened block cream cheese and powdered sugar until smooth and creamy. Beat in the lemon juice and 2 tablespoons of the strawberry jam. Taste it. It should be tangy and sweet. If you want more strawberry flavor, add the rest of the jam, but remember, too much liquid jam can make the filling runny.
Step 7: Assemble the Sandwiches (10 minutes)
Once the cookies are completely cool, pair them up. They don’t need to be identical, but try to match similar-sized cookies. Place one cookie flat-side up. Pipe or spoon a generous dollop of the cream cheese filling onto the center. Spread it out to within ¼ inch of the edge. Place the second cookie on top, flat-side down, and gently press down. The filling should just barely reach the edges.
Step 8: The White Chocolate Drizzle (5 minutes)
Melt the white chocolate chips and coconut oil (or butter) together. I do this in the microwave in 20-second intervals, stirring in between, until smooth. Let it cool for a minute so it’s not too hot. Put the drizzle in a small ziplock bag and snip off a tiny corner. Drizzle the chocolate over the assembled cookies in a zigzag pattern. If you’re using dried strawberry bits, sprinkle them on immediately while the chocolate is wet.
Let the chocolate set at room temperature for about 15 minutes, or pop them in the fridge for 5 minutes to speed it up. Once set, they’re ready to eat or store.
Expert Tips & Tricks
Here’s everything I’ve learned from making these dozens of times. These tips will save you from my mistakes.
Chill Your Dough — I cannot stress this enough. If you skip the chill, your cookies will spread into flat pancakes. The filling will ooze out, and you’ll have a mess. 30 minutes is the minimum. Overnight is best.
Use Block Cream Cheese — The tub stuff has stabilizers and extra water. It won’t hold its shape. Block cream cheese, softened properly, creates a thick, pipeable filling that stays put.
Reduce Your Jam — If your jam is watery, cook it down first. Water turns to steam in the oven, which can cause the cookies to puff up and then deflate, breaking the seal. A thick, reduced jam keeps the sandwich intact.
Don’t Overbake — These cookies should look underdone when you take them out. They continue to cook on the hot baking sheet. If they look fully set in the oven, they’ll be hard as rocks when they cool.
Match Your Cookies — When assembling, try to pair cookies of similar size and shape. It’s not just for looks; it ensures the structural integrity of the sandwich. A huge cookie with a tiny one on top will be unstable.
Store Properly — These cookies contain dairy, so they need to be stored in the fridge if you’re keeping them for more than a day. Keep them in an airtight container with parchment paper between layers to prevent sticking. They’ll last up to a week in the fridge.
Variations & Substitutions
Once you’ve nailed the basic version, here’s how you can mix it up. I’ve tried all of these.
Raspberry Cheesecake — Swap the strawberry jam for raspberry jam. It’s my second favorite. The red color against the white chocolate is stunning.
Blueberry Lemon — Use blueberry jam and add a teaspoon of lemon zest to the cream cheese filling. It’s bright and refreshing.
Chocolate Chip Cookie Base — Add ½ cup of mini chocolate chips to the dough before baking. It adds a fun surprise inside the cookie.
Gluten-Free — Use a 1-to-1 gluten-free flour blend. The texture might be slightly more tender, but it works well. Just be careful not to overmix.
Dairy-Free — Use vegan butter and vegan cream cheese blocks (like Miyoko’s or Kite Hill). Use dairy-free white chocolate chips. The result is surprisingly close to the original.
Dark Chocolate Drizzle — Swap the white chocolate for dark or milk chocolate. It adds a richer, less sweet contrast to the tangy filling.
Serving & Storage
How to Serve: I usually serve these at room temperature, but they’re also delicious chilled. The cold cream cheese filling feels almost like ice cream. I pair them with a glass of cold milk or a cup of coffee. They’re perfect for brunch, afternoon tea, or dessert after dinner.
Side Dishes: These cookies are a complete treat on their own. But if you’re having a party, I like to serve them with fresh berries or a fruit salad to balance the sweetness.
Storage Instructions:
Refrigerator: Store in an airtight container for up to 5 days. Place parchment paper between layers to prevent sticking. They will firm up in the fridge, so let them sit at room temperature for 10 minutes before eating for the best texture.
Freezer: You can freeze these, but the texture of the cream cheese filling might change slightly upon thawing. I recommend freezing the assembled cookies (without the drizzle) in an airtight container for up to 2 months. Thaw in the fridge overnight. Add the drizzle after thawing. The cookies themselves freeze very well.
Pro Tip: If your cookies seem a bit soft after taking them out of the fridge, let them sit on the counter for 15 minutes. The chocolate will soften slightly, making them easier to bite into.
Nutrition Information
I’m not a nutritionist, but here’s the breakdown if you’re tracking. Keep in mind that these are rich, indulgent treats, so portion control is key.
Per Cookie Sandwich (based on 24 servings):
- Calories: 180
- Protein: 3g
- Carbs: 22g
- Fiber: 0g
- Sugar: 14g
- Fat: 10g
- Saturated Fat: 6g
- Cholesterol: 30mg
- Sodium: 120mg
What’s Good: They provide a quick energy boost. The cream cheese adds a bit of protein and calcium.
What to Know: They are high in sugar and saturated fat due to the cream cheese, butter, and white chocolate. If you’re watching your intake, stick to one or two cookies.
My Take: Look, this is dessert. It’s not a health food. But it’s homemade, so you know exactly what’s in it. It’s way better than store-bought cookies that are full of preservatives. Enjoy it as a special treat.
Final Thoughts
So that’s my creamy strawberry cheesecake cookie sandwich recipe! I’ve talked your ear off, but I hope you’re convinced to give them a try. These cookies have saved my social life. They’re the reason I’m invited to parties, the reason my kids beg for “cookie sandwiches” for breakfast, and the reason I keep a box of cream cheese in my fridge at all times.
They’re proof that you don’t need to be a professional baker to make something impressive. You just need the right ratio of ingredients and a little bit of patience. Once you make these, you’ll understand why I’m obsessed. They’re soft, tangy, sweet, and absolutely delicious.
Make them yours! Try different jams, different chocolates, different flavors. The best recipes are the ones you adapt to your tastes. And if you make these, please let me know how they turn out. I love hearing from you.
Happy baking! And I hope your kitchen smells like a bakery soon.
Frequently Asked Questions
Can I use jarred cream cheese spread instead of block cream cheese?
I strongly recommend against it. The spreadable kind in the tub has more water and stabilizers, which makes the filling runny. It won’t hold its shape in the cookie sandwich and will likely leak out during baking or storage. Block cream cheese is essential for the right texture.
Why did my cookies spread too much?
Most likely, your butter was too soft or you skipped the chilling step. If the butter is melted, the cookies will spread into flat discs. If you don’t chill the dough, the fat melts too quickly in the oven before the structure sets. Make sure your butter is softened but still cool, and chill the dough for at least 30 minutes.
Can I make these ahead of time?
Yes! You can bake the cookies up to 3 days ahead and store them in an airtight container. Make the filling the day you plan to assemble them. Assemble the sandwiches no more than 24 hours before serving for the best texture. The white chocolate drizzle should be added just before serving or the night before.
Can I freeze the assembled cookies?
You can, but the texture of the cream cheese filling may change slightly. It might become a bit grainy or separate when thawed. I recommend freezing the plain cookies and assembling them after thawing. If you must freeze assembled cookies, thaw them in the fridge overnight and let them come to room temperature before eating.
What if I don’t have a mixer?
You can make the dough by hand, but it will take more effort. Creaming the butter and sugar by hand requires about 5-7 minutes of vigorous mixing. For the filling, you can use a fork or a small whisk to beat the cream cheese and sugar until smooth. It’s doable, just a bit more work.
Can I use fresh strawberries instead of jam?
Not directly. Fresh strawberries have too much water and will make the filling runny. If you want to use fresh strawberries, make a compote first by cooking them down with sugar until thick, then let it cool completely before mixing it with the cream cheese. But for simplicity and reliability, jam is the way to go.
How do I fix a cracked white chocolate drizzle?
If the chocolate cracks, it means it was too thick or you drizzled it too cold. Add a little more coconut oil or butter to thin it out. If the chocolate seized up and became grainy, it got wet. Unfortunately, you can’t fix seized chocolate. Start over, but make sure your bowl and utensils are completely dry.
Pin This Recipe!

Creamy Strawberry Cheesecake Cookie Sandwiches
- Total Time: 45 minutes
- Yield: 24 servings 1x
Description
Soft, chewy vanilla cookie sandwiches filled with a tangy cream cheese and strawberry jam mixture, finished with a white chocolate drizzle. These impressive yet easy-to-make treats are perfect for potlucks, gifts, or dessert.
Ingredients
- 1 cup (226g) unsalted butter, softened
- 1 cup (200g) granulated sugar
- ½ cup (100g) light brown sugar
- 2 large eggs, room temperature
- 2 teaspoons vanilla extract
- 2 ½ cups (315g) all-purpose flour
- 1 teaspoon baking powder
- ½ teaspoon baking soda
- ½ teaspoon salt
- 8 oz (225g) block cream cheese, softened
- ½ cup (60g) powdered sugar
- ½ cup strawberry jam or preserves
- 1 teaspoon lemon juice
- 1 cup (170g) white chocolate chips
- 1 tablespoon coconut oil or butter
- Optional: Dried strawberry bits
Instructions
- Preheat oven to 350°F (175°C). Line two baking sheets with parchment paper.
- In a large bowl, beat softened butter, granulated sugar, and brown sugar until light and fluffy (3-4 minutes).
- Add eggs one at a time, beating well after each addition. Scrape down sides and stir in vanilla extract.
- In a separate bowl, whisk together flour, baking powder, baking soda, and salt.
- Gradually add dry ingredients to wet ingredients, mixing until just combined. Do not overmix.
- Cover dough and refrigerate for at least 30 minutes (or up to 24 hours).
- Scoop 1.5 tablespoons of dough per cookie, roll into balls, and place on baking sheets 2 inches apart.
- Bake for 12-14 minutes until edges are lightly golden but centers look soft. Cool on sheet for 5 minutes, then transfer to wire rack to cool completely.
- While cookies cool, beat cream cheese and powdered sugar until smooth. Beat in lemon juice and 2 tablespoons of jam.
- Pair cooled cookies of similar size. Spread filling onto one cookie, leaving ¼ inch border. Top with second cookie.
- Melt white chocolate chips and coconut oil/butter in microwave intervals until smooth. Drizzle over assembled cookies.
- Sprinkle with dried strawberry bits if desired. Let chocolate set for 15 minutes at room temperature or 5 minutes in fridge.
Notes
Chilling the dough is crucial to prevent spreading. Use block cream cheese, not spreadable tub cream cheese, to ensure the filling holds its shape. If jam is watery, cook it down to reduce moisture. Store in an airtight container in the fridge for up to 5 days.
- Prep Time: 30 minutes
- Cook Time: 14 minutes
- Category: Dessert
- Cuisine: American
Nutrition
- Serving Size: 1 cookie sandwich
- Calories: 180
- Sugar: 14
- Sodium: 120
- Fat: 10
- Saturated Fat: 6
- Carbohydrates: 22
- Protein: 3
Keywords: strawberry cheesecake cookies, cookie sandwiches, cream cheese filling, white chocolate drizzle, easy dessert, potluck recipe, homemade cookies


