Last Tuesday, I stood in my kitchen at 6:30 PM, staring into the refrigerator with that specific kind of desperate hunger that only comes after a long workday. The takeout menu for our favorite local spot was open on my laptop, and I was about to click “Order.” But then I saw the chicken thighs sitting in the crisper drawer—skin-on, bone-in, perfectly ready for the oven. I also saw a block of Parmesan cheese I’d bought for a pasta recipe three days ago and completely forgot about.
I closed the laptop. I didn’t want soup. I didn’t want salad. I wanted something crispy, savory, and deeply satisfying without the guilt or the cost of delivery. So, I threw together what I thought would be a simple roast chicken. I tossed the thighs in a mixture of garlic, parmesan, and herbs, cranked the oven to 425°F, and waited.
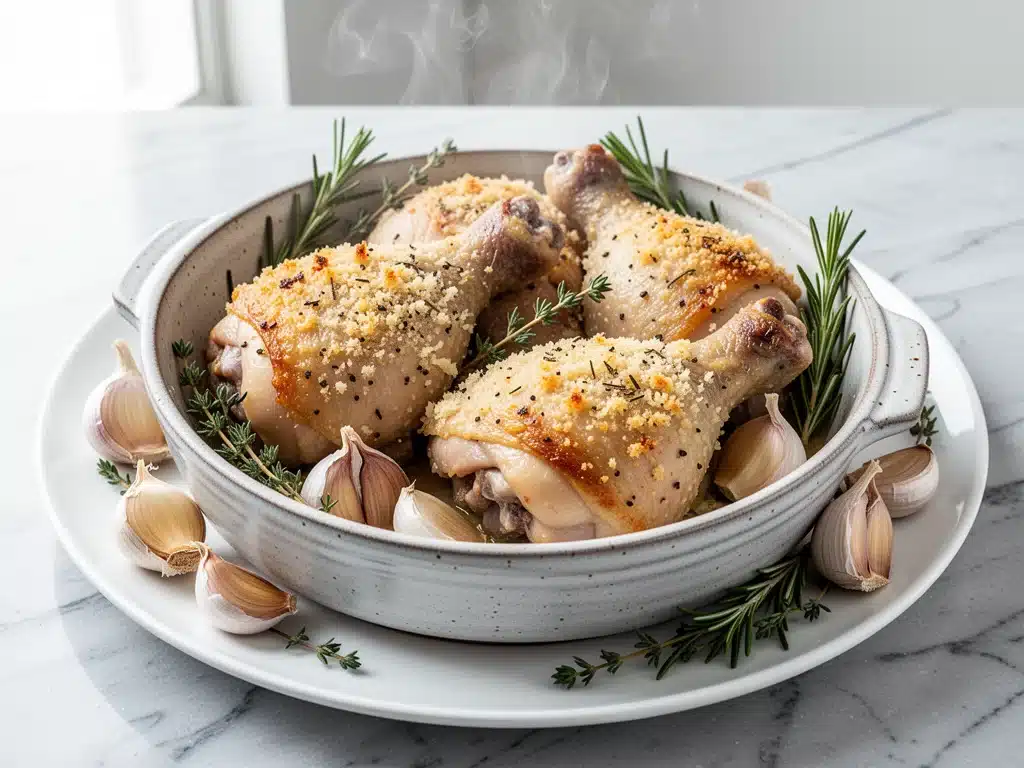
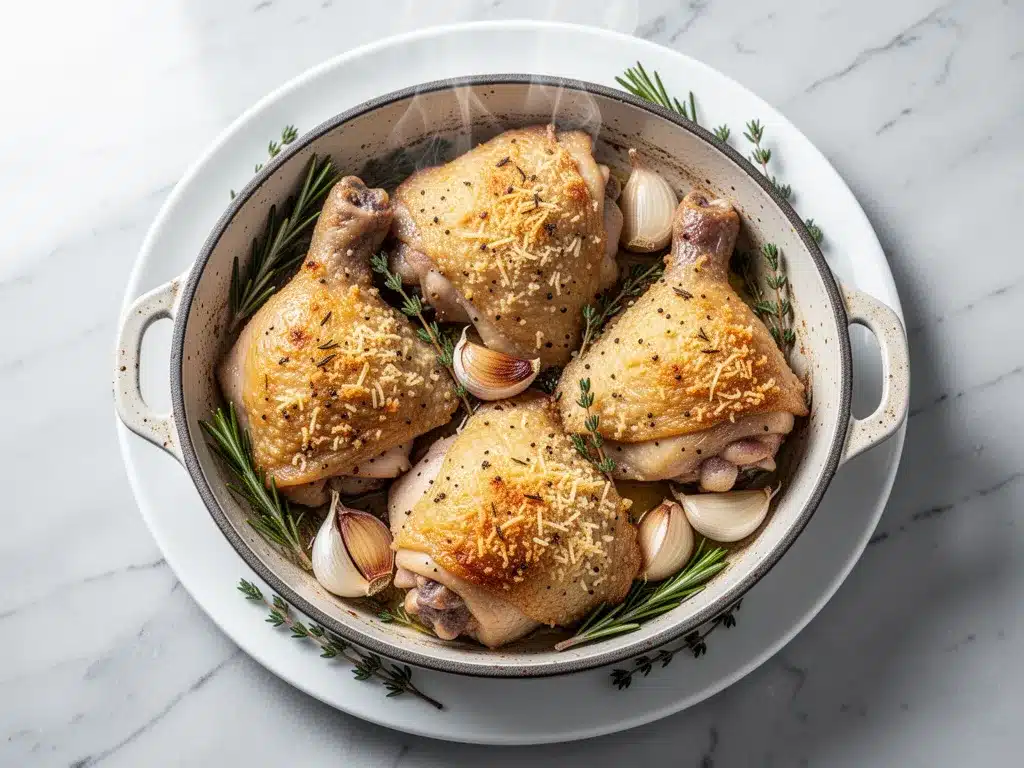
When I pulled the tray out, the smell hit me first. It wasn’t just “chicken.” It was nutty, garlicky, and impossibly savory. The skin was shattering-crisp, like the best fried chicken you’ve ever had, but baked to perfection. The parmesan had formed a golden, crunchy crust that clung to every bite. My husband walked in, took one look at the tray, and said, “Did we order food? Because this smells better than the restaurant.” Spoiler alert: It was better. It was significantly better.
That night, we didn’t order takeout. We scraped every last bit of that garlic parmesan crust off the baking sheet with a fork. Since then, I’ve made this crispy baked chicken thighs with garlic parmesan crust at least a dozen times. It’s become my secret weapon for busy weeknights when I want to impress but don’t have the energy to fuss. If you’re tired of dry oven-baked chicken or greasy fried versions, this is the recipe you’ve been waiting for. It’s tender, juicy, and has that addictive crunch that keeps you coming back for seconds.
Why You’ll Love This Garlic Parmesan Chicken
There are a lot of chicken recipes out there, but this specific combination of crispy skin, sharp cheese, and aromatic garlic just hits different. Here’s why this crispy baked chicken thighs with garlic parmesan crust has taken over my dinner rotation:
- Actually Crispy Skin — Most baked chicken turns out rubbery or soggy. Not this. By starting skin-side up and using the right heat, the fat renders out completely, leaving you with skin that shatters when you cut it. It’s like having fried chicken without the fryer.
- Zero Dryness — Breast meat is easy to overcook. Thighs are forgiving. They have more fat and connective tissue, which means even if you leave them in the oven for five extra minutes, they stay juicy. I’ve accidentally left this chicken in while I was on a call, and it was still perfect.
- Flavor Bomb — Parmesan isn’t just a garnish here; it’s a crust. When baked, the cheese melts, browns, and caramelizes with the garlic, creating a savory layer that’s unlike anything you get from a restaurant. It’s umami overload.
- Minimal Cleanup — It’s all done on one sheet pan. You toss the chicken, you sprinkle the cheese, you bake. When you’re done, you just scrape the pan and toss it in the dishwasher. No pots, no pans, no fuss.
- Restaurant Quality at Home — I’ve served this to dinner guests who swear they’re “chicken snobs,” and they couldn’t stop asking for the recipe. It looks fancy, tastes expensive, but takes almost zero effort.
This is the kind of recipe that makes you feel like a chef without the stress. It’s reliable, it’s delicious, and it’s the answer to “what’s for dinner?” when you’re tired.
Ingredients You’ll Need
Here’s the best part: you probably have most of these ingredients already. This isn’t a recipe that requires a special trip to the store. It’s pantry-friendly and straightforward.
For the Chicken
Chicken thighs (3-4 pounds / 1.5-2 kg) — Bone-in, skin-on thighs are non-negotiable for this recipe. Boneless thighs will dry out, and skinless thighs won’t get crispy. Look for thighs that are relatively uniform in size so they cook evenly. I buy them in bulk when they’re on sale and freeze them.
Vegetable oil or avocado oil (2 tablespoons) — You need a high smoke point oil to help crisp the skin. Olive oil can work, but it burns at high heat. I use avocado oil or just plain vegetable oil.
Garlic (6 cloves, minced / about 2 tablespoons) — Yes, six cloves. Fresh garlic is essential here. Jarred garlic has a metallic taste that doesn’t work with the delicate cheese crust. Mince it finely so it sticks to the chicken.
Parmesan cheese (1 cup / 100g, finely grated) — Buy a block of Parmigiano-Reggiano or a good quality Parmesan and grate it yourself. Pre-grated cheese has anti-caking agents that prevent it from melting into a nice crust. It’ll just stay powdery. This takes 3 minutes and makes a huge difference.
Dried Italian seasoning (1 tablespoon) — Or use a mix of dried oregano, basil, and thyme. It adds that classic savory herb flavor that pairs perfectly with garlic and cheese.
Salt and black pepper — Generous amounts. I use about 1 teaspoon of kosher salt and ½ teaspoon of freshly cracked pepper. Don’t be shy; the chicken needs seasoning.
For the Finish
Butter (1 tablespoon, melted) — Brushed on at the end for extra shine and richness.
Fresh parsley (2 tablespoons, chopped) — Optional, but it adds a pop of color and freshness to cut through the richness. I always have it in the fridge.
Common Questions
Can I use chicken breasts? You can, but you’ll need to reduce the cooking time significantly (about 20-25 minutes) and watch them closely. They dry out much faster than thighs. I stick with thighs for juiciness.
Can I use pre-minced garlic? I strongly advise against it. The flavor profile is just not the same. Fresh garlic has a brightness that stands up to the baked cheese. If you’re in a huge rush, buy pre-peeled cloves and mince them yourself—it takes 30 seconds.
Equipment Needed
You don’t need fancy gear for this. Here’s what I actually use:
Large Sheet Pan — I use a standard 18×13 inch rimmed baking sheet. Make sure it’s big enough to fit the chicken in a single layer with space between pieces. Crowding the pan steams the chicken instead of baking it, and you’ll lose that crispy texture.
Wire Rack (Optional but Recommended) — Placing a wire rack inside your sheet pan allows air to circulate underneath the chicken. This helps the bottom skin crisp up too. If you don’t have a rack, just flip the chicken halfway through cooking.
Small Mixing Bowl — For tossing the chicken in the oil and spices.
Microplane or Box Grater — For grating the Parmesan cheese finely.
Sharp Knife — For mincing garlic and chopping parsley.
Pastry Brush — For brushing the melted butter at the end.
How to Make It: Step-by-Step
Alright, let’s make this! I’m walking you through exactly how I do it, including the little tricks I’ve picked up over the years.
Step 1: Prep Your Oven and Pan (5 minutes)
Preheat your oven to 425°F (220°C). This high heat is crucial for rendering the fat and crisping the skin. Line your sheet pan with parchment paper or foil for easy cleanup, and place a wire rack on top if you’re using one. The rack helps air circulate.
Step 2: Dry the Chicken (Important!)
Pat the chicken thighs dry with paper towels. This is the most important step for crispy skin. If the skin is wet, it will steam instead of crisp. Get them as dry as possible. I usually use two sets of paper towels—one for the top, one for the bottom.
Step 3: Season the Chicken
Place the chicken thighs in a large bowl. Drizzle with the oil, then add the minced garlic, Italian seasoning, salt, and pepper. Toss everything together until the chicken is evenly coated. Make sure the garlic and herbs are stuck to the skin, not just sitting in the bottom of the bowl.
Step 4: Arrange on the Pan
Place the chicken skin-side up on the prepared sheet pan. Leave space between each piece. If they’re touching, they’ll steam each other. You want every piece of skin exposed to the hot air.
Step 5: Bake the First Half
Roast the chicken for 20 minutes. This starts the rendering process. You’ll see the fat bubbling out from under the skin.
Step 6: Add the Parmesan Crust
Remove the pan from the oven. Sprinkle the grated Parmesan cheese evenly over the chicken. Be generous—you want a thick, even layer. The cheese should cover most of the skin. Return to the oven and bake for another 15-20 minutes, or until the cheese is golden brown and bubbly, and the chicken reaches an internal temperature of 165°F (74°C).
Step 7: Rest and Serve
Remove the chicken from the oven and let it rest for 5 minutes. This allows the juices to redistribute. While it rests, brush the melted butter over the tops for extra gloss and flavor. Garnish with fresh parsley and serve immediately.
Expert Tips & Tricks
Here’s everything I’ve learned from making this dozens of times. These tips will save you from my mistakes.
- Don’t Skip the Drying Step — I know it seems tedious, but dry skin = crispy skin. Wet skin = sad, rubbery skin. Pat it dry. Then pat it dry again.
- Grate Your Own Cheese — I cannot stress this enough. Pre-grated cheese contains cellulose, which stops it from melting smoothly. Your crust will be patchy and gritty. Take 3 minutes to grate a block. Your taste buds will thank you.
- Watch the Oven — Ovens vary. If your cheese is browning too fast, cover the pan loosely with foil for the last 5 minutes. If it’s not browning enough, broil for 1-2 minutes at the end (watch it like a hawk!).
- Use a Meat Thermometer — Don’t guess. Pull the chicken when it hits 165°F. If you wait until it’s 175°F, it’ll start to dry out. Thighs are forgiving, but you don’t want to overcook them.
- Rest the Chicken — If you cut into it immediately, all the juices run out, and the meat dries. Let it rest for 5 minutes. It’s worth the wait.
Variations & Substitutions
Once you’ve nailed the basic version, here’s how you can mix it up. I’ve tried all of these.
Spicy Version — Add 1 teaspoon of cayenne pepper or red pepper flakes to the seasoning mix. The heat cuts through the rich cheese beautifully.
Lemon Herb — Add the zest of one lemon to the Parmesan mixture before sprinkling. It adds a bright, citrusy note that pairs well with the garlic.
Pesto Crust — Instead of dry herbs, mix the grated Parmesan with 2 tablespoons of pesto. Spread it over the chicken before baking. It’s rich and flavorful.
Gluten-Free — This recipe is naturally gluten-free, as long as your Parmesan doesn’t have added flour (check the label). Most pure Parmesan is safe.
Dairy-Free — Use a vegan Parmesan alternative and olive oil instead of butter. It won’t have the same nutty depth, but it still works.
Serving & Storage
How to Serve: I usually serve this straight from the pan. It looks rustic and stays warm. Great sides include roasted asparagus, a simple green salad, or mashed potatoes to soak up the juices. It pairs wonderfully with a crisp white wine like a Pinot Grigio.
Storage: Store leftovers in an airtight container in the fridge for up to 4 days. The skin will soften in the fridge, which is normal.
Reheating: To keep it crispy, reheat in the oven at 350°F for 10-15 minutes. Don’t microwave it—it’ll make the skin chewy. If you must microwave, do it for 30-second intervals and let it sit for a minute after.
Freezing: This doesn’t freeze well. The texture of the skin and cheese changes upon thawing. It’s best made fresh.
Nutrition Information
I’m not a nutritionist, but here’s the breakdown if you’re tracking. This is per serving (based on 4 servings).
- Calories: 550
- Protein: 40g
- Carbs: 5g
- Fat: 42g
- Sodium: 600mg
Look, this is comfort food. It’s higher in fat from the cheese and chicken skin, but it’s also high in protein. It’s way better than takeout, and you know exactly what’s in it. When I want to make it lighter, I skip the butter brush and use less cheese, but usually? I just enjoy it.
Final Thoughts
So that’s my go-to crispy baked chicken thighs with garlic parmesan crust! It’s saved weeknight dinners more times than I can count. It’s my answer to “what’s for dinner” when I’m tired, don’t want takeout, and still want something that tastes really good. My kids are happy, my husband’s happy, and I’m happy because I’m not stressed about cooking.
Make it yours! Try different herbs, add some red pepper flakes, or serve it with a different side dish. The best recipes are the ones you adapt to your family’s tastes. If you make this, drop a comment and let me know what you think! I love hearing how recipes turn out in your kitchen.
Happy cooking! And I hope your kitchen smells half as good as mine does right now.
Frequently Asked Questions
Can I use boneless chicken thighs?
You can, but the cooking time will be shorter. Check them at 15 minutes. They won’t get as crispy on the bottom since there’s no skin to render fat, but they’ll still be flavorful. Bone-in, skin-on is best for this specific recipe.
Why is my chicken skin not crispy?
Usually, this means the skin was wet when it went in the oven, or the pieces were crowded on the pan. Make sure to pat them dry thoroughly and leave space between each thigh. Also, ensure your oven is fully preheated to 425°F.
Can I make this ahead of time?
You can season the chicken and let it sit in the fridge for up to 24 hours before baking. This actually helps the skin dry out further, which can improve crispiness. Just take it out of the fridge 20 minutes before cooking so it comes to room temperature.
What if I don’t have Italian seasoning?
Use a mix of dried oregano, basil, and thyme. You can also use dried rosemary or sage. The key is dried herbs that pair well with garlic and cheese.
Can I double this recipe?
Yes, but you’ll need two sheet pans. Do not overcrowd the pans. Cook them on separate racks, swapping positions halfway through for even browning.
Does this work for chicken breasts?
It can, but chicken breasts dry out easily. If you use breasts, reduce the cooking time to 20-25 minutes total and watch them closely. Thighs are much more forgiving for this method.
How do I store leftovers?
Store in an airtight container in the fridge for up to 4 days. Reheat in the oven to restore crispiness.
Pin This Recipe!


Crispy Baked Chicken Thighs: Best Garlic Parmesan Recipe
- Total Time: 45 minutes
- Yield: 4 servings 1x
Description
Juicy, bone-in chicken thighs topped with a shattering-crisp garlic and parmesan crust, baked to perfection for a restaurant-quality weeknight dinner.
Ingredients
- 3–4 pounds bone-in, skin-on chicken thighs
- 2 tablespoons vegetable oil or avocado oil
- 6 cloves garlic, minced
- 1 cup finely grated Parmesan cheese
- 1 tablespoon dried Italian seasoning
- 1 teaspoon kosher salt
- 1/2 teaspoon freshly cracked black pepper
- 1 tablespoon butter, melted
- 2 tablespoons fresh parsley, chopped
Instructions
- Preheat oven to 425°F (220°C). Line a large rimmed baking sheet with parchment paper or foil, optionally placing a wire rack on top.
- Pat chicken thighs completely dry with paper towels to ensure crispy skin.
- In a large bowl, toss chicken thighs with oil, minced garlic, Italian seasoning, salt, and pepper until evenly coated.
- Arrange chicken skin-side up on the prepared baking sheet, ensuring pieces are not touching.
- Roast for 20 minutes to render the fat.
- Remove from oven and sprinkle grated Parmesan cheese evenly over the chicken.
- Return to oven and bake for another 15-20 minutes, or until cheese is golden brown and chicken reaches an internal temperature of 165°F (74°C).
- Remove from oven and let rest for 5 minutes.
- Brush melted butter over the tops and garnish with fresh parsley before serving.
Notes
Ensure chicken skin is completely dry before seasoning for maximum crispiness. Grate your own Parmesan cheese as pre-grated varieties contain anti-caking agents that prevent proper melting. Do not overcrowd the pan, as this will steam the chicken instead of baking it. For best results, use bone-in, skin-on thighs.
- Prep Time: 5 minutes
- Cook Time: 40 minutes
- Category: Main Course
- Cuisine: American
Nutrition
- Serving Size: 1 chicken thigh per
- Calories: 550
- Sugar: 1
- Sodium: 600
- Fat: 42
- Saturated Fat: 12
- Carbohydrates: 5
- Protein: 40
Keywords: crispy baked chicken, garlic parmesan chicken, chicken thighs recipe, easy weeknight dinner, baked chicken with crust


