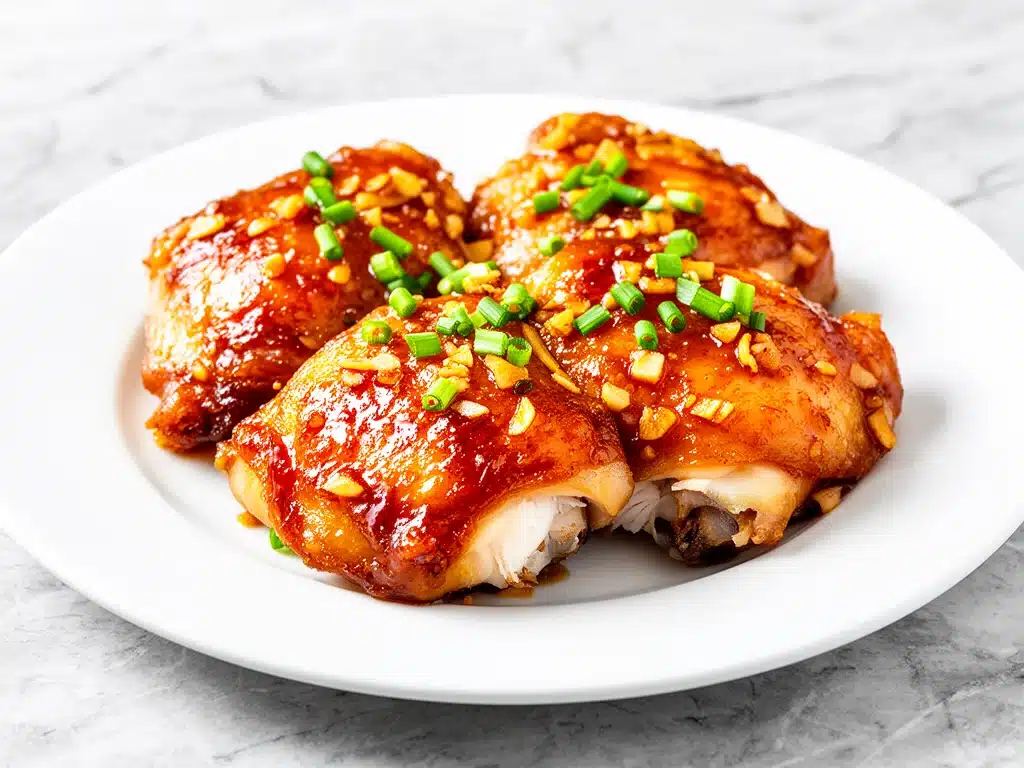
Last Tuesday, I came home from work with a headache that felt like it had a mind of its own. My brain was fried, my patience was non-existent, and the last thing I wanted to do was stand over a hot stove for an hour. I opened the fridge, stared at a package of chicken thighs I’d forgotten to thaw properly, and realized I had exactly twenty minutes before my kids would be demanding dinner. I didn’t have time to worry about complex techniques or obscure ingredients. I needed something fast, forgiving, and ridiculously flavorful.
So I threw together what I thought would be a mediocre stir-fry. I grabbed the thighs, hit them with some garlic, a splash of honey, and whatever soy sauce was left in the pantry. I seared them fast, let the sauce reduce while I tried to untangle a knot in my shoelace, and turned around to find my husband already plating up seconds. That’s when I knew: I had stumbled onto something special. It wasn’t just dinner; it was a rescue mission.
That accidental dinner turned into a weekly ritual. Honey garlic chicken thighs have become my go-to answer for those “what’s for dinner?” moments when I’m running on fumes. They’re sweet, savory, sticky, and come together in a single pan. I’ve made them so many times that I can probably do it blindfolded, but I’ve also tweaked the glaze a dozen times to get that perfect balance of sticky-sweet and savory. This isn’t just another chicken recipe; it’s the one that keeps me from ordering takeout on the hardest nights. And once you taste it, I promise it’ll earn its spot in your rotation too.
Why You’ll Love This Honey Garlic Glazed Chicken Thighs Recipe
There are about a dozen reasons I keep coming back to this dish, but let’s be real—you don’t need another complicated recipe with twelve ingredients you’ll only use once. Here’s why this honey garlic chicken thighs recipe is the real deal:
- One-Pan Wonder — Seriously, one skillet. That’s it. I love that cleanup is basically just throwing a pan in the dishwasher. I’ve made this on nights when I was too tired to even think about scrubbing multiple pots, and it’s always a winner.
- Sticky, Glossy Perfection — The glaze isn’t just a sauce; it’s a coating. It clings to the chicken, caramelizing in the pan to create this incredible sticky texture that makes you want to lick your fingers. It’s the kind of texture that feels like restaurant quality but takes half the effort.
- Forgiving Flavor — Chicken thighs are naturally juicier and more forgiving than breasts. If you leave them in the pan five minutes too long, they don’t turn into rubber. They just get more tender. This recipe is perfect for beginners because it’s nearly impossible to mess up.
- Under 30 Minutes — From thawed (or even frozen, if you adjust the time slightly) to plated, this takes less than half an hour. I make this on weeknights when I get home at 6:30 PM and still want to eat something that doesn’t taste like cardboard.
- Meal Prep Friendly — These reheat beautifully. I often make a double batch on Sunday so I have lunch sorted for the first half of the week. The flavors actually deepen overnight, making Monday’s lunch taste even better than Friday’s dinner.
This is the recipe I reach for when I need dinner to just work. No stress, no fancy equipment, just reliable, delicious food that makes everyone at the table happy. If you’re looking for a keto crispy air fryer chicken wings for a game day snack, these thighs are my answer for the actual meal.
Ingredients You’ll Need
Here’s the best part: you probably have most of these ingredients already. This honey garlic chicken thighs recipe relies on pantry staples and fresh basics. I’m particular about a few things here, but don’t worry—I’ll tell you exactly why and what you can swap.
For the Chicken
Chicken thighs (2 pounds / 900g) — Boneless, skinless is easiest for weeknight cooking, but I prefer bone-in, skin-on if I have time. The skin gets crispy and adds so much flavor. If you’re watching calories, skinless thighs still work great. Just pat them dry with paper towels before cooking to ensure good browning.
Salt and black pepper — Generous amounts. Don’t be shy. The chicken needs seasoning before it hits the pan. I use about 1 teaspoon of kosher salt and half a teaspoon of cracked black pepper for this amount of chicken.
Neutral oil (2 tablespoons) — I use avocado oil or vegetable oil. Olive oil works too, but extra virgin has a lower smoke point and might burn if the pan gets too hot. I keep avocado oil on hand specifically for high-heat searing.
For the Honey Garlic Glaze
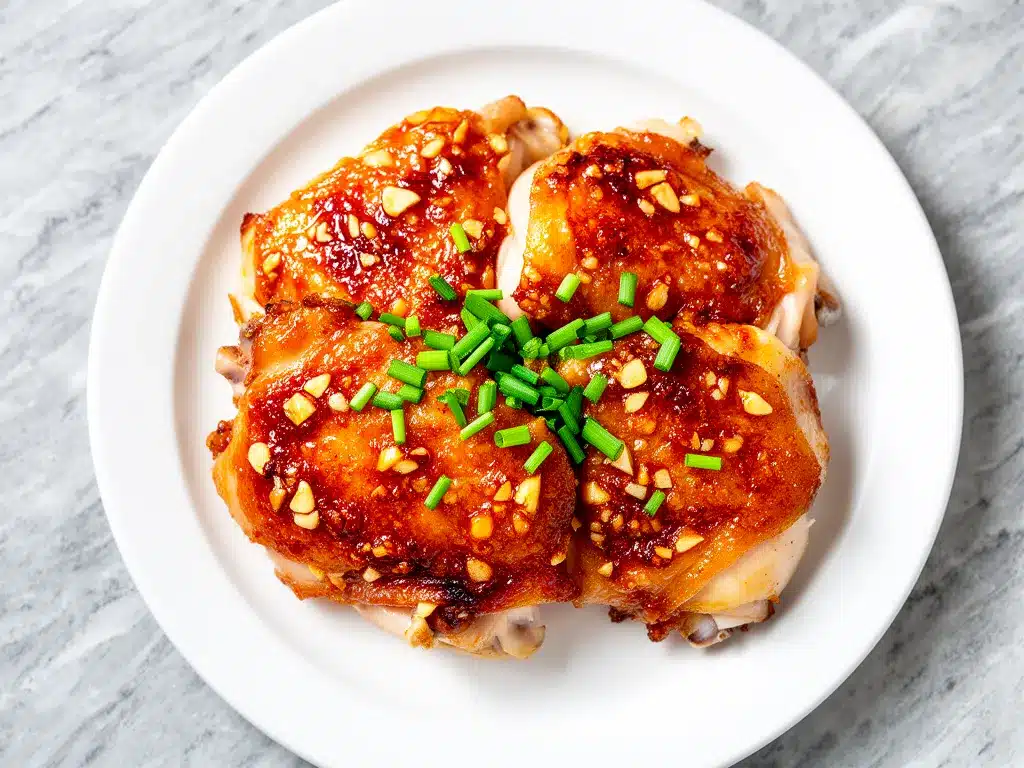
Garlic (6-8 cloves, minced) — Yes, that many. Don’t skimp. Fresh garlic is non-negotiable here. Jarred garlic has a weird metallic aftertaste that ruins the sweetness of the honey. If you’re feeling lazy, buy pre-minced fresh garlic in the refrigerated section, but mince it yourself if you can. It takes two minutes.
Honey (½ cup / 120ml) — This is the star. I use regular honey, but clover or wildflower adds a nice floral note. Avoid artificial “honey-flavored” syrups; they don’t caramelize the same way. The honey provides the sweetness and helps create that sticky glaze.
Soy sauce (¼ cup / 60ml) — This adds the savory umami that balances the sweet honey. I use low-sodium soy sauce so I can control the saltiness. Regular soy sauce works, but you might want to reduce the added salt in the seasoning step.
Rice vinegar (2 tablespoons) — This is the secret weapon. It adds a little tang that cuts through the richness of the honey and chicken. If you don’t have rice vinegar, apple cider vinegar works in a pinch, but rice vinegar is milder and more authentic.
Garlic powder (1 teaspoon) — This boosts the garlic flavor without adding more raw bits that might burn. I keep a jar of this on hand specifically for quick glazes.
Ginger (1 teaspoon, fresh grated or ½ teaspoon ground) — Fresh ginger adds a bright, zesty kick. If you don’t have fresh, ground ginger works, but it’s more potent, so use half the amount. Skip it if you hate ginger, but I think it elevates the dish.
Red pepper flakes (½ teaspoon, optional) — For a little heat. I add this because I like a kick, but if you’re serving kids or spice-sensitive guests, leave it out. It’s easy to add more later, though.
Water (2 tablespoons) — This helps thin the glaze slightly so it coats the chicken evenly without being too thick or sticky too fast.
For Serving
Sesame seeds — Toasted sesame seeds add a nice crunch and visual appeal. I sprinkle them on right before serving. You can buy them pre-toasted, or toast them in a dry pan for 2 minutes.
Green onions — Sliced thinly for garnish. Adds color and a fresh onion bite that contrasts with the rich glaze.
Steamed rice or noodles — This glaze is incredible over jasmine rice or even tossed with noodles. I usually serve it with rice to soak up all that extra sauce.
Equipment Needed
You don’t need fancy equipment for this. Here’s what I actually use:
Large skillet or frying pan — I use a 12-inch cast iron skillet. It holds heat well, which is crucial for getting that nice sear on the chicken. Stainless steel works too, but cast iron gives the best browning. If you don’t have a large skillet, you might need to cook in batches to avoid overcrowding, which steams the chicken instead of searing it.
Tongs — For flipping the chicken. I prefer tongs over a spatula because they give me better control. You want to handle the chicken gently to keep the skin intact if you’re using skin-on thighs.
Small bowl — For whisking the glaze ingredients together before adding to the pan. This ensures the honey and soy sauce are fully combined so you don’t get pockets of pure honey.
Sharp knife and cutting board — For mincing the garlic and slicing green onions. A dull knife makes mincing garlic a nightmare and increases the risk of slipping. Learn from my scars.
Spatula — For stirring the glaze and scraping up any browned bits from the bottom of the pan. Those browned bits are flavor gold.
How to Make It: Step-by-Step
Alright, let’s make this! I’m walking you through exactly how I do it, including the little tricks I’ve picked up over dozens of batches.
Step 1: Prep the Chicken (5 minutes)
If you’re using frozen chicken thighs, thaw them first. You can do this in the fridge overnight or in a bowl of cold water for 30 minutes. Pat the chicken thighs completely dry with paper towels. This is crucial. Wet chicken steams instead of sears. I’ve learned this the hard way. Season both sides generously with salt and pepper. Don’t skip this step—seasoning right before cooking helps form a nice crust.
Step 2: Sear the Chicken (10-12 minutes)
Heat the oil in your large skillet over medium-high heat. Once the oil shimmers, add the chicken thighs in a single layer. Do not overcrowd the pan. If your pan is small, cook in batches. Sear the chicken for 5-6 minutes on the first side without moving it. Let it get a nice golden-brown crust. This is where the flavor happens. Flip the chicken and cook for another 4-5 minutes on the other side. The chicken doesn’t need to be fully cooked through yet; we’ll finish it in the glaze. Remove the chicken to a plate and set aside.
Step 3: Make the Glaze (2 minutes)
Reduce the heat to medium. In your small bowl, whisk together the minced garlic, honey, soy sauce, rice vinegar, garlic powder, ginger, red pepper flakes, and water. Whisk until smooth. You want the honey to be fully dissolved into the soy sauce. Pour this mixture into the same skillet you cooked the chicken in. It will bubble up immediately. Let it simmer for 1-2 minutes to thicken slightly. This concentrates the flavors.
Step 4: Coat and Finish (5-7 minutes)
Return the chicken thighs to the skillet, nestling them into the glaze. Spoon the glaze over the top of the chicken. Cover the pan with a lid (or a piece of foil if you don’t have a lid) and let it simmer for 5-7 minutes. The chicken will finish cooking in the steam and glaze. Check that the internal temperature reaches 165°F (74°C). If you don’t have a thermometer, cut into the thickest part to ensure no pink remains. Uncover the pan and let the glaze reduce further for 1-2 minutes, spooning it over the chicken repeatedly. You want a sticky, glossy coating that clings to the chicken. If the glaze gets too thick or starts to burn, add a splash of water.
Step 5: Serve
Transfer the chicken to a serving platter. Spoon any remaining glaze from the pan over the top. Sprinkle with toasted sesame seeds and sliced green onions. Serve immediately over steamed rice or with your favorite side dish. The glaze should be sticky and shiny, not watery or burnt. If it’s too thin, keep simmering. If it’s too thick, add a teaspoon of water.
Expert Tips & Tricks
Here’s everything I’ve learned from making this dozens of times. These tips will save you from my mistakes.
Pat the Chicken Dry — I cannot stress this enough. Moisture is the enemy of browning. If your chicken is wet, it will steam. Use paper towels and be thorough. This ensures you get that delicious crispy exterior.
Don’t Crowd the Pan — When you sear the chicken, leave space between each thigh. If they’re touching, they’ll steam each other. Cook in batches if necessary. It takes an extra five minutes but makes a huge difference in texture.
Watch the Heat — Honey burns easily. Once you add the glaze, keep the heat at medium or medium-low. High heat will caramelize the honey too quickly and turn it bitter. Low and slow is the way to go for a sweet, sticky glaze.
Reserve Some Glaze — If you’re serving guests who might be sensitive to raw garlic (even though it’s cooked, some people are wary), reserve a little glaze before adding the raw minced garlic. Cook the garlic in the pan first to mellow its flavor, or just be honest about the ingredients.
Toast Your Sesame Seeds — Raw sesame seeds are fine, but toasted ones add a nutty aroma and crunch that elevates the dish. I toast them in a dry pan for 2-3 minutes, shaking frequently, until they’re golden. It takes one minute and makes the dish look professional.
Common Mistakes
- Glaze is too thin: Simmer longer. The water needs to evaporate for the honey to become sticky.
- Glaze is too thick/burnt: Add a splash of water and stir. If it’s already burnt, start over with a new batch of glaze.
- Chicken is dry: You overcooked it. Use a thermometer. Thighs are forgiving, but they can dry out if left on high heat too long.
Variations & Substitutions
Once you’ve nailed the basic version, here’s how you can mix it up. I’ve tried all of these.
Spicy Honey Garlic — Add 1 tablespoon of sriracha or gochujang to the glaze. This adds a Korean-inspired kick. It’s my favorite way to eat it when I want something with a bit of heat.
Ginger-Heavy Version — Double the ginger to 2 teaspoons fresh grated. This makes the dish brighter and more aromatic. Great if you love ginger.
Teriyaki Style — Swap the rice vinegar for mirin and add a teaspoon of cornstarch to the glaze to make it thicker. This mimics a classic teriyaki sauce.
Vegetarian Swap — Use firm tofu or seitan instead of chicken. Press the tofu, cube it, and follow the same searing and glazing steps. It absorbs the glaze beautifully.
Gluten-Free — Use tamari instead of soy sauce. Everything else is naturally gluten-free. I use tamari and it tastes identical to regular soy sauce.
Lower Sugar — Reduce the honey to ¼ cup and add a teaspoon of maple syrup or a zero-calorie sweetener if you’re watching sugar. It won’t be as sticky, but still tasty.
Serving & Storage
How to Serve — I usually serve this straight from the skillet at the dinner table—it looks rustic and stays warm. But here are other ways I’ve enjoyed it:
- Over Jasmine Rice — The rice soaks up the glaze perfectly. It’s the classic pairing.
- With Stir-Fried Vegetables — Broccoli, snap peas, or bell peppers add crunch and color. I toss them in the pan after removing the chicken, then add the glaze back in.
- In Lettuce Wraps — Spoon the chicken and glaze into butter lettuce cups for a lighter, low-carb option.
- Over Noodles — Ramen noodles or udon noodles work great. Toss the noodles with the glaze for a pasta-like dish.
Storage Instructions
Refrigerator: Store in an airtight container for up to 4 days. The chicken and glaze keep well together. The flavors meld nicely overnight.
Reheating: Best method: Add the chicken and glaze to a skillet over low heat with a splash of water. Stir gently until heated through. This keeps the chicken moist. Microwave method: Heat in 30-second intervals, stirring between. Add a splash of water to prevent drying out. Avoid high heat, which can make the honey harden and the chicken tough.
Freezing: Honestly, this doesn’t freeze well. The texture of the chicken can change, and the glaze might separate. I recommend making it fresh or storing in the fridge for up to 4 days. If you must freeze, freeze the chicken and glaze separately, and reheat gently.
Nutrition Information
I’m not a nutritionist, but here’s the breakdown if you’re tracking. This is per serving (based on 4 servings, with 2 thighs each).
- Calories: 380
- Protein: 32g
- Carbs: 28g
- Fiber: 0g
- Sugar: 24g
- Fat: 14g
- Sodium: 650mg
What’s Good: High in protein, which keeps you full. The chicken thighs provide healthy fats. It’s a balanced meal if served with vegetables or rice.
What to Know: Higher in sugar due to the honey. If you’re watching sugar intake, reduce the honey or use a substitute. The sodium is moderate, so use low-sodium soy sauce if you’re salt-sensitive.
My Take: Look, this is comfort food. It’s sweet, savory, and satisfying. It’s not a diet recipe, but it’s way better than takeout. When I want to make it lighter, I serve it over cauliflower rice and double the vegetables. But usually? I just eat a reasonable portion and enjoy it. Life is short, eat the honey garlic chicken.
Final Thoughts
So that’s my go-to honey garlic chicken thighs! I’ve probably talked your ear off at this point, but when you make a recipe this often, you have a lot to say about it. This has saved weeknight dinners more times than I can count. It’s my answer to “what’s for dinner” when I’m tired, don’t want takeout, and still want something that tastes really good. My kids are happy, my husband’s happy, and I’m happy because I’m not stressed about cooking.
Make it yours! Try different add-ins, swap in your favorite vegetables, adjust the spice level. The best recipes are the ones you adapt to your family’s tastes. If you make this, drop a comment and let me know what you think! I love hearing how recipes turn out in your kitchen. And if something doesn’t work, tell me that too—I’m here to help troubleshoot.
Happy cooking! And I hope your kitchen smells half as good as mine does right now.
Frequently Asked Questions
Can I use chicken breasts instead of thighs?
You can, but thighs are much better for this recipe. They stay juicier and more tender in the glaze. Chicken breasts can dry out quickly, especially with the high heat needed for searing. If you must use breasts, pound them to an even thickness and reduce the cooking time by a few minutes. Check the temperature frequently to avoid overcooking. Thighs are forgiving; breasts are not.
Why did my glaze turn out watery?
Usually means you didn’t simmer it long enough after adding the chicken. The water in the glaze needs to evaporate for the honey to become sticky. Keep the heat at medium-low and let it reduce for a few more minutes, spooning the glaze over the chicken. If it’s still watery, remove the chicken and boil the glaze alone for 2-3 minutes until thickened, then return the chicken.
Can I make this ahead for a dinner party?
Sort of. You can prep the glaze and season the chicken up to 24 hours ahead. Store them separately in the fridge. When you’re ready to cook, sear the chicken and add the glaze. It won’t save you the cooking time, but it reduces the active prep work during the party. I do this when I’m hosting and want to be present with my guests.
Is this recipe spicy?
Not by default. The red pepper flakes are optional and mild. If you add them, it’s a gentle warmth. If you want it spicy, add sriracha or chili flakes. If you’re serving kids, leave them out. The honey and garlic are the stars, not the heat.
Can I use maple syrup instead of honey?
You can, but the flavor will be different. Maple syrup has a stronger, distinct taste that might overpower the garlic. Honey is milder and pairs better with soy sauce and ginger. If you use maple syrup, reduce the amount slightly as it’s sweeter. I prefer honey for the classic honey garlic flavor.
How do I reheat leftovers without it getting dry?
Add a splash of water or broth to a skillet, add your leftover chicken and glaze, and heat gently over low heat, stirring frequently. The extra liquid brings back the sticky texture. Microwave sort of works but tends to dry it out. If you do microwave, definitely add a splash of water first and heat in short bursts, stirring between.
Can I double this recipe?
Absolutely! Double everything and use your biggest skillet. The cooking times stay the same. I do this when I’m meal-prepping or feeding a crowd. Just make sure your skillet is big enough for the chicken. If it’s crowded, cook in batches. Overcrowding steams the chicken instead of searing it.
Pin This Recipe!

Honey Garlic Chicken Thighs: Easy Weeknight Dinner
- Total Time: 25 minutes
- Yield: 4 servings 1x
Description
A quick, one-pan weeknight dinner featuring juicy chicken thighs coated in a sticky, sweet, and savory honey garlic glaze. Ready in under 30 minutes with minimal cleanup.
Ingredients
- 2 pounds (900g) chicken thighs (boneless, skinless or bone-in, skin-on)
- 1 teaspoon kosher salt
- 0.5 teaspoon cracked black pepper
- 2 tablespoons neutral oil (avocado or vegetable)
- 6–8 cloves garlic, minced
- 0.5 cup (120ml) honey
- 0.25 cup (60ml) soy sauce (low-sodium recommended)
- 2 tablespoons rice vinegar
- 1 teaspoon garlic powder
- 1 teaspoon fresh grated ginger (or 0.5 teaspoon ground)
- 0.5 teaspoon red pepper flakes (optional)
- 2 tablespoons water
- Toasted sesame seeds for garnish
- Sliced green onions for garnish
- Steamed rice or noodles for serving
Instructions
- Pat chicken thighs completely dry with paper towels and season generously with salt and pepper.
- Heat oil in a large skillet over medium-high heat. Sear chicken in a single layer for 5-6 minutes until golden brown, then flip and cook for another 4-5 minutes. Remove chicken to a plate.
- Reduce heat to medium. Whisk together minced garlic, honey, soy sauce, rice vinegar, garlic powder, ginger, red pepper flakes, and water in a small bowl.
- Pour the glaze mixture into the same skillet and let it simmer for 1-2 minutes to thicken slightly.
- Return chicken to the skillet, nestling it into the glaze. Spoon glaze over the top, cover with a lid, and simmer for 5-7 minutes until chicken reaches an internal temperature of 165°F (74°C).
- Uncover and simmer for another 1-2 minutes, spooning glaze over chicken repeatedly until the sauce is sticky and glossy. Add a splash of water if the glaze becomes too thick or burns.
- Transfer chicken to a serving platter, spoon remaining glaze over the top, and garnish with toasted sesame seeds and sliced green onions. Serve immediately over steamed rice or noodles.
Notes
Patting the chicken dry is crucial for proper browning; wet chicken will steam. Do not overcrowd the pan when searing to ensure a good crust. Honey burns easily, so keep heat at medium or medium-low once the glaze is added. For a spicy version, add sriracha or gochujang. For a vegetarian swap, use firm tofu or seitan.
- Prep Time: 5 minutes
- Cook Time: 20 minutes
- Category: Main Course
- Cuisine: Asian Fusion
Nutrition
- Serving Size: 2 chicken thighs per
- Calories: 380
- Sugar: 24
- Sodium: 650
- Fat: 14
- Saturated Fat: 3
- Carbohydrates: 28
- Protein: 32
Keywords: honey garlic chicken, chicken thighs, weeknight dinner, one pan meal, easy chicken recipe, sticky chicken, gluten-free option, meal prep


