It was 11:30 PM on a Tuesday. I was standing in my kitchen, the house completely quiet except for the hum of the refrigerator, staring into the open fridge like it might magically spit out a solution to my craving. I didn’t want dinner. I didn’t want a snack. I wanted something sweet, rich, and chocolatey, but I absolutely did not want to turn on the oven, stand over a mixing bowl for twenty minutes, or deal with the cleanup that comes with baking.
I had a bag of dates that had been sitting in my pantry for three weeks (oops), a jar of almond butter that was halfway empty, and a cup of semi-sweet chocolate chips. I figured, what’s the worst that could happen? I’d have a sticky, weird mess on my hands.
Instead, I got the best dessert I’ve made all year.
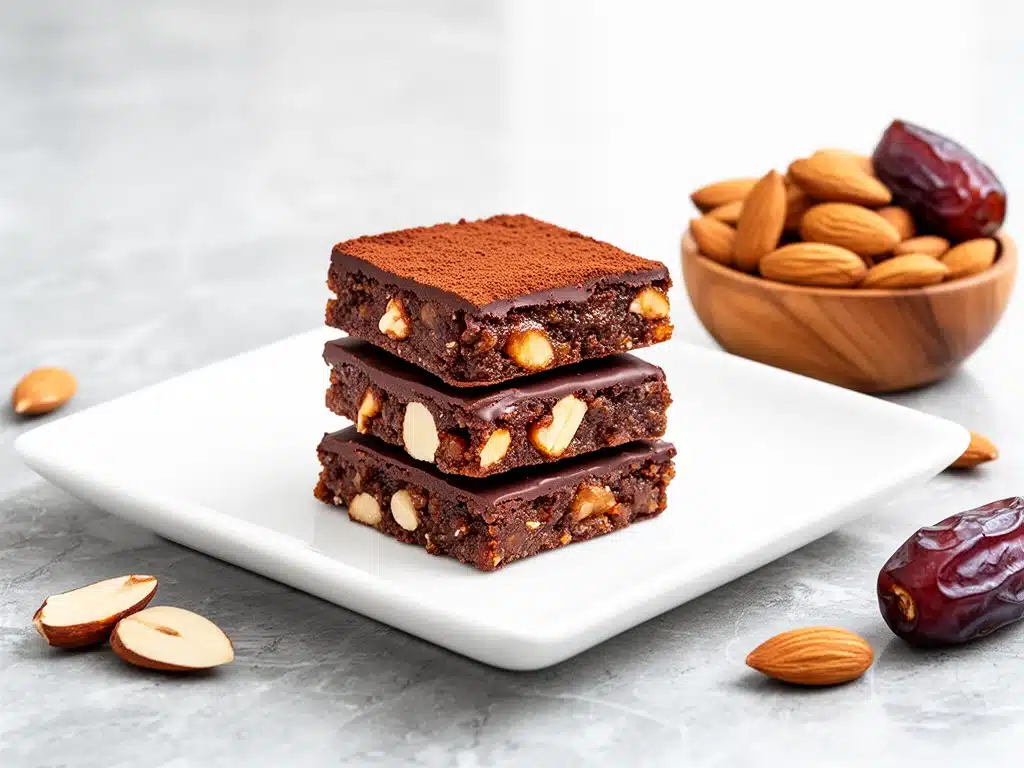
Those no-bake chocolate almond date bars were so good that I ate half of them before they’d even set in the fridge. The next morning, I had three more for breakfast with my coffee. By the end of the week, I’d made them twice because my kids had figured out where I hid them. They’re chewy, fudgy, naturally sweetened, and they require zero baking skills. Seriously. If you can mash a banana, you can make these.
I’ve tested this recipe about ten times in the last month, tweaking the ratios of almond butter to chocolate until it was perfect. I’ve shared them with neighbors, coworkers, and even my picky-eater nephew (who usually only eats bread crusts). They all ask for the recipe. And honestly? It’s become my go-to when I need a quick treat that doesn’t feel like junk food. It’s my answer to “I want dessert but I’m tired.”
These bars are my secret weapon for busy weeknights. They’re my answer to “what’s for dessert” when I’m exhausted, don’t want takeout, and still want something that tastes really good. My kids are happy, my husband’s happy, and I’m happy because I’m not stressed about cooking. Make it yours! Try different add-ins, swap in your favorite nut butter, adjust the chocolate (though more is always better in my opinion). The best recipes are the ones you adapt to your family’s tastes.
Why These No-Bake Bars Are About to Become Your New Obsession
There are about ten reasons I keep making these, but here are the big ones that keep me coming back to this specific combination of ingredients.
Stupid Simple — Seriously, if you can boil water and chop a date, you can make this. I’ve walked my teenage son through it over FaceTime while he was at college. He sent me a photo of his first batch. It was slightly lopsided, but he said it tasted amazing.
Lightning Fast — 15 minutes from start to finish, and only 5 of those are active prep. The rest is just waiting for the fridge to do its job. I make these on weeknights when I get home at 7pm and have zero energy left for anything complicated.
Pantry-Friendly — You probably have 80% of these ingredients already. I keep dates, almond butter, and chocolate chips stocked just so I can make these on a whim when the sweet tooth hits. It’s cheaper and healthier than buying those fancy granola bars at the store.
Crowd-Pleaser — I’ve served these to my gluten-free neighbor, my sugar-conscious friend, and my husband who usually prefers brownies. Everyone loved them. They’re rich enough to feel indulgent but light enough to not leave you feeling sluggish.
Makes Amazing Leftovers — Actually, they taste better after sitting in the fridge for a day or two. The flavors meld together and the texture gets even chewier. I deliberately make extra for lunch or afternoon snacks throughout the week.
Budget-Smart — Feeds 8-10 people for under $10. That’s less than one meal at a coffee shop. When you buy dates in bulk and almond butter on sale, these are pennies per bar.
This is my go-to when I need dessert to just work. No complicated techniques, no weird ingredients, just reliable, delicious food that makes everyone happy. It’s basically a healthy cookie bar that tastes like a candy bar.
Ingredients You’ll Need (Yes, Only Five)
Here’s the best part: you probably have most of this already. I’m particular about three ingredients here, and I’ll tell you exactly why they matter. This isn’t a long shopping list, just five simple items that work together like magic.
Dates (2 cups, pitted / about 300g) — This is your base and your sweetener. I use Medjool dates because they’re large, soft, and naturally caramel-like. If your dates are dry or stiff, soak them in warm water for 10 minutes first, then drain. Don’t skimp on pitting them! I learned this the hard way with a broken food processor blade (and a very angry thumb). Look for soft, plump dates at the store.
Almond Butter (½ cup / 120g) — I use natural, unsweetened almond butter. The oil separation is fine—just stir it well before measuring. It binds everything together and adds that rich, nutty flavor. You can substitute peanut butter if you prefer, but almond butter has a milder taste that lets the chocolate shine. I always buy the kind with just two ingredients: almonds and salt.
Dark Chocolate Chips (1 cup / 170g) — Semi-sweet or dark chocolate chips work best. I prefer 60% cocoa for that slightly bitter contrast to the sweet dates. Milk chocolate makes them too sweet. If you don’t have chips, chop up a chocolate bar—it melts the same way. I always keep a bag of Ghirardelli semi-sweet chips in my pantry.
Vanilla Extract (1 teaspoon) — Just a splash to round out the flavors. It sounds like a small detail, but it makes the chocolate taste more “chocolatey.” Pure vanilla only—no imitation stuff. It makes a huge difference.
Sea Salt (½ teaspoon) — This is non-negotiable. Salt balances the sweetness and makes the chocolate flavor pop. I use flaky sea salt if I have it, but table salt works fine. Don’t skip this step!
Optional Add-ins:
- Mini chocolate chips (¼ cup) — For extra chocolatey bursts. I throw these in sometimes.
- Chopped almonds (¼ cup) — For crunch. I toast them lightly in a dry pan for 2 minutes first.
- Coconut flakes (2 tablespoons) — For texture and a tropical twist. I sprinkle these on top.
Personal Tips:
- Brand recommendations: I always use Medjool dates from the bulk bin—they’re softer and easier to blend.
- Shopping shortcuts: Buy pre-pitted dates if you’re in a rush, but they’re usually more expensive. I usually pit them myself.
- Substitutions: No dates? You could try dried apricots, but the flavor profile changes completely. Stick with dates for this recipe.
- Storage: Dates keep for months in the pantry. Almond butter keeps for months once opened. Chocolate chips keep forever.
Common Questions:
- Can I use peanut butter instead of almond butter? Yes! It will taste more like a Reese’s Cup. Just make sure it’s natural, not the kind with added sugar and hydrogenated oils.
- Where do I find Medjool dates? Usually in the dried fruit aisle of any grocery store. Look for the big, soft ones.
- Can I make this ahead? Absolutely. These keep well in the fridge for up to two weeks.
Equipment Needed
You don’t need fancy equipment for this. Here’s what I actually use.
Food Processor — I use a 14-cup Cuisinart. It’s essential for breaking down the dates into a smooth, sticky paste. A blender works too, but you might need to add a splash of water to get it moving. I’ve tried with a mortar and pestle—don’t. It takes forever and your arms hurt.
8×8 Inch Baking Pan — I use a glass pan because it’s easy to see the bottom. You can also use a metal pan or even a loaf pan if you want taller bars. Line it with parchment paper for easy removal.
Parchment Paper — Crucial for cleanup. Just line the pan, press the bars in, lift out, and slice. No scrubbing pans. I keep rolls of it in every cupboard.
Knife — A sharp chef’s knife for slicing the bars. Or just tear them into pieces if you’re feeling rustic.
Measuring Cups and Spoons — Pretty standard stuff. Dollar store versions work fine.
Optional but nice:
- Digital scale — For weighing dates if you want precision. I eyeball it mostly.
- Microplane — For grating chocolate if you don’t have chips. Not necessary.
How to Make It: Step-by-Step
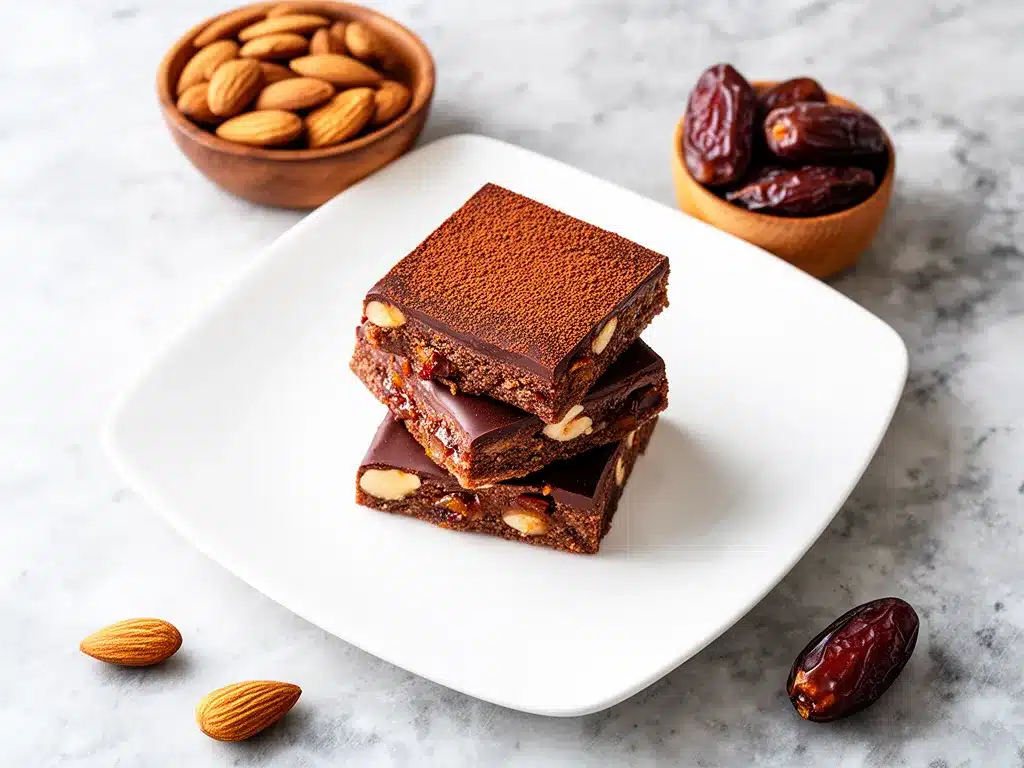
Alright, let’s make this! I’m walking you through exactly how I do it, including the little tricks I’ve picked up.
Step 1: Prep Your Pan (1 minute)
Line your 8×8 inch baking pan with parchment paper, leaving an overhang on the sides. This is your handle for lifting the bars out later. I grease it lightly with cooking spray just in case, but the parchment usually does the job. This step takes 30 seconds but saves you from washing a sticky pan.
Step 2: Blend the Dates (2 minutes)
Add the pitted dates to your food processor. Pulse a few times to chop them up, then let it run until they form a sticky, paste-like ball. If the dates are dry, add a teaspoon of water at a time until they stick together. Scrape down the sides of the bowl with a spatula as needed. You want a smooth, uniform mixture. This is the base of your bars.
Step 3: Add the Almond Butter (1 minute)
Add the almond butter and vanilla extract to the food processor. Pulse until everything is well combined and forms a cohesive dough. It should stick together when you pinch it between your fingers. If it’s too dry, add another teaspoon of water. If it’s too wet, add a few more dates. You’re looking for a texture like playdough.
Step 4: Press Into the Pan (2 minutes)
Transfer the date-almond mixture to your prepared pan. Use your hands or the back of a spoon to press it down firmly and evenly. You want it packed tight so the bars hold together. I usually press it into the corners first, then smooth the top. This step is satisfying, I’ll admit.
Step 5: Melt the Chocolate (2 minutes)
Melt the chocolate chips in a microwave-safe bowl. Heat in 30-second intervals, stirring between each, until smooth. Don’t overheat—it burns easily. I usually need about 1 minute total. If you don’t have a microwave, melt it in a double boiler over low heat, stirring constantly.
Step 6: Top and Chill (10+ minutes)
Pour the melted chocolate over the date layer. Use a spatula to spread it evenly to the edges. Sprinkle with sea salt and any optional add-ins like chopped almonds or coconut flakes. Place the pan in the fridge for at least 30 minutes, or until the chocolate is set. I usually leave it for an hour to be safe.
Step 7: Slice and Serve
Lift the bars out of the pan using the parchment paper. Slice into 8-10 bars with a sharp knife. Serve immediately or store in the fridge. They’re best eaten chilled.
Total Time: About 15 minutes active, plus 30 minutes chilling.
Built-in Troubleshooting:
- Mixture too dry? Add water, one teaspoon at a time, until it sticks.
- Chocolate too thick? Add a teaspoon of coconut oil to thin it out.
- Bars falling apart? You didn’t pack them tight enough. Press harder next time.
Expert Tips & Tricks
Here’s everything I’ve learned from making these dozens of times. These tips will save you from my mistakes.
Soft Dates Are Key
If your dates are hard or dry, soak them in warm water for 10 minutes before blending. Drain well before using. Soft dates blend into a smoother paste, which means smoother bars. I’ve made these with dry dates and the texture was gritty. Don’t make my mistake.
Pack It Tight
The more firmly you press the date layer, the better the bars hold together. I use the bottom of a measuring cup to pack it down. Loose bars crumble when you bite them. Tight bars slice cleanly.
Don’t Skip the Salt
That sprinkle of sea salt on top isn’t just for show. It cuts through the sweetness and makes the chocolate taste richer. I use flaky salt if I have it, but regular salt works too. Trust me on this.
Chill Thoroughly
Don’t try to slice them while the chocolate is still soft. Let them chill for at least 30 minutes. I usually leave them for an hour. Rushing this step leads to messy, melted bars.
Common Mistakes (and how to avoid them):
- Mistake: Bars are too sticky Fix: Add more almond butter or a few more dates to balance the moisture.
- Mistake: Chocolate is grainy Fix: You overheated it. Melt it slowly and stir often.
- Mistake: Bars fall apart Fix: Press the date layer tighter. And make sure your dates are soft enough to blend smoothly.
Pro Tricks I’ve Learned:
- For Extra Crunch Toast chopped almonds in a dry pan for 2 minutes before sprinkling on top.
- For Better Texture Add a teaspoon of coconut oil to the chocolate before melting. Makes it smoother.
- For Gift-Giving Cut into squares, wrap in parchment squares, and tie with twine. They make great gifts.
Variations & Substitutions
Once you’ve nailed the basic version, here’s how you can mix it up. I’ve tried all of these.
Peanut Butter Version
Swap almond butter for peanut butter. These taste like a giant peanut butter cup. My husband prefers this version. Just make sure it’s natural peanut butter.
Coconut Lover’s
Add ¼ cup shredded coconut to the date mixture and sprinkle more on top. Adds a tropical twist. I love this version in the summer.
Sea Salt Caramel
Drizzle caramel sauce over the chocolate before sprinkling with salt. Indulgent and fancy. I make this when I have guests.
Protein Boost
Add a scoop of vanilla protein powder to the date mixture. It thickens it up, so you might need a splash of water. Good for post-workout snacks.
Dietary Modifications:
- Gluten-Free These are naturally gluten-free. Just check your chocolate chips for cross-contamination warnings.
- Dairy-Free These are naturally dairy-free. Just use dairy-free chocolate chips.
- Vegan These are naturally vegan. Just ensure your chocolate chips are vegan.
- Nut-Free Swap almond butter for sunflower seed butter. The flavor is different but still tasty.
Serving & Storage
How to Serve:
I usually serve these straight from the fridge—they’re best cold. But here are other ways I’ve enjoyed them:
- With a glass of cold milk (classic combo)
- On top of yogurt for breakfast
- Crumbled over ice cream for a healthy-ish dessert
- As a snack with my afternoon coffee
Toppings Bar:
When I have guests, I put out: extra sea salt, chopped nuts, coconut flakes, and mini chocolate chips. Everyone customizes their bar.
Wine Pairing:
Not a wine expert, but my wine-snob friend says a bold red like Cabernet Sauvignon works great with these. Or a glass of cold milk, which is what I actually drink.
Storage Instructions:
Refrigerator: Store in an airtight container for up to 2 weeks. They keep well in the fridge. The chocolate might sweat if you take them out, but it wipes off.
Freezer: These freeze well! Store in a freezer-safe bag for up to 3 months. Thaw in the fridge overnight. I make a big batch and freeze half.
Room Temperature: Not recommended. The dates will dry out and the chocolate will melt. Keep them cool.
Pro tip: If they stick to your knife when slicing, dip the knife in hot water and wipe dry between cuts. Makes for clean slices.
Nutrition Information
I’m not a nutritionist, but here’s the breakdown if you’re tracking.
| Per Bar (1 of 8) | Amount |
|---|---|
| Calories | 180 |
| Protein | 5g |
| Carbs | 22g |
| Fiber | 4g |
| Sugar | 16g |
| Fat | 9g |
| Sodium | 10mg |
What’s Good:
- High in fiber from the dates
- Healthy fats from almond butter
- No refined sugar (naturally sweetened)
- Good source of magnesium and potassium
What to Know:
- Higher in calories than you might think (dates are calorie-dense)
- Contains nuts (almonds)
- Naturally sweet, so watch portion size if you’re watching sugar
My Take:
Look, these are still a treat. They’re made with chocolate and dates. They’re not a diet food. But they’re way better than a candy bar, and I know exactly what’s in them. When I want to make it lighter, I use less chocolate and more dates. But usually? I just eat one bar and enjoy it.
Final Thoughts
So that’s my no-bake chocolate almond date bars! I’ve probably talked your ear off at this point, but when you make a recipe this often, you have a lot to say about it.
This has saved late-night snack attacks more times than I can count. It’s my answer to “I want dessert” when I’m tired, don’t want to bake, and still want something that tastes really good. My kids are happy, my husband’s happy, and I’m happy because I’m not stressed about cooking.
Make it yours! Try different add-ins, swap in your favorite nut butter, adjust the chocolate (though more is always better in my opinion). The best recipes are the ones you adapt to your family’s tastes.
If you make this, drop a comment and let me know what you think! I love hearing how recipes turn out in your kitchen. And if something doesn’t work, tell me that too—I’m here to help troubleshoot.
Happy cooking! And I hope your kitchen smells half as good as mine does right now.
Frequently Asked Questions
Can I use peanut butter instead of almond butter?
Yes! It will taste more like a Reese’s Cup. Just make sure it’s natural, not the kind with added sugar and hydrogenated oils. The texture might be slightly different, but it works great.
My bars are too sticky—what happened?
Usually means your dates were too wet or you didn’t pack them tight enough. If they’re too wet, add more almond butter or a few more dates. If they’re just sticky to handle, wet your hands slightly before pressing them into the pan.
Can I make these ahead for a party?
Absolutely. Make them up to 2 weeks ahead and store in the fridge. Or freeze them for up to 3 months. They’re perfect for meal prep or party snacks. Just take them out of the fridge 10 minutes before serving so the chocolate softens slightly.
Why is my chocolate grainy?
You probably overheated it. Chocolate burns easily. Melt it in 30-second intervals, stirring between each, until just melted. If it’s already grainy, stir in a teaspoon of coconut oil to smooth it out.
Can I use dried apricots instead of dates?
You can, but the flavor profile changes completely. Apricots are tarter and less sweet. The texture might also be different. I recommend sticking with dates for this specific recipe, but feel free to experiment!
How do I store these if I don’t have an airtight container?
Wrap the whole block in plastic wrap, then put it in a zip-top bag. Or store individual bars in parchment paper squares. The key is keeping them from drying out. They’ll last up to 2 weeks in the fridge.
Can I double this recipe?
Yes! Double everything and use a 9×13 inch pan instead of an 8×8. The cooking times stay the same. I do this when I’m making a big batch for a party. Just make sure your food processor is big enough.
Pin This Recipe!
No-Bake Chocolate Almond Date Bars
- Total Time: 45 minutes
- Yield: 8 servings 1x
Description
These easy, no-bake chocolate almond date bars are a chewy, fudgy, and naturally sweetened snack that requires only five ingredients and zero baking skills.
Ingredients
- 2 cups pitted Medjool dates (about 300g)
- ½ cup natural unsweetened almond butter (120g)
- 1 cup semi-sweet or dark chocolate chips (170g)
- 1 teaspoon pure vanilla extract
- ½ teaspoon sea salt
- Optional: ¼ cup mini chocolate chips, ¼ cup chopped toasted almonds, 2 tablespoons coconut flakes
Instructions
- Line an 8×8 inch baking pan with parchment paper, leaving an overhang on the sides for easy removal.
- Add the pitted dates to a food processor and pulse until they form a sticky, paste-like ball. If the dates are dry, add a teaspoon of water at a time until they stick together.
- Add the almond butter and vanilla extract to the food processor. Pulse until everything is well combined and forms a cohesive dough that sticks together when pinched.
- Transfer the date-almond mixture to the prepared pan. Press it down firmly and evenly using your hands or the back of a spoon to ensure the bars hold together.
- Melt the chocolate chips in a microwave-safe bowl in 30-second intervals, stirring between each, until smooth. Alternatively, melt in a double boiler over low heat.
- Pour the melted chocolate over the date layer and spread it evenly to the edges with a spatula.
- Sprinkle with sea salt and any optional add-ins like chopped almonds or coconut flakes.
- Place the pan in the fridge for at least 30 minutes, or up to an hour, until the chocolate is fully set.
- Lift the bars out of the pan using the parchment paper and slice into 8-10 bars with a sharp knife.
Notes
If your dates are hard or dry, soak them in warm water for 10 minutes before blending and drain well. Ensure you press the date layer tightly so the bars hold together. If the chocolate is too thick, add a teaspoon of coconut oil to thin it out. Store in an airtight container in the fridge for up to 2 weeks or freeze for up to 3 months.
- Prep Time: 15 minutes
- Cook Time: 0 minutes
- Category: Dessert
- Cuisine: American
Nutrition
- Serving Size: 1 bar
- Calories: 180
- Sugar: 16
- Sodium: 10
- Fat: 9
- Saturated Fat: 3
- Carbohydrates: 22
- Fiber: 4
- Protein: 5
Keywords: no-bake, chocolate, almond butter, dates, healthy snack, vegan, gluten-free, dairy-free, easy dessert, 5-ingredient recipe


