There is a specific kind of chaos that only exists in August. You know the one. It’s 7:30 PM on a Sunday, the kitchen counters are covered in backpacks that haven’t been unpacked yet, and the fridge is staring back at you like an empty museum. My husband was already dreading the morning rush—coffee, lunches, shoes, the whole frantic ballet of getting three kids out the door before the bus comes. We needed a win. Something that looked like effort, tasted like a treat, and actually helped us survive the next three months.
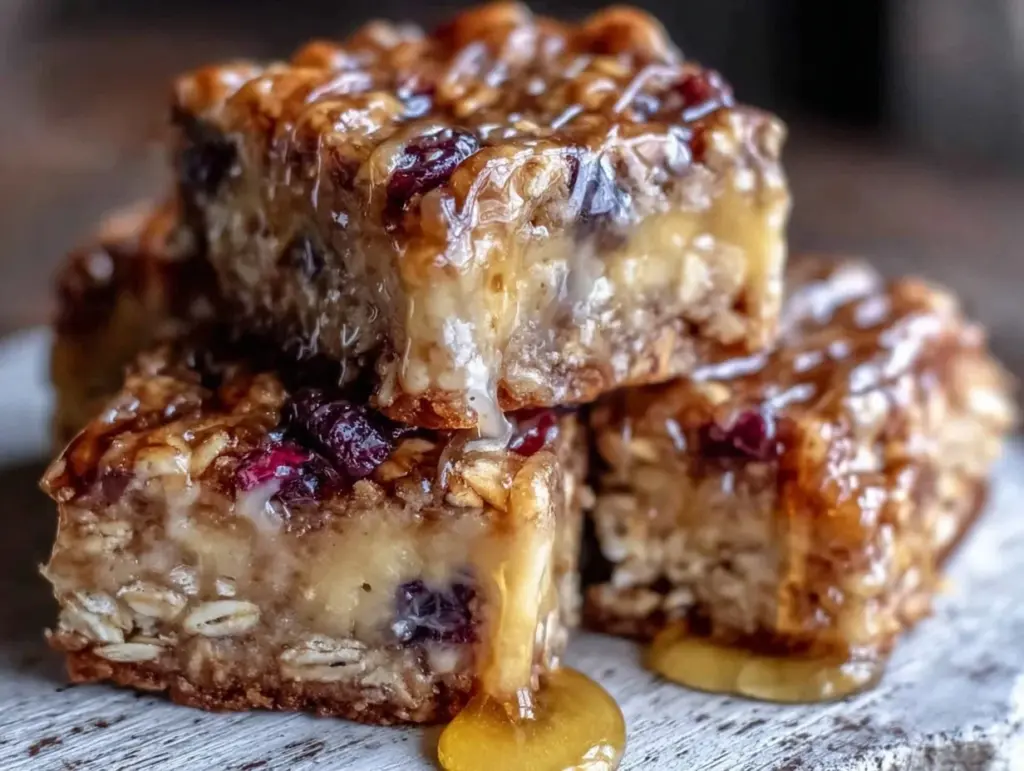
That’s when I decided to stop buying those sad, chalky granola bars from the grocery store aisle and started making these Back to School Chewy Granola Bars with Honey and Oats. I’ve batch-cooked these every single Sunday for the last two years, and they’ve become the secret weapon in our house. They’re sticky, sweet, chewy in the best way possible, and they hold together long enough to fit in a crumpled lunchbox without turning into oat dust.
What started as a desperate attempt to avoid the $5 gas station candy aisle turned into a family tradition. My kids think they’re getting a special dessert, but really, it’s just oats, honey, and butter. But here’s the thing about these bars: they are infinitely better than anything you’ll buy in a box. They’re dense with flavor, packed with just enough crunch from toasted nuts, and sweetened naturally so they don’t crash your blood sugar by third period. I’ve tested this recipe at least a dozen times, tweaking the honey-to-oat ratio until it was perfect. This isn’t just a snack; it’s peace of mind in a bar.
Why You’ll Love This Recipe
I’ve tried countless granola bar recipes over the years. Some were too dry and crumbled everywhere. Others were so sweet they tasted like candy. These Back to School Chewy Granola Bars with Honey and Oats hit that sweet spot—literally. Here’s why they’ve earned a permanent spot in our meal prep rotation:
- Batch Cooking Champion — Seriously, you can make three batches in under an hour and have snacks sorted for two weeks. I throw the whole pan in the fridge, and they keep for ages. It’s the ultimate “set it and forget it” strategy.
- Actually Chewy — Not gummy, not brittle. Just the right amount of chew. The secret is letting them cool completely in the pan. I learned this the hard way when I tried to cut them warm (a huge mistake).
- Picky-Eater Approved — My youngest, who usually rejects anything with “texture,” asks for these by name. The honey and oats are familiar and comforting, while the nuts add a sophistication even the pickiest eaters can’t argue with.
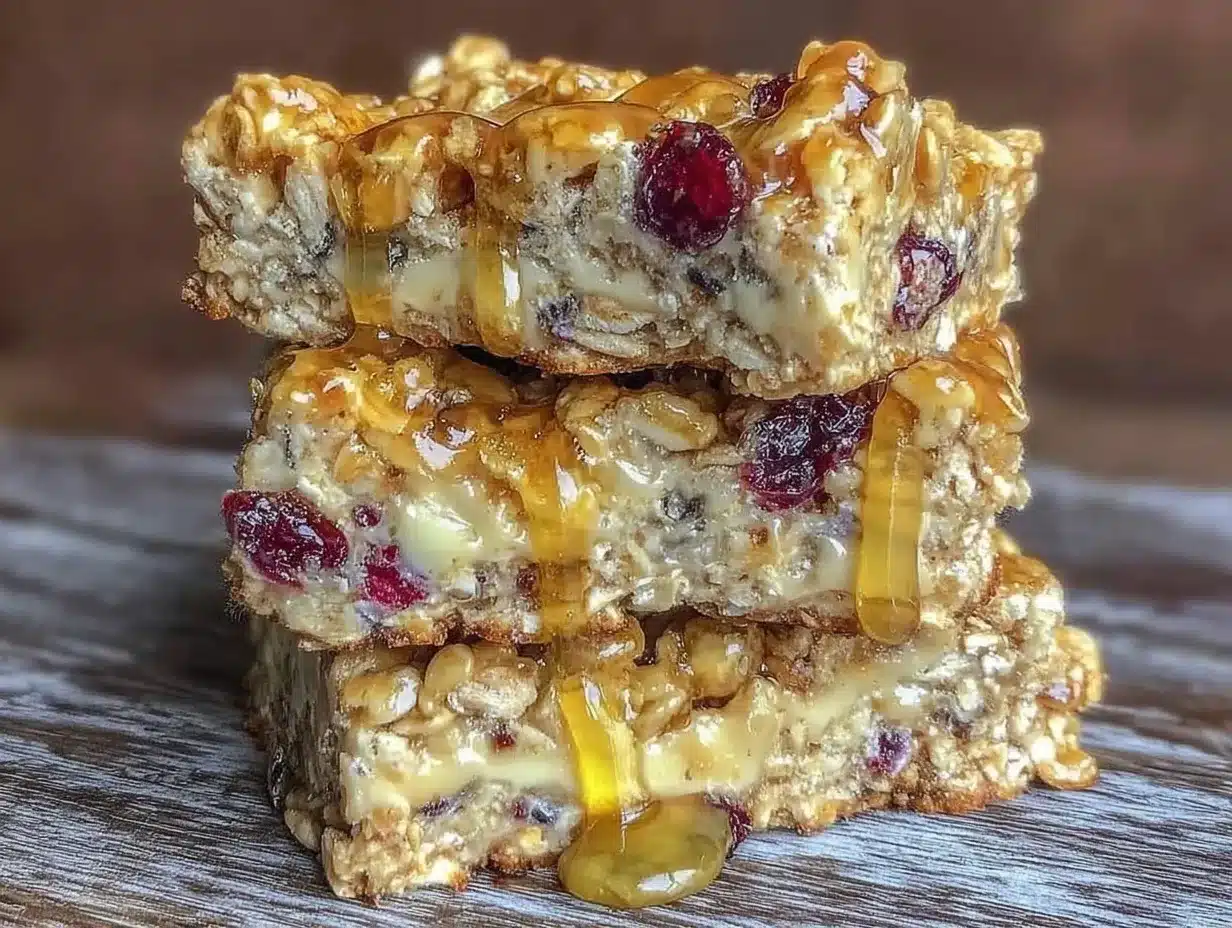
- Customizable Magic — Love chocolate? Add chips. Hate nuts? Swap them for seeds. This recipe is a canvas. I’ve made versions with dried cranberries, white chocolate chips, and even pumpkin seeds. They all work.
- Healthy-ish Treat — Yes, they’re sweet. But they’re sweetened with honey and packed with fiber from the oats. They’re a far cry from a bag of chips, and I feel good serving them as an afternoon pick-me-up.
This recipe has saved me more Sunday evenings than I can count. It’s my go-to when I need to impress, or just when I need to feel like I’ve got everything under control.
Ingredients You’ll Need
Here’s the best part: you probably have most of this already in your pantry. This recipe relies on simple, wholesome ingredients that you can trust. I’m particular about the quality of the honey and oats, so I’ll share my tips below.
The Base
Rolled Oats (Old-Fashioned) (6 cups / 540g) — Do not use quick oats or steel-cut oats. You need old-fashioned rolled oats for that chewy texture. Quick oats will turn this into mush. I love Bob’s Red Mill, but any brand works as long as it’s thick.
Honey (1 cup / 300g) — This is your binder and your sweetener. Use real, raw honey if you can find it. It tastes better and has a nicer aroma. Clover or wildflower honey works great. Avoid “honey blend” products that are mostly corn syrup.
Butter (½ cup / 115g, unsalted) — Adds richness and helps the oats toast. I use unsalted so I can control the saltiness. If you’re dairy-free, you can use coconut oil, but the flavor will be different.
Peanut Butter (½ cup / 125g) — Creamy or crunchy? I prefer creamy for a smoother bar, but crunchy adds nice texture. This is optional if you have nut allergies, but it really helps bind everything together. Sunflower seed butter is a great substitute.
The Mix-Ins
Mini Chocolate Chips (1 cup / 170g) — Because it’s granola bars and they need chocolate. Mini chips distribute better than regular chips, so you get a bit of chocolate in every bite.
Dried Cranberries or Raisins (½ cup / 60g) — Adds a chewy, tart contrast to the sweet honey. I love the tartness of cranberries, but raisins are a classic for a reason.
Chopped Almonds or Walnuts (1 cup / 100g) — For crunch and healthy fats. Toasting them first makes a huge difference. I’ll show you how in the steps.
Vanilla Extract (1 teaspoon) — Just a splash to round out the flavors. Don’t skip it.
Salt (½ teaspoon) — Essential. It balances the sweetness. Use kosher salt or sea salt.
Optional: Flax Seeds or Chia Seeds (2 tablespoons) — For an extra nutrition boost. They add a subtle nuttiness and help with binding.
Equipment Needed
You don’t need fancy gadgets for this. Here’s what I actually use:
Large Bowl — I use a 6-quart mixing bowl. You need enough room to toss the oats and mix-ins without making a mess.
Microwave-Safe Measuring Cup or Small Pot — To melt the butter and honey together. I prefer the microwave for speed, but a saucepan on low heat works too.
9×13 Inch Baking Pan — Line it with parchment paper. This is non-negotiable for easy removal.
Parchment Paper — For lining the pan and pressing the bars down. It prevents sticking and makes cleanup a breeze.
Sharp Knife or Pizza Cutter — For cutting the bars. A pizza cutter works surprisingly well for clean slices.
Measuring Cups and Spoons — Standard stuff. Accuracy matters here because the ratio of wet to dry ingredients is key.
How to Make It: Step-by-Step
Alright, let’s make these Back to School Chewy Granola Bars with Honey and Oats! I’m walking you through exactly how I do it, including the little tricks I’ve picked up over the years.
Step 1: Prep Your Pan and Oats (5 minutes)
Preheat your oven to 350°F (175°C). Line a 9×13 inch baking pan with parchment paper, leaving an overhang on the sides. This overhang is your friend—it’ll help you lift the whole block out of the pan later. While the oven heats, spread your rolled oats and chopped nuts on a baking sheet. Toast them in the oven for 5-7 minutes. This step is crucial. It brings out the nutty flavor and adds a deeper taste that raw oats just don’t have. Keep a close eye on them—they burn fast!
Step 2: Mix the Dry Ingredients (2 minutes)
In your large mixing bowl, combine the toasted oats, toasted nuts, dried fruit, flax seeds (if using), and salt. Toss them together so everything is evenly distributed. This ensures every bar has a little bit of everything.
Step 3: Melt the Wet Ingredients (2 minutes)
In a microwave-safe measuring cup or small saucepan, combine the butter, honey, and peanut butter. Microwave in 30-second intervals, stirring between each, until completely smooth and melted. If using a saucepan, heat over low heat, stirring constantly. Do not let it boil. You just want it warm and liquid. Stir in the vanilla extract.
Step 4: Combine Everything (3 minutes)
Pour the warm honey-butter mixture over the oat mixture. Use a sturdy spatula to fold everything together. You want every oat to be coated. This might take a little elbow grease. If the mixture feels too dry, add a tablespoon more honey. If it’s too wet, add a handful more oats. You’re looking for a sticky, cohesive mass.
Step 5: Add the Chocolate (1 minute)
Stir in the mini chocolate chips. They’ll melt slightly into the warm mixture, creating little pockets of chocolate goodness.
Step 6: Press into the Pan (5 minutes)
Transfer the mixture to your prepared pan. Use another piece of parchment paper or the back of a greased measuring cup to press the mixture down firmly. This is the most important step for chewy bars. You need to compress them tightly. If they’re loose, they’ll crumble. Press hard! Aim for an even layer.
Step 7: Bake and Cool (20 minutes)
Bake at 350°F (175°C) for 15-18 minutes. You want the edges to turn golden brown. The center might still look a bit soft—that’s okay. Let them cool completely in the pan on a wire rack. This cooling time is when they set and firm up. If you cut them warm, they will fall apart. Be patient.
Step 8: Cut and Store
Once completely cool, lift the block out of the pan using the parchment overhang. Use a sharp knife or pizza cutter to slice into bars. I usually cut them into 12 large bars or 16 smaller ones. Store in an airtight container in the fridge for up to two weeks, or in the freezer for up to three months.
Expert Tips & Tricks
Here’s everything I’ve learned from making these dozens of times. These tips will save you from my mistakes.
Toast Your Nuts
I can’t stress this enough. Raw nuts taste flat. Toasting them adds a layer of complexity that makes these bars taste gourmet. It only takes 5 minutes, but the flavor difference is night and day.
Press Firmly
The texture of your bar depends on how hard you press it. If you’re lazy with this step, your bars will be crumbly. Use your hands or a flat-bottomed glass to pack it down tight. It should feel like a solid block of earth.
Use Warm Honey
Cold honey is thick and stubborn. If your honey is crystallized or just cold, warm it slightly before mixing. It will coat the oats much more evenly.
Don’t Overbake
These bars continue to cook a bit after you take them out of the oven. If they look dry in the pan, they’re probably done. Overbaking makes them hard and crunchy instead of chewy.
Cool Completely
I know, it’s hard. But cutting warm bars is a recipe for disaster. Let them cool for at least an hour. If you’re in a rush, put the pan in the fridge for 20 minutes to speed things up.
Variations & Substitutions
Once you’ve nailed the basic version, here’s how you can mix it up. I’ve tried all of these, and they’re all winners.
Chocolate Chip Cookie Dough
Skip the dried fruit and add 1 cup of mini chocolate chips and ½ cup of chopped macadamia nuts. Add a teaspoon of almond extract instead of vanilla. It tastes like cookie dough!
Trail Mix Style
Add ½ cup of M&Ms or Reese’s Pieces along with the chocolate chips. Perfect for kids who want something extra sweet.
Pumpkin Spice
Add 1 teaspoon of pumpkin pie spice to the dry ingredients. Use pumpkin puree (strained well) instead of some of the honey. Add chopped pecans and white chocolate chips. Great for fall.
Seed-Based (Nut-Free)
Swap nuts for sunflower seeds, pumpkin seeds, and sesame seeds. Use sunflower seed butter instead of peanut butter. Perfect for school-safe lunches.
Dairy-Free
Use coconut oil instead of butter and dairy-free chocolate chips. The texture might be slightly firmer, but it’s still delicious.
Lower Sugar
Reduce the honey to ¾ cup and use sugar-free chocolate chips. Add more nuts for balance. It’s less sweet but still satisfying.
Serving & Storage
How to Serve:
I usually serve these straight from the fridge—they’re nice and firm. But if you want them softer, let them sit at room temperature for 10 minutes. They make a great addition to a lunchbox, a post-workout snack, or a coffee break treat.
Side Dishes:
Pair these with a glass of cold milk or a cup of coffee. They also go great with a side of fresh fruit or yogurt.
Storage Instructions:
- Refrigerator: Store in an airtight container for up to 2 weeks. The cold keeps them firm and fresh.
- Freezer: Wrap individual bars in plastic wrap or parchment paper and store in a freezer bag for up to 3 months. Thaw at room temperature for 10 minutes before eating.
- Room Temperature: Can be stored for 3-4 days, but they may get soft in humid weather. I prefer the fridge.
Pro Tip: If your bars are sticking to the knife when you cut them, dip the knife in hot water and wipe it dry between cuts. This gives you clean, professional-looking edges.
Nutrition Information
I’m not a nutritionist, but here’s the breakdown if you’re tracking. This is per bar (based on 12 servings).
| Nutrient | Amount |
|---|---|
| Calories | 280 |
| Protein | 8g |
| Carbs | 42g |
| Fiber | 4g |
| Sugar | 22g |
| Fat | 10g |
| Saturated Fat | 4g |
| Sodium | 120mg |
What’s Good:
Decent protein from the oats and nuts. Good source of fiber. Natural sugars from honey.
What to Know:
Higher in calories than a plain apple, but more filling. Contains nuts and dairy (unless substituted).
My Take:
Look, these are treats. They’re sweet and chewy. But they’re made with real ingredients, so they’re a better choice than processed candy bars. Enjoy them in moderation and as part of a balanced diet.
Final Thoughts
So that’s my go-to Back to School Chewy Granola Bars with Honey and Oats! I’ve probably talked your ear off at this point, but when you make a recipe this often, you have a lot to say about it.
This has saved our mornings more times than I can count. It’s my answer to “what’s for lunch?” when I’m tired, don’t want to cook, and still want something that tastes really good. My kids are happy, my husband’s happy, and I’m happy because I’m not stressed about packing lunches.
Make it yours! Try different mix-ins, swap in your favorite nuts, adjust the honey. The best recipes are the ones you adapt to your family’s tastes.
If you make this, drop a comment and let me know what you think! I love hearing how recipes turn out in your kitchen. And if something doesn’t work, tell me that too—I’m here to help troubleshoot.
Happy cooking! And I hope your kitchen smells half as good as mine does right now.
Frequently Asked Questions
Can I use quick oats instead of rolled oats?
I really don’t recommend it. Quick oats are thinner and will absorb the honey differently, resulting in a mushy, dense bar rather than a chewy one. Old-fashioned rolled oats are the key to the right texture. If you must, you can pulse rolled oats in a blender to break them up slightly, but don’t use the pre-packaged quick oats.
My bars are crumbling—what happened?
This usually means one of two things: you didn’t press them down firmly enough, or you cut them while they were still warm. Make sure to pack the mixture tightly into the pan, and let them cool completely in the fridge before cutting. Also, check your ratio—if you used too many mix-ins and not enough binder (honey/butter/peanut butter), they might fall apart.
Can I make these ahead of time?
Yes! In fact, they taste even better the next day after the flavors have melded. You can make them up to 2 weeks in advance and store them in the fridge. Or, freeze them for up to 3 months. This is perfect for batch cooking on Sundays.
Can I substitute the honey?
You can use maple syrup, but the bars will be softer and stickier. You might need to add a bit more oats to compensate. Agave nectar is another option, but it’s thinner than honey. Honey is the best binder for this recipe.
Are these safe for school?
It depends on your school’s policy. If it’s nut-free, use sunflower seed butter and omit all nuts. Use seeds instead. If chocolate is allowed, M&Ms or Reese’s Pieces are often school-safe alternatives to regular chocolate chips. Always check with your school first.
Can I add protein powder?
You can, but it changes the texture. Add ½ cup of vanilla or chocolate protein powder and reduce the honey by ¼ cup. You may need to add a splash of milk or water to get the mixture to stick. It’s a good way to boost protein, but the bars will be denser.
Why are my bars too hard?
You probably overbaked them or pressed them down too tightly. Granola bars should be chewy, not rock-hard. If you like crunch, you can bake them longer, but for chewy bars, keep an eye on the oven and don’t overdo it.
Pin This Recipe!

Back to School Chewy Granola Bars with Honey and Oats
- Total Time: 40 minutes
- Yield: 12 servings 1x
Description
These homemade chewy granola bars are a batch-cooking champion, perfect for back-to-school lunches. Made with simple ingredients like oats, honey, and nuts, they are naturally sweetened, customizable, and hold together well in lunchboxes.
Ingredients
- 6 cups old-fashioned rolled oats
- 1 cup raw honey
- 1/2 cup unsalted butter
- 1/2 cup creamy or crunchy peanut butter
- 1 cup mini chocolate chips
- 1/2 cup dried cranberries or raisins
- 1 cup chopped almonds or walnuts
- 1 teaspoon vanilla extract
- 1/2 teaspoon salt
- 2 tablespoons flax seeds or chia seeds (optional)
Instructions
- Preheat oven to 350°F (175°C). Line a 9×13 inch baking pan with parchment paper, leaving an overhang on the sides.
- Spread rolled oats and chopped nuts on a baking sheet and toast in the oven for 5-7 minutes until fragrant. Watch closely to prevent burning.
- In a large mixing bowl, combine the toasted oats, toasted nuts, dried fruit, flax seeds (if using), and salt.
- In a microwave-safe measuring cup or small saucepan, combine butter, honey, and peanut butter. Microwave in 30-second intervals or heat on low, stirring until smooth and melted. Stir in vanilla extract.
- Pour the warm honey-butter mixture over the oat mixture and fold with a sturdy spatula until every oat is coated and the mixture forms a sticky, cohesive mass.
- Stir in the mini chocolate chips.
- Transfer the mixture to the prepared pan. Press down firmly and tightly using parchment paper or a greased measuring cup to ensure chewy texture.
- Bake at 350°F (175°C) for 15-18 minutes, until edges are golden brown.
- Let the bars cool completely in the pan on a wire rack (at least 1 hour or refrigerate for 20 minutes) to set.
- Lift the block out of the pan using the parchment overhang. Cut into 12 large or 16 smaller bars using a sharp knife or pizza cutter.
- Store in an airtight container in the fridge for up to two weeks or in the freezer for up to three months.
Notes
Do not use quick oats or steel-cut oats; old-fashioned rolled oats are required for the correct chewy texture. Toasting the nuts and oats beforehand significantly enhances flavor. Pressing the mixture firmly into the pan is crucial to prevent crumbling. Ensure bars cool completely before cutting to allow them to set. For nut-free versions, substitute peanut butter with sunflower seed butter and nuts with seeds.
- Prep Time: 15 minutes
- Cook Time: 25 minutes
- Category: Snack
- Cuisine: American
Nutrition
- Serving Size: 1 bar
- Calories: 280
- Sugar: 22
- Sodium: 120
- Fat: 10
- Saturated Fat: 4
- Carbohydrates: 42
- Fiber: 4
- Protein: 8
Keywords: granola bars, back to school snacks, oat bars, honey oat bars, healthy snacks, batch cooking, chewy granola bars, lunchbox ideas


