It was 11:30 on a Tuesday, and I was staring into the abyss of my kitchen cabinets. The fridge was empty except for a wilting head of lettuce and half a jar of pickles, but my brain was screaming for something chocolate, rich, and dangerously close to illegal. I didn’t want to order delivery (too expensive, too cold by the time it arrived). I didn’t want to bake a whole batch of brownies (too much cleanup, too many calories for one person). I just wanted that specific, dense, fudgy chocolate hit that only comes from a properly made mug cake.
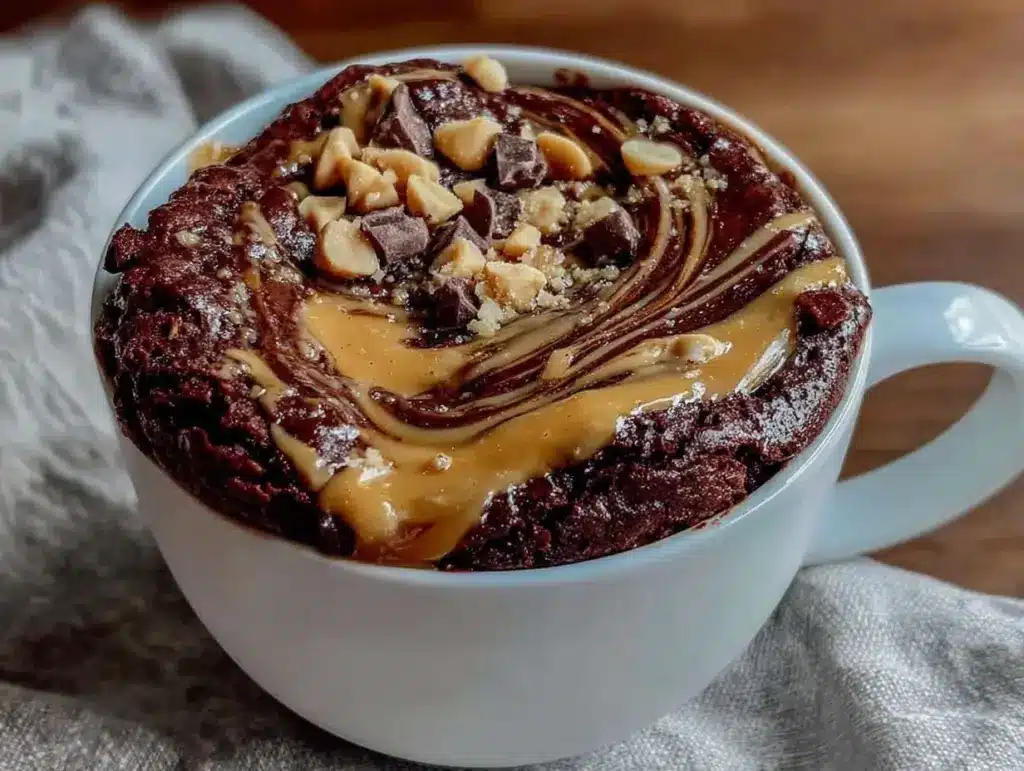
Most mug brownie recipes are… well, let’s be honest, they’re often rubbery disappointments. They’re the culinary equivalent of a “hello there” from a stranger—polite but ultimately forgettable. I tried them. I’ve eaten them. And I’ve mostly forgotten them. But then I stumbled onto a method that changed my life. It’s not just a brownie; it’s a single-serving masterpiece with a peanut butter swirl that feels like you’ve cheated on your diet with style.
This Microwave Mug Brownie with Peanut Butter Swirl is the dessert I make on repeat. Seriously. I’ve made it on rainy Sundays, after stressful workdays, and for impromptu midnight snacks with my partner. It’s indulgent without being pretentious, fast without being cheap, and it looks like you spent an hour in the kitchen (you didn’t). If you’re looking for a dessert that feels special but requires zero effort, this is it. Let’s get into why this tiny cake is about to become your new best friend.
Why You’ll Love This Mug Brownie
Look, I’m a big believer in desserts that don’t require a shopping trip or a three-hour baking window. This brownie checks every single box. It’s not just about convenience; it’s about the experience. Here’s why this recipe has earned a permanent spot in my rotation:
- Zero Guilt, Maximum Flavor — It’s one mug. One serving. You get that rich, chocolatey satisfaction without the urge to lie down for three hours. It’s indulgent, but in a controlled way. Plus, the peanut butter adds healthy fats and protein, so you’re not just eating pure sugar.
- Ready in 90 Seconds — Yes, really. From empty bowl to hot, gooey dessert is just over a minute and a half. I’ve made this while my coffee was brewing. I’ve made this while waiting for a movie to load. It is the ultimate speed-dating dessert.
- The Swirl Factor — This is the game-changer. Plain brownies are good. Brownies with ribbons of salty, creamy peanut butter running through them? That’s restaurant-quality. The contrast of sweet chocolate and salty nut butter is what keeps me coming back.
- Pantry Staples Only — You don’t need fancy ingredients. Flour, sugar, cocoa powder, butter, milk, peanut butter. If you have these in your house, you can make this right now. No special trips to the store needed.
- One Dish to Clean — This is huge for me. I hate doing dishes. This recipe requires one mug, one spoon, and maybe a small bowl if you’re fancy. That’s it. The cleanup is faster than the cooking.
This isn’t just a quick fix; it’s a mood lifter. Whether you’re hosting a last-minute guest who has a sweet tooth or you’re having a “treat yourself” night alone, this Microwave Mug Brownie with Peanut Butter Swirl delivers. It feels luxurious, it tastes incredible, and it’s impossible to mess up.
Ingredients You’ll Need
Here’s the best part: you probably have 90% of this already. I’m not asking you to buy exotic flours or expensive chocolate chips. This is about using what you have to make something extraordinary. Let’s break down what goes into this magic mug.
For the Brownie Base:
All-purpose flour (4 tablespoons / 30g) — This is your structure. Don’t try to substitute with almond flour here unless you want a crumbly mess. All-purpose gives that classic brownie chew. If you’re gluten-free, I’ve tested it with a 1:1 GF blend, and it works, but the texture is slightly more cake-like.
Granulated sugar (3 tablespoons / 40g) — Sugar isn’t just for sweetness; it’s for moisture. It helps create that fudgy texture. Don’t reduce it too much, or it’ll be dry. If you prefer a less sweet brownie, 2 tablespoons works, but it’ll be less gooey.
Cocoa powder (2 tablespoons / 10g) — Use good quality unsweetened cocoa powder. Hershey’s is fine, but if you have a fancy brand like Guittard or Valrhona, use it. The cocoa flavor is the star here. Dutch-processed cocoa gives a darker, richer taste, but regular works great too.
Baking powder (1/4 teaspoon) — Just a tiny bit to help it rise. You don’t want a towering cake; you want a dense, fudgy brownie. A little lift is all we need.
Salt (1/4 teaspoon) — This is non-negotiable. Salt enhances the chocolate flavor. Without it, the brownie tastes flat. Use table salt or sea salt; it doesn’t matter much here.
Unsalted butter (2 tablespoons / 30g) — Melted. This adds richness and moisture. You can use oil, but butter tastes better. If you’re out of butter, vegetable oil works, but it won’t be as rich.
Milk (3 tablespoons / 45ml) — Whole milk is best for creaminess, but any milk works. Dairy-free milk like almond or oat milk works fine too. Just don’t use non-fat milk; you want that richness.
Vanilla extract (1/2 teaspoon) — For that warm, home-baked aroma. Pure vanilla is best, but imitation works in a pinch.
For the Swirl:
Creamy peanut butter (1 tablespoon / 15g) — This is the star of the show. Use regular Jif or Skippy, or a natural peanut butter. If you use natural peanut butter, make sure it’s well-stirred and not separated, or it’ll be too runny. Avoid crunchy peanut butter for the swirl; you want a smooth ribbon.
Optional Add-ins:
Chocolate chips (1 teaspoon) — If you’re a chocolate fiend, drop a few chips in before microwaving. They’ll melt into pockets of goodness.
Sea salt flakes — A pinch on top after cooking adds a nice crunch and visual appeal.
Equipment Needed
You don’t need much. This is part of the charm. Here’s what I actually use:
12-ounce microwave-safe mug — This is crucial. Don’t use a tiny espresso cup; the batter will overflow. A standard 12-ounce coffee mug is perfect. I use a ceramic mug with a handle; it looks nice and holds heat well. Make sure it’s truly microwave-safe (some decorative mugs have metallic paint).
Small mixing bowl — For mixing the dry and wet ingredients. A small ramekin or a tiny bowl works. I use a 4-ounce bowl because it’s easy to stir in.
Fork or small whisk — To mix everything together. A fork works fine; you don’t need a whisk. Just make sure there are no lumps of flour.
Teaspoon and tablespoon — For measuring the peanut butter and sugar. I usually just eyeball it, but if you want precision, use these.
Microplane or grater (optional) — For grating a little chocolate on top at the end. It looks fancy and adds a nice texture.
How to Make It: Step-by-Step
Alright, let’s make this! I’m walking you through exactly how I do it. It’s simple, but there are a few tricks to get that perfect fudgy texture.
Step 1: Mix the Dry Ingredients
In your small bowl, whisk together the flour, sugar, cocoa powder, baking powder, and salt. Make sure there are no lumps. This takes about 30 seconds. If you see a lump of cocoa powder, break it up with your fork. You want a smooth, uniform mixture.
Step 2: Add the Wet Ingredients
Add the melted butter, milk, and vanilla extract to the dry ingredients. Stir vigorously with your fork until the batter is smooth and glossy. It should look like thick chocolate cake batter. If it’s too thick, add a teaspoon of milk. If it’s too thin, add a teaspoon of flour. You want a consistency that coats the back of a spoon.
Step 3: Pour into the Mug
Pour the batter into your microwave-safe mug. Use a spatula or the back of the spoon to scrape out all the batter from the bowl. You don’t want to waste any chocolate goodness. Smooth the top of the batter so it’s even.
Step 4: The Swirl
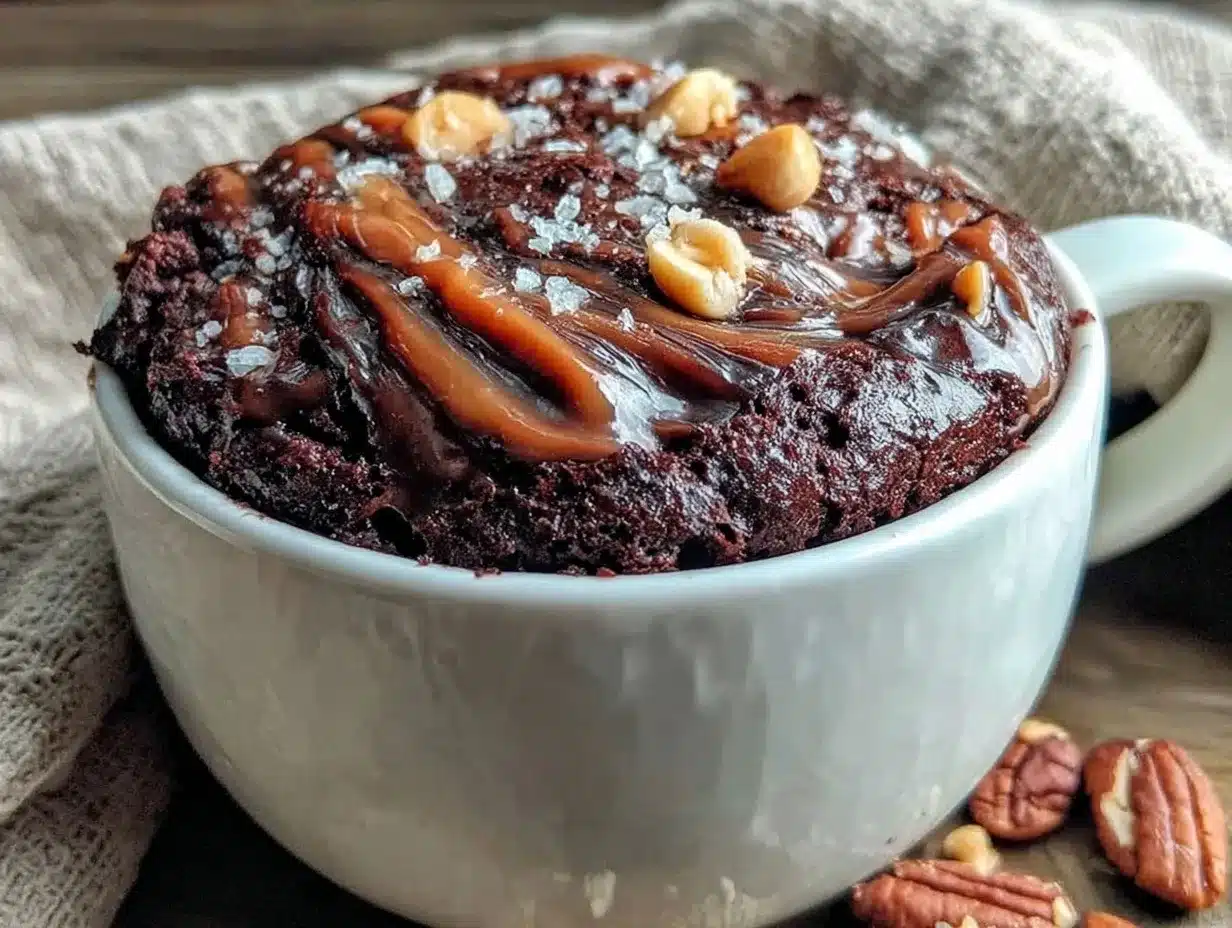
This is the fun part. Take your tablespoon of peanut butter and drop it on top of the batter. Don’t spread it out. Just drop it in the center. Then, take a toothpick or a thin knife and gently swirl it into the batter. You don’t want to mix it in completely; you want ribbons of peanut butter visible. Go slow and gentle. If you mix it too much, it’ll just turn brown. You want distinct swirls.
Step 5: Microwave
Microwave on high for 60 to 90 seconds. This is the tricky part. Every microwave is different. Start with 60 seconds. Check the center. It should be set but still slightly soft. If it’s still liquid in the middle, microwave for another 15-30 seconds. Do not overcook it! A slightly undercooked center is fudgy and delicious. An overcooked center is dry and crumbly. I usually do 75 seconds for my microwave.
Step 6: Cool and Serve
Let the brownie sit in the mug for 1-2 minutes. It continues to cook as it rests, and it firms up slightly. This is also when the peanut butter swirl sets a bit. Serve it warm. I like to eat it straight from the mug with a spoon, but you can also invert it onto a plate if you want to show off the swirl.
Total Time: About 5 minutes (2 minutes prep, 1.5 minutes cook, 2 minutes rest)
Expert Tips & Tricks
Here’s everything I’ve learned from making this dozens of times. These tips will save you from my mistakes.
Don’t Overmix the Batter — Once you add the wet ingredients, mix just until combined. Overmixing develops gluten, which makes the brownie tough. You want it tender and fudgy.
Watch the Microwave Closely — This is the most important tip. Microwaves vary wildly. My microwave is 1100 watts, so 75 seconds is perfect. If you have a lower wattage microwave, you might need 90 seconds. If you have a high-end one, 60 seconds might be enough. Always check at 60 seconds.
Use Room Temperature Butter — Melted butter is fine, but if it’s boiling hot, it can cook the egg (if you add one) or make the batter grainy. Let it cool for a minute after melting.
The Peanut Butter Trick — If your peanut butter is too stiff to swirl, microwave it for 5 seconds to soften it. This makes it easier to create beautiful ribbons.
Add a Pinch of Coffee — If you have espresso powder, add a tiny pinch to the dry ingredients. It enhances the chocolate flavor without making it taste like coffee. It’s a baker’s secret.
Common Mistakes:
- Brownie is too dry: You microwaved it too long. Next time, reduce time by 10-15 seconds.
- Brownie is too raw: You didn’t microwave it long enough. Add 15 seconds next time.
- Batter overflowed: Your mug was too small or you mixed too much air into the batter. Use a larger mug and stir gently.
Variations & Substitutions
Once you’ve nailed the basic version, here’s how you can mix it up. I’ve tried all of these.
Double Chocolate — Add a tablespoon of mini chocolate chips to the batter before microwaving. It’s chocolate on chocolate heaven.
Marshmallow Swirl — Instead of peanut butter, drop a mini marshmallow on top and swirl it in slightly. It melts into a gooey, sweet center. Great for camping vibes.
Nutella Swirl — Swap the peanut butter for Nutella. It’s richer and sweeter, but absolutely delicious. Use half a tablespoon to avoid it being too sweet.
Almond Butter Swirl — For a slightly more sophisticated nutty flavor, use almond butter. It’s a bit drier, so soften it first.
Gluten-Free — Use a 1:1 gluten-free flour blend. The texture will be slightly more cake-like, but it still tastes great.
Dairy-Free — Use coconut oil instead of butter and almond milk instead of dairy milk. The result is surprisingly rich and creamy.
Vegan — Use coconut oil, almond milk, and a flax egg (1 tablespoon ground flaxseed + 3 tablespoons water) instead of butter and milk. It holds together well.
Serving & Storage
This brownie is best served fresh, hot, and right out of the mug. But here’s how to handle leftovers and serving ideas.
How to Serve:
I usually serve this straight from the mug at the dinner table—it looks rustic and stays warm. But here are other ways I’ve enjoyed it:
- With Ice Cream — A scoop of vanilla ice cream on top is classic. The hot brownie and cold ice cream combo is perfection.
- With Whipped Cream — A dollop of freshly whipped cream adds lightness to the dense brownie.
- With Coffee or Milk — This brownie is perfect with a hot coffee or a cold glass of milk. It’s a complete dessert experience.
Storage Instructions:
Refrigerator: This brownie doesn’t store well. It becomes dense and rubbery when cold. If you must store it, keep it in an airtight container in the fridge for up to 2 days. Reheat it in the microwave for 15 seconds before eating.
Freezing: I don’t recommend freezing mug brownies. The texture changes too much. Make it fresh for the best experience.
Pro Tip: If you’re making this for guests, make them individually in mugs. It’s a fun, interactive dessert. Let everyone choose their own swirl—peanut butter, Nutella, marshmallow, etc.
Nutrition Information
I’m not a nutritionist, but here’s the breakdown if you’re tracking.
| Nutrient | Per Serving |
|---|---|
| Calories | 320 |
| Protein | 8g |
| Carbs | 38g |
| Fiber | 3g |
| Sugar | 24g |
| Fat | 16g |
| Saturated Fat | 8g |
| Cholesterol | 25mg |
| Sodium | 210mg |
What’s Good: Decent protein from the peanut butter and milk. It’s a single serving, so it’s controlled.
What to Know: Higher in sugar and fat from the chocolate and peanut butter. It’s a treat, not a health food. But it’s way better than takeout, costs less, and I know exactly what’s in it.
Final Thoughts
So that’s my go-to Microwave Mug Brownie with Peanut Butter Swirl! I’ve probably talked your ear off at this point, but when you make a recipe this often, you have a lot to say about it.
This has saved late-night cravings more times than I can count. It’s my answer to “what’s for dessert” when I’m tired, don’t want takeout, and still want something that tastes really good. My kids are happy, my husband’s happy, and I’m happy because I’m not stressed about cooking.
Make it yours! Try different add-ins, swap in your favorite nut butter, adjust the sugar. The best recipes are the ones you adapt to your family’s tastes.
If you make this, drop a comment and let me know what you think! I love hearing how recipes turn out in your kitchen. And if something doesn’t work, tell me that too—I’m here to help troubleshoot.
Happy cooking! And I hope your kitchen smells half as good as mine does right now.
Frequently Asked Questions
Can I use a different nut butter?
Absolutely! Almond butter, cashew butter, or even sunflower seed butter work great. Just make sure it’s creamy and not too stiff. If it’s thick, soften it in the microwave for 5 seconds before swirling.
Why did my brownie turn out rubbery?
Overcooking is the usual culprit. Microwaves cook from the outside in, and if you leave it in too long, the moisture evaporates and the texture becomes tough. Start with 60 seconds and check. It should be set but still slightly soft in the center.
Can I make this ahead for a party?
I wouldn’t recommend making it ahead. Mug brownies are best fresh. If you’re hosting, you can prep the dry ingredients in small bags or containers, and then mix and microwave right before serving. It’s quick enough that you can do it on the spot.
Can I use dark chocolate chips instead of cocoa powder?
You can, but the texture will be different. You’d need to melt the chocolate chips with the butter, which changes the method. Cocoa powder gives that classic brownie flavor. If you use chips, you’ll need more sugar because they’re sweeter. I stick with cocoa powder for consistency.
Is this recipe gluten-free friendly?
Yes! Just swap the all-purpose flour for a 1:1 gluten-free flour blend. The result will be slightly more cake-like but still delicious. Make sure your baking powder and peanut butter are certified gluten-free if you have celiac disease.
Can I double this recipe?
If you double it, you’ll need a larger mug (16 ounces or more). The cooking time will increase by about 30-45 seconds. I usually just make two separate mugs because it’s easier to control the cooking time for each one.
Pin This Recipe!

Microwave Mug Brownie with Peanut Butter Swirl
- Total Time: 5 minutes
- Yield: 1 serving 1x
Description
A quick, indulgent single-serving dessert made in the microwave with a rich chocolate base and a creamy peanut butter swirl. Ready in under 5 minutes using pantry staples.
Ingredients
- 4 tablespoons (30g) all-purpose flour
- 3 tablespoons (40g) granulated sugar
- 2 tablespoons (10g) unsweetened cocoa powder
- 1/4 teaspoon baking powder
- 1/4 teaspoon salt
- 2 tablespoons (30g) unsalted butter, melted
- 3 tablespoons (45ml) milk
- 1/2 teaspoon vanilla extract
- 1 tablespoon (15g) creamy peanut butter
- 1 teaspoon chocolate chips (optional)
- Sea salt flakes (optional, for topping)
Instructions
- In a small bowl, whisk together the flour, sugar, cocoa powder, baking powder, and salt until smooth and lump-free.
- Add the melted butter, milk, and vanilla extract to the dry ingredients. Stir vigorously with a fork until the batter is smooth, glossy, and coats the back of a spoon.
- Pour the batter into a 12-ounce microwave-safe mug, scraping the bowl to get all the batter out. Smooth the top.
- Drop the tablespoon of peanut butter onto the center of the batter. Use a toothpick or thin knife to gently swirl it into the batter to create ribbons; do not fully mix it in.
- Microwave on high for 60 to 90 seconds. Start with 60 seconds and check the center; it should be set but slightly soft. Add 15-30 seconds if needed, but avoid overcooking.
- Let the brownie sit in the mug for 1-2 minutes to firm up before serving warm.
Notes
Microwave wattages vary; start with 60 seconds and check frequently to avoid a dry, rubbery texture. For gluten-free, use a 1:1 GF flour blend. For dairy-free, use coconut oil and almond milk. For vegan, use coconut oil, almond milk, and a flax egg. Do not store leftovers as the texture becomes rubbery; best served fresh.
- Prep Time: 2 minutes
- Cook Time: 1.5 minutes
- Category: Dessert
- Cuisine: American
Nutrition
- Serving Size: 1 mug
- Calories: 320
- Sugar: 24
- Sodium: 210
- Fat: 16
- Saturated Fat: 8
- Carbohydrates: 38
- Fiber: 3
- Protein: 8
Keywords: microwave brownie, mug cake, peanut butter swirl, quick dessert, single serving, chocolate dessert, easy recipe, 5 minute dessert


