Last Saturday, I was standing in my kitchen at 9 PM, staring into the pantry like it owed me money. I had zero plans, a craving that felt urgent, and a cupboard that was dangerously low on fancy ingredients. I didn’t want chocolate chip. I didn’t want sugar cookies. I wanted something warm, something with a little salt, and something that tasted like comfort without the fuss.
So I threw together what I thought would be a mediocre snack. I grabbed the peanut butter, the oats, and the sugar—just three ingredients, basically. I figured it would be a quick fix. But then I added that final sprinkle of flaky sea salt right before they went into the oven, and suddenly, my whole apartment smelled like a high-end bakery in Brooklyn.
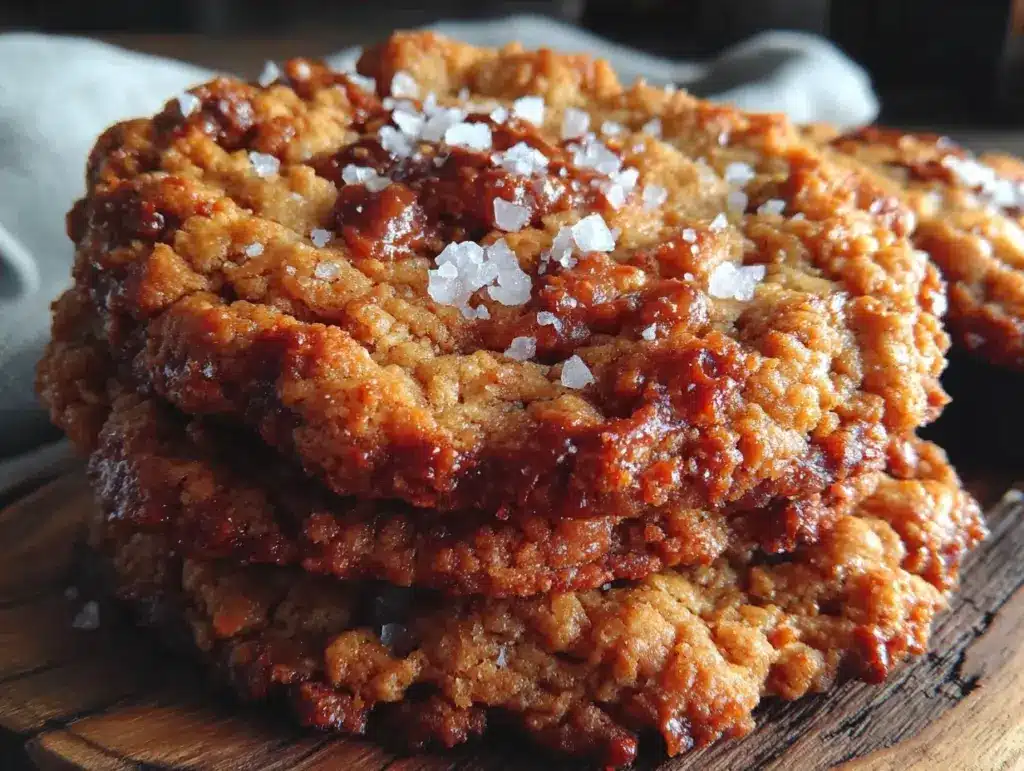
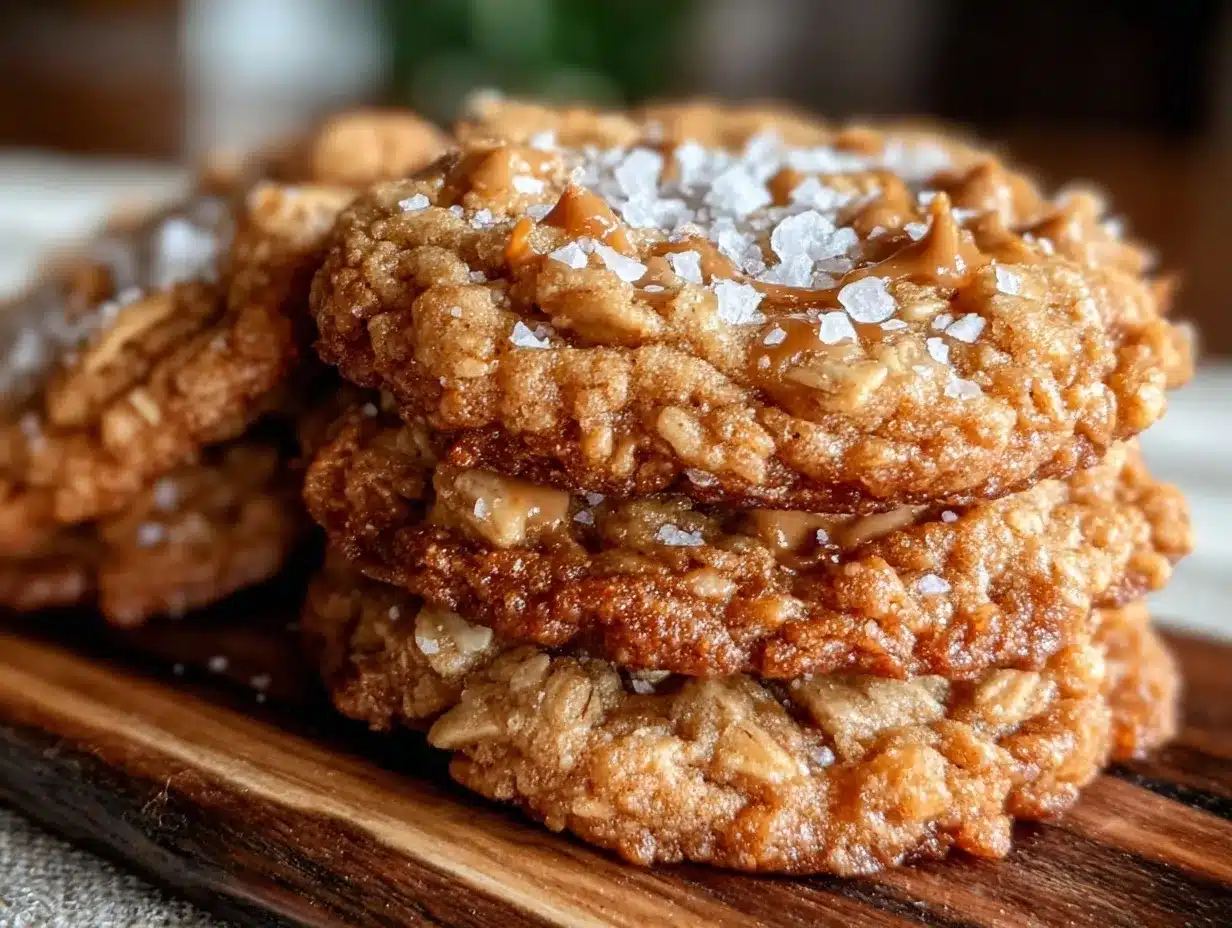
I pulled them out, let them cool for exactly two minutes (which is torture, by the way), and took a bite. It was perfect. Chewy in the middle, crisp at the edges, salty, sweet, and rich. My husband walked in, saw me eating them straight from the cooling rack, and asked if I had bought them from a store. I told him I made them in 15 minutes with three ingredients. He didn’t believe me until he tried one.
That was three weeks ago. Since then, I’ve made this chewy peanut butter oatmeal cookie with sea salt recipe at least six times. It’s become my go-to for late-night cravings, my secret weapon for last-minute dinner parties, and my way of proving that you don’t need a complex recipe to make people happy. This isn’t just a cookie; it’s a mood. It’s the kind of treat that makes you close your eyes and sigh. And the best part? It’s stupidly simple.
If you’ve been looking for a dessert that feels indulgent but actually respects your time, this is it. I’ve tested this method so many times that I know exactly what to look for when they’re done. I know how the edges should brown. I know how the center should look slightly underdone (which is the secret to that chewiness). I know that the sea salt isn’t optional—it’s the star.
So, let’s get into it. No fancy techniques, no weird ingredients you can’t find at a regular grocery store. Just real food, made by a real person who really loves these cookies.
Why You’ll Love This Chewy Peanut Butter Oatmeal Cookie with Sea Salt
There are about ten reasons I keep making this cookie, but let’s be real—you’re here because you want cookies that taste amazing and don’t require a degree in pastry arts to make. Here’s why this chewy peanut butter oatmeal cookie with sea salt has taken over my kitchen:
- Three Ingredients, Maximum Flavor — Seriously, three. Peanut butter, oats, and sugar. That’s it. I know it sounds too simple to work, but the quality of the peanut butter does the heavy lifting. When you combine just a few ingredients, there’s nowhere for mediocrity to hide.
- Texture Perfection — Most peanut butter cookies are dry and crumbly. This one? It’s chewy. Like, “stick to the roof of your mouth” chewy. The oats provide a hearty bite, while the peanut butter keeps it moist and rich. It’s the best of both worlds.
- Ready in 15 Minutes — From mixing to eating, it takes less time than it takes to scroll through Instagram. I’ve made these after dinner when I didn’t want to do dishes. You really can’t beat that.
- The Sea Salt Factor — This is the game-changer. The flaky sea salt on top cuts through the richness of the peanut butter and sugar. It makes the flavors pop. You’ll never go back to plain cookies again.
- Impressive Yet Humble — Serve these at a dinner party and watch people ask for the recipe. They’ll think you spent hours on them. You won’t tell them it was a 15-minute panic bake. Let them wonder.
- Gluten-Free Friendly — Since the base is oats and peanut butter, this is naturally gluten-free (just make sure your oats are certified GF). It’s a huge win for guests with dietary restrictions.
This recipe has saved me more times than I can count. It’s my answer to “What’s for dessert?” when I’m tired, broke, or just lazy. And honestly? It’s better than anything I’ve ever bought at a store.
Ingredients You’ll Need for Your Chewy Peanut Butter Oatmeal Cookie with Sea Salt
Here’s the best part: you probably have most of this already. I’m not asking you to go to three different stores for obscure items. This is pantry-friendly cooking at its finest.
The Base
Creamy Peanut Butter (1 cup / 250g) — This is the most important ingredient. Use natural, creamy peanut butter. No oil separation if you can help it, but if there is, just stir it in. Avoid the “processed” kind with hydrogenated oils if you can; it changes the texture. Skippy or Jif work fine if that’s what you have, but I prefer a natural brand like Smucker’s Natural or Peter Pan Natural for a deeper peanut flavor.
Old-Fashioned Rolled Oats (1 ½ cups / 150g) — Do not use instant oats. They’re too fine and will make the cookies cakey. You need the chew. Old-fashioned oats give that hearty, rustic texture. If you only have quick oats, you can use them, but the texture will be softer and less chewy. I’ve tested it, and old-fashioned is worth the extra 10 seconds.
Granulated Sugar (1 cup / 200g) — White sugar gives that classic cookie sweetness and helps with the crisp edges. You can use brown sugar for a chewier, molasses-y flavor, but I stick to white for this specific recipe because it contrasts better with the salty peanut butter. Half-and-half works too if you want a softer cookie.
Flaky Sea Salt (for sprinkling) — I use Maldon sea salt. It’s the gold standard. The large, delicate flakes dissolve slowly on the tongue, giving you bursts of saltiness. If you don’t have Maldon, kosher salt works, but avoid table salt—it’s too fine and salty.
Optional Boosters (Because I’m Opinionated)
Vanilla Extract (1 teaspoon) — It’s not strictly necessary, but a splash of vanilla adds warmth and complexity. I add it every time.
Dark Chocolate Chips (½ cup) — If you want to go full indulgent, fold these in. But honestly? The peanut butter and salt are enough. Don’t overcomplicate it.
Pinch of Baking Soda — Some recipes call for this, but I’ve found that the peanut butter’s fat and sugar create enough spread without it. If your cookies are too flat, add a tiny pinch. But usually, they’re perfect as is.
Pro Tip: If your peanut butter is cold from the fridge, microwave it for 15-20 seconds to soften it. It makes mixing so much easier. You don’t need it melted, just pliable.
Equipment Needed
You don’t need fancy equipment for this. Here’s what I actually use:
- Large Mixing Bowl — Anything big enough to hold the dough. I use a 4-quart stainless steel bowl. It’s durable and easy to clean.
- Wooden Spoon or Spatula — For mixing. The dough is thick, so you need something sturdy. A silicone spatula works great because it scrapes the sides.
- Baking Sheets — Two standard 13×18 inch sheets. I use aluminum ones because they’re cheap and replaceable. If you have non-stick, even better.
- Parchment Paper — I line my sheets with parchment. It prevents sticking and makes cleanup a breeze. You can skip it, but then you’ll be scrubbing your pans.
- Cooling Rack — Essential. You need to get the cookies off the hot pan so they don’t keep cooking and become hard rocks.
- Mesuring Cups and Spoons — Standard stuff. I use the nested sets from the dollar store. They work fine.
Optional but nice: An ice cream scoop. It makes uniform cookies, which bake evenly. But if you’re lazy, just use two tablespoons. I’m not judging.
How to Make It: Step-by-Step
Alright, let’s make this! I’m walking you through exactly how I do it, including the little tricks I’ve picked up over the years.
Step 1: Prep Your Oven and Pans (2 minutes)
Preheat your oven to 350°F (175°C). This is crucial. If the oven isn’t hot enough, the cookies will spread too much and become flat. Line your baking sheets with parchment paper. I use two sheets because I usually make a double batch. If you’re making a single batch, one sheet is fine, but rotate it halfway through for even baking.
Step 2: Mix the Dough (3 minutes)
In your large bowl, combine the creamy peanut butter, granulated sugar, and vanilla extract (if using). Mix until smooth. It will be thick and sticky. Don’t worry if it looks a bit lumpy; it’ll come together. Add the rolled oats and stir until everything is evenly coated. The dough will be stiff. This is normal. If it’s too dry, add a teaspoon of milk. If it’s too wet, add a sprinkle more oats. But usually, it’s perfect.
Step 3: Scoop and Shape (5 minutes)
Use a cookie scoop or two tablespoons to portion the dough into balls. Roll them lightly between your palms to make them smooth. Place them on the prepared baking sheets, spacing them about 2 inches apart. They won’t spread much, so you can pack them in tighter if you want. I make them about 1.5 inches in diameter. If you make them too big, they’ll be doughy in the middle. If too small, they’ll be crunchy. Aim for medium.
Step 4: Bake (9-11 minutes)
Place the sheets in the oven. Bake for 9-11 minutes. Here’s the secret: you want them to look slightly underdone when you take them out. The edges should be just starting to turn golden, but the centers should still look soft and pale. They will firm up as they cool. If you bake them until they look done in the oven, they’ll be hard as rocks when cooled. Trust me. I’ve burned more cookies than I care to admit by overbaking them.
Step 5: The Sea Salt Finish (1 minute)
As soon as you pull the cookies out of the oven, sprinkle them with flaky sea salt. The heat will help the salt adhere. Do this while they’re still hot. If you wait, the salt will just sit on top and fall off. I pinch a little salt between my fingers and sprinkle it over each cookie. It’s meditative, honestly.
Step 6: Cool and Eat (10 minutes)
Let the cookies cool on the baking sheet for 5 minutes. This lets them set. Then, transfer them to a wire rack to cool completely. Or, if you’re like me, eat one warm while it’s still soft and gooey. They’re best at room temperature, but warm is acceptable.
Total Time: About 20 minutes (5 minutes prep, 15 minutes cook/cool).
Expert Tips & Tricks
Here’s everything I’ve learned from making this dozens of times. These tips will save you from my mistakes.
Don’t Overmix the Dough
Once you add the oats, mix just until combined. Overmixing can develop the starch in the oats, making the cookies dense. You want them light and chewy, not brick-like.
Chill the Dough (Optional but Recommended)
If you have time, chill the dough in the fridge for 30 minutes before baking. This helps the flavors meld and prevents the cookies from spreading too much. I don’t always do this because I’m impatient, but when I do, the cookies are thicker and more flavorful.
Use Room Temperature Peanut Butter
Cold peanut butter is hard to mix. If it’s straight from the fridge, let it sit out for 15 minutes or microwave it briefly. It should be soft and spreadable, not hard.
The Salt is Non-Negotiable
I cannot stress this enough. The salt balances the sweetness and enhances the peanut flavor. Don’t skip it. And don’t use regular table salt. Get the flaky stuff. It’s worth the extra dollar.
Storage for Maximum Freshness
Store cookies in an airtight container at room temperature for up to 5 days. They actually get chewier after a day or two as the moisture redistributes. If they start to dry out, add a slice of bread to the container. The cookies will absorb the moisture from the bread.
Variations & Substitutions
Once you’ve nailed the basic version, here’s how you can mix it up. I’ve tried all of these.
Chocolate Peanut Butter
Add ½ cup of semi-sweet chocolate chips to the dough before baking. The chocolate melts into pockets of goodness. It’s like a Reese’s cup in cookie form.
Salted Caramel Swirl
Before baking, drop a teaspoon of salted caramel sauce on top of each cookie ball. It creates a gooey center. This is my favorite variation for dinner parties.
Vegan Version
This recipe is already vegan if you use vegan peanut butter and sugar (some sugars are processed with bone char, so check your brand). Just swap the granulated sugar for a vegan-friendly alternative if needed.
Gluten-Free
Use certified gluten-free oats. Everything else is naturally gluten-free. Make sure your peanut butter doesn’t have any cross-contamination if you’re severe.
Protein-Packed
Add a scoop of vanilla protein powder. It will make the dough drier, so you may need to add a splash of milk or water. It’s a great post-workout snack.
Serving & Storage
How to Serve: I usually serve these straight from the cooling rack at the dinner table. They look rustic and homemade. But here are other ways I’ve enjoyed them:
- With Coffee: The classic combo. The bitterness of the coffee cuts through the sweetness.
- With Milk: Cold milk is perfect for dipping. These cookies hold up well to dunking.
- With Ice Cream: Serve a warm cookie with a scoop of vanilla ice cream and a drizzle of caramel. It’s dessert heaven.
Storage Instructions:
Refrigerator: Not recommended. Cookies dry out in the fridge. Store at room temperature.
Freezer: Yes! You can freeze the dough balls. Scoop them onto a baking sheet, freeze until solid, then transfer to a freezer bag. Bake from frozen, adding 1-2 minutes to the bake time. Or freeze baked cookies for up to 3 months.
Reheating: Microwave a cookie for 10-15 seconds to warm it up. It brings back that fresh-baked texture.
Nutrition Information
I’m not a nutritionist, but here’s the breakdown if you’re tracking. Keep in mind that this is an estimate based on standard ingredients.
Per Cookie (makes about 18 cookies):
- Calories: 180
- Protein: 6g
- Carbs: 22g
- Fiber: 2g
- Sugar: 12g
- Fat: 9g
- Sodium: 150mg
What’s Good: High in protein from the peanut butter. Good source of healthy fats. Gluten-free option. No refined flour.
What to Know: High in sugar and calories. It’s a treat, not a health food. But it’s cleaner than most store-bought cookies. When I want to make it lighter, I reduce the sugar to ¾ cup. It’s still sweet, just less so.
Dietary Notes: Contains: peanuts, oats. Can be made: gluten-free, vegan. Not suitable for: nut allergies.
Final Thoughts
So that’s my go-to chewy peanut butter oatmeal cookie with sea salt! I’ve probably talked your ear off at this point, but when you make a recipe this often, you have a lot to say about it.
This has saved weeknight desserts more times than I can count. It’s my answer to “What’s for dessert?” when I’m tired, don’t want to bake a cake, and still want something that tastes really good. My kids are happy, my husband’s happy, and I’m happy because I’m not stressed about cooking.
Make it yours! Try different add-ins, swap in your favorite salt, adjust the sugar. The best recipes are the ones you adapt to your family’s tastes.
If you make this, drop a comment and let me know what you think! I love hearing how recipes turn out in your kitchen. And if something doesn’t work, tell me that too—I’m here to help troubleshoot.
Happy baking! And I hope your kitchen smells half as good as mine does right now.
Frequently Asked Questions
Q: Can I use crunchy peanut butter?
A: Yes, but the texture will be different. Crunchy peanut butter will make the cookies more textured and less smooth. I prefer creamy for that uniform chewiness, but crunchy adds a nice bite. If you use crunchy, you might want to reduce the oats slightly so it’s not too dry.
Q: Why did my cookies spread too much?
A: This usually happens if the peanut butter was too warm or if the oven wasn’t hot enough. Make sure your oven is preheated to 350°F. Also, if your peanut butter is very oily, stir out the excess oil before mixing. Chilling the dough for 30 minutes also helps prevent spreading.
Q: Can I make these ahead of time?
A: Absolutely! Scoop the dough into balls and freeze them on a baking sheet. Once solid, transfer to a freezer bag. You can bake them straight from frozen, just add 1-2 minutes to the bake time. This is great for meal prep.
Q: Why are my cookies dry?
A: You probably overbaked them. Remember, they should look underdone when you take them out. They continue to cook on the hot pan. Also, check your peanut butter. Some natural peanut butters are drier than others. If yours is dry, add a teaspoon of milk or honey to the dough.
Q: Can I use almond butter instead?
A: Yes, you can substitute almond butter 1:1. The flavor will be different, but the texture will be similar. Almond butter is often drier, so you might need to add a splash of milk. It’s a delicious variation if you’re nut-allergy-friendly to peanuts.
Q: How do I store these cookies?
A: Store in an airtight container at room temperature for up to 5 days. They stay fresh and chewy. If you live in a humid climate, they might get soft faster. In that case, store them in the fridge, but let them come to room temperature before eating for the best texture.
Q: Is this recipe healthy?
A: Compared to traditional cookies, yes. It’s high in protein and healthy fats, and it doesn’t contain refined flour. However, it still has sugar and is calorie-dense. Enjoy it as a treat, not a health food. If you’re watching your sugar, reduce the amount of sugar or use a natural sweetener like maple syrup (note: this will change the texture).
Pin This Recipe!

Chewy Peanut Butter Oatmeal Cookies with Sea Salt
- Total Time: 20 minutes
- Yield: 18 cookies 1x
Description
A simple, 3-ingredient cookie recipe that is chewy in the middle, crisp at the edges, and finished with flaky sea salt. Ready in just 15 minutes, this treat is naturally gluten-free and perfect for late-night cravings.
Ingredients
- 1 cup (250g) creamy peanut butter
- 1 ½ cups (150g) old-fashioned rolled oats
- 1 cup (200g) granulated sugar
- Flaky sea salt (for sprinkling)
- 1 teaspoon vanilla extract (optional)
- ½ cup dark chocolate chips (optional)
Instructions
- Preheat oven to 350°F (175°C) and line baking sheets with parchment paper.
- In a large mixing bowl, combine the creamy peanut butter, granulated sugar, and vanilla extract (if using). Mix until smooth.
- Add the rolled oats and stir until everything is evenly coated. The dough will be stiff.
- Scoop the dough into balls (about 1.5 inches in diameter) and place them on the prepared baking sheets, spacing them about 2 inches apart.
- Bake for 9-11 minutes. The edges should be just starting to turn golden, but the centers should still look soft and pale.
- Remove from the oven and immediately sprinkle with flaky sea salt while the cookies are still hot.
- Let the cookies cool on the baking sheet for 5 minutes to set, then transfer to a wire rack to cool completely.
Notes
Use old-fashioned rolled oats for the best texture; instant oats will make the cookies cakey. Do not overbake; the cookies should look slightly underdone when removed from the oven as they will firm up while cooling. If using natural peanut butter, ensure it is well-stirred. For best results, use flaky sea salt like Maldon rather than table salt.
- Prep Time: 5 minutes
- Cook Time: 15 minutes
- Category: Dessert
- Cuisine: American
Nutrition
- Serving Size: 1 cookie
- Calories: 180
- Sugar: 12
- Sodium: 150
- Fat: 9
- Saturated Fat: 2
- Carbohydrates: 22
- Fiber: 2
- Protein: 6
Keywords: peanut butter cookies, oatmeal cookies, 3 ingredient recipe, gluten free cookies, sea salt cookies, easy dessert, chewy cookies


