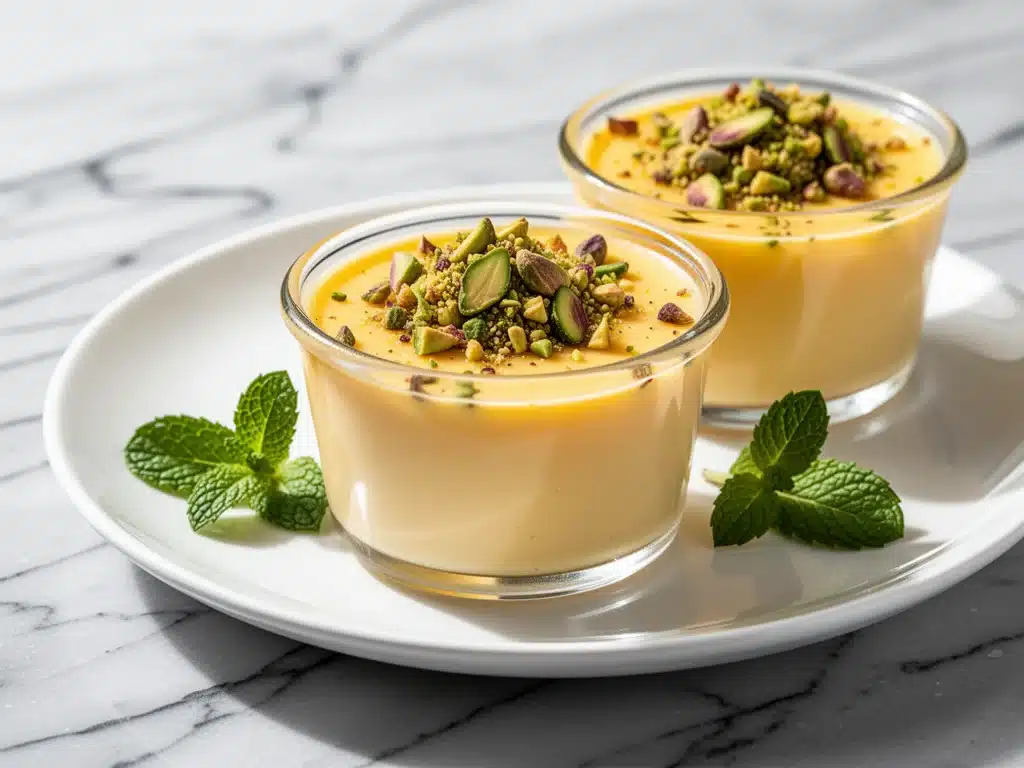
Last summer, I stood in my kitchen at 10 PM, staring at a pantry that was dangerously low on ingredients. I had guests coming in two hours, and the only things I had were overripe mangoes, a can of coconut milk, and a jar of pistachios. I was panicked. I didn’t want to order takeout, and I definitely didn’t want to serve store-bought dessert that would taste like cardboard. So, I did what I do best: I improvised.
I threw together a batch of what I thought would be a mediocre custard. I whisked some cream, heated the mango puree, and prayed the gelatin would set properly. When I tasted it, I was shocked. It was silky, tropical, and somehow elegant enough to serve to friends who know their way around a cheese board. That night, the Silky Mango Coconut Panna Cotta Cups with Toasted Pistachio Crumble became my secret weapon. It’s not just a dessert; it’s a stress-buster. It’s the thing you make when you want to look like you spent hours in the kitchen but actually did almost all the work the day before.
I’ve tested this recipe at least a dozen times since that chaotic Tuesday night. I’ve tweaked the sweetness, played with the gelatin ratios, and experimented with different nuts. The result? A dessert that is foolproof, stunningly beautiful, and tastes like a vacation in a glass. If you’ve ever been intimidated by panna cotta, thinking it’s too technical or too fancy, let me assure you: it’s not. It’s just cream, sugar, and patience. And honestly? It’s easier than making my authentic Italian carbonara, which is saying something because I love pasta almost as much as I love dessert.
Why You’ll Love This Recipe
There are a few reasons this mango coconut panna cotta has taken over my weekend routine, and honestly, once you try it, you’ll understand why it’s replaced almost every other dessert in my rotation.
- Zero Baking Required — Seriously. If you can whisk and pour, you can make this. No oven, no timing the bake, no worrying about cracks on the surface. It’s the ultimate no-bake dessert for people who love the results of baking but hate the cleanup.
- Make-Ahead Magic — This is the best part. You make it the day before, or even two days before. It needs to chill. While it’s chilling, you’re free to hang out with your guests, drink wine, and not be trapped in the kitchen. I’ve hosted dinner parties where this was the final course, and I barely touched it while cooking.
- Texture Perfection — The magic word here is “silky.” When done right, panna cotta doesn’t jiggle like Jell-O; it melts on your tongue. The contrast between the smooth, cool custard and the crunchy, salty pistachio crumble is addictive. It’s the kind of texture play that makes people close their eyes when they take a bite.
- Gluten-Free Friendly — By default, this recipe is gluten-free. The only thing to watch out for is your pistachios (sometimes they’re processed in facilities with wheat), but if you buy pure nuts, you’re good to go. This makes it a safe bet for guests with dietary restrictions, unlike my soft homemade brioche buns which are strictly for the gluten-loving crowd.
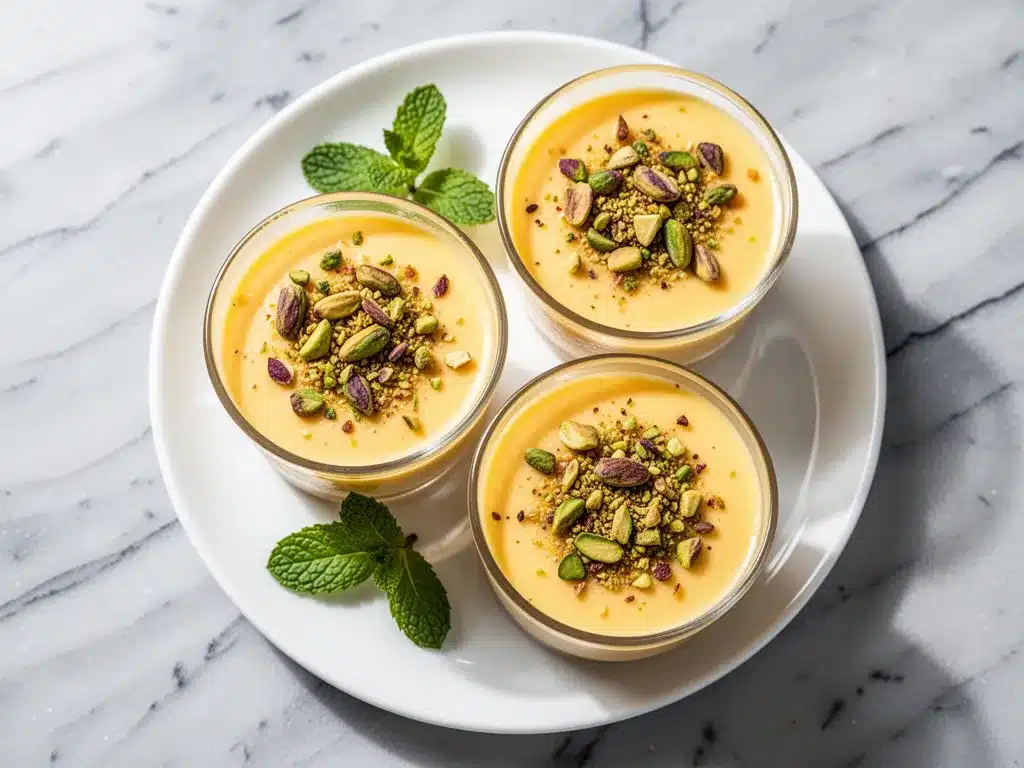
- Impressive Presentation — It looks like you spent hours decorating it. The layers of orange mango, white coconut, and green pistachios are visually striking. It photographs beautifully for Pinterest and Instagram, which is a nice bonus if you’re into that.
Real talk? This dessert makes you look like a pro. It’s elegant, it’s tropical, and it’s surprisingly light despite being rich. It’s the perfect balance of sweet and savory, and it’s guaranteed to impress.
Ingredients You’ll Need
Here’s the thing about panna cotta: the ingredient list is short, which means quality matters. You can’t hide behind spices or complex flavors. If the coconut milk tastes like metal, the dessert will taste like metal. Here’s what I use and why.
For the Mango Layer
Ripe Mangoes (2 large / about 600g flesh) — This is non-negotiable. Use Alphonso or Ataulvo (Honey) mangoes if you can find them. They’re less fibrous and sweeter. If you only have Tommy Atkins, they’ll work, but you might need more sugar. Blend them until completely smooth. I’ve tried straining it through a sieve, and it’s worth the extra five minutes to remove any stringy bits.
Heavy Cream (1 cup / 240ml) — Full fat only. This gives the custard its body. Skim milk will make it watery and sad.
Granulated Sugar (3 tablespoons / 40g) — Adjust based on how sweet your mangoes are. Taste the puree before adding gelatin! If the mangoes are super sweet, cut the sugar to 2 tablespoons.
Unflavored Gelatin Powder (1 packet / 2 ¼ teaspoons or 7g) — This is the setting agent. Bloom it in cold water first. Don’t skip this step, or your gelatin won’t dissolve properly.
For the Coconut Layer
Full-Fat Coconut Milk (2 cans / 400ml each) — Use the canned variety, not the carton stuff from the juice aisle. You need the thick, creamy part. Shake the cans well before opening, or scoop out the thick cream and thin it with a little water if you want a lighter texture. I prefer the full richness.
Vanilla Bean Paste (1 teaspoon) — Or use seeds from half a vanilla bean. Extract works, but it lacks those tiny black specks that make it look fancy. I keep vanilla bean paste in my fridge at all times.
Lime Zest (1 teaspoon) — Just the green part. This cuts through the richness of the coconut and brightens the flavor. Don’t use the white pith; it’s bitter.
For the Pistachio Crumble
Salted Pistachios (½ cup / 60g) — Shelled. If you buy them in the shell, it’s a pain to shell ½ cup, but the flavor is fresher. I usually just buy pre-shelled to save my sanity.
Butter (2 tablespoons / 30g) — Unsalted is fine since the pistachios are salted. Melted.
Flour (2 tablespoons / 15g) — All-purpose. This helps the crumble get crunchy instead of just oily nuts.
Brown Sugar (1 tablespoon / 15g) — Adds a caramel note that pairs perfectly with the toasted nuts.
Equipment Needed
You don’t need anything fancy. Here’s what I actually use in my home kitchen.
Blender — A high-speed blender like a Vitamix makes the mango puree perfectly smooth. If you don’t have one, a food processor works, but you might need to strain it afterward. An immersion blender is okay, but it sometimes leaves tiny chunks.
Saucepan — A small, heavy-bottomed saucepan is ideal for heating the cream and coconut milk. You want even heat distribution so you don’t scorch the bottom. My 2-quart saucepan works perfectly.
Ramekins or Glasses — I use 6-ounce ramekins. They’re classic and easy to unmold if you dip them in warm water. But honestly? I serve them in little mason jars or even martini glasses for a modern look. It’s easier and less fragile.
Small Skillet — For toasting the pistachios. Any small frying pan works. I use my cast iron skillet because it holds heat well, but stainless steel is fine too.
Whisk — A simple balloon whisk is all you need. No need for fancy gadgets.
Sieve or Fine Mesh Strainer — Highly recommended for the mango puree. It ensures that silky texture we’re aiming for.
How to Make It: Step-by-Step
Alright, let’s make this! I’m walking you through exactly how I do it. It’s simple, but there are a few tricks to keep it silky.
Step 1: Bloom the Gelatin
Start by sprinkling the gelatin powder over ¼ cup of cold water in a small bowl. Let it sit for 5-10 minutes. It will look like a spongy mass. This is called “blooming.” It prepares the gelatin to dissolve smoothly. Don’t skip this!
Step 2: Make the Mango Base
Puree your mangoes in a blender until completely smooth. Strain the puree through a sieve into a bowl to remove any fibers. This step is crucial for that restaurant-quality smoothness. Taste it and add sugar if needed. Set aside about ½ cup of this puree for the topping later.
Step 3: Heat the Cream Mixture
In your saucepan, combine the heavy cream and the bloomed gelatin. Heat over medium-low heat, whisking constantly. You just want it warm enough to melt the gelatin—do not boil it. Boiling can weaken the gelatin’s setting power. Once the gelatin is dissolved and the mixture looks glossy, remove from heat.
Step 4: Combine Mango and Cream
Whisk half of the mango puree into the warm cream mixture. Then, pour this mixture back into the remaining mango puree in the bowl. Whisk until fully combined. This ensures the color is even and the gelatin is distributed throughout.
Step 5: Make the Coconut Layer
In the same saucepan (wipe it out first), combine the coconut milk, vanilla bean paste, and lime zest. Heat gently over medium heat until it starts to steam. Again, do not boil. Remove from heat and let it cool for 5 minutes. This prevents the layers from mixing too much when you pour.
Step 6: Assemble the Cups
Pour the mango mixture into your ramekins or glasses, filling them about ¾ full. Place them in the fridge for 30 minutes to set slightly. Then, slowly pour the coconut mixture on top. The key here is to pour it gently over the back of a spoon to avoid disturbing the mango layer.
Refrigerate for at least 4 hours, or ideally overnight. The layers should be distinct and firm.
Step 7: Make the Pistachio Crumble
While the panna cotta chills, make the topping. In a small skillet, melt the butter over medium heat. Add the chopped pistachios, flour, and brown sugar. Stir constantly for 3-5 minutes until the nuts are toasted and the mixture is crunchy and golden. Be careful not to burn the nuts. Remove from heat and let it cool. It will crisp up as it cools.
Step 8: Serve
Sprinkle the pistachio crumble generously over each cup just before serving. Add a small dollop of the reserved mango puree on top for a pretty swirl. Enjoy!
Expert Tips & Tricks
Here’s everything I’ve learned from making this dozens of times. These tips will save you from my mistakes.
Don’t Boil the Gelatin — I learned this the hard way. Once, I boiled the cream mixture, and the panna cotta didn’t set as firmly as I wanted. Keep it warm, not hot. Just enough to melt the gelatin.
Layering Technique — If your layers are blending too much, make sure the first layer is set enough before pouring the second. The 30-minute chill in the fridge is important. If you’re impatient, you can put it in the freezer for 10 minutes, but watch it closely.
Toasting Nuts — Toasting the pistachios brings out their natural oils and flavor. It’s a game-changer. Don’t use raw nuts; they’ll taste bland and soft. The contrast of crunchy, salty nuts against the soft custard is what makes this recipe special.
Acidity Balance — The lime zest in the coconut layer is vital. Coconut can be heavy, and the lime cuts through that richness. Don’t skip it. If you’re sensitive to lime, start with half a teaspoon.
Storage — These keep well in the fridge for up to 3 days. In fact, they taste even better the next day as the flavors meld. Just add the crumble right before serving so it stays crunchy.
Variations & Substitutions
Once you’ve nailed the basic version, here’s how you can mix it up. I’ve tried all of these.
Tropical Twist — Swap the mango for passion fruit puree. It’s tart and intense, and it pairs beautifully with coconut. You’ll need to add a bit more sugar to balance the tartness.
Strawberry Coconut — Use fresh strawberries instead of mango. Blend them and strain. The pink and white layers are gorgeous.
Almond Crumble — If you’re not a fan of pistachios, use sliced almonds or pecans. Almonds pair well with coconut, and pecans add a Southern twist.
Dairy-Free — Use coconut cream instead of heavy cream. The texture will be slightly different but still delicious. Use agar-agar instead of gelatin for a vegan version, but note that agar sets differently (it’s firmer and doesn’t melt in your mouth the same way).
Gluten-Free — The recipe is naturally gluten-free, but double-check your pistachios and flour. Most pistachios are safe, but some brands process them in facilities with wheat.
Serving & Storage
How to Serve: I usually serve these straight from the fridge. They’re best cold. If you’re feeling fancy, garnish with a mint leaf or a few edible flowers. It looks stunning on a dessert table.
Side Dishes: These are rich, so they don’t need much else. But if you want something light, a simple fruit salad or some roasted raspberries work well. I also like to serve them with a cup of strong espresso, similar to how I’d serve my chocolate lava cake.
Storage: Store in the fridge in an airtight container or covered with plastic wrap for up to 3 days. Do not freeze, as the texture will change and become watery when thawed.
Reheating: Do not reheat. This is a chilled dessert. If you let it sit out too long, it will melt. Keep it cold until the moment you eat it.
Nutrition Information
I’m not a nutritionist, but here’s the breakdown if you’re tracking. Keep in mind this is a rich dessert, so portion control is key.
Per Serving (based on 6 cups):
- Calories: 280
- Protein: 4g
- Carbs: 22g
- Fiber: 2g
- Sugar: 18g
- Fat: 18g
- Saturated Fat: 12g
- Cholesterol: 45mg
- Sodium: 80mg
What’s Good: It’s naturally gluten-free and dairy-free if you swap the cream. The pistachios add some protein and healthy fats.
What to Know: It’s high in sugar and saturated fat due to the cream and mango. But it’s also relatively low in volume, so a small cup is very satisfying. It’s a treat, not a snack.
Final Thoughts
So that’s my go-to Silky Mango Coconut Panna Cotta Cups with Toasted Pistachio Crumble! I’ve probably talked your ear off at this point, but when you make a recipe this often, you have a lot to say about it.
This has saved dinner parties more times than I can count. It’s my answer to “what’s for dessert” when I’m tired, don’t want to bake, and still want something that tastes really good. My guests are always impressed, and I’m happy because I’m not stressed about cooking.
Make it yours! Try different fruits, swap the nuts, adjust the sweetness. The best recipes are the ones you adapt to your family’s tastes. If you make this, drop a comment and let me know what you think! I love hearing how recipes turn out in your kitchen. And if something doesn’t work, tell me that too—I’m here to help troubleshoot.
Happy cooking! And I hope your kitchen smells half as good as mine does right now.
Frequently Asked Questions
Can I use mango juice instead of fresh mango?
You can, but the flavor won’t be as intense. Fresh mango puree has a brightness and complexity that juice lacks. If you must use juice, choose 100% pure mango juice without added sugar, and reduce the added sugar in the recipe by half. But honestly, fresh fruit is worth the effort.
Why didn’t my panna cotta set?
This usually happens for two reasons: either the gelatin wasn’t dissolved properly, or the mixture was boiled, which weakens the gelatin. Make sure you bloom the gelatin in cold water and dissolve it in warm (not boiling) cream. Also, check the expiration date on your gelatin; old gelatin loses its potency.
Can I make this ahead of time?
Yes! This is actually best made ahead. It needs at least 4 hours to set, but 24 hours is ideal. You can make it up to 3 days in advance. Just keep it covered in the fridge. Add the pistachio crumble right before serving to keep it crunchy.
Can I use agar-agar instead of gelatin?
Yes, but the texture will be different. Agar sets firmer and doesn’t melt in your mouth like gelatin. It’s also vegan. Use about 1 teaspoon of agar powder for this amount of liquid, but follow the package instructions closely as agar sets quickly. It’s a bit trickier to work with than gelatin.
How do I get clean layers?
The key is patience. Let the first layer set completely before pouring the second. Use a spoon to pour the second layer gently over the back of the spoon to diffuse the flow. If you’re worried, chill the first layer in the freezer for 10 minutes to firm it up before adding the coconut layer.
Can I freeze panna cotta?
I don’t recommend it. The texture of dairy-based custards changes when frozen and thawed. It can become watery or grainy. It’s best enjoyed fresh from the fridge.
What if I don’t have a blender?
You can use a food processor, but you’ll likely need to strain the puree through a fine-mesh sieve afterward to remove any fibers. A hand blender works too, but it might not get it as smooth. The smoother the puree, the silkier the final dessert.
Pin This Recipe!

Silky Mango Coconut Panna Cotta Cups with Toasted Pistachio Crumble
- Total Time: 4 hours 45 minutes
- Yield: 6 servings 1x
Description
A stunning no-bake dessert featuring layers of silky mango and coconut custard topped with a crunchy, salty pistachio crumble. This make-ahead treat is elegant, gluten-free friendly, and surprisingly easy to make.
Ingredients
- 2 large ripe mangoes (about 600g flesh), peeled and pureed
- 1 cup heavy cream (240ml)
- 3 tablespoons granulated sugar (40g)
- 1 packet unflavored gelatin powder (2 ¼ teaspoons or 7g)
- ¼ cup cold water (for blooming gelatin)
- 2 cans full-fat coconut milk (400ml each)
- 1 teaspoon vanilla bean paste
- 1 teaspoon lime zest
- ½ cup salted pistachios, shelled and chopped (60g)
- 2 tablespoons unsalted butter, melted (30g)
- 2 tablespoons all-purpose flour (15g)
- 1 tablespoon brown sugar (15g)
Instructions
- Bloom the gelatin: Sprinkle gelatin powder over ¼ cup cold water in a small bowl and let sit for 5-10 minutes until spongy.
- Prepare mango base: Puree mangoes in a blender until smooth. Strain through a sieve to remove fibers. Taste and adjust sugar if needed. Reserve ½ cup of puree for topping.
- Heat cream mixture: In a saucepan, combine heavy cream and bloomed gelatin. Heat over medium-low heat, whisking constantly, until gelatin dissolves. Do not boil. Remove from heat.
- Combine mango and cream: Whisk half of the mango puree into the warm cream mixture, then pour back into the remaining puree. Whisk until fully combined.
- Make coconut layer: In the same saucepan, combine coconut milk, vanilla bean paste, and lime zest. Heat gently until steaming. Do not boil. Remove from heat and cool for 5 minutes.
- Assemble cups: Pour mango mixture into ramekins or glasses, filling ¾ full. Refrigerate for 30 minutes to set slightly. Slowly pour coconut mixture on top, pouring gently over the back of a spoon to maintain layers.
- Chill: Refrigerate for at least 4 hours or overnight until firm.
- Make pistachio crumble: While panna cotta chills, melt butter in a small skillet over medium heat. Add pistachios, flour, and brown sugar. Stir constantly for 3-5 minutes until toasted and crunchy. Let cool.
- Serve: Sprinkle pistachio crumble generously over each cup just before serving. Garnish with reserved mango puree if desired.
Notes
Do not boil the cream mixture as it weakens the gelatin. Ensure the first layer is set before pouring the second to maintain distinct layers. Toasting the pistachios enhances their flavor. The dessert keeps well in the fridge for up to 3 days but should not be frozen.
- Prep Time: 30 minutes
- Cook Time: 15 minutes
- Category: Dessert
- Cuisine: Italian
Nutrition
- Serving Size: 1 cup
- Calories: 280
- Sugar: 18
- Sodium: 80
- Fat: 18
- Saturated Fat: 12
- Carbohydrates: 22
- Fiber: 2
- Protein: 4
Keywords: mango panna cotta, coconut dessert, no-bake dessert, gluten-free dessert, pistachio crumble, make-ahead dessert, tropical dessert, silky custard


