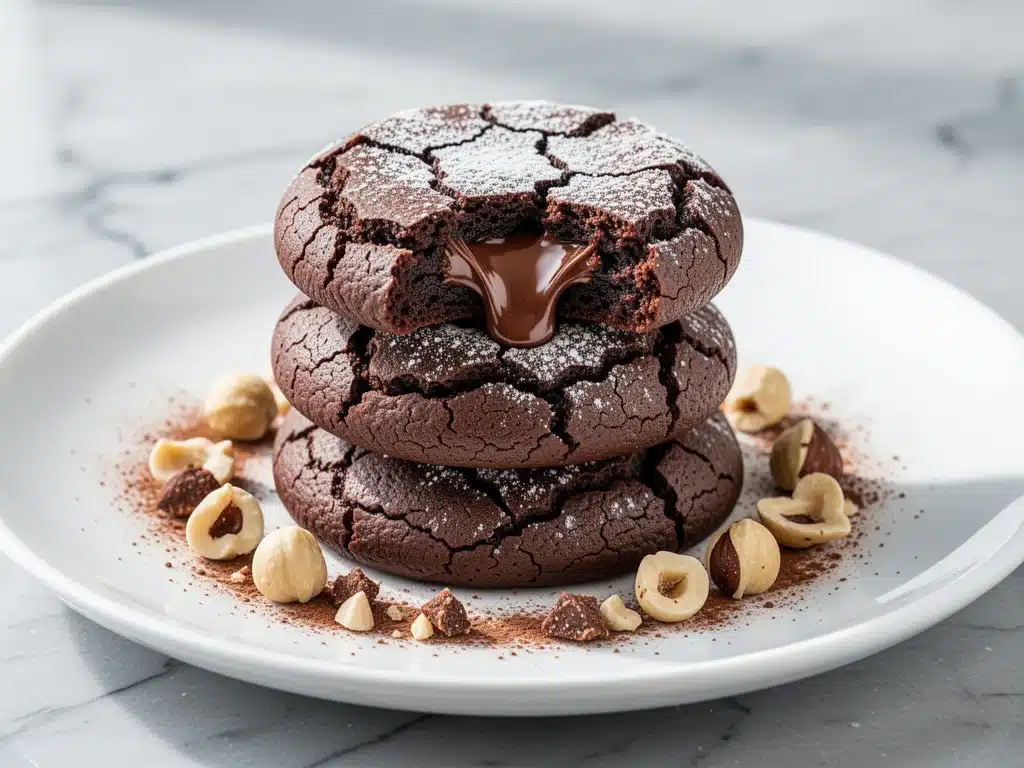
I still remember the exact moment I realized I had created a monster. It was a Tuesday evening, and I had just pulled a batch of these cookies from the oven. They looked like ordinary chocolate cookies—crinkly tops, dark and inviting. But when I broke one open, the smell hit me first. That distinct, nutty hazelnut aroma mixed with rich, melted chocolate. Then came the sight: a warm, gooey center of Nutella oozing out like a chocolate lava cake, but contained in a perfectly crisp cookie shell.
My partner took one bite, closed his eyes, and actually groaned. That’s how you know it’s good. The next morning, he was digging through the Tupperware in the fridge for the leftovers. By Wednesday, I had to bake another batch because my kids had negotiated a “trade” (two loads of laundry for the entire first batch). That’s when I knew these Nutella stuffed brownie cookies with crackly tops were going to become a permanent fixture in our house.
There is something deeply satisfying about a dessert that tricks you. You think you’re getting a cookie, but you’re actually getting a brownie experience with the convenience of a hand-held treat. The contrast is everything: the crisp, sugary crust on the outside gives way to a fudgy, dense interior that holds a molten pool of hazelnut spread. It’s indulgent, sure, but it’s also surprisingly easy to make. You don’t need fancy equipment or hours of prep time. Just a few pantry staples, a jar of your favorite hazelnut spread, and the willingness to let your kitchen smell like a high-end Italian patisserie.
I’ve tested this recipe more times than I care to admit. I’ve tried different brands of chocolate, experimented with chilling times, and even tried to make them lighter (spoiler: they’re not). The version below is the winner. It’s the one that gets asked for at parties, the one that clears plates in minutes, and the one that makes me feel like a baking genius even on my laziest days. If you’re looking for a dessert that feels fancy but is actually foolproof, this is it. These cookies are richer than my small batch fudgy brownies but easier to handle, making them the perfect compromise for chocolate lovers who want maximum flavor with minimum fuss.
Why You’ll Love This Recipe
Let’s be real: most cookie recipes are either too dry, too sweet, or require twenty different ingredients you don’t have. This recipe hits that sweet spot—literally. Here’s why these cookies have earned a permanent spot on my baking rotation:
- The Texture is Unmatched — Most chocolate cookies are cakey. These are fudgy. The crackly top comes from the sugar beating process, creating that signature brownie-like crust. It’s a texture you can’t fake.
- Center Surprise Factor — Stuffing the cookies with Nutella creates a molten core that turns a simple chocolate cookie into a decadent dessert. It’s like a chocolate lava cake but portable and less messy.
- Super Fast Prep — You can have these in the oven in under 15 minutes. The dough comes together in one bowl, and the stuffing process takes only a few minutes longer. It’s perfect for last-minute cravings or impromptu guests.
- Make-Ahead Friendly — The dough balls can be frozen raw. I often scoop and freeze them, then bake straight from the freezer when company arrives. It’s a lifesaver for busy weeknights.
- Universal Appeal — I’ve served these to picky eaters, chocolate snobs, and kids, and everyone loves them. The hazelnut flavor is familiar and comforting, while the dark chocolate adds sophistication.
This isn’t just a cookie; it’s an experience. It’s the kind of treat that makes you close your eyes and savor every bite. And the best part? You’ll never go back to store-bought cookies again.
Ingredients You’ll Need
Before we get to the mixing bowl, let’s talk about what goes into these cookies. I’m particular about a few things here, but don’t worry—most of this is standard pantry stuff. The key is quality, especially for the chocolate and the hazelnut spread.
For the Cookie Dough
Unsalted butter (½ cup / 113g) — Room temperature is non-negotiable. If it’s cold, you won’t get that creamy emulsion. If it’s melted, the cookies will spread too much. I take mine out of the fridge about an hour before baking.
Granulated sugar (½ cup / 100g) — This is what creates the crackly top. Don’t substitute with brown sugar here; we want that crisp exterior. The granules create tiny air pockets as they dissolve, leading to that signature brownie crust.
Light brown sugar (½ cup / 100g) — Packed. This adds moisture and chewiness. It balances the sweetness of the granulated sugar and gives the cookie its dense, fudgy interior.
Egg (1 large) — Room temperature. Helps bind everything together and adds structure. Don’t skip it.
Egg yolk (1 large) — This is the secret weapon. The extra fat in the yolk makes the cookies richer and more tender. It’s what separates a cakey cookie from a fudgy one.
Vanilla extract (1 teaspoon) — Pure vanilla, not imitation. It enhances the chocolate flavor without overpowering it.
All-purpose flour (1 cup / 125g) — Don’t overmeasure. Spoon it into the cup and level it off. Too much flour makes dry cookies.
Cocoa powder (¼ cup / 20g) — Unsweetened, high-quality cocoa. I use Dutch-processed cocoa because it has a deeper, richer flavor. Natural cocoa works too, but the color might be lighter.
Baking powder (½ teaspoon) — Just a little helps the cookies rise slightly without becoming cakey.
Salt (½ teaspoon) — Essential for balancing the sweetness. It makes the chocolate taste more like chocolate.
For the Filling
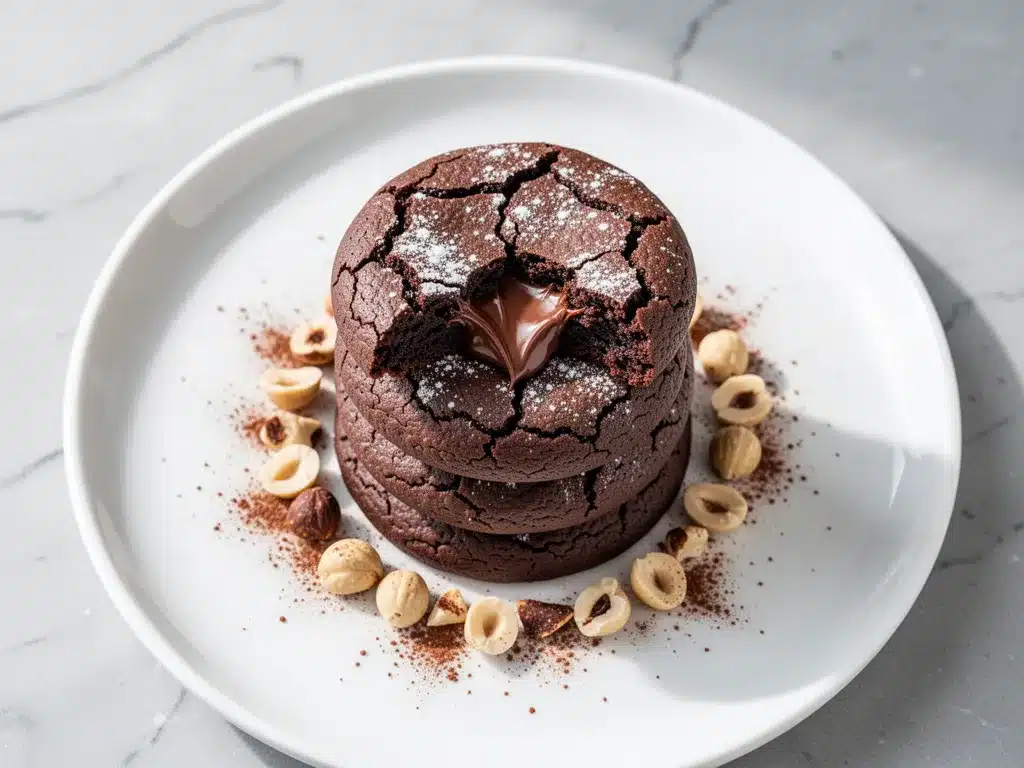
Nutella (about ½ cup) — The star of the show. Use a standard hazelnut chocolate spread. If you want a more intense hazelnut flavor, you can mix a teaspoon of hazelnut liqueur into the Nutella, but it’s not necessary. I keep a jar in the fridge at all times specifically for baking.
Chocolate chips (optional) — I sometimes add a few chocolate chips to the dough for extra chocolatey bites, but it’s not required. The Nutella center is plenty sweet.
Substitutions
Can’t find Nutella? You can use any chocolate-hazelnut spread, or even a thick peanut butter mixed with a little honey for a different twist. For a dairy-free version, use a dairy-free chocolate spread and ensure your chocolate chips are also dairy-free. The texture will be slightly different, but still delicious.
Equipment Needed
You don’t need a fancy kitchen for this. Here’s what I actually use:
Large mixing bowl — A glass or ceramic bowl is best for creaming the butter and sugar. It’s easy to scrape down the sides.
Electric hand mixer or stand mixer — While you can do this by hand, a mixer makes creaming the butter and sugar much faster and ensures a smoother dough. I use my hand mixer because it’s easier to clean for small batches.
Measuring cups and spoons — Accuracy matters in baking. I use standard metal measuring cups for dry ingredients and liquid measuring cups for wet ones.
Silicone spatula — For folding in the flour. It’s gentle and gets every bit of dough out of the bowl.
Baking sheets — I use rimmed half-sheet pans. Dark pans cook faster, so you might need to reduce the baking time by 1-2 minutes.
Parchment paper — Non-negotiable. It prevents sticking and makes cleanup a breeze. I never bake cookies without it.
Spoon or small ice cream scoop — For portioning the Nutella. A teaspoon works well for the filling.
How to Make It: Step-by-Step
Alright, let’s make these! I’m walking you through exactly how I do it, including the little tricks I’ve picked up over the years.
Step 1: Prep Your Oven and Pans (2 minutes)
Preheat your oven to 350°F (175°C). Line two large baking sheets with parchment paper. This ensures even baking and easy cleanup. If you don’t have parchment, you can use silicone baking mats, but parchment is cheaper and easier to replace.
Step 2: Cream the Butter and Sugars (3-4 minutes)
In a large bowl, beat the room-temperature butter, granulated sugar, and brown sugar together until light and fluffy. This is the most important step for getting that crackly top. You want the mixture to look pale and aerated, about 2-3 minutes with a mixer. If you’re mixing by hand, this will take longer, but it’s worth the effort. The mixture should double in volume slightly.
Step 3: Add Wet Ingredients (1 minute)
Beat in the egg, egg yolk, and vanilla extract until fully combined. The mixture might look slightly curdled at first—don’t panic. It will come together when you add the dry ingredients.
Step 4: Mix Dry Ingredients (1 minute)
In a separate medium bowl, whisk together the flour, cocoa powder, baking powder, and salt. This ensures there are no lumps of cocoa and the leavening is evenly distributed.
Step 5: Combine Wet and Dry (2 minutes)
Add the dry ingredients to the wet ingredients. Mix on low speed or fold with a spatula until just combined. Do not overmix! Overmixing develops gluten, which makes cookies tough. The dough should be thick and sticky. If it’s too dry, add a teaspoon of milk. If it’s too wet, add a tablespoon of flour.
Step 6: Scoop and Chill the Dough (15-30 minutes)
Use a cookie scoop or spoon to portion the dough into 1.5-tablespoon balls. Place them on a baking sheet and refrigerate for at least 15 minutes. Chilling the dough prevents the cookies from spreading too much and helps them hold their shape around the Nutella center. If you’re short on time, you can skip this, but the cookies will be flatter.
Step 7: Stuff the Cookies (10 minutes)
Take a chilled dough ball and flatten it slightly in your palm. Place a teaspoon of Nutella in the center. Carefully fold the dough over the Nutella, sealing it completely. Roll the ball back up to hide the filling. Make sure there are no cracks or holes where the Nutella could leak out. Place the stuffed ball back on the baking sheet. Repeat with remaining dough. This step takes a bit of patience, but it’s worth it for the gooey center.
Step 8: Bake (9-11 minutes)
Bake the cookies at 350°F (175°C) for 9-11 minutes. They should look set on the edges but still soft in the center. The tops should have that characteristic crackly appearance. Do not overbake! They will continue to cook on the hot baking sheet after you remove them from the oven. If you bake them until they’re firm, they’ll be dry.
Step 9: Cool and Serve (10 minutes)
Let the cookies cool on the baking sheet for 5 minutes. This allows them to set and become firm enough to move. Then transfer them to a wire rack to cool completely. The centers will be molten hot when you first take them out, so let them cool a bit before biting in. Serve warm for the best texture.
Expert Tips & Tricks
Here’s everything I’ve learned from making these dozens of times. These tips will save you from my mistakes.
- Chill the Dough — I can’t stress this enough. Chilled dough holds its shape better and results in a thicker, fudgier cookie. If you skip this, your cookies might spread into flat discs.
- Don’t Overbake — These cookies are done when the edges are set but the centers are still soft. They firm up as they cool. Overbaking is the number one reason these cookies turn out dry.
- Seal the Nutella Tight — Make sure there are no air pockets or cracks in the dough when you seal the Nutella inside. If the Nutella leaks out, it will burn on the baking sheet and create a mess. If you see cracks, pinch them closed.
- Use a Cookie Scoop — Uniform-sized dough balls ensure even baking. I use a 1.5-tablespoon scoop for consistency.
- Freeze for Later — You can freeze the stuffed dough balls on a baking sheet until solid, then transfer them to a zip-top bag. Bake from frozen, adding 1-2 minutes to the baking time. This is perfect for having dessert ready to go.
Variations & Substitutions
Once you’ve mastered the basic version, here’s how you can mix it up. I’ve tried all of these.
- Double Chocolate — Add ½ cup of chocolate chips to the dough before stuffing. This makes them even more chocolatey.
- White Nutella — Use white chocolate hazelnut spread for a sweeter, milder flavor. Great for kids.
- Peanut Butter Center — Replace Nutella with a dollop of creamy peanut butter for a salty-sweet combination.
- Marble Effect — Swirl a little Nutella into the dough before scooping, then add a small dollop on top for a marbled look.
- Gluten-Free — Substitute the all-purpose flour with a 1:1 gluten-free flour blend. The texture will be slightly more tender.
- Vegan — Use dairy-free butter, a vegan chocolate spread, and a flax egg (1 tablespoon ground flaxseed mixed with 3 tablespoons water). The cookies will be slightly denser but still delicious.
Serving & Storage
These cookies are best served warm, fresh out of the oven. I usually pair them with a tall glass of cold milk or a cup of coffee. They also go well with a scoop of vanilla ice cream if you’re feeling extra indulgent.
Storage Instructions
Room Temperature: Store in an airtight container for up to 3 days. They stay soft and fudgy if sealed properly.
Refrigerator: Store in the fridge for up to 5 days. Let them come to room temperature before eating for the best texture.
Freezer: You can freeze baked cookies for up to 3 months. Thaw at room temperature or microwave for 10 seconds to soften.
Reheating: Warm them in the microwave for 10-15 seconds to restore the molten center. This is my favorite way to enjoy leftovers.
Nutrition Information
I’m not a nutritionist, but here’s the breakdown if you’re tracking. These are rich, calorie-dense cookies, so a little goes a long way.
Per Cookie (makes 18 cookies):
- Calories: 280
- Fat: 14g
- Carbs: 36g
- Sugar: 24g
- Protein: 4g
- Fiber: 2g
These are definitely a treat, not a snack. But compared to store-bought options, they’re made with real ingredients and no preservatives. When I want to make them lighter, I reduce the sugar by 2 tablespoons and use a lighter chocolate spread, but I always miss the richness of the original.
Final Thoughts
So that’s my recipe for Nutella stuffed brownie cookies with crackly tops. I’ve probably talked your ear off at this point, but when you make a recipe this often, you have a lot to say about it. These cookies have saved my social life more times than I can count. They’re my go-to when I need a dessert that looks impressive but is actually easy to make. My family loves them, my friends beg for the recipe, and I love that they’re always ready to go in the freezer.
Make them your own! Try different fillings, adjust the sweetness, or add nuts for crunch. The best recipes are the ones you adapt to your tastes. If you make this, drop a comment and let me know what you think! I love hearing how recipes turn out in your kitchen. And if something doesn’t work, tell me that too—I’m here to help troubleshoot.
Happy baking! And I hope your kitchen smells half as good as mine does right now.
Frequently Asked Questions
Can I use a different chocolate spread instead of Nutella?
Absolutely. Any chocolate-hazelnut spread will work. If you want a more intense flavor, you can mix in a teaspoon of hazelnut extract. For a non-nut option, use peanut butter or almond butter. The key is to use a spread that’s thick enough to hold its shape when frozen.
Why did my Nutella leak out of the cookies?
This usually happens if the dough wasn’t sealed properly or if the cookies were overbaked. Make sure you pinch the dough tight around the Nutella and roll it smooth. Also, don’t overbake—remove the cookies when the edges are set but the centers are still soft. The heat from the baking sheet will finish cooking them.
Can I make the dough ahead of time?
Yes! You can scoop the dough balls and freeze them on a baking sheet until solid, then transfer them to a zip-top bag. Bake from frozen, adding 1-2 minutes to the baking time. You can also refrigerate the dough for up to 3 days, but freezing is better for long-term storage.
Are these cookies crispy or chewy?
They are both! The top is crisp and crackly, while the inside is soft and fudgy. This contrast is what makes them so special. If you prefer a chewier cookie, underbake them by 1 minute. If you prefer a crisper cookie, bake them for the full 11 minutes.
Can I double the recipe?
Yes, you can double everything. Just make sure you have enough baking sheets or bake in batches. The cooking time stays the same. I often double the recipe when I’m feeding a crowd or meal-prepping for the week.
Do I need to chill the dough?
It’s highly recommended. Chilling the dough prevents the cookies from spreading too much and helps them hold their shape around the Nutella center. If you skip this step, your cookies might be flat and thin. But if you’re in a rush, you can bake them immediately—they’ll just be thinner.
Pin This Recipe!

Nutella Stuffed Brownie Cookies
- Total Time: 26 minutes
- Yield: 18 cookies 1x
Description
Rich, fudgy chocolate cookies with a crackly top and a warm, gooey Nutella center. These easy-to-make treats offer the texture of a brownie with the convenience of a cookie.
Ingredients
- 1/2 cup (113g) unsalted butter, room temperature
- 1/2 cup (100g) granulated sugar
- 1/2 cup (100g) light brown sugar, packed
- 1 large egg, room temperature
- 1 large egg yolk, room temperature
- 1 teaspoon vanilla extract
- 1 cup (125g) all-purpose flour
- 1/4 cup (20g) unsweetened cocoa powder
- 1/2 teaspoon baking powder
- 1/2 teaspoon salt
- 1/2 cup Nutella (for filling)
- Chocolate chips (optional, for extra chocolatey bites)
Instructions
- Preheat oven to 350°F (175°C). Line two large baking sheets with parchment paper.
- In a large bowl, beat the room-temperature butter, granulated sugar, and brown sugar together until light and fluffy (about 2-3 minutes with a mixer).
- Beat in the egg, egg yolk, and vanilla extract until fully combined.
- In a separate medium bowl, whisk together the flour, cocoa powder, baking powder, and salt.
- Add the dry ingredients to the wet ingredients and mix on low speed or fold with a spatula until just combined. Do not overmix.
- Portion the dough into 1.5-tablespoon balls. Place them on a baking sheet and refrigerate for at least 15 minutes.
- Take a chilled dough ball, flatten it slightly, and place a teaspoon of Nutella in the center. Fold the dough over the Nutella to seal it completely and roll back into a ball.
- Place the stuffed dough balls on the prepared baking sheets.
- Bake for 9-11 minutes, until edges are set but centers are still soft.
- Let cookies cool on the baking sheet for 5 minutes, then transfer to a wire rack to cool completely.
Notes
Chilling the dough is crucial to prevent spreading and help the cookies hold their shape around the Nutella center. Do not overbake; the centers will continue to cook on the hot baking sheet. For best results, serve warm. Dough balls can be frozen raw and baked from frozen, adding 1-2 minutes to baking time.
- Prep Time: 15 minutes
- Cook Time: 11 minutes
- Category: Dessert
- Cuisine: American
Nutrition
- Serving Size: 1 cookie
- Calories: 280
- Sugar: 24
- Sodium: 150
- Fat: 14
- Saturated Fat: 7
- Carbohydrates: 36
- Fiber: 2
- Protein: 4
Keywords: Nutella cookies, brownie cookies, stuffed cookies, chocolate dessert, easy baking, hazelnut spread, crackly top cookies


