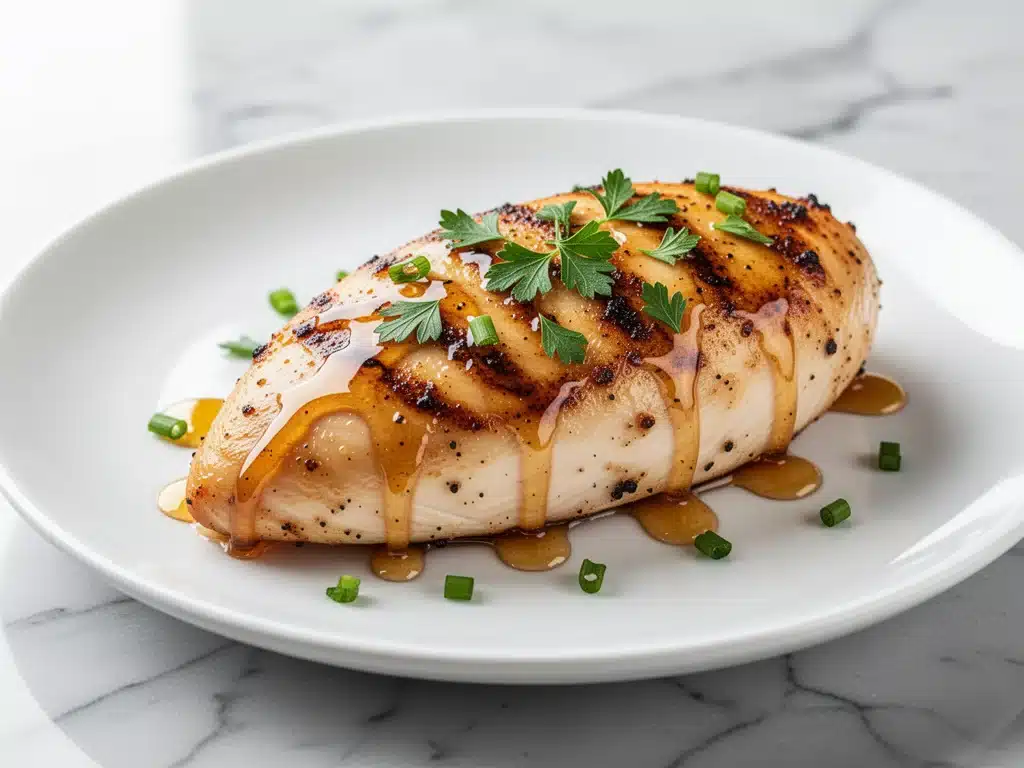
I have to confess something. For years, I treated chicken breast like the enemy. It was dry, it was boring, and every time I tried to cook it, it came out looking like a piece of shoe leather that had been left in the sun too long. I’d sigh, scrape it into the trash, and order takeout. Sound familiar?
Then I got an air fryer. And honestly? It changed everything.
But here’s the real game-changer: the combination of sweet, sticky honey, savory garlic, and rich butter. I first made this air fryer chicken breast with honey garlic butter glaze on a Tuesday night when I was exhausted and just wanted something that tasted indulgent without the guilt of heavy restaurant food. I drizzled the glaze on at the last minute, watching it bubble and caramelize under the heat. One bite, and I knew I was done with dry chicken forever.
This isn’t just another bland diet dinner. This is the kind of meal that makes your spouse ask, “Did you order takeout?” when you tell them you made it yourself. It’s juicy on the inside, slightly crispy on the outside, and coated in a sauce that’s dangerously addictive. I’ve tested this air fryer chicken breast with honey garlic butter glaze probably twenty times now, tweaking the ratios until it was perfect. And let me tell you, once you make this, you’re going to want it on repeat.
If you’re looking for more ways to keep your chicken juicy and flavorful, you might also want to check out my never dry oven baked chicken breast with herb butter. Both methods keep the meat incredibly moist, but the air fryer version adds this amazing crispy texture that you just can’t beat.
Why You’ll Love This Air Fryer Chicken Breast with Honey Garlic Butter Glaze
There are a dozen reasons I keep coming back to this recipe, but let’s be real—you’re here because you want dinner to work. Here’s why this air fryer chicken breast with honey garlic butter glaze is about to become your new best friend.
Lightning Fast — Seriously, this is one of the quickest dinners you can make. It takes about 15-20 minutes from start to finish. That’s faster than waiting for a delivery driver. I make this on weeknights when I get home late and just want to eat something good without standing over a hot stove for an hour.
Zero Dry Chicken — This is the big one. The air fryer circulates hot air rapidly, cooking the chicken evenly without drying it out. Combined with the butter glaze, which bastes the meat as it cooks, the result is tender, juicy chicken every single time. No more guessing if it’s done. You just know.
Flavor Explosion — Honey and garlic is a classic combo for a reason. But adding butter? That’s what takes it from “good” to “restaurant quality.” The glaze caramelizes slightly, creating little crispy, sweet-savory bits on the chicken that are absolutely irresistible. It’s like honey brisket but in a fraction of the time and with way less effort.
Minimal Cleanup — Line your air fryer basket with parchment paper or foil, and you’re done. The glaze might drip a bit, but it’s contained. No scrubbing pots, no washing pans. Just toss the liner in the trash and you’re free. This is crucial for me because I hate doing dishes almost as much as I hate dry chicken.
Perfectly Portable — Whether you’re meal prepping for the week or taking leftovers to work, this chicken holds up beautifully. It reheats well in the microwave (though the air fryer brings back that crispiness better) and tastes great cold in salads or wraps. I’ve packed this for lunch more times than I can count.
So basically, if you want juicy chicken, amazing flavor, and less cleanup, this is the recipe. It’s the trifecta. And once you try it, I promise you’ll be making this air fryer chicken breast with honey garlic butter glaze again and again.
Ingredients You’ll Need
Here’s the best part: you probably have most of these ingredients already. This isn’t a recipe that requires a trip to three different specialty stores. It’s simple, pantry-friendly, and uses fresh flavors that make a huge difference.
For the Chicken
Chicken breasts (1.5 lbs / 680g) — I use boneless, skinless chicken breasts. Try to find ones that are fairly uniform in thickness so they cook evenly. If they’re super thick, I pound them down a bit with a meat mallet or the bottom of a heavy pan. This helps them cook faster and stay juicy. You can also use chicken thighs if you prefer darker meat—they’re even more forgiving and stay moist, though the cooking time might vary slightly.
Neutral oil (1 tablespoon) — I use avocado oil or light olive oil. You just need a little bit to help the seasoning stick and prevent sticking in the air fryer. Don’t use extra virgin olive oil here; the high heat can make it bitter.
Seasoning blend — I keep it simple: 1 teaspoon garlic powder, 1 teaspoon onion powder, ½ teaspoon paprika, ½ teaspoon salt, and ¼ teaspoon black pepper. This creates a savory base that complements the sweet glaze without overpowering it. If you like a little heat, add a pinch of cayenne or red pepper flakes.
For the Honey Garlic Butter Glaze
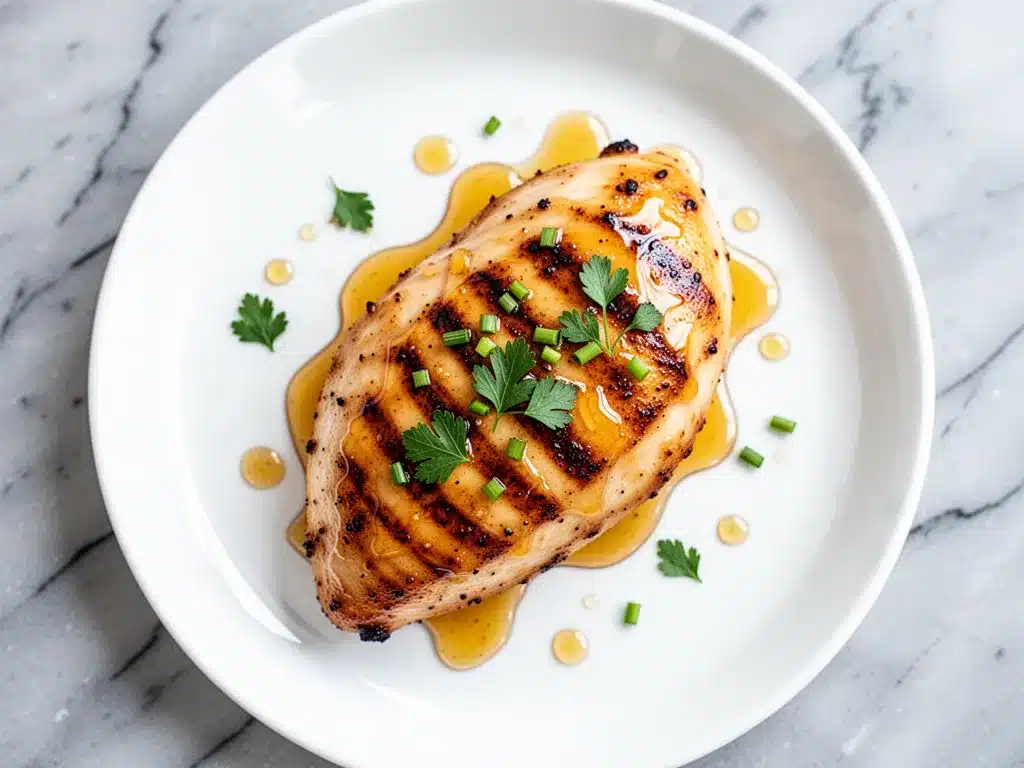
Butter (3 tablespoons / 42g) — Unsalted butter is best so you can control the saltiness. Melt it before mixing. If you’re feeling fancy, use European-style butter for a richer flavor, but regular salted butter works fine too. Just reduce the salt in the chicken seasoning if you use salted butter.
Honey (3 tablespoons / 45ml) — This is the star of the show. Use good quality honey if you can—it makes a noticeable difference in flavor. Clover honey is mild and sweet, while wildflower honey has more character. Avoid overly processed “honey-flavored” syrups; they don’t have the same depth.
Garlic (4-5 cloves, minced / about 2 tablespoons) — Yes, five cloves. Don’t skimp. Fresh garlic is non-negotiable here. Jarred garlic has a metallic taste that just doesn’t work in a delicate glaze. If you’re in a huge rush, you can use fresh minced garlic from a jar, but I promise fresh tastes so much better. It’s worth the extra 30 seconds.
Soy sauce (1 tablespoon) — This adds umami and saltiness, balancing the sweetness of the honey. It’s the secret ingredient that makes the sauce taste complex, not just sweet. Use low-sodium soy sauce if you’re watching your salt intake.
Rice vinegar (1 teaspoon) — A little acidity cuts through the richness of the butter and honey. It brightens up the whole dish. If you don’t have rice vinegar, apple cider vinegar works in a pinch.
Red pepper flakes (½ teaspoon) — Optional, but highly recommended. It adds a tiny kick that keeps the flavor from being one-dimensional. You can adjust this based on your spice tolerance.
Green onions (2 stalks, sliced) — For garnish. They add a fresh, crisp contrast to the rich chicken. If you don’t have green onions, fresh parsley or cilantro works too, but green onions are traditional for this flavor profile.
Sesame seeds (1 tablespoon, optional) — For an extra crunch and nutty flavor. Toasting them in a dry pan for a minute before sprinkling on top takes it to the next level.
Equipment Needed
You don’t need fancy equipment for this. Here’s what I actually use.
Air Fryer — Obviously. I use a 5.8-quart basket style air fryer. It’s big enough to fit two chicken breasts with a little room for air circulation. If you have a smaller air fryer, you might need to cook in two batches. Don’t overcrowd the basket, or the chicken will steam instead of crisp up.
Small saucepan or microwave-safe bowl — To melt the butter and mix the glaze. I usually melt the butter in the microwave for 30 seconds and whisk it all together in a small bowl. It’s faster than heating it on the stove.
Pastry brush or spoon — To apply the glaze. A pastry brush gives you more control, but a spoon works fine too. I like to brush it on generously.
Tongs — For flipping the chicken. Metal tongs are durable, but silicone-tipped tongs are gentler on non-stick air fryer baskets.
Meat thermometer — This is the only way to be 100% sure your chicken is done. Insert it into the thickest part of the breast; it should read 165°F (74°C). I learned this the hard way after guessing and ending up with overcooked chicken. Now I never cook without it.
Parchment paper liners — Optional but helpful. They keep the air fryer basket clean and make cleanup a breeze. Just make sure they don’t block the airflow.
How to Make It: Step-by-Step
Alright, let’s make this! I’m walking you through exactly how I do it, including the little tricks I’ve picked up over time.
Step 1: Prep the Chicken (5 minutes)
Start by patting the chicken breasts dry with paper towels. Moisture is the enemy of browning, so getting them dry helps the seasoning stick and promotes a better texture. If the breasts are very thick, pound them gently to an even ½-inch thickness. This ensures they cook evenly. Season both sides generously with the garlic powder, onion powder, paprika, salt, and pepper. Rub the seasoning in well, then drizzle with the oil and massage it in. This step might seem simple, but it builds a flavor foundation that carries through to the end.
Step 2: Air Fry the Chicken (12-15 minutes)
Preheat your air fryer to 380°F (190°C). This isn’t strictly necessary, but it helps the chicken start cooking immediately for better browning. Place the chicken breasts in the air fryer basket in a single layer. Make sure they aren’t touching each other. Air fry for 12-15 minutes, flipping halfway through. The exact time depends on the thickness of your chicken. You’re looking for an internal temperature of 165°F (74°C). If they’re done before the glaze is ready, remove them and set aside on a plate, loosely tented with foil to keep warm.
Step 3: Make the Glaze (2 minutes)
While the chicken cooks, make the glaze. In a small bowl, whisk together the melted butter, honey, minced garlic, soy sauce, rice vinegar, and red pepper flakes. The mixture should be smooth and slightly thickened. If it’s too thick, add a teaspoon of water. If it’s too thin, let it sit for a minute to reduce slightly. The goal is a glossy, pourable sauce that clings to the chicken.
Step 4: Glaze and Finish (3-5 minutes)
Once the chicken is cooked through, brush a generous layer of the glaze over the top of each breast. Return the chicken to the air fryer for 2-3 minutes. This allows the glaze to caramelize and stick to the chicken. Keep a close eye on it—the sugar in the honey can burn quickly if left too long. You want it sticky and glossy, not black and bitter. Remove the chicken and brush with another layer of glaze for extra shine and flavor.
Step 5: Rest and Serve (5 minutes)
Let the chicken rest for 5 minutes before slicing. This is crucial. Resting allows the juices to redistribute throughout the meat. If you cut into it immediately, all the juice runs out, and you’re left with dry chicken. After resting, slice the chicken against the grain. This makes each bite more tender. Drizzle any remaining glaze from the bowl over the top, and garnish with sliced green onions and sesame seeds. Serve immediately while hot.
Total Time: About 20-25 minutes (5 minutes prep, 15-20 minutes cooking).
Troubleshooting:
- Glaze is burning: Your air fryer might be running hot. Lower the temperature to 360°F (180°C) for the glazing step, or watch it very closely. Sugar burns fast.
- Chicken is dry: You might have overcooked it. Use a meat thermometer! Remove the chicken at 160°F (71°C); it will continue to cook to 165°F (74°C) while resting.
- Sauce is too thin: Simmer it on the stove for a minute before brushing to reduce. Or just accept it as a dipping sauce!
Expert Tips & Tricks
Here’s everything I’ve learned from making this dozens of times. These tips will save you from my mistakes.
Pound the Chicken Even
Chicken breasts are rarely uniform. The thick end cooks slower than the thin end. By pounding them to an even thickness, you ensure they cook at the same rate. This prevents the thin end from drying out while waiting for the thick end to cook. It’s a small step that makes a huge difference.
Don’t Skip the Rest
I know it’s tempting to cut into the chicken the second it’s done. But resist the urge. Resting for 5 minutes allows the muscle fibers to relax and reabsorb the juices. If you cut it too soon, you lose that moisture. Trust me, your chicken will be significantly juicier.
Brush, Don’t Pour
When applying the glaze, use a brush. Pouring it on can make the chicken soggy in spots and leave other spots dry. Brushing ensures an even coating that caramelizes nicely. Also, apply the glaze at the end, not the beginning. If you put it on too early, the sugar will burn before the chicken is cooked.
Toast Your Sesame Seeds
It takes 30 seconds in a dry pan, but toasting sesame seeds releases their natural oils and adds a nutty depth that raw seeds just don’t have. It’s a tiny detail that elevates the presentation and flavor.
Double the Glaze
I always make a little extra glaze. Some people like to dip their chicken in it, and some like to drizzle it over rice or vegetables. Having extra means no one goes without.
Variations & Substitutions
Once you’ve nailed the basic version, here’s how you can mix it up. I’ve tried all of these, and they all work.
Spicy Honey Garlic
Add 1 teaspoon of sriracha or gochujang to the glaze. It adds a Korean-inspired kick that pairs perfectly with the sweetness. This is my go-to when I want something with a bit more heat.
Ginger Garlic Twist
Add 1 teaspoon of freshly grated ginger to the glaze. It adds a warm, zesty note that complements the garlic beautifully. Ginger and honey are a classic pairing for a reason.
Lemon Herb Glaze
Swap the honey for maple syrup and add lemon zest and fresh thyme. It’s brighter and more herbaceous. This version feels lighter and is great for spring or summer.
Dairy-Free Option
Replace the butter with olive oil or coconut oil. The flavor will be slightly different, but it still works well. Just make sure to use a neutral oil so it doesn’t overpower the honey and garlic.
Gluten-Free Option
Use tamari instead of soy sauce. Everything else is naturally gluten-free, so this is an easy swap for those avoiding gluten.
Vegetable Add-ins
I sometimes air fry broccoli or asparagus alongside the chicken. Just toss the veggies in a little oil and seasonings, and air fry them for the last 10 minutes of the chicken’s cooking time. They absorb some of the glaze drippings and taste amazing.
Serving & Storage
How to Serve:
I usually serve this with steamed rice, quinoa, or roasted vegetables. The glaze is so good, you’ll want something to soak it up. A simple green salad with a vinaigrette also balances the richness well. For a more complete meal, I like to serve it with stir-fried bok choy or snap peas.
Refrigerator:
Store leftovers in an airtight container for up to 3 days. The chicken will keep well, and the glaze will continue to flavor the meat. I actually think it tastes even better the next day as the flavors meld.
Reheating:
Best method: Reheat in the air fryer at 350°F (175°C) for 3-4 minutes. This brings back the crispiness of the chicken and warms the glaze without drying it out.
Microwave method: Heat in 30-second intervals. It works, but the chicken might lose some texture. Add a splash of water to the plate to keep it moist.
Freezing:
This doesn’t freeze well. The butter in the glaze can separate upon thawing, and the chicken texture can become grainy. It’s best made fresh. If you must freeze, freeze the chicken without the glaze, and make fresh glaze when you’re ready to eat.
Nutrition Information
I’m not a nutritionist, but here’s the breakdown if you’re tracking.
| Nutrient | Per Serving (1 breast with glaze) |
|---|---|
| Calories | 320 |
| Protein | 35g |
| Carbs | 18g |
| Fat | 12g |
| Sugar | 16g |
| Sodium | 450mg |
What’s Good: High in protein, which keeps you full. The air fryer method uses less oil than frying, so it’s relatively low in fat.
What to Know: The sugar content comes from the honey, so if you’re watching your sugar intake, you might want to reduce the honey or use a sugar-free alternative. The sodium is moderate, mostly from the soy sauce.
My Take: Look, this is a treat. It’s sweet, savory, and delicious. It’s not a diet food, but it’s a healthy-ish option compared to fried chicken or takeout. When I want to make it lighter, I use less honey and more garlic, and I serve it with a big salad. But usually? I just enjoy a reasonable portion and love every bite.
Final Thoughts
So that’s my go-to air fryer chicken breast with honey garlic butter glaze! I’ve probably talked your ear off at this point, but when you make a recipe this often, you have a lot to say about it.
This has saved weeknight dinners more times than I can count. It’s my answer to “what’s for dinner” when I’m tired, don’t want takeout, and still want something that tastes really good. My kids are happy, my husband’s happy, and I’m happy because I’m not stressed about cooking.
Make it yours! Try different add-ins, swap in your favorite vegetables, adjust the garlic (though more is always better in my opinion). The best recipes are the ones you adapt to your family’s tastes. If you make this, drop a comment and let me know what you think! I love hearing how recipes turn out in your kitchen. And if something doesn’t work, tell me that too—I’m here to help troubleshoot.
Happy cooking! And I hope your kitchen smells half as good as mine does right now.
Frequently Asked Questions
Q: Can I use chicken thighs instead of breasts?
A: Absolutely! Chicken thighs are actually more forgiving and stay juicier. Just note that they have a slightly different cooking time and a richer flavor. You might want to reduce the honey slightly if you prefer a less sweet glaze with the darker meat.
Q: Why did my glaze burn?
A: Honey burns easily because of its high sugar content. This usually happens if the air fryer temperature is too high or if the glaze is left in too long. Always apply the glaze at the end of cooking and watch it closely. If your air fryer runs hot, lower the temperature for the glazing step.
Q: Can I make this ahead of time?
A: You can prep the chicken and season it ahead of time and store it in the fridge for up to 24 hours. Make the glaze fresh, though. The garlic can become bitter if it sits in the butter for too long. Just brush it on right before cooking.
Q: Is this recipe gluten-free?
A: The base recipe is gluten-free, but you need to check your soy sauce. Regular soy sauce contains wheat. Use tamari or a certified gluten-free soy sauce to keep it safe.
Q: How do I know when the chicken is done?
A: Use a meat thermometer. Insert it into the thickest part of the breast. When it reads 165°F (74°C), it’s done. If you don’t have a thermometer, cut into the thickest part; the juice should run clear, and the meat should be opaque throughout.
Q: Can I double this recipe?
A: Yes, but you’ll need to cook in batches. Don’t overcrowd the air fryer basket. Overcrowding blocks airflow and results in steamed, soggy chicken instead of crispy, juicy chicken. Cook in two batches if necessary.
Q: What side dishes go well with this?
A: I love serving this with steamed rice, quinoa, roasted sweet potatoes, or a simple green salad. It also pairs well with stir-fried vegetables or garlic green beans. Basically, anything that can soak up that delicious glaze!
Pin This Recipe!

Air Fryer Chicken Breast: Easy Honey Garlic Butter Glaze
- Total Time: 20-25 minutes
- Yield: 2 servings 1x
Description
Juicy, tender air fryer chicken breasts coated in a sweet and savory honey garlic butter glaze. This quick weeknight dinner is crispy on the outside, moist on the inside, and ready in under 25 minutes.
Ingredients
- 1.5 lbs boneless, skinless chicken breasts
- 1 tablespoon neutral oil (avocado or light olive oil)
- 1 teaspoon garlic powder
- 1 teaspoon onion powder
- 1/2 teaspoon paprika
- 1/2 teaspoon salt
- 1/4 teaspoon black pepper
- 3 tablespoons unsalted butter, melted
- 3 tablespoons honey
- 4–5 cloves garlic, minced
- 1 tablespoon soy sauce (or tamari for gluten-free)
- 1 teaspoon rice vinegar
- 1/2 teaspoon red pepper flakes
- 2 stalks green onions, sliced (for garnish)
- 1 tablespoon sesame seeds, toasted (optional)
Instructions
- Pat chicken breasts dry with paper towels. If thick, pound to an even 1/2-inch thickness.
- Season chicken on both sides with garlic powder, onion powder, paprika, salt, and pepper. Drizzle with oil and rub to coat.
- Preheat air fryer to 380°F (190°C).
- Place chicken in the air fryer basket in a single layer, ensuring they are not touching.
- Air fry for 12-15 minutes, flipping halfway through, until internal temperature reaches 165°F (74°C).
- While chicken cooks, whisk together melted butter, honey, minced garlic, soy sauce, rice vinegar, and red pepper flakes in a small bowl.
- Remove chicken from air fryer and brush generously with the glaze.
- Return chicken to air fryer for 2-3 minutes to caramelize the glaze. Watch closely to prevent burning.
- Remove chicken and brush with a second layer of glaze.
- Let chicken rest for 5 minutes before slicing against the grain.
- Serve immediately, drizzled with remaining glaze and garnished with green onions and sesame seeds.
Notes
Pound chicken to even thickness for uniform cooking. Do not skip the resting step to ensure juiciness. Apply glaze at the end to prevent burning. Use a meat thermometer to ensure chicken reaches 165°F. For gluten-free, use tamari. For dairy-free, substitute butter with olive or coconut oil.
- Prep Time: 5 minutes
- Cook Time: 15-20 minutes
- Category: Main Course
- Cuisine: Asian Fusion
Nutrition
- Serving Size: 1 chicken breast wit
- Calories: 320
- Sugar: 16
- Sodium: 450
- Fat: 12
- Saturated Fat: 5
- Carbohydrates: 18
- Protein: 35
Keywords: air fryer chicken, honey garlic chicken, chicken breast recipe, easy dinner, healthy chicken, gluten-free option, dairy-free option


