It was 6:30 AM on a Saturday, and my kitchen was cold. The kind of cold that seeps into your bones because the heating system decided to take a nap. My kids were still asleep, but my stomach was doing that specific growl that means breakfast is no longer optional—it’s urgent. I opened the pantry, hoping for something quick, something that wouldn’t require me to get out of my robe and start a complex cooking project.
I had flour. I had baking powder. I had butter. And, miraculously, I had a small carton of buttermilk that I’d bought for pancakes three days ago and never used. I didn’t have time to knead dough. I didn’t have time to roll it out and cut shapes. I just needed something warm, soft, and fluffy to put in front of my children before they turned into hangry monsters.
So I threw together what I thought would be a mediocre quick bread. I stirred it roughly, dropped spoonfuls onto a baking sheet, and popped them in the oven. Twenty minutes later, the smell hit me. It wasn’t just the smell of baking bread; it was the smell of comfort. It was the smell of a bakery window display, but made in my mismatched mugs and worn-out apron.
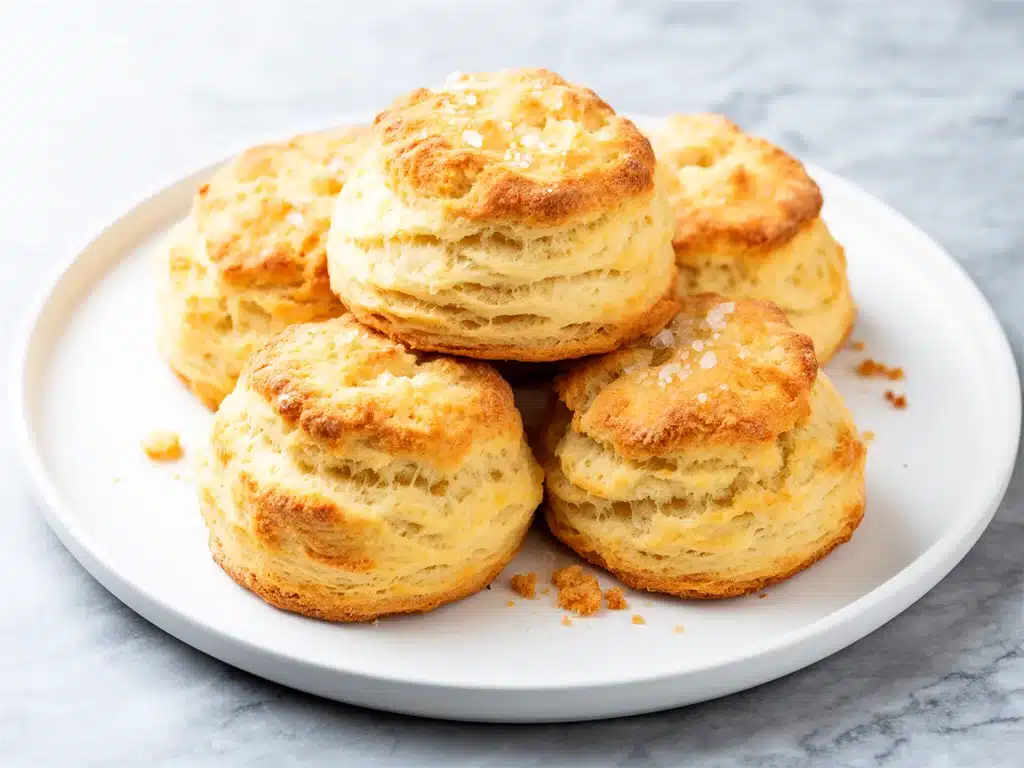
When I pulled them out, they were golden brown on the outside and impossibly soft on the inside. No tough crust. No dense center. Just tender, buttery clouds. My kids devoured them with jam before I could even pour my coffee. That was six months ago. Since then, I’ve made this recipe for soft buttermilk drop biscuits at least once a week. Sometimes twice. They’ve become the anchor of our weekend breakfasts, the go-to treat for unexpected guests, and my secret weapon when I need to feel like a good mom without spending hours in the kitchen.
Here’s the thing about biscuits: most people think they’re hard. They think you need a rolling pin, a pastry cutter, and a degree in pastry arts. But these soft buttermilk drop biscuits are different. They’re drop biscuits. You mix them in a bowl, you scoop them onto a pan, and you bake them. That’s it. Five ingredients. No fancy tools. No stress. Just real, honest, homemade goodness that tastes like it came from a southern grandmother’s kitchen.
I’ve tested this recipe dozens of times—sometimes with salted butter, sometimes with unsalted, sometimes with cold butter straight from the fridge, sometimes with butter that’s been sitting out for ten minutes. I’ve learned what works, what doesn’t, and why the temperature of your butter actually matters more than you think. Let me walk you through exactly how to make the best biscuits you’ve ever tasted, without the headache.
Why You’ll Love This 5-Ingredient Recipe
There are a lot of breakfast options out there. You could make pancakes, which require flipping and syrup management. You could make french toast, which involves soaking bread and dealing with egg spills. You could make oatmeal, which is healthy but often bland unless you spend twenty minutes adding toppings. But soft buttermilk drop biscuits? They hit a sweet spot that nothing else does.
Here’s why this recipe has earned a permanent spot in my weekly rotation:
Stupid Simple — Seriously, if you can stir a spoon and scoop ice cream, you can make these biscuits. There is no rolling. There is no cutting. There is no technique that requires years of practice. I’ve made these biscuits while holding my toddler on one hip and stirring with the other. It happens. It works.
Lightning Fast — From mixing to oven, you’re looking at about 25 minutes total. But here’s the kicker: only 10 minutes of that is active work. The rest is just waiting for the oven to do its thing. I make these on Saturday mornings when I want to sleep in an extra 15 minutes. The oven does the heavy lifting.
Pantry-Friendly — You probably have four out of these five ingredients right now. Flour, baking powder, salt, and butter are staples. Buttermilk is the only thing you might need to grab, and honestly, it keeps in the fridge for weeks, so stock up when you see it on sale. I keep a carton just for this recipe.
Crowd-Pleaser — I’ve served these to my coffee-club friends, my skeptical in-laws, and my kids’ picky friends. Everyone loves them. The texture is so tender that people actually stop talking and just eat. It’s a rare win in the world of baked goods.
Makes Amazing Leftovers — Yes, biscuits are best fresh, but these reheat beautifully. I often make a double batch and freeze half. They thaw and warm up in minutes, making for a perfect grab-and-go breakfast during the busy week. I’ve even eaten cold ones straight from the fridge (don’t judge me; they’re still good).
This is my go-to when I need breakfast to just work. No complicated techniques, no weird ingredients, just reliable, delicious food that makes everyone happy. And the best part? They’re cheap. Feeds a family of four for under $5. That’s less than a box of cereal, but infinitely more satisfying.
Ingredients You’ll Need
Here’s the best part: you don’t need a specialty store to make these. You don’t need cake flour or fancy cultured butter. You need simple, honest ingredients that you likely already have or can grab on your way home. I’m particular about three things here, and I’ll tell you exactly why they matter.
All-purpose flour (2 cups / 250g) — This is your base. Don’t use self-rising flour unless you adjust the baking powder and salt, but honestly, it’s easier to just use all-purpose and control the leavening yourself. Spoon the flour into your measuring cup and level it off. Don’t scoop and pack, or you’ll end up with dense biscuits. I use Gold Medal flour because it’s consistent, but any brand works.
Baking powder (2 teaspoons / 10g) — This is the lift. Make sure it’s fresh. If your baking powder has been sitting in the back of the cupboard since last Christmas, it’s probably dead. Test it: drop a teaspoon into hot water. If it fizzes violently, you’re good. If it barely bubbles, toss it and buy new. I keep a fresh canister specifically for baking days.
Salt (1 teaspoon / 6g) — Flavor enhancer. Don’t skip it. Salt makes the butter taste like butter. Use fine sea salt or table salt. Kosher salt works too, but you might need a little more because the crystals are bigger. I use Diamond Crystal kosher salt, so I measure carefully.
Unsalted butter (1/2 cup / 115g, cold and cubed) — This is where the magic happens. The cold butter creates steam pockets as it melts, which creates those flaky layers. If your butter is warm, it will melt into the flour too quickly, and you’ll get tough biscuits. Cube it straight from the fridge. If you’re in a rush, put the cubes in the freezer for 5 minutes. I use Kerrygold because it has a higher fat content and richer flavor, but any unsalted butter works.
Buttermilk (3/4 cup / 180ml) — The liquid that ties it all together. Buttermilk adds tang and tenderness. The acidity reacts with the baking powder for extra lift. If you don’t have buttermilk, you can make a substitute: add 1 tablespoon of lemon juice or white vinegar to a measuring cup, then fill the rest with whole milk. Let it sit for 5 minutes until it curdles. It’s not quite the same, but it works in a pinch. I buy buttermilk in bulk when it’s on sale because I use it for this recipe and for banana bread when I’m feeling fancy.
Optional: Granulated sugar (1 tablespoon / 12g) — I add a little sugar to balance the tang of the buttermilk and help with browning. If you prefer savory biscuits, skip this. If you like a slight sweetness, add it. I usually add it because my kids like them slightly sweet with butter.
Optional: Melted butter for brushing (2 tablespoons) — For that bakery-style golden top. Brush the tops of the biscuits with melted butter right after they come out of the oven. It adds shine and extra flavor. I do this every time. It’s the difference between good and great.
Equipment Needed
You don’t need fancy equipment for this. Here’s what I actually use, and what you can swap if you don’t have it.
Large mixing bowl — I use a 4-quart ceramic bowl. It’s heavy enough that it doesn’t slide around when I’m mixing. Any large bowl works, though. Just make sure it’s big enough to hold the dough without spilling.
Fork or pastry cutter — To cut in the butter. I use a fork because it’s faster and I don’t want to dig out the pastry cutter. A pastry cutter works too, but a fork is what I reach for every time. You can also use your fingers if you don’t mind getting buttery hands.
Baking sheet — I use a half-sheet pan (18×13 inches). It’s the standard size for most ovens. If you have a smaller pan, you’ll need to bake in two batches. Line it with parchment paper for easy cleanup, or grease it lightly with butter or cooking spray.
Cooking spray or butter — For greasing the pan. I prefer butter because it adds flavor, but cooking spray is easier. Either works.
Spoon or cookie scoop — To drop the biscuits. I use a medium cookie scoop because it gives uniform sizes. If you don’t have one, use two spoons to scoop and drop the dough. Uniform size ensures even baking.
Pastry brush — For brushing melted butter on top. If you don’t have one, just tilt the pan and use a spoon to drizzle the butter over the tops. It won’t be as pretty, but it’ll taste the same.
Whisk — For mixing the dry ingredients. A small whisk is perfect. You could use a fork, but a whisk ensures the baking powder and salt are evenly distributed, which prevents bitter spots.
You don’t need a rolling pin, cutter, or stand mixer. Seriously. That’s the beauty of drop biscuits. Just a bowl, a spoon, and a baking sheet.
How to Make It: Step-by-Step
Alright, let’s make these biscuits! I’m walking you through exactly how I do it, including the little tricks I’ve picked up over the years. This process is forgiving, but there are a few key moments where attention matters.
Step 1: Prep Your Oven and Pan (5 minutes)
Preheat your oven to 425°F (220°C). This high heat is crucial. It creates the initial burst of steam that lifts the biscuits before the crust sets. If your oven is too low, the biscuits will spread too much and turn out flat. Line your baking sheet with parchment paper or grease it lightly. Set it aside.
Step 2: Mix the Dry Ingredients (2 minutes)
In your large bowl, whisk together the flour, baking powder, salt, and sugar (if using). I whisk for about 30 seconds to make sure everything is evenly distributed. If you don’t whisk well, you might get a bite with just baking powder, which tastes metallic and bitter. Take the time to mix it thoroughly.
Step 3: Cut in the Butter (3-4 minutes)
Add the cold, cubed butter to the dry ingredients. Now comes the fun part. Use a fork, pastry cutter, or your fingers to cut the butter into the flour. You’re looking for a mixture that resembles coarse crumbs with some pea-sized chunks of butter remaining. Don’t overmix here. Those chunks of butter are what create the flaky layers. If you mix until it’s just fine crumbs, your biscuits will be dense. I use my fingers sometimes because I can feel the texture better, but a fork is faster. Aim for that pea-sized chunk look.
Step 4: Add the Buttermilk (2 minutes)
Make a well in the center of the dry mixture and pour in the buttermilk. Use a spoon or spatula to gently stir the mixture until it just comes together. It will look shaggy and messy. That’s okay. Do not overmix. Overmixing develops gluten, which makes biscuits tough. You want tender biscuits, so stop stirring as soon as there are no dry spots left. It might take 30 seconds. If some small bits of flour are still visible, that’s fine. The dough will be sticky. That’s normal for drop biscuits.
Step 5: Scoop and Drop (5 minutes)
Using a spoon or cookie scoop, drop mounds of dough onto the prepared baking sheet. Leave about 2 inches between each mound because they will spread. I usually fit 6-8 biscuits on a standard half-sheet pan. If you want taller biscuits, place the mounds closer together so they support each other as they rise. For softer sides, place them touching. For crispier sides, leave space. I usually leave space because I like a little crunch.
Step 6: Bake (15-18 minutes)
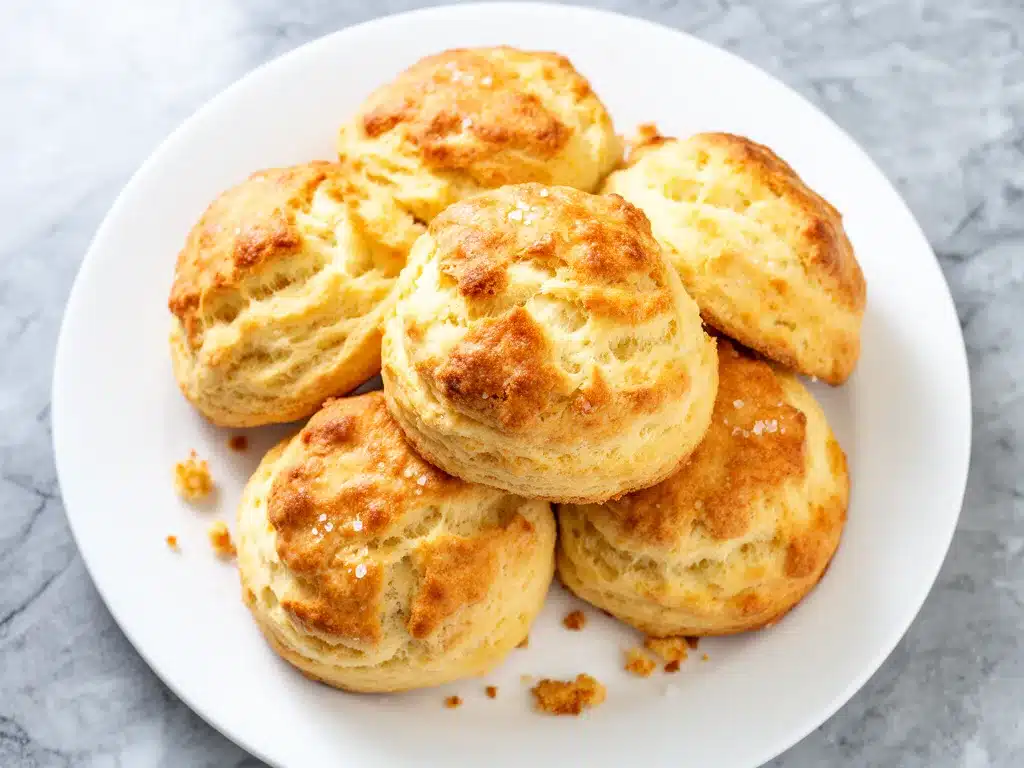
Place the baking sheet in the preheated oven. Bake for 15-18 minutes, or until the tops are golden brown and a toothpick inserted into the center comes out clean. I rotate the pan halfway through baking to ensure even browning, especially if my oven has hot spots. The biscuits should be puffed up and golden. If they’re browning too fast, tent them loosely with aluminum foil.
Step 7: Brush and Serve (2 minutes)
While the biscuits are baking, melt the extra butter for brushing. As soon as the biscuits come out of the oven, brush the tops with melted butter. This adds shine and flavor. Let them cool on the pan for 5 minutes before serving. They’re very hot inside, so let them settle a bit. Serve warm with butter, jam, honey, or just plain. They’re amazing on their own.
Expert Tips & Tricks
Here’s everything I’ve learned from making this recipe dozens of times. These tips will save you from my mistakes and ensure your biscuits are perfect every time.
Keep Everything Cold
This is the #1 rule for flaky biscuits. Cold butter, cold buttermilk, cold bowl. If your butter warms up before it hits the oven, it melts into the flour instead of creating steam pockets. I keep my butter in the fridge until the last second. If you live in a hot kitchen, put your flour and buttermilk in the fridge for 15 minutes before starting. It makes a huge difference.
Don’t Overmix
I know it’s tempting to mix until it’s smooth. Don’t. Stop as soon as the dough comes together. Lumpy dough is good. Smooth dough means you’ve developed too much gluten, and your biscuits will be tough. I’ve made tough biscuits before because I was impatient. Now I trust the shaggy look.
Use a Cookie Scoop
If you want uniform biscuits that bake evenly, use a cookie scoop. It ensures each biscuit is the same size, so they all finish baking at the same time. If you use spoons, you might get some big ones and some tiny ones, and the tiny ones will burn while the big ones are undercooked.
Brush with Butter
I cannot stress this enough. Brushing with melted butter after baking adds flavor and color. It’s the bakery touch. Don’t skip it. It’s worth the extra tablespoon of butter.
Adjust for Altitude
If you live at high altitude, you might need to adjust the baking powder and liquid. Generally, reduce baking powder by 1/4 teaspoon and add 1-2 tablespoons more buttermilk. The air pressure affects how the biscuits rise. If you’re at sea level, you’re good to go.
Make-Ahead Strategy
You can scoop the dough onto the baking sheet, cover it tightly with plastic wrap, and freeze it. When you’re ready to bake, bake from frozen, adding 2-3 minutes to the baking time. This is great for meal prep. I do this on Sundays for the week ahead.
Variations & Substitutions
Once you’ve nailed the basic version, here’s how you can mix it up. I’ve tried all of these, and they all work.
Cheesy Biscuits
Add 1 cup of shredded cheddar cheese to the dry ingredients before adding the butter. These are amazing with breakfast sausage or eggs. I make these for brunch parties. The cheese adds richness and flavor.
Herb Biscuits
Add 1 tablespoon of dried chives or parsley to the dry mix. These are great with soup or salad. I use them for dipping in tomato soup. The herb flavor is subtle but delicious.
Garlic Biscuits
Add 1 teaspoon of garlic powder to the dry mix. These are perfect with roasted chicken or steak. I make these for dinner parties. They’re a crowd-pleaser.
Gluten-Free Version
Use a 1-to-1 gluten-free flour blend. I use Bob’s Red Mill 1-to-1 because it works well in baked goods. The texture might be slightly denser, but it’s still good. I’ve made these for my gluten-free friend, and she loved them.
Dairy-Free Version
Use dairy-free butter (like Miyoko’s or Earth Balance) and dairy-free buttermilk (made with plant milk and lemon juice). The texture might be slightly different, but it’s still tasty. I make these for my vegan neighbor, and she appreciates the effort.
Sweet Biscuits
Increase the sugar to 2 tablespoons and add 1 teaspoon of cinnamon. Serve with maple syrup or honey. These are like breakfast pastries. I make these for weekend brunch.
Serving & Storage
How to Serve:
I usually serve these straight from the oven, piled high on a platter. They’re best warm, but they’re good at room temperature too. Serve with butter, jam, honey, or gravy. They’re versatile. I’ve served them with chicken and waffles, with eggs and bacon, and just with butter and jam. They work for every meal.
Side Dishes:
These biscuits pair well with almost anything. Try them with fall maple pecan cold brew for a cozy morning treat. Or serve them with a simple green salad for a light lunch. They’re great with soup, stew, or chili. I often make a big pot of chili and serve it with these biscuits. It’s a classic combo.
Toppings Bar:
When I have guests, I put out: butter, strawberry jam, honey, whipped cream, and fresh fruit. Everyone customizes their biscuit. It’s fun and interactive.
Storage Instructions:
Refrigerator: Store in an airtight container for up to 3 days. They might lose some flakiness, but they’re still good. Reheat in the oven or toaster oven to restore crispness.
Freezer: These freeze beautifully. Let them cool completely, then wrap them tightly in plastic wrap and place in a freezer bag. They’ll last for 2 months. To reheat, thaw at room temperature and warm in the oven at 350°F for 10 minutes. Or bake from frozen, adding 2-3 minutes to the time.
Reheating: The best method is the oven. 350°F for 5-10 minutes. The microwave works but can make them chewy. If you microwave, do it in short bursts and add a damp paper towel to keep them moist.
Nutrition Information
I’m not a nutritionist, but here’s the breakdown if you’re tracking. This is per biscuit, based on 8 biscuits.
| Nutrient | Amount |
|---|---|
| Calories | 220 |
| Protein | 4g |
| Carbs | 22g |
| Fiber | 1g |
| Sugar | 1g |
| Fat | 13g |
| Saturated Fat | 8g |
| Cholesterol | 30mg |
| Sodium | 380mg |
What’s Good: They’re a decent source of carbohydrates for energy. The butter adds satiety. Can be made lighter by reducing butter.
What to Know: Higher in calories and fat from the butter. Contains dairy and gluten. Moderate sodium.
My Take: Look, these are biscuits. They’re comfort food. They’re not a diet food. But they’re way better than store-bought, and you know exactly what’s in them. When I want to make them lighter, I reduce the butter slightly and add more herbs. But usually? I just enjoy them in moderation. They’re a treat, and that’s okay.
Final Thoughts
So that’s my go-to soft buttermilk drop biscuits! I’ve probably talked your ear off at this point, but when you make a recipe this often, you have a lot to say about it. This has saved weekend mornings more times than I can count. It’s my answer to “what’s for breakfast” when I’m tired, don’t want to make pancakes, and still want something that tastes really good.
My kids are happy, my husband is happy, and I’m happy because I’m not stressed about cooking. These biscuits are my comfort food, my crowd-pleaser, and my secret weapon for easy entertaining.
Make it yours! Try different add-ins, swap in your favorite herbs, or adjust the sweetness. The best recipes are the ones you adapt to your family’s tastes. If you make this, drop a comment and let me know what you think! I love hearing how recipes turn out in your kitchen. And if something doesn’t work, tell me that too—I’m here to help troubleshoot.
Happy baking! And I hope your kitchen smells half as good as mine does right now.
Frequently Asked Questions
Can I use milk instead of buttermilk?
You can, but the biscuits will be less tender and less tangy. If you must use milk, make a substitute: add 1 tablespoon of lemon juice or vinegar to a measuring cup, then fill with whole milk. Let it sit for 5 minutes until it curdles. It’s not quite the same, but it works. I’ve done this when I ran out of buttermilk—it works okay, just not as good as the real thing.
Why did my biscuits turn out flat?
This usually means your baking powder was old or your butter was too warm. Make sure your baking powder is fresh (it should fizz in hot water). Also, keep your butter cold until it hits the oven. If the butter melts before baking, you lose the steam pockets that create lift. I’ve had flat biscuits before because I left the butter out too long. Now I cube it right before mixing.
Can I make these ahead for a brunch party?
Sort of. You can scoop the dough onto the baking sheet, cover it tightly with plastic wrap, and refrigerate it for up to 24 hours. Bake them straight from the fridge, adding 2-3 minutes to the baking time. They won’t be quite as puffed as fresh, but they’re close and save you stress during the party. I do this all the time for weekend guests.
Why did my biscuits turn out tough?
Overmixing is the usual culprit. Once you add the buttermilk, mix only until the dough comes together. Lumps are okay. If you mix until it’s smooth, you develop gluten, which makes biscuits tough. I’ve made tough biscuits before because I was impatient. Now I trust the shaggy look and stop mixing early.
Can I use salted butter?
You can, but reduce the added salt in the recipe to 1/2 teaspoon. Salted butter varies in salt content, so it’s hard to adjust perfectly. I prefer unsalted butter because I can control the salt level. If you use salted butter, taste the dough before baking (don’t eat raw dough with butter, but just smell it) and adjust if needed. I always use unsalted for consistency.
How do I store leftovers?
Store in an airtight container at room temperature for up to 2 days, or in the fridge for up to 3 days. Reheat in the oven at 350°F for 5-10 minutes to restore crispness. The microwave works but can make them chewy. I usually freeze extras because they freeze so well. I wrap them tightly in plastic and freeze for up to 2 months.
Can I double this recipe?
Absolutely! Double everything and use a larger bowl. The cooking times stay the same, but you might need to bake in two batches if your oven is small. I do this when I’m feeding a crowd or meal-prepping. Just make sure your baking sheets are big enough. I usually bake in two batches to ensure even browning.
Pin This Recipe!

Soft Buttermilk Drop Biscuits: 5-Ingredient Easy Recipe
- Total Time: 25 minutes
- Yield: 8 servings 1x
Description
These soft buttermilk drop biscuits are a quick, easy, and pantry-friendly breakfast solution that requires no rolling or cutting. Made with just five simple ingredients, they are tender, fluffy, and perfect for busy mornings.
Ingredients
- 2 cups (250g) all-purpose flour
- 2 teaspoons (10g) baking powder
- 1 teaspoon (6g) salt
- 1/2 cup (115g) unsalted butter, cold and cubed
- 3/4 cup (180ml) buttermilk
- 1 tablespoon (12g) granulated sugar (optional)
- 2 tablespoons melted butter (for brushing, optional)
Instructions
- Preheat oven to 425°F (220°C). Line a baking sheet with parchment paper or grease lightly.
- In a large bowl, whisk together the flour, baking powder, salt, and sugar (if using) until evenly distributed.
- Add the cold, cubed butter to the dry ingredients. Use a fork, pastry cutter, or fingers to cut the butter into the flour until the mixture resembles coarse crumbs with pea-sized chunks of butter remaining.
- Make a well in the center and pour in the buttermilk. Gently stir with a spoon or spatula until the dough just comes together. Do not overmix; the dough should look shaggy and sticky.
- Drop mounds of dough onto the prepared baking sheet, leaving about 2 inches between each for spreading. Place 6-8 biscuits per pan.
- Bake for 15-18 minutes, or until the tops are golden brown and a toothpick inserted into the center comes out clean. Rotate the pan halfway through for even browning.
- Immediately brush the tops with melted butter while hot. Let cool for 5 minutes before serving.
Notes
Keep all ingredients cold for flaky layers. Do not overmix the dough to avoid tough biscuits. If you don’t have buttermilk, substitute with milk plus 1 tablespoon of lemon juice or vinegar per cup. For gluten-free, use a 1-to-1 gluten-free flour blend. For dairy-free, use plant-based butter and buttermilk alternatives.
- Prep Time: 10 minutes
- Cook Time: 15-18 minutes
- Category: Breakfast
- Cuisine: American
Nutrition
- Serving Size: 1 biscuit
- Calories: 220
- Sugar: 1
- Sodium: 380
- Fat: 13
- Saturated Fat: 8
- Carbohydrates: 22
- Fiber: 1
- Protein: 4
Keywords: buttermilk biscuits, drop biscuits, easy breakfast, southern biscuits, quick bread, homemade biscuits, 5 ingredient recipe


