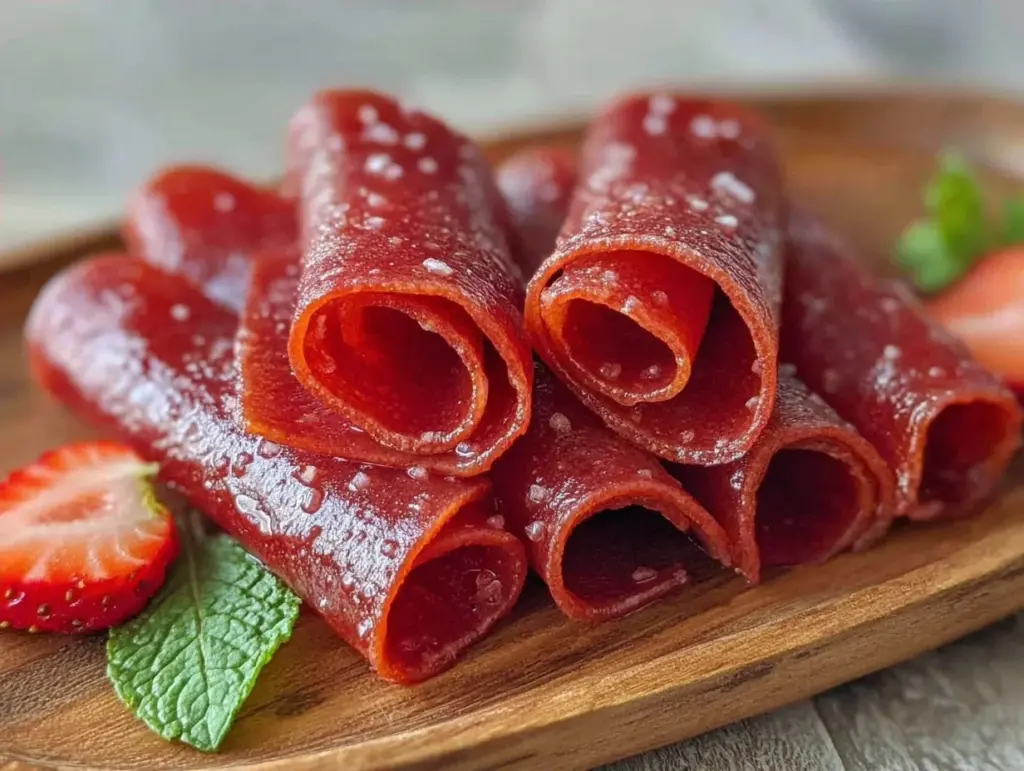
Last July, I was standing in my kitchen, staring at a gallon bag of strawberries that were turning mushy faster than I could eat them. My kids were already complaining about the “sugar bombs” in their lunchboxes, and I was feeling that familiar pinch of guilt. You know the one. It’s that moment when you’re trying to be a good parent but also just want them to eat something that doesn’t taste like cardboard and preservatives.
I decided to try making fruit roll-ups from scratch. I’d seen the Pinterest versions before—those bright red, slightly translucent sheets that look like they came from a 1980s playground—but I was skeptical. Could I actually make something that chewy, sweet, and totally kid-approved without a bucket of sugar?
Turns out, yes. And not just yes, but *oh my god, this is better*.
These homemade strawberry fruit roll-ups are the kind of snack that changes the game. They’re vibrant, they’re chewy in that satisfying way, and they taste like actual strawberries, not artificial cherry candy. The best part? They’re ridiculously simple. Three ingredients. That’s it. No corn syrup, no weird gelling agents, no mystery chemicals. Just fruit, a little honey, and a bit of patience.
I made a batch on a Tuesday afternoon, and by Wednesday, my kids were begging for “the red sheets.” By Friday, I was making them for my book club. They’re elegant enough to serve on a cheese board (trust me, it works) but simple enough to let the kids help with. If you’re looking for a way to get back into the kitchen groove as school starts, this is your win. It’s sweet, it’s seasonal, and it’s going to become a staple in your lunchbox rotation.
Why These Are the Ultimate Back-to-School Snack
There are about a dozen reasons I keep making these, but here’s the real talk on why they’ve replaced every store-bought fruit snack in my house.
Actually Tastes Like Fruit — Seriously. Store-bought versions taste like sugar and flavoring. These taste like summer. I’ve had friends try them blindfolded and they swear they’re buying them from a fancy artisanal candy shop. The natural tartness of the berries cuts through the honey perfectly.
Three Ingredients, Zero Stress — You need strawberries, honey, and lemon juice. That’s it. If you can blend fruit and spread it on a tray, you can make this. I’ve had my four-year-old help me stir the pot (with supervision, obviously), and he was so proud of his “big kid snack.” It’s a great way to get them interested in cooking early.
Perfectly Portable — These roll up beautifully. They don’t get squished in lunchboxes like fresh fruit sometimes does. I wrap them in parchment paper or plastic wrap, and they stay fresh for days. No more mushy apple slices or sad carrot sticks. This is a snack that survives the backpack journey.
Visually Stunning — I’m not going to lie, these look incredible. That deep, vibrant red color? It’s all natural. I’ve served these on a platter at a summer BBQ, and people were asking for the recipe before they even took a bite. They look like candy, but they’re actually good for you. It’s the ultimate parent hack.
Flexible Flavor Profile — While strawberry is my go-to, this method works with almost any berry. Raspberry, blueberry, blackberry—you name it. I’ve made mixed berry versions, and they’re just as good. It’s a recipe that grows with you and your pantry.
This is my go-to when I need a snack that feels special but requires zero effort. No complicated techniques, no weird ingredients, just reliable, delicious food that makes everyone happy. And honestly? It feels good to know exactly what my kids are eating.
What You’ll Need for This Recipe
Here’s the best part: you probably have most of this already in your kitchen. I’m particular about three things here, but honestly, the simplicity is the point.
Fresh or Frozen Strawberries (2 cups / 300g) — I use fresh when they’re in season and cheap, but frozen works just as well. In fact, frozen berries often break down easier, which means a smoother puree. Just make sure they’re thawed completely if you’re using frozen. I love using local berries in the summer—they’re sweeter and more aromatic.
Honey (2 tablespoons / 30ml) — This is your sweetener. I prefer honey because it adds a nice floral note that complements the berries. Maple syrup works too, if you want to keep it vegan. Don’t use white sugar; it doesn’t dissolve the same way and can make the roll-ups gritty. Honey keeps them chewy.
Lemon Juice (1 teaspoon / 5ml) — This is the secret weapon. It brightens up the flavor and balances the sweetness. It also helps preserve that vibrant red color. If you don’t have lemon, a tiny splash of vinegar works in a pinch, but lemon is best. Don’t skip this—it’s what makes the flavor pop.
Powdered Sugar (Optional, 1-2 tablespoons) — I usually skip this, but if your berries are super tart, a little powdered sugar can help. It dissolves instantly and doesn’t add crunch. I only use this when the berries are a bit green or sour.
Parchment Paper or Silicone Mat — You’ll need this for lining your baking sheet. I use a silicone mat because it’s reusable and nothing sticks to it. Parchment works fine too, but you might need a light spray of oil if the berries are very juicy.
Blender or Food Processor — A high-speed blender gives you the smoothest puree. If you’re okay with a few tiny seeds, a regular blender or even an immersion blender works. I like the smooth texture for these roll-ups, so I usually push my puree through a fine-mesh sieve to remove seeds. It’s an extra step, but it makes them feel more like candy.
Sharp Knife — For slicing the finished roll-ups. A pizza cutter works great too if you want straight edges.
Measuring Spoons — Standard stuff. Dollar store versions work fine.
Baking Sheet — Any size works, but I prefer a half-sheet pan because it gives me enough room to spread the puree thinly. If your pan is small, you might need to make two batches.
Whisk — For mixing the puree and honey. A silicone spatula works too.
Microplane or Fine-Mesh Sieve — Optional, but recommended for removing seeds. If you don’t mind the seeds, skip it. My kids don’t care, but I like the silky texture.
Equipment You’ll Actually Use
You don’t need fancy equipment for this. Here’s what I actually use.
Blender — I use my Vitamix, but any blender works. If you’re using frozen berries, a powerful blender helps break them down evenly.
Baking Sheet — I use a rimmed half-sheet pan. The rim keeps any juices from spilling over. Non-stick is nice, but not required.
Parchment Paper or Silicone Mat — I swear by my silicone mat. It’s eco-friendly and nothing sticks. Parchment is fine if you don’t have one, but you might need to grease it lightly.
Whisk or Spoon — For mixing. A silicone spatula is great for scraping the sides.
Measuring Cups and Spoons — Pretty standard stuff. Dollar store versions work fine.
Knife or Pizza Cutter — For slicing the finished roll-ups. A pizza cutter makes clean cuts without squishing them.
Optional but nice:
- Food Processor — If you don’t have a blender, this works well for chopping berries first.
- Dehydrator — Some people use a dehydrator instead of an oven. It takes longer (6-8 hours) but gives a more even dry. I prefer the oven for speed.
How to Make Homemade Strawberry Fruit Roll-Ups
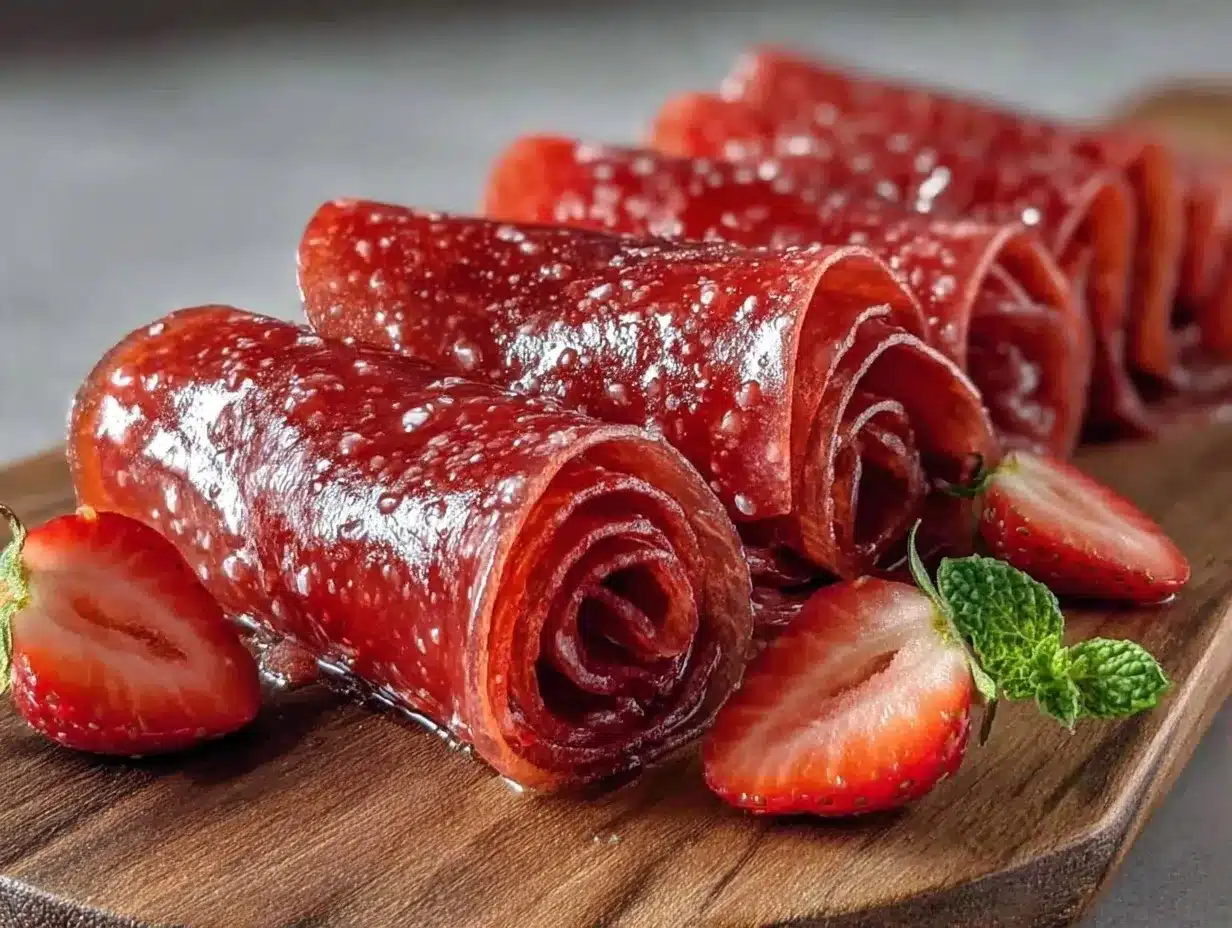
Alright, let’s make this! I’m walking you through exactly how I do it, including the little tricks I’ve picked up.
Step 1: Prep the Berries (5 minutes)
If you’re using fresh strawberries, wash them and hull them (remove the green tops). If you’re using frozen, let them thaw completely. I usually thaw them in a bowl in the fridge overnight. Once thawed, drain any excess liquid—too much water will make the roll-ups soggy and take forever to dry.
Step 2: Blend the Puree (2 minutes)
Toss the strawberries into your blender. Add the honey and lemon juice. Blend on high until completely smooth. This should take about 30-60 seconds. If you want seedless roll-ups, pour the puree through a fine-mesh sieve into a bowl, using a spoon to press the liquid through. Discard the seeds. This step is optional but makes a huge difference in texture.
Step 3: Spread the Puree (5 minutes)
Preheat your oven to 170°F (75°C). This is a low temperature—we’re drying, not baking. Line your baking sheet with parchment paper or a silicone mat. Pour the puree onto the sheet. Use a spatula to spread it out evenly. You want it about 1/8 inch thick. If it’s too thick, it won’t dry properly. If it’s too thin, it’ll be brittle. Aim for uniformity.
Step 4: Dry in the Oven (1.5-2 hours)
Place the baking sheet in the oven. Leave the door slightly ajar (stick a wooden spoon in the door to keep it open). This allows moisture to escape. Dry for 1.5 to 2 hours. The roll-ups are done when they’re no longer sticky to the touch and can be peeled off the paper easily. They should feel leathery, not crisp. If they’re still sticky, give them another 15-30 minutes.
Step 5: Roll and Slice (5 minutes)
Let the dried sheet cool completely on the counter. Once cool, gently lift the edge of the parchment paper. Starting from one end, roll the sheet up tightly. Use a sharp knife or pizza cutter to slice the roll into strips. I like them about 1 inch wide. If they’re sticking, dust your knife with a little powdered sugar.
Step 6: Store and Enjoy
Store the roll-ups in an airtight container between sheets of parchment paper. They’ll keep in the fridge for up to 2 weeks or in the freezer for up to 3 months. I usually keep a batch in the fridge for quick snacking.
Total Time: About 2.5 hours (mostly hands-off drying time)
Built-in Troubleshooting:
- Too sticky? Dry longer. Check every 15 minutes.
- Too brittle? You dried it too long. Next time, check earlier.
- Uneven drying? Make sure the puree is spread evenly. Thick spots take longer.
Expert Tips & Tricks
Here’s everything I’ve learned from making this dozens of times. These tips will save you from my mistakes.
Low and Slow is Key — Do not crank up the heat. If the oven is too hot, the outside will burn while the inside stays wet. 170°F is ideal. If your oven doesn’t go that low, prop the door open wider or use the lowest setting possible.
Remove the Seeds — I know it’s an extra step, but I highly recommend sieving the puree. Strawberry seeds are tiny, but they can be gritty in a smooth roll-up. If you don’t mind them, skip it. My kids don’t care, but I like the silky texture.
Uniform Thickness — The key to even drying is spreading the puree evenly. Use a spatula to smooth out any bumps. If one spot is thicker, it’ll take longer to dry and might stay sticky.
Use a Wooden Spoon in the Door — This is a classic baker’s trick. It lets moisture escape without losing too much heat. If you don’t have a wooden spoon, just leave the door cracked open a few inches.
Let Them Cool Completely — Hot roll-ups are sticky. Let them cool on the counter before rolling. If you try to roll them warm, they’ll stick to themselves. Patience pays off.
Dust with Powdered Sugar — If you’re serving these at a party, dust them lightly with powdered sugar before slicing. It looks pretty and adds a tiny bit of sweetness.
Try Different Berries — Raspberry, blueberry, and blackberry all work great. Just adjust the honey to taste—some berries are tarter than others. I’ve made mixed berry versions, and they’re delicious.
Make-Ahead Strategy — You can dry the sheets up to 3 days ahead. Store them flat in an airtight container in the fridge. Roll and slice them the day you want to serve them. They’re best fresh, but they hold up well.
Variations & Substitutions
Once you’ve nailed the basic strawberry version, here’s how you can mix it up. I’ve tried all of these.
Raspberry Roll-Ups — Swap strawberries for raspberries. Raspberries are tarter, so you might need a bit more honey. The color is stunning—a deep magenta. I love these for spring.
Blueberry Lemon — Use blueberries and add an extra teaspoon of lemon juice. The flavor is bright and tangy. Great for summer picnics.
Blackberry Mint — Add a few fresh mint leaves to the blender. It adds a refreshing kick. Blackberries are seedy, so sieve the puree for the best texture.
Mixed Berry — Use a mix of strawberries, raspberries, and blueberries. It’s a colorful, complex flavor. I use this when I have a bounty of different berries.
Gluten-Free — This recipe is naturally gluten-free. Just make sure your honey and berries are certified gluten-free if you have severe allergies.
Vegan — Use maple syrup or agave nectar instead of honey. Everything else is vegan-friendly.
Sugar-Free — Use a sugar-free honey alternative or stevia. The texture might be slightly different, but it’s a good option for low-sugar diets.
Serving & Storage
How to Serve: I usually serve these straight from the fridge—they’re chewy and cold, which is perfect. But here are other ways I’ve enjoyed them:
- Lunchbox Snack: Wrap them in parchment paper and toss them in the lunchbox. They stay fresh all day.
- Party Platter: Arrange them on a cheese board with crackers and cheese. The sweet and salty combo is amazing.
- Yogurt Topping: Slice them into small pieces and sprinkle them over yogurt. Adds a nice chew and sweetness.
Storage Instructions:
Refrigerator: Store in an airtight container with parchment paper between layers. They’ll keep for up to 2 weeks. They might get a bit harder in the fridge, but they soften at room temperature.
Freezer: Store in a freezer-safe bag or container. They’ll keep for up to 3 months. Thaw in the fridge before eating.
Room Temperature: I don’t recommend storing them at room temperature for more than a day, as they can get sticky and attract ants. The fridge is best.
Pro tip: If they get too sticky, dust them lightly with powdered sugar before serving. It absorbs the excess moisture.
Nutrition Information
I’m not a nutritionist, but here’s the breakdown if you’re tracking. These are estimates based on 10 roll-ups.
- Calories: 45 per roll-up
- Carbs: 10g
- Sugar: 8g (natural fruit sugar + honey)
- Fiber: 1g
- Protein: 0g
- Fat: 0g
What’s Good: No artificial colors or preservatives. Natural fruit sugars. Low calorie. Great for kids.
What to Know: Contains fruit sugar. If you’re watching sugar intake, be mindful of the honey. But compared to store-bought candy, this is a much healthier option.
My Take: Look, these are a treat. But they’re a *good* treat. Made with real fruit, no chemicals. I feel good giving these to my kids. When I want to make it lighter, I use less honey or swap to berries with lower sugar content. But usually? I just enjoy them as a sweet, wholesome snack.
Final Thoughts
So that’s my homemade strawberry fruit roll-up recipe! I’ve probably talked your ear off at this point, but when you make a recipe this often, you have a lot to say about it.
This has saved my sanity during back-to-school season. It’s my answer to “what’s for snack?” when I’m tired, don’t want to buy processed stuff, and still want something that tastes really good. My kids are happy, I’m happy because I’m not stressed about ingredients, and I’m happy because I get to make something special in my kitchen.
Make it yours! Try different berries, adjust the sweetness, or add a splash of vanilla. The best recipes are the ones you adapt to your family’s tastes. And if you’re looking for other healthy snack ideas, check out my healthy banana oat cookies or my no-bake energy balls for more kid-approved treats.
If you make this, drop a comment and let me know what you think! I love hearing how recipes turn out in your kitchen. And if something doesn’t work, tell me that too—I’m here to help troubleshoot.
Happy snacking! And I hope your kitchen smells half as good as mine does right now.
Frequently Asked Questions
Can I use fresh berries instead of frozen?
Absolutely! Fresh berries work great, especially in season. Just make sure they’re ripe and sweet. If your berries are a bit tart, you might need a little more honey. Frozen berries are convenient and often cheaper, but fresh has a brighter flavor. I use both depending on what’s available.
Why did my roll-ups turn out sticky?
They probably didn’t dry long enough. Oven drying is a slow process. Check them every 15-20 minutes once they’re close to done. They should feel leathery and not sticky to the touch. If they’re still tacky, give them another 15-30 minutes. Also, make sure your oven temperature is accurate—some ovens run hot or cold.
Can I make these in a dehydrator?
Yes! A dehydrator works beautifully for this. Set it to 135°F (57°C) and dry for 6-8 hours. The texture might be slightly more even, and you don’t need to prop the door open. Just make sure the puree is spread evenly on the dehydrator sheets. It’s a bit more time-consuming but very hands-off.
How long do these last?
In the fridge, they’ll last up to 2 weeks in an airtight container. In the freezer, up to 3 months. At room temperature, I’d recommend eating them within 1-2 days, as they can get sticky and attract bugs. The fridge is the best place for long-term storage.
Can I use a different sweetener?
Yes! Maple syrup, agave nectar, or even a sugar-free alternative like stevia or monk fruit can work. Keep in mind that different sweeteners have different consistencies, so you might need to adjust the amount. Honey is my favorite because it adds a nice flavor and keeps the texture chewy.
Why are my roll-ups too brittle?
You probably dried them too long. They should be leathery, not crisp. If they’re brittle, they’ll snap when you try to roll them. Next time, check them earlier. They should still have some flexibility when you take them out of the oven. They’ll firm up slightly as they cool.
Can I add other flavors?
Definitely! Try adding a teaspoon of vanilla extract, a pinch of cinnamon, or a few fresh mint leaves. You can also mix in different berries for a more complex flavor. I’ve added a splash of orange juice to strawberry puree, and it was delicious. Get creative!
Pin This Recipe!

Homemade Strawberry Fruit Roll-Ups: Perfect 3-Ingredient Back to School Snack
- Total Time: 2.5 hours
- Yield: 10 roll-ups 1x
Description
These homemade strawberry fruit roll-ups are a simple, healthy, and kid-approved snack made with just three ingredients: strawberries, honey, and lemon juice. They are chewy, vibrant, and perfect for lunchboxes or parties.
Ingredients
- 2 cups (300g) fresh or frozen strawberries
- 2 tablespoons (30ml) honey
- 1 teaspoon (5ml) lemon juice
- 1–2 tablespoons powdered sugar (optional, for tart berries)
- Parchment paper or silicone mat
Instructions
- Preheat oven to 170°F (75°C). Line a baking sheet with parchment paper or a silicone mat.
- If using fresh strawberries, wash and hull them. If using frozen, thaw completely and drain excess liquid.
- Combine strawberries, honey, and lemon juice in a blender. Blend on high until smooth.
- For a smoother texture, press the puree through a fine-mesh sieve to remove seeds.
- Spread the puree evenly onto the prepared baking sheet, aiming for about 1/8 inch thickness.
- Place in the oven and dry for 1.5 to 2 hours, leaving the door slightly ajar to allow moisture to escape.
- The roll-ups are done when they are no longer sticky to the touch and feel leathery.
- Let the dried sheet cool completely on the counter.
- Roll the sheet up tightly and slice into strips using a sharp knife or pizza cutter.
- Store in an airtight container with parchment paper between layers.
Notes
Ensure the puree is spread evenly for uniform drying. If using frozen berries, make sure to drain excess liquid to prevent sogginess. The oven temperature should be low (170°F) to dry rather than bake. If your oven doesn’t go that low, prop the door open wider. These can be made with other berries like raspberry, blueberry, or blackberry.
- Prep Time: 12 minutes
- Cook Time: 1.5-2 hours
- Category: Snack
- Cuisine: American
Nutrition
- Serving Size: 1 roll-up
- Calories: 45
- Sugar: 8
- Carbohydrates: 10
- Fiber: 1
Keywords: homemade fruit roll-ups, strawberry snack, back to school snacks, healthy kids snacks, 3 ingredient recipe, gluten-free snack, vegan snack option


