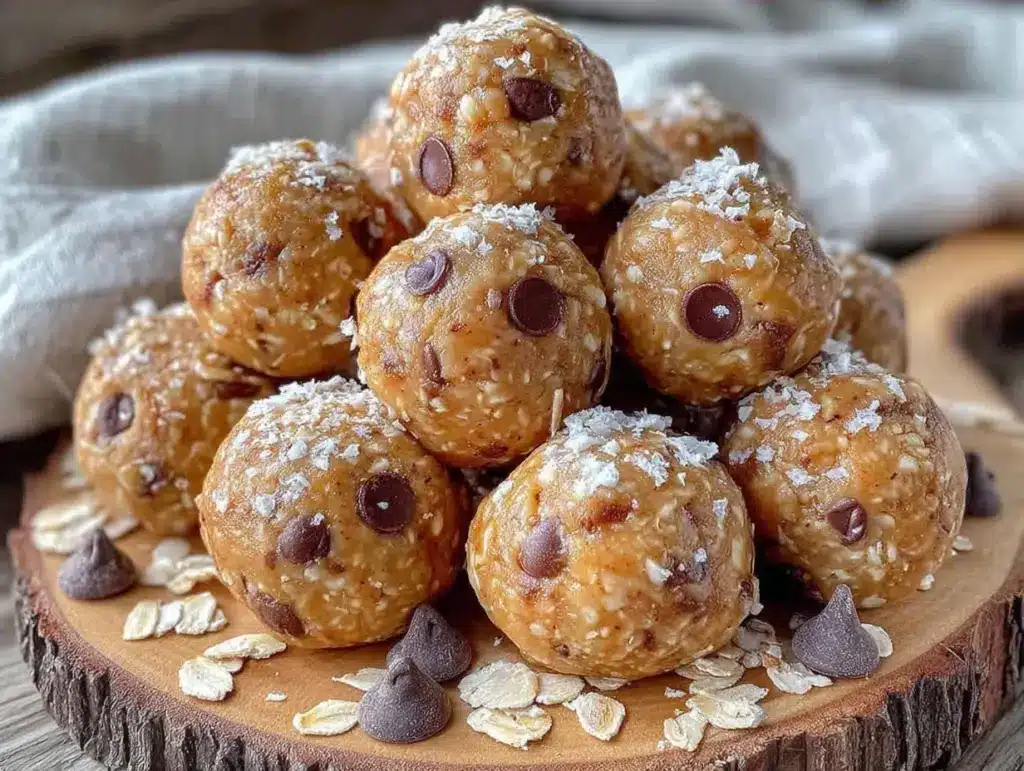
Let’s be honest for a second. The “back to school” rush is not just about buying new notebooks or ironing shirts. It’s about survival. It’s about that 7:00 AM scramble when your brain is still buffering and your kids are asking if they can have juice for breakfast. (The answer is no, but I don’t have the energy to argue yet.)
I used to spend Sunday mornings wrestling with oatmeal or trying to get pancakes to not burn. But after three years of this morning chaos, I found a shortcut that actually tastes like a treat, not a health compromise. These back to school peanut butter banana energy bites are my secret weapon. They’re no-bake, they come together in ten minutes, and they taste like a cookie without the sugar crash.
The best part? You make them once, and they become the thing everyone in the house grabs. My kids call them “PB balls.” I call them “sanity in a bite-sized package.” They’re soft, chewy, and packed with just enough natural sweetness to get us through that first period of the day.
I’ve tested this recipe with everything from creamy to crunchy peanut butter, and I’ve learned a few tricks to keep them from falling apart. This isn’t just a snack; it’s a strategy. And once you try them, you’ll be making a batch every single week. Trust me.
Why You’ll Love This Recipe
There are a lot of “healthy” snacks out there that taste like cardboard or regret. These energy bites are different. They’re rich, satisfying, and genuinely delicious. Here’s why they’ve earned a permanent spot in my fridge:
Zero Cooking Required — Seriously. If you can mix things in a bowl, you can make these. No oven, no stove, no mess. I make these on Tuesday nights when I’m too tired to stand over a pot. It’s pure magic.
Grab-and-Go Convenience — This is the ultimate lunchbox hack. You pack them in a container, toss them in a backpack, and suddenly breakfast is handled. No more buying overpriced granola bars at the gas station. These travel better than anything in a wrapper.
Only Five Ingredients — You probably have everything right now. Oats, peanut butter, honey, banana, and chocolate chips. That’s it. No weird powders or hard-to-find superfoods. Just real food that actually tastes good.
Customizable for Picky Eaters — Hate chocolate chips? Use raisins. Allergic to nuts? Swap in sunflower seed butter. I’ve made these with flaxseed, chia seeds, and even a dash of cinnamon. They adapt to whatever you have in your pantry.
Meal Prep Friendly — They keep for two weeks in the fridge or three months in the freezer. I make a double batch every other Sunday. It’s one less thing to worry about during the week. Real talk? This recipe has saved me more times than I can count.
Ingredients You’ll Need
Here’s the thing about these energy bites: simplicity is key. You don’t need fancy ingredients. You just need good quality basics. I’m particular about the peanut butter and the oats, so pay attention to those details.
For the Base
Rolled Oats (2 cups / 160g) — Use old-fashioned rolled oats, not instant or quick-cook. Instant oats turn these into mush. I buy the big canister of Quaker or store-brand rolled oats. They hold their structure and give that nice chewy texture.
Ripe Bananas (2 medium / about 1 cup mashed) — This is crucial. They need to be spotty-brown ripe bananas. If they’re yellow, they’re not sweet enough and the mixture will be too dry. If you don’t have ripe bananas, mash them and microwave for 30 seconds to soften. But really, just wait for the brown spots.
Peanut Butter (½ cup / 128g) — I prefer creamy natural peanut butter because it binds better. If you use crunchy, chop the peanuts finer so the bites hold together. Avoid peanut butter with added oil if you can help it; the separation can make the mixture greasy.
For the Sweetness & Texture
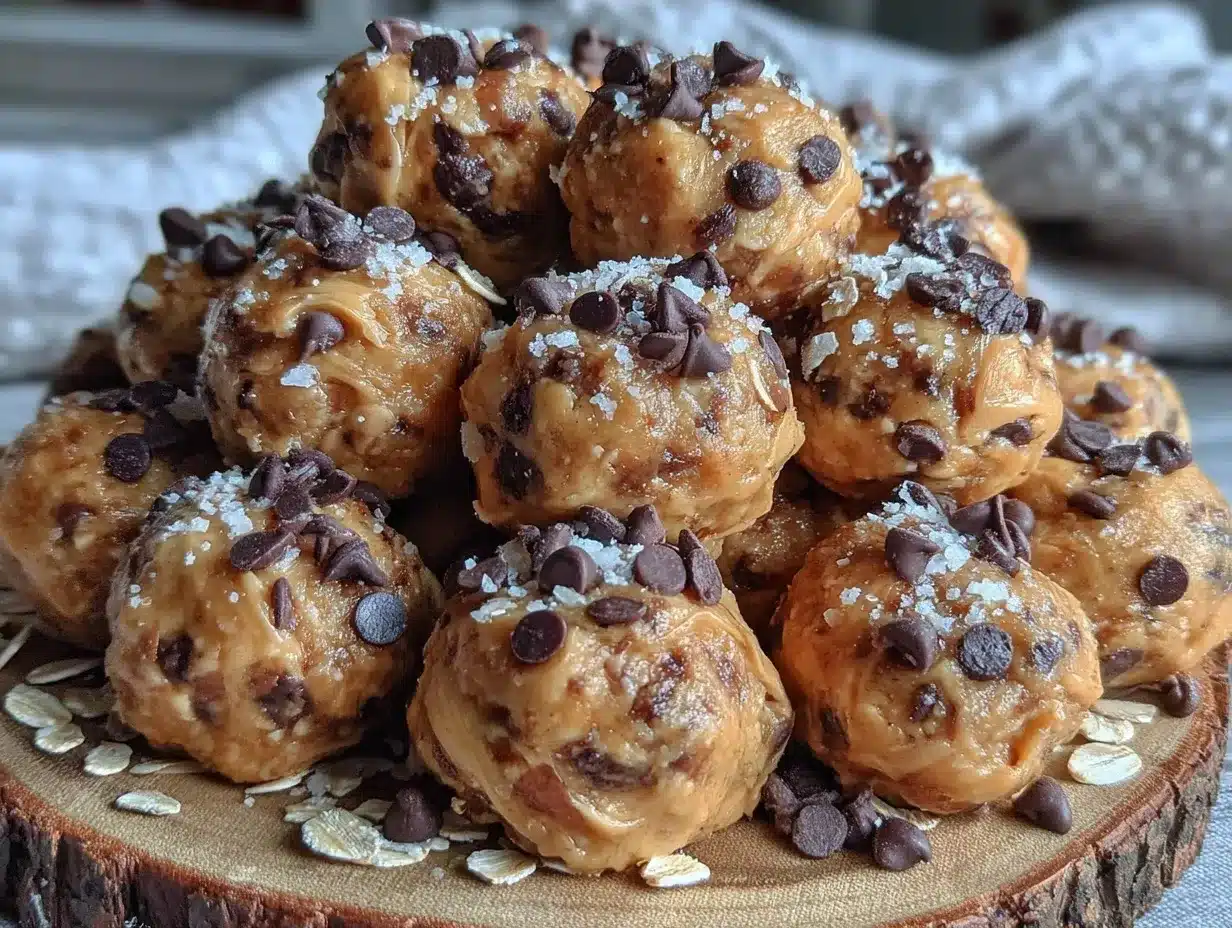
Honey (¼ cup / 85g) — Honey acts as the glue. Maple syrup works too, but the bites will be softer and stickier. I stick with honey for that classic flavor. Use raw honey if you have it for extra nutrition, but regular works fine.
Mini Chocolate Chips (½ cup / 85g) — Mini chips distribute evenly. Regular chips create huge chocolate chunks that might throw off the ratio. Semi-sweet or milk chocolate both work. I like semi-sweet to balance the sweetness of the banana.
Optional Boosters
Flaxseed Meal (2 tablespoons) — Adds omega-3s and helps bind the mixture. I always add this for an extra health kick. Ground flax is mild and doesn’t change the taste.
Vanilla Extract (1 teaspoon) — Just a splash to round out the flavors. It makes them taste more like a dessert.
Salt (a pinch) — Always add a pinch of salt. It makes the peanut butter taste nuttier and balances the sweet. Don’t skip it.
Equipment Needed
You don’t need any fancy gadgets for this. Here’s what I actually use:
Large Mixing Bowl — I use a 4-quart stainless steel bowl. It needs to be big enough to mix everything without making a mess. Plastic works too, but stainless is easier to clean.
Fork or Spatula — For mashing the bananas and mixing the dough. A sturdy silicone spatula is best because it scrapes the sides clean.
Measuring Cups and Spoons — Standard stuff. I use the nesting set from IKEA. They’re cheap and accurate.
Airtight Container — Glass or plastic. I like glass because it doesn’t stain from the peanut butter. Store the bites here once they’re chilled.
Parchment Paper — To line the plate or tray while you roll the balls. Keeps them from sticking.
How to Make It: Step-by-Step
Alright, let’s make these! It’s super simple, but there are a few tricks to get the texture just right. I’m walking you through exactly how I do it.
Step 1: Mash the Bananas (2 minutes)
In your large bowl, peel the bananas and mash them with a fork until there are no large chunks left. You want a smooth puree. If you leave big chunks, the bites won’t hold together well. Get it nice and creamy.
Step 2: Add the Wet Ingredients (1 minute)
Add the peanut butter and honey to the mashed bananas. Stir vigorously with your spatula. The mixture will be sticky and thick. If it’s too dry, add a teaspoon more honey. If it’s too wet, add a tablespoon more oats. You’re looking for a consistency like thick cookie dough.
Step 3: Mix in the Dry Ingredients (2 minutes)
Add the rolled oats, flaxseed (if using), vanilla, and salt. Stir until everything is evenly coated. The oats will absorb some moisture, so the mixture will start to stiffen. It should look like a shaggy dough. If it’s too crumbly, mash in a little more banana.
Step 4: Fold in the Chocolate Chips (1 minute)
Gently fold in the mini chocolate chips. Be careful not to overmix now, or you’ll break up the chips. Just distribute them evenly throughout the dough.
Step 5: Chill the Dough (15-30 minutes)
This is the step most people skip, but don’t. Cover the bowl and refrigerate for at least 15 minutes. Cold dough is much easier to roll. If you skip this, the peanut butter will be too soft and sticky, and you’ll end up with a mess on your hands.
Step 6: Roll the Bites (5 minutes)
Take a tablespoon-sized portion of dough and roll it between your palms to form a ball. Place on a parchment-lined plate. Repeat until all dough is used. You should get about 20-24 bites. Keep them uniform in size so they chill evenly.
Step 7: Set and Store
Once rolled, put the plate back in the fridge for another 15 minutes to firm up. Then transfer them to an airtight container. They’re ready to eat!
Expert Tips & Tricks
Here’s everything I’ve learned from making these dozens of times. These tips will save you from my mistakes.
Banana Ripeness is Non-Negotiable
I cannot stress this enough. If your bananas are green or yellow, these bites will not work. They need to be fully ripe, with brown spots all over. The riper the banana, the sweeter and softer the final product. I keep a bag of bananas on the counter until they’re almost black. That’s when I make these.
Don’t Skip the Chill
I know you’re eager to eat them. I do too. But warm peanut butter is sticky and messy. Chilling firms up the fats in the peanut butter and the banana, making them easy to handle. If you’re in a huge rush, you can put them in the freezer for 10 minutes instead of the fridge.
Adjust for Weather
If you live in a hot climate, these might get soft in your lunchbox. Add an extra tablespoon of oats or a tablespoon of flaxseed to help them hold their shape. Or just keep them in a cooler bag with an ice pack.
Rolling Technique
If the dough is sticking to your hands, wet your hands slightly with water before rolling. It helps prevent sticking without making the dough wet. Or, lightly grease your hands with a tiny bit of peanut butter.
Storage Hack
Store them in a single layer if possible. If you stack them, put parchment paper between the layers. They can stick together if pressed against each other for too long.
Variations & Substitutions
Once you’ve nailed the basic version, here’s how you can mix it up. I’ve tried all of these, and they’re all winners.
Almond Butter Version
Swap peanut butter for almond butter. It’s slightly more expensive but tastes incredible. The bites will be a bit drier, so you might need an extra tablespoon of honey.
Trail Mix Style
Add ¼ cup of mini marshmallows or dried cranberries along with the chocolate chips. Great for kids who want something fun.
Protein-Packed
Add 1 scoop of vanilla protein powder. Note: This will absorb moisture, so you may need to add a splash of milk or an extra banana to keep it moist. I use whey isolate for best results.
Coconut Lover’s
Add ¼ cup of shredded coconut and swap chocolate chips for white chocolate chips. Tropical vibes!
Gluten-Free
Use certified gluten-free oats. Most oats are fine, but cross-contamination is real if you’re sensitive. Otherwise, the recipe is naturally gluten-free.
Nut-Free
Use sunflower seed butter or soy nut butter instead of peanut butter. The texture is slightly different but still tasty. Great for school-safe lunches.
Serving & Storage
How to Serve:
These are best served cold. Straight from the fridge, they’re firm and chewy. I pack them in small containers for lunchboxes or grab them for a quick snack before soccer practice. They pair well with a glass of cold milk or a smoothie.
Refrigerator:
Store in an airtight container for up to 2 weeks. They actually get firmer and more cookie-like after a few days, which I love.
Freezer:
These freeze beautifully. Place them on a baking sheet in the freezer for an hour, then transfer to a freezer bag. They’ll last for 3 months. Thaw in the fridge for 10 minutes before eating. I keep a stash in the freezer for busy mornings.
Meal Prep:
Make a double batch on Sunday. They keep well, so you’re set for the whole week. Just keep them in the fridge until you’re ready to pack them.
Nutrition Information
I’m not a nutritionist, but here’s the breakdown if you’re tracking. Keep in mind these are estimates based on standard ingredients.
Per Serving (1 bite, based on 20 bites):
- Calories: 110
- Protein: 3g
- Carbs: 14g
- Fiber: 1g
- Sugar: 8g
- Fat: 5g
What’s Good:
- Good source of energy from oats and banana
- Healthy fats from peanut butter
- Protein helps keep you full
What to Know:
- Higher in sugar from banana and honey, but it’s natural sugar
- Contains peanuts (tree nuts can be substituted)
- Calories add up quickly if you eat a lot—moderation is key!
My Take:
Look, these are treats. They’re not a vegetable. But they’re way better than a granola bar full of corn syrup. I use them as a pre-workout snack or a mid-morning boost. They give me energy without the crash. When I want to make them lighter, I reduce the chocolate chips and add more oats. But usually? I just enjoy them and move on.
Final Thoughts
So that’s my go-to back to school peanut butter banana energy bites! I’ve probably talked your ear off at this point, but when you make a recipe this often, you have a lot to say about it.
This has saved me more mornings than I can count. It’s my answer to “what’s for breakfast” when I’m tired, don’t want to cook, and still want something that tastes really good. My kids are happy, I’m happy, and we’re all ready for the day.
Make it yours! Try different add-ins, swap in your favorite nut butter, adjust the sweetness. The best recipes are the ones you adapt to your family’s tastes.
If you make this, drop a comment and let me know what you think! I love hearing how recipes turn out in your kitchen. And if something doesn’t work, tell me that too—I’m here to help troubleshoot.
Happy cooking! And I hope your kitchen smells half as good as mine does right now.
Frequently Asked Questions
Can I use quick oats instead of rolled oats?
You can, but the texture will be different. Quick oats are finer and will make the bites denser and less chewy. Rolled oats give that nice, substantial bite. If you only have quick oats, it’s better than nothing, but rolled is ideal.
Why are my energy bites falling apart?
Usually means the mixture is too dry. This happens if your bananas aren’t ripe enough or if you added too many oats. Mash the bananas more thoroughly or add a teaspoon of honey or milk to bind it. Also, make sure you chilled the dough before rolling—cold dough holds together better.
Can I make these ahead for the week?
Absolutely! That’s the best part. Make them on Sunday and store them in the fridge. They’ll last for two weeks. Just keep them in an airtight container. I make a batch every other week, so I always have some ready to go.
Are these safe for school?
Many schools are nut-free. If your school has a nut-free policy, swap the peanut butter for sunflower seed butter or soy nut butter. The recipe works perfectly with those substitutions. Check your school’s guidelines first!
Can I freeze these?
Yes! They freeze very well. Place them on a baking sheet in the freezer for an hour, then transfer to a freezer bag. They’ll last for 3 months. Thaw in the fridge for 10 minutes before eating. They taste just as good frozen as they do fresh.
How do I keep them from sticking to my hands?
Wet your hands slightly with water before rolling. Or, lightly grease your hands with a tiny bit of peanut butter. This prevents sticking without making the dough wet. It’s a small trick that makes a huge difference.
Pin This Recipe!


Back to School Peanut Butter Banana Energy Bites
- Total Time: 45 minutes
- Yield: 20-24 servings 1x
Description
No-bake, grab-and-go energy bites made with just five simple ingredients. These soft, chewy bites are perfect for busy mornings and lunchboxes, offering a healthy treat without the sugar crash.
Ingredients
- 2 cups old-fashioned rolled oats
- 2 medium ripe bananas (mashed)
- 1/2 cup creamy natural peanut butter
- 1/4 cup honey
- 1/2 cup mini chocolate chips
- 2 tablespoons flaxseed meal (optional)
- 1 teaspoon vanilla extract (optional)
- 1 pinch salt
Instructions
- In a large bowl, peel and mash the bananas with a fork until smooth.
- Add the peanut butter and honey to the mashed bananas and stir vigorously until combined.
- Add the rolled oats, flaxseed (if using), vanilla, and salt. Stir until evenly coated and the mixture resembles thick cookie dough.
- Gently fold in the mini chocolate chips.
- Cover the bowl and refrigerate the dough for at least 15-30 minutes to firm up.
- Take tablespoon-sized portions of dough and roll between palms to form balls. Place on a parchment-lined plate.
- Refrigerate the rolled bites for another 15 minutes to set, then transfer to an airtight container.
Notes
Ensure bananas are very ripe (spotty-brown) for sweetness and binding. If the dough is too sticky, wet your hands slightly with water before rolling. Store in the fridge for up to 2 weeks or freeze for up to 3 months.
- Prep Time: 10 minutes
- Cook Time: 0 minutes
- Category: Snack
- Cuisine: American
Nutrition
- Serving Size: 1 bite
- Calories: 110
- Sugar: 8
- Sodium: 50
- Fat: 5
- Saturated Fat: 1
- Carbohydrates: 14
- Fiber: 1
- Protein: 3
Keywords: energy bites, no bake, peanut butter, banana, healthy snack, back to school, meal prep, gluten-free option, nut-free option


