I’ve always been the person who shows up to a party with a store-bought pie. It’s efficient, sure, but it’s also a little sad, isn’t it? Last month, I hosted a small get-together for some friends, and I decided to finally tackle the recipe I’d been putting off for years: brown butter chocolate chip cookies. I was nervous. I’d heard the rumors—that browning butter is risky, that the timing is tricky, that they might just be fancy cookies that don’t taste like comfort food.
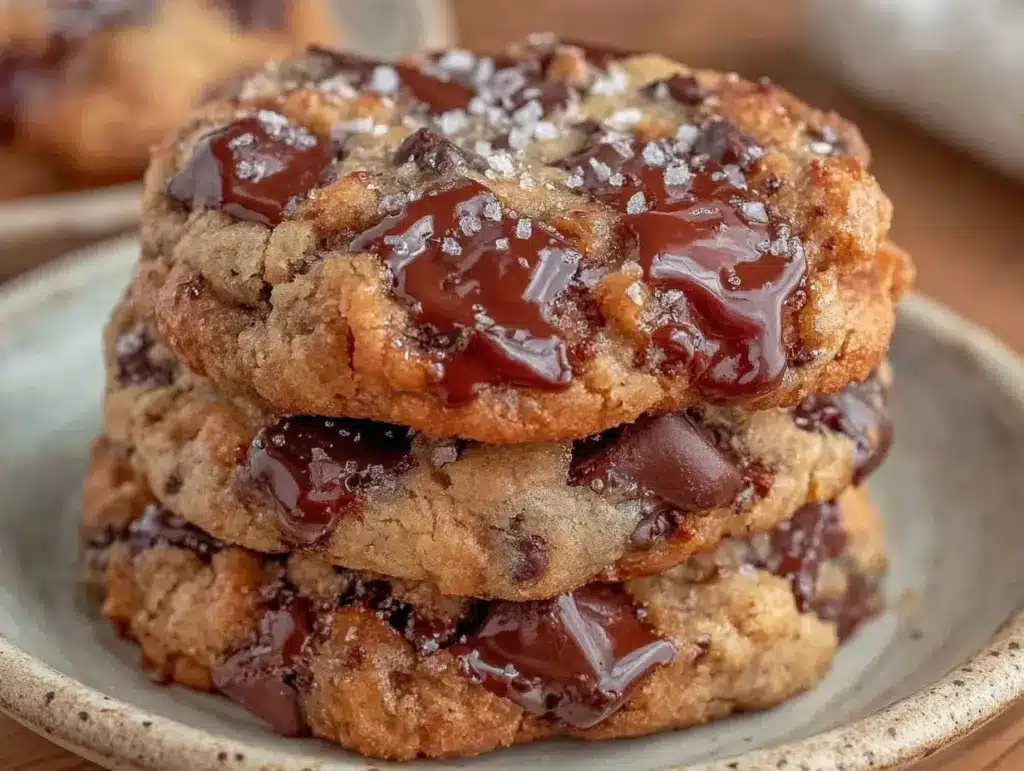
But then I pulled that first batch out of the oven. The kitchen didn’t just smell like chocolate; it smelled like caramel, toasted nuts, and pure nostalgia. The cookies were golden around the edges with those deep, browned butter pools, and when I bit into one, the center was soft, chewy, and impossibly rich. They were better than takeout. Better than any bakery in town. My friends didn’t even care about the savory courses; they were circling the plate of cookies like hawks.
That was the moment I realized these aren’t just cookies. They’re a vibe. They’re the kind of treat that makes people stop talking and start savoring. I’ve tested this brown butter chocolate chip cookie recipe over a dozen times, tweaking the bake time and the flour ratio until I got that perfect chewy center. It’s become my go-to for impressing guests or just treating myself on a quiet Sunday. If you’re looking to upgrade your baking game, this is the one.
Why You’ll Love This Brown Butter Chocolate Chip Cookie Recipe
There are a million cookie recipes out there, but this brown butter chocolate chip cookie recipe stands out for reasons that go beyond just taste. Here’s why I keep making it:
- Deep, Complex Flavor — Browning the butter adds a nutty, caramel-like depth that regular melted butter just can’t match. It’s subtle but transformative. You’ll taste it immediately.
- Chewy, Gooey Centers — I’ve mastered the balance of flour and sugar to ensure the centers stay soft and chewy, even after cooling. No dry, cakey cookies here.
- Restaurant-Quality Look — These cookies have a rustic, professional appearance with cracked tops and golden edges. They look as good as they taste, making them perfect for plating.
- Make-Ahead Friendly — The dough can be chilled for up to three days, which actually improves the flavor. Perfect for planning ahead if you’re hosting a dinner party.
- Shareable & Impressive — These cookies are rich enough to be served as a dessert but casual enough to be a snack. They disappear fast, so I always make a double batch.
Whether you’re serving them alongside a cheese board at a weekend dinner party or enjoying them with a glass of milk on a cozy night in, these cookies bring a level of indulgence that feels special. They’re not just a recipe; they’re an experience.
Ingredients You’ll Need for the Best Brown Butter Chocolate Chip Cookies
Here’s the thing about this brown butter chocolate chip cookie recipe: the ingredients are simple, but the quality matters. You don’t need anything fancy, but you do need to pay attention to a few key items.
For the Brown Butter Base
Unsalted butter (1 cup / 226g) — I use high-quality butter like Plugrá or Kerrygold. The flavor of the butter shines through, so don’t skimp. Salted butter can work, but you’ll need to reduce the added salt.
All-purpose flour (2 ¼ cups / 280g) — The backbone of the cookie. I measure by spooning and leveling for accuracy. Cup-and-sweep can lead to dry cookies.
Baking soda (1 teaspoon) — Essential for spread and chew. Make sure it’s fresh; old baking soda won’t give you that rise.
Kosher salt (1 teaspoon) — Enhances the chocolate and balances the sweetness. I use Diamond Crystal, but adjust if you use table salt.
Brown sugar (1 cup / 200g, packed) — Adds moisture and chew. Dark brown sugar gives a deeper molasses flavor.
Granulated sugar (½ cup / 100g) — Helps with crisp edges. Don’t skip this; it provides structure.
Vanilla extract (2 teaspoons) — Use pure vanilla, not imitation. It’s a key flavor note.
Eggs (1 large + 1 yolk) — The whole egg adds structure, and the extra yolk adds richness and chew. Room temperature is best.
Chocolate chips (2 cups / 340g) — I use a mix of semi-sweet and dark chocolate chunks. High-quality chocolate makes a huge difference. I also love adding flaky sea salt on top for contrast.
Optional but Recommended
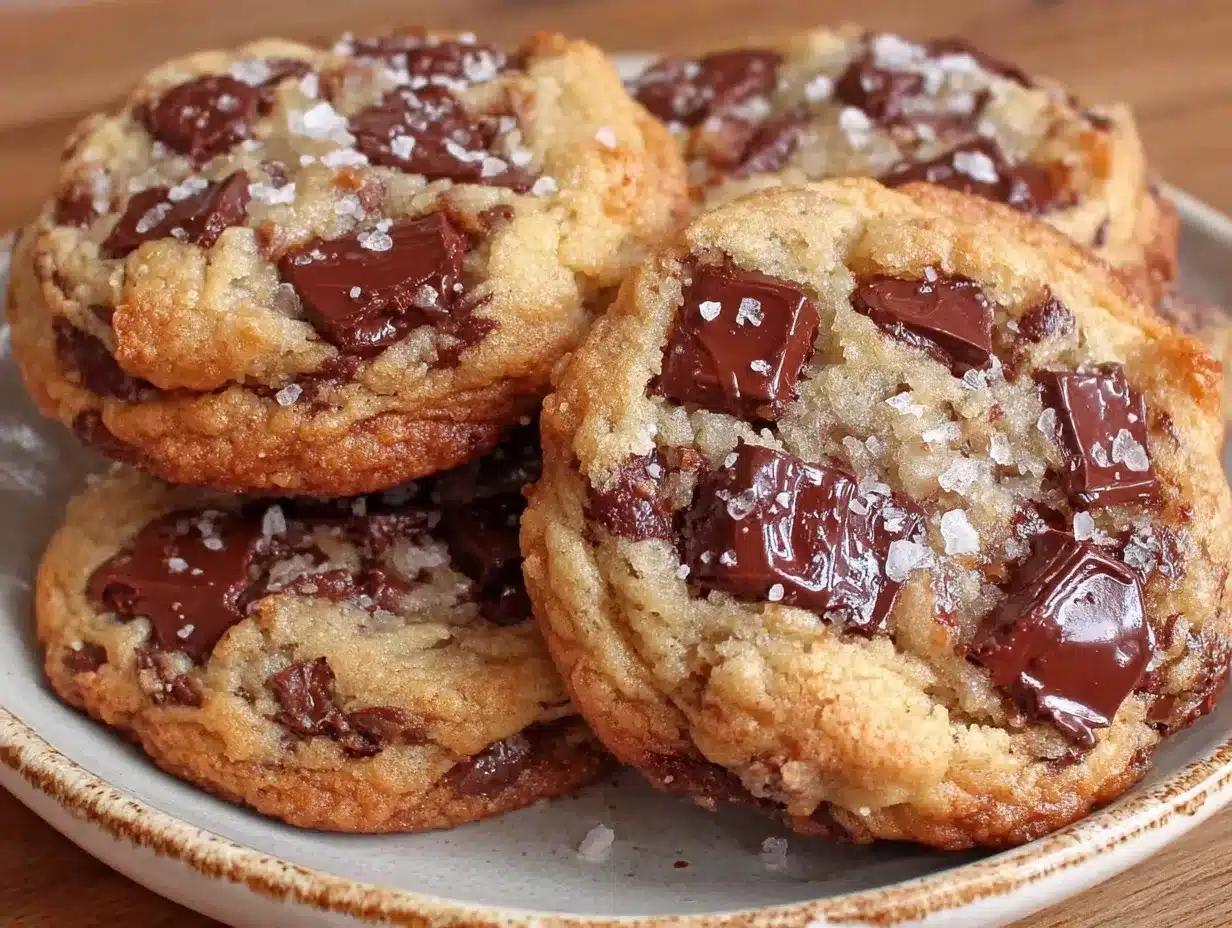
Flaky sea salt — Sprinkle on top right after baking. It’s non-negotiable for me.
Vanilla bean paste — If you want to elevate the vanilla flavor, swap the extract for paste. It adds beautiful specks and depth.
Equipment Needed
You don’t need anything fancy, but a few tools make this process smoother.
Saucepan — A light-colored stainless steel or aluminum pan is best so you can see the butter browning. Dark pans can hide the color changes.
Stand mixer or hand mixer — Mixing the brown butter with sugar and eggs is easier with a mixer, but you can do it by hand if you’re strong.
Baking sheets — Heavy-gauge aluminum sheets are ideal. They distribute heat evenly. I line them with parchment paper for easy cleanup.
Cooling rack — Essential for stopping the cooking process and keeping the bottoms from getting soggy.
Mixing bowls — One large bowl for wet ingredients, one for dry.
Ice cream scoop or cookie scoop — Ensures uniform size and shape. Uniformity means even baking.
Whisk — For combining the dry ingredients.
How to Make Brown Butter Chocolate Chip Cookies: Step-by-Step
Alright, let’s get into the nitty-gritty. This brown butter chocolate chip cookie recipe is straightforward, but there are a few tricks to get it right.
Step 1: Brown the Butter (10 minutes)
Start by melting the butter in a saucepan over medium heat. Stir frequently. It will foam up, then subside. Keep watching. You’ll see the milk solids turn golden brown and smell like toasted nuts. This is the key to the flavor. It takes about 5-7 minutes. Don’t walk away!
Once it’s brown, immediately pour it into a heatproof bowl to stop the cooking. Let it cool for 10-15 minutes until it’s still liquid but not hot.
Step 2: Mix the Wet Ingredients (5 minutes)
In a large bowl, combine the cooled brown butter, brown sugar, and granulated sugar. Whisk vigorously for about 2 minutes until the mixture is smooth and glossy. This incorporates air and helps with chew.
Add the egg, egg yolk, and vanilla extract. Whisk again until fully combined. The mixture should look thick and shiny.
Step 3: Combine the Dry Ingredients (2 minutes)
In a separate bowl, whisk together the flour, baking soda, and salt. Make sure there are no lumps of baking soda.
Step 4: Bring It All Together (3 minutes)
Gradually add the dry ingredients to the wet ingredients. Mix on low speed or by hand until just combined. Do not overmix. Overmixing develops gluten, which leads to tough cookies.
Stir in the chocolate chips. Fold them in gently.
Step 5: Chill the Dough (30 minutes to 3 days)
This step is crucial for flavor and texture. Cover the bowl and refrigerate the dough for at least 30 minutes. If you can, chill it for 24-48 hours. This allows the flour to hydrate and the flavors to meld. It also prevents the cookies from spreading too thin.
Step 6: Bake (12-14 minutes)
Preheat your oven to 350°F (175°C). Line baking sheets with parchment paper.
Scoop the dough onto the sheets, spacing them about 2 inches apart. I use a 2-tablespoon scoop for standard-sized cookies.
Bake for 12-14 minutes. The edges should be golden brown, but the centers should still look slightly underdone and soft. They will set as they cool.
Sprinkle with flaky sea salt immediately after removing from the oven.
Step 7: Cool (10 minutes)
Let the cookies cool on the baking sheet for 5 minutes, then transfer to a wire rack to cool completely. They will continue to cook slightly on the sheet.
Expert Tips for Perfect Chewy Centers
Here’s everything I’ve learned from making these cookies dozens of times. These tips will save you from my mistakes.
Brown the Butter Correctly
Don’t rush this. If you burn the butter, it will taste bitter. Aim for a deep amber color and a nutty aroma. If you’re unsure, err on the side of lighter. You can always brown it more, but you can’t un-burn it.
Chill the Dough
I can’t stress this enough. Chilling the dough is what gives these cookies their dense, chewy texture. If you skip this step, you’ll get thinner, cakier cookies. Plan ahead.
Underbake Slightly
Take the cookies out when they look soft in the center. They will firm up as they cool. If you bake them until they look done in the oven, they’ll be dry. We want chewy, not crisp.
Use High-Quality Chocolate
Chocolate chips are fine, but chopped chocolate bars give you those beautiful, irregular chunks and better melt. I use a mix of both for texture and flavor.
Don’t Overmix
Once you add the flour, mix until you no longer see dry streaks. Overmixing makes the cookies tough.
Variations & Substitutions
Once you’ve nailed the basic version, here’s how you can mix it up. I’ve tried all of these.
Add-Ins
Pretzels — Crushed pretzels add a salty crunch that pairs perfectly with the brown butter. I love this combo.
Toasted Pecans or Walnuts — Adds a nice crunch and nutty flavor. Toast them first for extra depth.
White Chocolate Chips — Swap half the dark chocolate for white chocolate for a sweeter, creamier cookie.
Espresso Powder — Add 1 teaspoon of instant espresso powder to the dry ingredients. It enhances the chocolate flavor without making the cookies taste like coffee.
Dietary Modifications
Gluten-Free — Use a 1:1 gluten-free flour blend. The texture will be slightly different but still delicious.
Dairy-Free — Use a high-quality dairy-free butter alternative. The browning process works similarly, but the flavor will be slightly different.
Serving & Storage
How to serve these cookies? They’re versatile. I often serve them warm with a scoop of vanilla ice cream for a dessert course. They also pair beautifully with a strong black coffee or a glass of cold milk.
For storage, keep them in an airtight container at room temperature for up to 5 days. If you’re meal-prepping, you can freeze the dough balls for up to 3 months. Bake them straight from frozen, adding 1-2 minutes to the bake time.
To reheat, warm them in the microwave for 10-15 seconds. They’ll be soft and gooey again.
Nutrition Information
I’m not a nutritionist, but here’s the breakdown if you’re tracking. These are indulgent cookies, so enjoy in moderation.
Per Cookie (approx. 12 cookies per batch):
- Calories: 220
- Protein: 3g
- Carbs: 28g
- Fat: 12g
- Sugar: 18g
Look, this is a treat. It’s not a health food. But it’s homemade, so you know exactly what’s in it. When I’m having these, I’m having these. No guilt, just enjoyment.
Final Thoughts
So that’s my brown butter chocolate chip cookie recipe! I hope you give it a try. These cookies have become a staple in my kitchen, and I think they’ll become a staple in yours too. They’re rich, chewy, and incredibly flavorful. Perfect for sharing or savoring all to yourself.
If you make these, I’d love to hear how they turn out. Drop a comment below and let me know what you think. And if you’re looking for more dessert inspiration, check out my classic chocolate cake for a richer treat, or my lemon bars for something bright and tangy.
Happy baking! And I hope your kitchen smells as amazing as mine does right now.
Frequently Asked Questions
Can I use salted butter?
Yes, but reduce the added salt in the recipe by half. Salted butter varies in salt content, so taste the dough if you’re unsure. I prefer unsalted butter for control.
Why did my cookies spread too thin?
This usually happens if the butter was too warm when mixed with the sugar, or if the dough wasn’t chilled long enough. Make sure the brown butter is cooled to room temperature and chill the dough for at least 30 minutes.
Can I freeze the cookie dough?
Absolutely. Scoop the dough onto a baking sheet, freeze until solid, then transfer to a bag. Bake from frozen, adding 1-2 minutes to the bake time.
What kind of chocolate is best?
I recommend a mix of semi-sweet chocolate chips for structure and chopped dark chocolate bars for pools of chocolate. High-quality chocolate with 60-70% cocoa works best.
Can I make these cookies ahead?
Yes! The dough can be chilled for up to 3 days. You can also bake the cookies and store them in an airtight container for up to 5 days. They actually taste better the next day as the flavors meld.
Why is my dough too dry?
This can happen if you over-measured the flour or if the brown butter evaporated too much. Measure the flour by spooning and leveling, not scooping. If the dough is too dry, add a tablespoon of milk or cream.
Can I use brown sugar instead of white sugar?
You can use all brown sugar, but the cookies will be cakier and less chewy. The mix of brown and white sugar gives the perfect balance of chew and crisp edges.
Pin This Recipe!

Brown Butter Chocolate Chip Cookies: Chewy Centers
- Total Time: 45 minutes
- Yield: 12 cookies 1x
Description
These brown butter chocolate chip cookies feature deep, nutty caramel flavors and soft, chewy centers. The recipe uses browned butter for complex taste and includes chilling time for the perfect texture.
Ingredients
- 1 cup (226g) unsalted butter
- 2 ¼ cups (280g) all-purpose flour
- 1 teaspoon baking soda
- 1 teaspoon kosher salt
- 1 cup (200g) packed brown sugar
- ½ cup (100g) granulated sugar
- 2 teaspoons vanilla extract
- 1 large egg
- 1 egg yolk
- 2 cups (340g) chocolate chips (mix of semi-sweet and dark)
- Flaky sea salt (optional, for topping)
Instructions
- Brown the butter: Melt butter in a saucepan over medium heat, stirring frequently until milk solids turn golden brown and it smells like toasted nuts (5-7 minutes). Pour into a heatproof bowl and cool for 10-15 minutes.
- Mix wet ingredients: In a large bowl, whisk cooled brown butter, brown sugar, and granulated sugar vigorously for 2 minutes until smooth and glossy. Add egg, egg yolk, and vanilla extract; whisk until combined.
- Combine dry ingredients: In a separate bowl, whisk together flour, baking soda, and salt.
- Bring it together: Gradually add dry ingredients to wet ingredients. Mix on low speed or by hand until just combined. Do not overmix. Fold in chocolate chips.
- Chill dough: Cover and refrigerate dough for at least 30 minutes (or up to 3 days) to hydrate flour and prevent spreading.
- Preheat oven to 350°F (175°C). Line baking sheets with parchment paper.
- Scoop dough onto sheets, spacing 2 inches apart. Bake for 12-14 minutes until edges are golden but centers look slightly underdone.
- Sprinkle with flaky sea salt immediately after removing from oven.
- Cool on baking sheet for 5 minutes, then transfer to a wire rack to cool completely.
Notes
Ensure butter is cooled before mixing with sugar to avoid cooking the eggs. Chilling the dough is crucial for chewy texture. Do not overmix the dough to prevent tough cookies. For gluten-free version, use a 1:1 gluten-free flour blend. For dairy-free, use a high-quality dairy-free butter alternative.
- Prep Time: 30 minutes
- Cook Time: 12-14 minutes
- Category: Dessert
- Cuisine: American
Nutrition
- Serving Size: 1 cookie
- Calories: 220
- Sugar: 18
- Sodium: 150
- Fat: 12
- Saturated Fat: 7
- Carbohydrates: 28
- Fiber: 1
- Protein: 3
Keywords: brown butter cookies, chocolate chip cookies, chewy cookies, baking, dessert, homemade cookies


