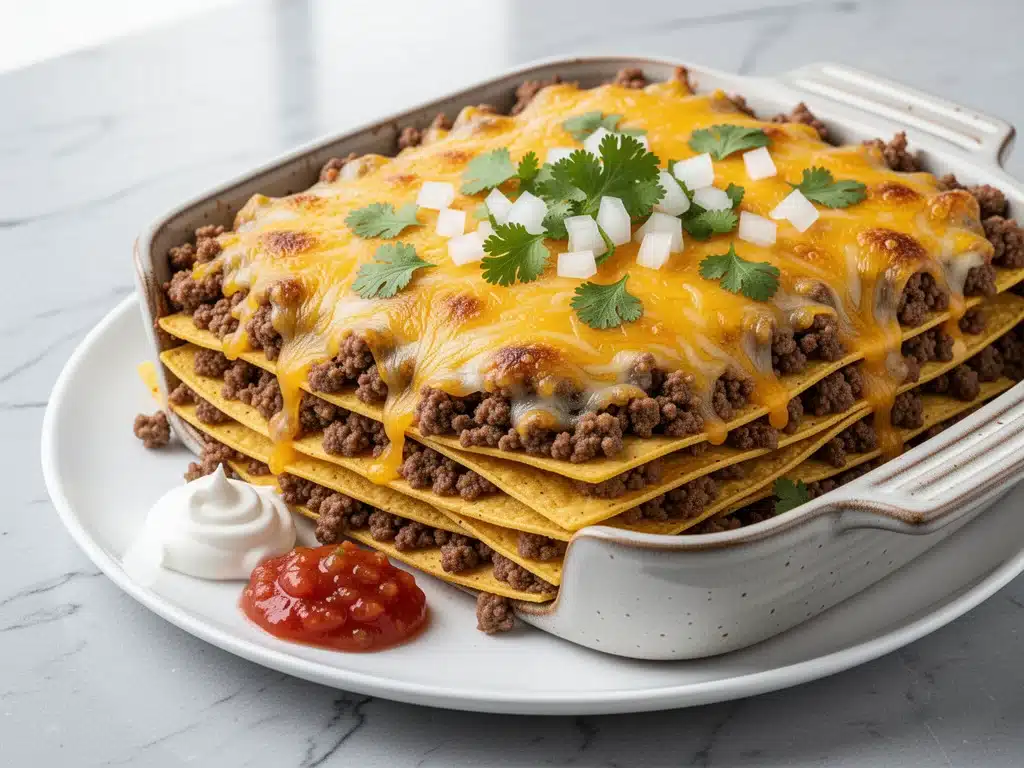
I still remember the exact moment I realized my taco game needed a serious upgrade. It was a Tuesday in November, the kind of night where the wind howls outside and the house feels cold no matter how high I cranked the thermostat. My husband had just walked through the door, exhausted from work, and my two kids were already arguing over who got the last slice of pizza from lunch. The usual “what’s for dinner?” question hung in the air, heavy with exhaustion.
I looked at the clock. 6:45 PM. I had exactly 45 minutes before the kids’ tempers would completely derail the evening. I didn’t want to make regular tacos—too much assembly, too many dirty plates, and let’s be honest, the kids are picky enough that they’ll only eat the meat, leaving the shells and veggies behind. I wanted something warm, something cheesy, and something that tasted like a treat but cooked like a standard casserole.
That night, I threw together my cheesy ground beef taco casserole with crispy tortilla layers. I didn’t have a recipe. I just had a hunch. I layered seasoned beef, a mountain of shredded Mexican blend cheese, and broken tortilla chips (yes, chips) into a baking dish. I popped it in the oven, and when I pulled it out, the smell alone silenced the house. The cheese was bubbling and golden, the tortillas had crisped up like a gourmet nacho, and the beef was perfectly seasoned. My husband took one bite and actually stopped complaining about his day. My kids, who usually turn their noses up at “mixed” foods, went back for seconds.
I’ve made this taco casserole at least a dozen times since that November night. I’ve tweaked the spices, tried different cheeses, and even tested it with turkey and chicken. But this version? The one with the crispy tortilla layers and that perfect balance of gooey cheese and savory beef? It’s the one that keeps coming back to our table. It’s not just dinner; it’s a hug in a baking dish. And the best part? It uses ingredients you probably already have in your pantry and fridge. If you can make a casserole, you can master this. Let me show you how to make it.
Why You’ll Love This Recipe
There are a few reasons this cheesy ground beef taco casserole has become the undisputed king of our weeknight rotation. It’s not just about the taste, though that’s definitely a huge part of it. It’s about the experience of making it and the way it feeds my family without driving me crazy.
It’s Stupid Simple — Seriously, if you can brown ground beef and layer ingredients in a dish, you can make this. There’s no fancy technique required. I’ve walked my teenage son through it over FaceTime while he was at college, and he nailed it on the first try. No sous-vide machines, no complicated spice blends you need to hunt down at three different stores.
It’s Lightning Fast — We’re talking about 30 minutes from start to finish. I know, that sounds too good to be true for a “casserole.” But because we’re using pre-cooked ground beef and just baking it to melt the cheese and crisp the tortillas, the active time is minimal. I make this on weeknights when I get home at 7 PM and need dinner on the table before the sun goes down.
It’s a Crowd-Pleaser — I’ve served this to my vegetarian sister (she swaps the beef for black beans and loves it), my gluten-free neighbor (I use corn tortillas and GF chips), and my dad who thinks “taco” means a hard shell and ketchup. Everyone leaves the table happy. It’s the kind of dish that brings people together without any fuss.
Makes Amazing Leftovers — This is rare for taco dishes. Usually, leftover tacos get soggy. Not this casserole. The flavors actually meld together overnight. I deliberately make extra for lunch throughout the week, and it reheats beautifully in the microwave. It tastes like a fresh batch of nachos every time.
Budget-Smart — Feeds 4-6 people for under $15. That’s less than one meal at a fast-food drive-thru, and it’s way more satisfying. I keep the key items stocked just so I can make this on a whim when money is tight but hunger is high.
This is my go-to when I need dinner to just work. No complicated techniques, no weird ingredients, just reliable, delicious food that makes everyone happy. It’s the kind of meal that reminds you why cooking at home is worth the effort.
Ingredients You’ll Need
Here’s the best part: you probably have most of this already. This recipe relies on pantry staples and basic fridge items. I’m particular about a few things here, specifically the cheese and the tortillas, because they make or break the texture. I’ll tell you exactly why.
Ground Beef (1.5 pounds / 680g) — I use 80/20 ground beef. The fat adds flavor, and you don’t want this dish to be dry. If you prefer leaner, go for 90/10, but you might need to add a tablespoon of olive oil when browning. Drain the grease well, though—nobody wants a greasy casserole.
Taco Seasoning (1 packet / 28g) — I use the standard store-bought packet for convenience, but homemade is great too. If you make your own, use cumin, chili powder, paprika, garlic powder, onion powder, salt, and pepper. The packet gives that classic “taco night” flavor profile that kids recognize and love.
Water (½ cup / 120ml) — This is what you mix with the taco seasoning to create the sauce base. It’s simple, but it ensures the beef is moist and flavorful before it goes into the oven.
Shredded Mexican Blend Cheese (3 cups / 340g) — This is the star. I buy a block and shred it myself because pre-shredded cheese has cellulose that prevents it from melting smoothly. You want gooey, stringy cheese, not grainy clumps. Mexican blend is perfect because it has queso quesadilla and asadero, which melt beautifully.
Flour Tortillas (6 large / about 15-inch diameter) — I use large flour tortillas because they’re pliable and have a nice chew. Corn tortillas can be used, but they’re more fragile and might break when you layer them. If you use corn, handle them gently. You’ll break them into pieces anyway, but flour holds up better.
Tortilla Chips (1 large bag / 10oz) — This is the secret weapon for the crispy layer. I use plain or lightly salted chips. The key is to crush them into bite-sized pieces, not powder. You want chunks that stay crunchy even after baking.
Optional Add-ins:
Black Beans (1 can / 15oz, drained) — Adds protein and fiber. My kids don’t always eat beans, so I keep them separate sometimes, but they’re great for adding bulk.
Jalapeños (½ cup, sliced) — For heat. Fresh or pickled, your choice.
Salsa (1 cup) — For extra moisture and tang. I usually add this on top before baking.
Personal Tips:
– Cheese Quality: I always buy Kirkland Signature or Trader Joe’s block cheese and shred it. It saves money and tastes way better.
– Tortilla Prep: If your tortillas are stiff, microwave them for 10 seconds to make them pliable. This prevents cracking when you layer them.
– Substitutions: No tortilla chips? Use crushed corn chips or even crushed crackers. But chips give the best texture.
– Storage: The taco seasoning keeps for months in the pantry. The cheese should be used within a week of shredding for best melt.
Equipment Needed
You don’t need fancy equipment for this. Here’s what I actually use.
Large Skillet — 12-inch works best for browning the beef. I prefer cast iron because it holds heat well, but stainless steel or non-stick works too. Just make sure it’s big enough to fit the beef without overcrowding.
9×13 Baking Dish — This is the standard size for this recipe. Glass or ceramic works well. I use a Pyrex dish because I can see the bottom browning. Metal pans work too but might brown the bottom too fast.
Wooden Spoon — For stirring the beef. Silicone works too. Don’t use metal on non-stick.
Colander — For draining the beef. Or just use the lid to drain—I do this when I’m lazy, but a colander is easier.
Rolling Pin or Hands — To crush the tortilla chips. I usually just crush them in the bag with my hands. It’s therapeutic.
Sharp Knife — For slicing jalapeños or chopping toppings. Dull knives make you cry more—learned this the hard way.
Cutting Board — Any size works. I use plastic for easier cleanup.
Measuring Cups and Spoons — Pretty standard stuff. Dollar store versions work fine.
Optional but nice:
– Food Processor: If you’re shredding a lot of cheese, this saves time. But for 3 cups, a box grater is faster.
– Pastry Brush: For brushing oil on the tortillas if you want extra crispness (optional).
How to Make It: Step-by-Step
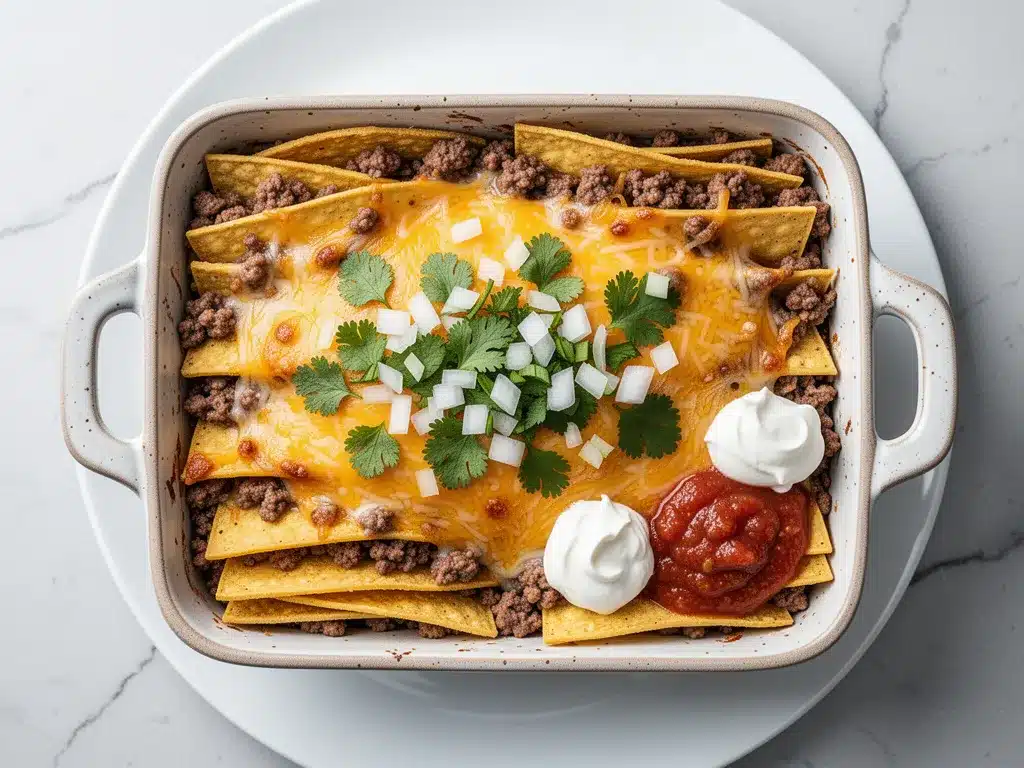
Alright, let’s make this! I’m walking you through exactly how I do it, including the little tricks I’ve picked up over the years.
Step 1: Prep Your Oven and Dish (5 minutes)
Preheat your oven to 375°F (190°C). Grease your 9×13 baking dish with cooking spray or a little butter. This prevents sticking and helps the bottom crisp up. While the oven heats, open your bag of tortilla chips and crush them into bite-sized pieces. Don’t turn them to dust—you want chunks. Set them aside.
Step 2: Brown the Beef (8-10 minutes)
Heat your large skillet over medium-high heat. Add the ground beef. Break it up with a wooden spoon as it cooks. You want small, even crumbles, not big chunks. Cook until it’s no longer pink, about 6-8 minutes. IMPORTANT: Once cooked, drain the grease. I tilt the pan and use a spoon to scoop it out. If it’s too greasy, the casserole will be soggy. Return the beef to the pan.
Step 3: Season the Beef (2 minutes)
Add the taco seasoning and water to the beef. Stir well to combine. Let it simmer for 2 minutes until the liquid reduces and the beef is coated in sauce. The beef should look moist and flavorful, not dry. Remove from heat. Taste and adjust salt if needed—most taco seasoning is salty enough, but your beef might need a pinch.
Step 4: Layer the Casserole (10 minutes)
This is the fun part. Start with a thin layer of the crushed tortilla chips on the bottom of the baking dish. This creates a crispy base. Then, add half of the seasoned beef. Spread it evenly. Sprinkle half of the shredded cheese over the beef. Next, take the flour tortillas and break them into large pieces, laying them over the cheese. You don’t need to be neat—just cover the surface. Add the rest of the beef, then the rest of the cheese. Finally, top with the remaining crushed tortilla chips. This top layer will get super crispy.
Step 5: Bake Until Golden (20-25 minutes)
Place the dish in the preheated oven. Bake for 20-25 minutes. You’ll know it’s done when the cheese is fully melted and bubbling, and the top layer of chips is golden brown and crunchy. If the top isn’t browning enough, broil for the last 2 minutes, but watch it closely—burnt chips are not a good look.
Step 6: Rest and Serve (5 minutes)
Remove from the oven and let it rest for 5 minutes. This allows the cheese to set slightly so it doesn’t slide off when you cut it. Serve hot, topped with sour cream, diced tomatoes, and fresh cilantro if you have it. The contrast of the hot, cheesy casserole with the cool, fresh toppings is perfect.
Total Time: About 30 minutes (15 minutes active, 25 minutes baking)
Expert Tips & Tricks
Here’s everything I’ve learned from making this dozens of times. These tips will save you from my mistakes.
Don’t Skip the Resting Time
This is the #1 tip. Letting the casserole rest for 5 minutes after baking allows the cheese to firm up. If you cut into it immediately, it’ll be a cheesy mess. Trust me, I’ve made this mistake more than once. The 5 minutes makes a huge difference in how cleanly it slices.
Use Block Cheese
Pre-shredded cheese contains anti-caking agents that prevent smooth melting. You want that gooey, stringy texture. Grate your own from a block—it takes 3 minutes and makes a world of difference. My husband can tell when I’ve been lazy and used pre-shredded. It’s a dead giveaway.
Crush Chips Correctly
For the bottom layer, crush the chips into small pieces so they create a solid base. For the top layer, leave them larger for crunch. This contrast in textures is what makes this casserole special. Small pieces on the bottom, big chunks on top.
Drain the Beef Well
Greasy beef = soggy casserole. I always drain the beef and even pat it dry with a paper towel if it’s really oily. It’s an extra step, but it ensures the final dish is crisp, not wet.
Room Temperature Cheese
Cold cheese takes longer to melt. If you’re in a rush, let your cheese sit out for 15 minutes before shredding. It melts faster and more evenly.
Common Mistakes (and how to avoid them):
Mistake: Casserole is too dry
Fix: Add a little more water to the beef seasoning, or add a layer of salsa before baking. The moisture from the salsa helps keep it juicy.
Mistake: Tortillas are tough
Fix: Make sure you’re using flour tortillas, not corn. And break them into pieces—they cook faster and softer than whole tortillas.
Mistake: Bottom is burnt
Fix: Your oven might be too hot. Place the dish in the center of the oven, not too close to the bottom element. If your oven runs hot, cover the top with foil for the first 15 minutes.
Pro Tricks I’ve Learned:
For Extra Flavor
Add a layer of black beans and corn under the beef. It adds sweetness and texture that complements the savory beef perfectly.
For Better Texture
Brush the top layer of chips with a little melted butter before baking. It helps them brown evenly and adds a rich flavor.
Variations & Substitutions
Once you’ve nailed the basic version, here’s how you can mix it up. I’ve tried all of these.
Turkey Taco Casserole
Swap ground beef for ground turkey. It’s leaner and lighter. I use 93% lean turkey and add a little olive oil when browning to keep it moist. My health-conscious sister loves this version.
Chicken Taco Casserole
Use shredded rotisserie chicken instead of beef. Toss it with the taco seasoning and water. This is a quick way to use up leftover chicken. It’s milder but still delicious.
Veggie-Loaded
Add 1 cup of black beans and 1 cup of corn to the beef layer. Or swap the beef entirely for a mix of beans and lentils. This is how I get my kids to eat vegetables without noticing. They’re too busy digging for the cheese.
Spicy Jalapeño Version
Add ½ cup of sliced jalapeños and 1 teaspoon of cayenne pepper to the beef. For extra heat, use pepper jack cheese instead of Mexican blend. This is for the heat lovers in the family.
Dietary Modifications:
Gluten-Free
Use corn tortillas and gluten-free tortilla chips. Everything else is naturally gluten-free. I’ve used simple corn tortillas and they work great—just handle them gently.
Dairy-Free
Replace Mexican blend cheese with dairy-free shreds. Not all dairy-free cheeses melt well, so look for ones labeled “melts well.” I’ve used Daiyo and it works okay. It’s not the same, but it’s tasty.
Lower-Carb
Skip the tortillas and chips. Use cauliflower rice as a base layer and top with crushed pork rinds instead of chips. It’s a keto-friendly version that still feels indulgent.
Different Proteins:
– Ground pork (seasoned with taco spices)
– Italian sausage (crumbled and cooked)
– Beef brisket (slow-cooked and shredded)
Serving & Storage
How to Serve:
I usually serve this straight from the baking dish at the dinner table—it looks rustic and stays warm. But here are other ways I’ve enjoyed it:
Side Dishes:
– Simple green salad with lime vinaigrette
– Mexican street corn (elote)
– Refried beans on the side
– Guacamole and tortilla chips for dipping
Toppings Bar:
When I have guests, I put out: sour cream, diced tomatoes, fresh cilantro, sliced jalapeños, and hot sauce. Everyone customizes their bowl. It’s interactive and fun.
Storage Instructions:
Refrigerator:
Store in an airtight container for up to 4 days. The casserole will hold up well in the fridge. Just reheat it gently.
Reheating:
Best method: Microwave individual portions for 1-2 minutes, stirring halfway through. Add a splash of water if it looks dry.
Oven method: Reheat in a 350°F oven for 15-20 minutes, covered with foil, until heated through. This restores the crispiness better than the microwave.
Freezing:
This doesn’t freeze well because of the dairy and tortillas. The texture changes when thawed. Make it fresh or store in the fridge for up to 4 days.
Pro tip: If leftovers are drying out, stir in a tablespoon of sour cream or a splash of milk when reheating. Brings back that creamy texture.
Nutrition Information
I’m not a nutritionist, but here’s the breakdown if you’re tracking.
Per Serving (based on 6 servings):
– Calories: 520
– Protein: 28g
– Carbs: 42g
– Fiber: 3g
– Sugar: 2g
– Fat: 28g
– Saturated Fat: 12g
– Cholesterol: 75mg
– Sodium: 680mg
– Calcium: 300mg
What’s Good:
– High protein from beef and cheese
– Calcium from the cheese
– Can add vegetables to boost nutrition
– More filling than it looks
What to Know:
– Higher in calories from cheese and beef
– Contains dairy and gluten
– Moderate sodium (use low-sodium seasoning to reduce)
My Take:
“Look, this is comfort food with cheese and beef. It’s not a diet recipe. But it’s way better than takeout, costs less, and I know exactly what’s in it. When I want to make it lighter, I use turkey and less cheese. But usually? I just eat a reasonable portion and enjoy it.”
Dietary Notes:
– Contains: gluten, dairy
– Can be made: gluten-free, vegetarian
– Not suitable for: vegan (without modifications), dairy-free (without modifications)
Final Thoughts
So that’s my go-to cheesy ground beef taco casserole with crispy tortilla layers! I’ve probably talked your ear off at this point, but when you make a recipe this often, you have a lot to say about it.
This has saved weeknight dinners more times than I can count. It’s my answer to “what’s for dinner” when I’m tired, don’t want takeout, and still want something that tastes really good. My kids are happy, my husband’s happy, and I’m happy because I’m not stressed about cooking.
Make it yours! Try different add-ins, swap in your favorite vegetables, adjust the spice level. The best recipes are the ones you adapt to your family’s tastes. If you’re looking for other easy dinner ideas, you might also enjoy my viral baked feta pasta for a different kind of cheesy comfort, or my never-dry oven-baked chicken breast when you want something lighter. These dishes share that same “set it and forget it” vibe that makes weeknights easier.
If you make this, drop a comment and let me know what you think! I love hearing how recipes turn out in your kitchen. And if something doesn’t work, tell me that too—I’m here to help troubleshoot.
Happy cooking! And I hope your kitchen smells half as good as mine does right now.
Frequently Asked Questions
Can I use corn tortillas instead of flour?
You can, but they’re more fragile and might break when you layer them. If you use corn, handle them gently and break them into smaller pieces. They’ll cook faster and get softer than flour tortillas. I prefer flour for the chewy texture, but corn works if you’re avoiding gluten.
My casserole came out soggy—what happened?
Usually means you didn’t drain the beef well enough, or you added too much liquid with the taco seasoning. Make sure you drain all the grease from the beef. Also, don’t add extra salsa unless you reduce the water in the seasoning. The casserole should be moist, not wet.
Can I make this ahead for a dinner party?
Sort of. You can assemble the casserole up to 2 hours ahead and keep it in the fridge. Bake it when you’re ready to serve. Don’t bake it ahead and reheat—it’ll lose its texture. I assemble it in the morning and bake it in the evening.
Why did my top layer of chips stay soft?
The oven might not have been hot enough, or you didn’t bake it long enough. Make sure your oven is preheated to 375°F. If the chips aren’t browning, broil for the last 2 minutes. Also, make sure you’re using a light-colored baking dish—dark pans can brown the bottom too fast.
Can I freeze this casserole?
Honestly, this doesn’t freeze well because of the dairy and tortillas. The cheese separates and the tortillas get mushy when thawed. Make it fresh or store in the fridge for up to 4 days. If you must freeze, freeze the beef mixture separately and add fresh tortillas and cheese when reheating.
How do I reheat leftovers without it getting dry?
Add a splash of water or milk to a microwave-safe bowl, add your leftover casserole, and heat gently in 30-second intervals, stirring between. The extra liquid brings back the creamy texture. If you do microwave, definitely add a splash of liquid first.
Can I double this recipe?
Absolutely! Double everything and use a 9×13 dish or two 8×8 dishes. The cooking time might increase by 5-10 minutes. I do this when I’m meal-prepping or feeding a crowd. Just make sure your baking dish is big enough for the layers.
Pin This Recipe!

Cheesy Ground Beef Taco Casserole: Easy 5-Ingredient Recipe
- Total Time: 40 minutes
- Yield: 6 servings 1x
Description
A quick and easy weeknight dinner featuring seasoned ground beef, gooey Mexican blend cheese, and crispy tortilla layers. This crowd-pleasing casserole is ready in about 30 minutes and is perfect for picky eaters.
Ingredients
- 1.5 pounds ground beef (80/20 recommended)
- 1 packet taco seasoning (28g)
- 1/2 cup water
- 3 cups shredded Mexican blend cheese
- 6 large flour tortillas
- 10oz bag tortilla chips (plain or lightly salted)
- Optional: 1 can black beans (drained)
- Optional: 1/2 cup sliced jalapeños
- Optional: 1 cup salsa
Instructions
- Preheat oven to 375°F (190°C) and grease a 9×13 baking dish.
- Crush tortilla chips into bite-sized pieces (not dust) and set aside.
- Brown ground beef in a large skillet over medium-high heat, breaking into small crumbles. Drain excess grease thoroughly.
- Add taco seasoning and water to the beef. Simmer for 2 minutes until liquid reduces and beef is coated. Remove from heat.
- Layer 1/3 of crushed chips on the bottom of the baking dish.
- Add half of the seasoned beef, then half of the shredded cheese.
- Break flour tortillas into large pieces and layer over the cheese.
- Add remaining beef and cheese.
- Top with remaining crushed tortilla chips.
- Bake for 20-25 minutes until cheese is bubbly and top is golden brown. Broil for 2 minutes if needed for extra crispness.
- Let rest for 5 minutes before serving to allow cheese to set.
Notes
Use block cheese and shred it yourself for better melting. Ensure beef is well-drained to prevent a soggy casserole. Let the casserole rest for 5 minutes after baking to help it slice cleanly. Do not freeze as the texture of tortillas and cheese will suffer.
- Prep Time: 15 minutes
- Cook Time: 25 minutes
- Category: Main Course
- Cuisine: Mexican
Nutrition
- Serving Size: 1 serving
- Calories: 520
- Sugar: 2
- Sodium: 680
- Fat: 28
- Saturated Fat: 12
- Carbohydrates: 42
- Fiber: 3
- Protein: 28
Keywords: taco casserole, ground beef recipe, easy weeknight dinner, cheesy casserole, family friendly meals, 30 minute meals


