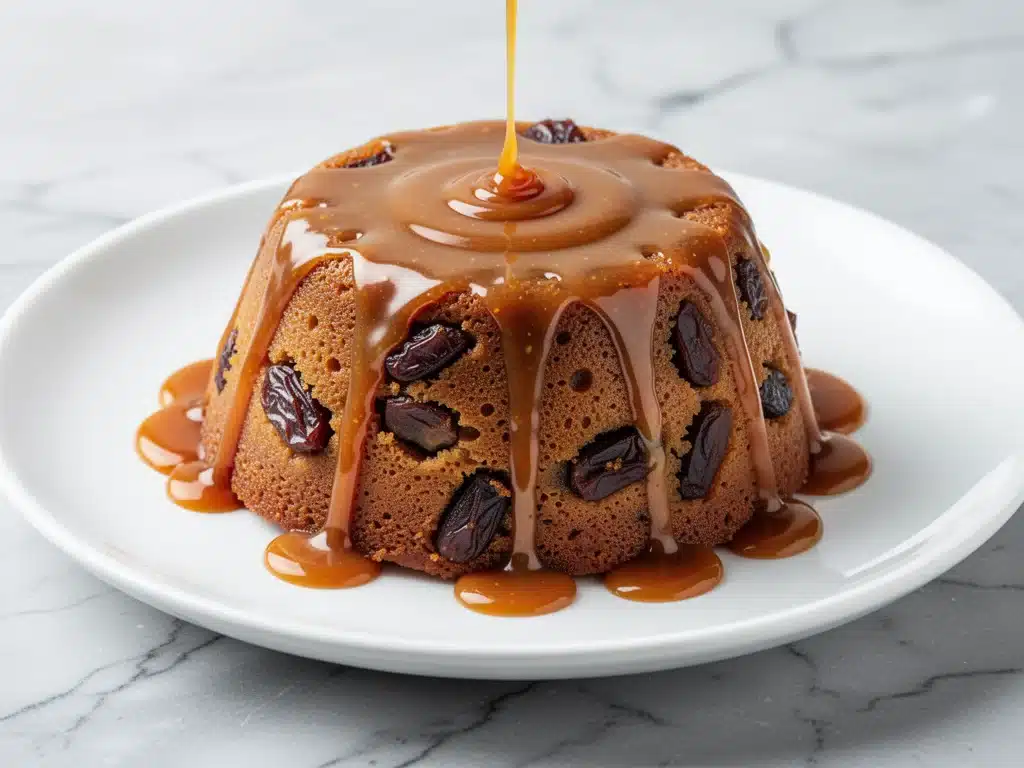
It was a rainy Tuesday in November, the kind where the sky feels like it’s pressing down on your roof, and I was standing in my kitchen staring at a bowl of soaked dates like they were a personal insult. I had promised my in-laws—people who have high standards for desserts and even higher standards for judgment—that I would bring something impressive. Something warm. Something that smelled like comfort but tasted like a five-star restaurant.
I tried a standard sticky date pudding recipe from a magazine. It was fine. Technically correct. But it lacked soul. It was dry, the dates were chunky, and the sauce tasted like sugar water. I was ready to call it a night and order takeout, but then I remembered my grandmother’s secret: she always added a splash of cream *and* a pinch of salt to her caramel. Not just any caramel. The kind that sticks to your ribs and makes you forget about the rain outside.
So I scrapped the recipe. I grabbed whatever I had—dates, brown sugar, butter, cream, and a whole lot of patience—and I threw it together. I didn’t measure half of it. I just cooked until it smelled right. And when I pulled that creamy sticky date caramel pudding cake out of the oven, the house didn’t just smell like dessert; it smelled like a hug. My mother-in-law took one bite, closed her eyes, and said, “You can keep this recipe forever.”
That was three years ago. I’ve made this creamy sticky date caramel pudding cake probably fifty times since then. I’ve tweaked it, tested it with picky teenagers, and served it to dinner parties where people asked for the recipe before they even finished their plates. It’s become my go-to when I need to impress without stressing. And the best part? It’s incredibly forgiving. You don’t need fancy equipment or perfect skills. You just need to trust the process. This cake is moist, deeply flavorful, and drenched in a sauce that makes you question why you ever bought store-bought pudding mix. Let’s make some magic.
Why You’ll Love This Recipe
There are about ten reasons I keep coming back to this creamy sticky date caramel pudding cake, but let’s be real—you’re here because you want dessert that works. You want something that looks like you spent hours in the kitchen (even if you didn’t) and tastes like you hired a pastry chef. Here’s why this recipe has earned a permanent spot in my rotation:
- It’s Actually Moist — Not the kind of moist that’s soggy or underbaked, but the kind that stays tender for days. The dates soak into the batter, creating a texture that’s almost like a dense, delicious bar. I’ve left slices out on the counter overnight, and they’re still soft the next morning.
- One Bowl Wonder — Seriously. I mix the batter in one bowl, pour it into a baking dish, and then make the sauce in the same pan (after a quick rinse, or just a separate small saucepan if you’re being tidy). No dirty dishes nightmare. My husband says this is the main reason he likes me cooking.
- The Sauce is Non-Negotiable — Most sticky date pudding recipes skimp on the sauce. This one does not. We’re talking a rich, buttery, caramel-infused cream sauce that pools at the bottom and seeps up through the cake. It’s sticky, it’s sweet, and it’s dangerous. You will need a spoon just to eat the sauce off the plate.
- Impressive But Easy — It looks like a showstopper. The edges caramelize, the center jiggles just right, and the smell fills the entire house. But the technique is simple: soak, mix, bake, pour. If you can boil water, you can make this. I’ve walked my niece through it over the phone while she was at her college dorm.
- Perfect for Company — I’ve served this to food snobs, casual friends, and my notoriously difficult mother. Everyone loves it. It’s warm, it’s comforting, and it pairs beautifully with a scoop of vanilla ice cream or a dollop of whipped cream. It’s the ultimate crowd-pleaser.
This is my answer to “What should I bring to the potluck?” or “What should I bake for date night?” It’s reliable, it’s delicious, and it makes everyone happy. No complicated techniques, no weird ingredients, just pure, sticky, caramelized joy.
Ingredients You’ll Need
Here’s the best part: you probably have most of this already in your pantry. This creamy sticky date caramel pudding cake relies on simple, accessible ingredients, but the quality matters more than you’d think. I’m particular about a few things here, and I’ll tell you exactly why.
For the Cake Base
Dates (2 cups / 300g, pitted) — This is the star. Use Medjool dates if you can find them. They’re larger, softer, and naturally sweeter than the smaller Deglet Noor dates. If you only have Deglet Noor, soak them for an extra 15 minutes. Don’t skip the pitting! I learned this the hard way one time when my husband spat out a pit. It was awkward.
Boiling Water (1 cup / 240ml) — We pour this over the dates to soften them. It’s the simplest way to break them down. No need to chop them finely if you’re using a blender later, but if you’re chopping by hand, make sure they’re small pieces.
Butter (½ cup / 115g, unsalted) — Unsalted is key here because we control the salt in the sauce. Room temperature is easier to cream, but melted works too. I prefer melted for this recipe because it mixes more evenly with the dates.
Light Brown Sugar (1 cup / 200g) — Dark brown sugar works, but light gives a more subtle molasses flavor that lets the dates shine. If you use dark, expect a deeper, more robust taste. I stick to light for that classic sticky date flavor.
Large Eggs (2 large) — Room temperature eggs incorporate better into the batter. If you’re in a rush, just drop them in a bowl of warm water for 5 minutes. Cold eggs can seize up the butter, and we don’t want that.
Vanilla Extract (1 teaspoon) — Pure vanilla, please. I’ve used imitation before, and the difference is night and day. It adds that warm, aromatic background note that makes the dessert feel “baked.”
All-Purpose Flour (1 cup / 125g) — Just standard flour. Sift it if you have time to avoid lumps, but honestly, whisking it well into the dry mix is usually enough. I don’t obsess over sifting for this recipe.
Baking Soda (1 teaspoon) — This helps the cake rise slightly and react with the acidic dates. Don’t use baking powder; it’s a different chemical reaction.
Salt (½ teaspoon) — Enhances all the flavors. Don’t skip it. Sweet desserts need salt to balance the sugar.
For the Caramel Sauce
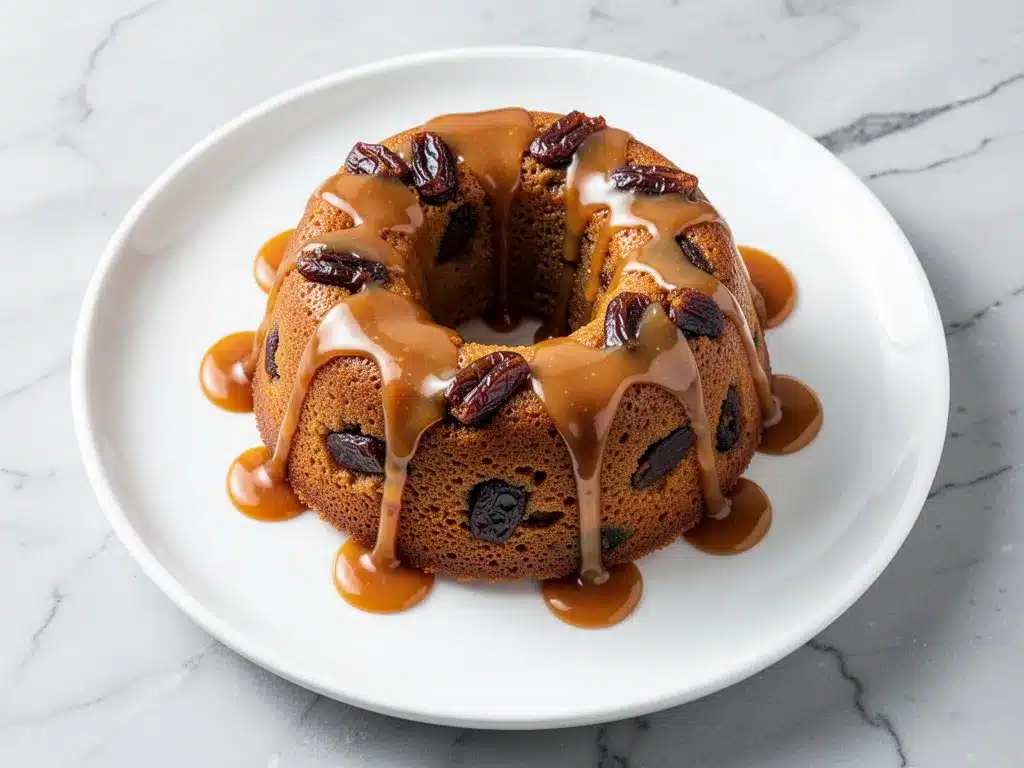
Heavy Cream (1 cup / 240ml) — Full fat only. Half-and-half is too thin, and milk will make it watery. The fat content is what makes the sauce luxuriously creamy and stable when poured hot.
Unsalted Butter (½ cup / 115g) — Again, unsalted. This melts into the cream to create a rich base.
Light Brown Sugar (1 cup / 200g) — Yes, more brown sugar. This is what creates the caramel flavor. Light brown sugar gives a milder taste; dark brown sugar makes it more intense. I usually use light here too for balance.
Salt (½ teaspoon) — Crucial for salted caramel vibes. It cuts through the sweetness and adds complexity.
Vanilla Extract (1 teaspoon) — Added at the end to preserve the flavor. Cooking vanilla too long can make it taste bitter.
Equipment Needed
You don’t need fancy equipment for this. Here’s what I actually use:
9×13 Inch Baking Dish — I use a glass Pyrex dish because it heats evenly and lets me see the caramelization at the edges. Ceramic works too, but avoid metal if you want to prevent over-browning. I’ve used metal before, and the edges got too dark.
Medium Saucepan — For making the caramel sauce. A 2-quart pan is perfect. I prefer stainless steel because it’s easy to clean and heats evenly. Non-stick works if you’re careful not to scratch it.
Blender or Food Processor — To puree the dates. A blender gives a smoother texture, which I prefer for this cake. If you don’t have one, chop the dates very finely and mash them with a fork after soaking. It takes longer, but it works.
Mixing Bowl — A large bowl for combining the batter. I use a glass bowl because I can see how well things are mixing.
Whisk and Spatula — A silicone spatula is essential for scraping the bowl and folding the batter. Don’t use a wooden spoon; it doesn’t get into the corners as well.
Measuring Cups and Spoons — Pretty standard stuff. Dollar store versions work fine, but make sure they’re accurate. I’ve had bad luck with cheap measuring spoons that are slightly off.
How to Make It: Step-by-Step
Alright, let’s make this! I’m walking you through exactly how I do it, including the little tricks I’ve picked up over the years.
Step 1: Soak the Dates (10 minutes)
Start by chopping your dates into rough pieces if they’re large. Place them in a heatproof bowl and pour boiling water over them. Let them sit for 10 minutes. This softens them up and makes them easy to blend. If you’re using a blender, drain most of the water but save a little bit if the mixture looks too thick. I usually reserve about 2 tablespoons of that date-soaking water to add to the batter for extra moisture.
Step 2: Blend the Date Paste
Transfer the soaked dates and any remaining water to a blender. Blend until you have a smooth, thick paste. It should look like date butter. If it’s too thick to blend, add a splash more water. Scrape down the sides of the blender as needed. This paste is the foundation of your cake, so smooth is better than chunky here.
Step 3: Mix the Batter (5 minutes)
In your large mixing bowl, combine the melted butter, brown sugar, eggs, and vanilla extract. Whisk until the mixture is smooth and slightly pale. This takes about a minute. Then, stir in the date paste until it’s fully incorporated. The batter will look dark and sticky. That’s good. In a separate small bowl, whisk together the flour, baking soda, and salt. Sprinkle this dry mix over the wet ingredients and fold it in gently with your spatula. Do not overmix! Stop as soon as you no longer see streaks of flour. Overmixing makes the cake tough.
Step 4: Bake the Cake (35-40 minutes)
Preheat your oven to 350°F (175°C). Pour the batter into your greased 9×13 inch baking dish. Spread it out evenly. Bake for 35-40 minutes. The cake is done when the top is set and slightly cracked, and a toothpick inserted into the center comes out clean or with just a few moist crumbs. It shouldn’t be liquidy. I usually check at 35 minutes. If the top is browning too fast, cover it loosely with foil for the last 10 minutes.
Step 5: Make the Caramel Sauce (10 minutes)
While the cake is baking, make the sauce. In your saucepan, combine the heavy cream, butter, brown sugar, and salt. Heat over medium heat, stirring constantly. Once it starts to bubble, let it simmer for 2-3 minutes. The sauce will thicken slightly and become glossy. Remove from heat and stir in the vanilla extract. Be careful—it’s hot! The sauce will thicken more as it cools, so don’t worry if it looks thin right after boiling.
Step 6: Combine and Serve
Once the cake is out of the oven, let it cool for 5 minutes. Then, pour the hot caramel sauce evenly over the top. It will sizzle and soak into the cake. Let it sit for another 10 minutes before serving. This allows the sauce to penetrate the center. Serve warm with a scoop of vanilla ice cream or whipped cream. The contrast between the warm cake and cold cream is everything.
Total Time: About 1 hour (15 minutes prep, 40 minutes bake, 10 minutes sauce)
Expert Tips & Tricks
Here’s everything I’ve learned from making this dozens of times. These tips will save you from my mistakes.
Don’t Skip the Salt in the Sauce
This is the #1 tip. The salt balances the intense sweetness of the caramel. Without it, the dessert tastes one-dimensional and cloying. I use a good sea salt flake for the final touch if I’m feeling fancy, but kosher salt in the sauce is essential.
Use Medjool Dates
If you can find them, use Medjool dates. They’re softer and sweeter. If you’re stuck with Deglet Noor, soak them longer and maybe add a teaspoon of honey to the batter to boost the sweetness. I’ve made this with both, and the Medjool version is always superior.
Don’t Overbake
This cake continues to cook slightly after you take it out of the oven. If you wait until the toothpick comes out completely clean, it might be dry. Aim for a few moist crumbs. The sauce adds moisture, but the cake itself should be tender, not cakey.
Warm the Sauce
If you make the sauce ahead of time, reheat it gently on the stove before pouring. Cold sauce won’t soak into the cake properly and might make the top soggy in a weird way. Warm sauce integrates beautifully.
Storage Hack
Store leftovers in the fridge, but bring them to room temperature or warm them up before serving. Cold sticky date pudding is less flavorful. I microwave individual slices for 20-30 seconds to soften the sauce again.
Variations & Substitutions
Once you’ve nailed the basic version, here’s how you can mix it up. I’ve tried all of these.
Gluten-Free Version
Use a 1:1 gluten-free flour blend. It works surprisingly well. I’ve used Bob’s Red Mill and King Arthur, and both give a similar texture. Just make sure your baking soda is certified gluten-free.
Dairy-Free Option
Replace the butter with coconut oil and the heavy cream with full-fat coconut cream. The flavor will be slightly coconutty, which actually pairs well with the dates. It’s not exactly the same, but it’s still delicious. My lactose-intolerant friend loves this version.
Spiced Variation
Add 1 teaspoon of ground cinnamon and ½ teaspoon of cardamom to the dry ingredients. Cardamom and dates are a classic pairing. It adds a warm, aromatic complexity that feels very Middle Eastern. I add this when I want to feel fancy.
Rum Soak
For an adult twist, add a tablespoon of dark rum to the caramel sauce. Or, soak the dates in rum instead of water. It adds a deep, boozy richness. I serve this version for dinner parties when I want to impress.
Mini Cakes
You can bake this in a muffin tin for individual portions. Bake for 18-20 minutes. The sauce recipe stays the same. These are great for potlucks because everyone gets their own serving.
Serving & Storage
How to Serve:
I usually serve this straight from the baking dish at the dinner table—it looks rustic and stays warm. But here are other ways I’ve enjoyed it:
- With Ice Cream: Vanilla bean ice cream is the classic pairing. The cold cream cuts the sweetness.
- With Whipped Cream: For a lighter touch, top with freshly whipped cream.
- With Custard: If you’re feeling British, serve it with warm custard (crème anglaise).
- With Nuts: Sprinkle toasted pecans or walnuts on top for crunch. It adds a nice textural contrast.
Storage Instructions:
Refrigerator:
Store in an airtight container for up to 4 days. The cake will absorb the sauce and become even softer. It’s still good, but it’s best eaten within the first two days.
Reheating:
Microwave slices for 20-30 seconds to soften the sauce. Or, warm in the oven at 300°F for 10 minutes. Never serve it cold straight from the fridge—the texture is too firm and the flavors are muted.
Freezing:
You can freeze the baked cake (without sauce) for up to 3 months. Wrap tightly in plastic wrap and foil. Thaw overnight in the fridge, then bake briefly to warm it up before adding the sauce. Freezing with the sauce already on it can make the texture mushy, so I recommend adding the sauce fresh.
Pro Tip:
Make the sauce a day ahead. It tastes better after the flavors have melded overnight. Just reheat it gently before serving.
Nutrition Information
I’m not a nutritionist, but here’s the breakdown if you’re tracking. This is a rich dessert, so portion control is key.
Per Serving (based on 9 servings, with sauce):
| Nutrient | Amount |
|---|---|
| Calories | 480 |
| Protein | 5g |
| Carbs | 65g |
| Fiber | 4g |
| Sugar | 55g |
| Fat | 22g |
| Saturated Fat | 14g |
| Cholesterol | 85mg |
| Sodium | 280mg |
What’s Good:
Dates provide fiber and potassium. The cake is naturally gluten-free if you use GF flour. It’s a whole-food-based dessert, not just refined sugar.
What to Know:
It’s high in sugar and saturated fat due to the cream and butter. It’s a treat, not a health food. Enjoy a reasonable portion and savor it. When I want to make it lighter, I reduce the sugar in the sauce by half and use less butter, but it changes the texture significantly.
Dietary Notes:
Contains: dairy, gluten (unless modified). Can be made: gluten-free, dairy-free, vegan (with modifications). Not suitable for: low-sugar diets.
Final Thoughts
So that’s my go-to creamy sticky date caramel pudding cake! I’ve probably talked your ear off at this point, but when you make a recipe this often, you have a lot to say about it.
This has saved dinner parties more times than I can count. It’s my answer to “What dessert should I bring?” when I’m tired, don’t want takeout, and still want something that tastes really good. My family is happy, my guests are happy, and I’m happy because I’m not stressed about cooking.
Make it yours! Try different add-ins, swap in your favorite nuts, adjust the spices. The best recipes are the ones you adapt to your family’s tastes. If you make this, drop a comment and let me know what you think! I love hearing how recipes turn out in your kitchen. And if something doesn’t work, tell me that too—I’m here to help troubleshoot.
Happy baking! And I hope your kitchen smells half as good as mine does right now.
Frequently Asked Questions
Q: Can I use dried apricots instead of dates?
A: You can, but the flavor and texture will be different. Apricots are less sweet and more tart. The cake will be lighter and less dense. I haven’t tested it extensively, but it’s worth a try if you’re out of dates. Just soak them in hot water until soft.
Q: Why did my cake turn out dry?
A: Usually means you overbaked it. Check it at 35 minutes. The cake should be moist and tender. If the top is browning too fast, cover it with foil. Also, make sure you’re using enough butter and dates. The ratio is important.
Q: Can I make this ahead for a dinner party?
A: Absolutely. Bake the cake up to 2 days ahead and store it covered at room temperature. Make the sauce fresh or reheat it gently. Pour the sauce over the cake 10 minutes before serving. It saves you stress during the party.
Q: Why did my sauce separate?
A: The heat was too high. Cream sauces can break if boiled too vigorously. Keep it on medium-low heat and stir constantly. If it does separate, whisk in a splash of cold cream to bring it back together.
Q: Can I use dark brown sugar in the cake?
A: Yes, but it will have a stronger molasses flavor. Light brown sugar is milder and lets the date flavor shine. If you use dark, reduce the amount slightly if you’re sensitive to molasses.
Q: How do I reheat leftovers without it getting dry?
A: Microwave for 20-30 seconds with a damp paper towel over the top. The steam helps keep it moist. Or, warm in the oven at 300°F for 10 minutes. Avoid the microwave on high power, which can make the cake rubbery.
Q: Can I double this recipe?
A: Yes, double everything and use a 9×13 inch dish. The baking time might increase by 5-10 minutes. Check with a toothpick to ensure it’s done. I’ve doubled this for large gatherings and it works perfectly.
Pin This Recipe!

Creamy Sticky Date Caramel Pudding Cake
- Total Time: 1 hour
- Yield: 9 servings 1x
Description
A moist, deeply flavorful sticky date pudding cake with a rich, buttery caramel sauce. This one-bowl recipe is forgiving, impressive, and perfect for dinner parties or cozy nights in.
Ingredients
- 2 cups (300g) Medjool dates, pitted
- 1 cup (240ml) boiling water
- 1/2 cup (115g) unsalted butter, melted
- 1 cup (200g) light brown sugar
- 2 large eggs, room temperature
- 1 teaspoon vanilla extract
- 1 cup (125g) all-purpose flour
- 1 teaspoon baking soda
- 1/2 teaspoon salt
- 1 cup (240ml) heavy cream
- 1/2 cup (115g) unsalted butter
- 1 cup (200g) light brown sugar
- 1/2 teaspoon salt
- 1 teaspoon vanilla extract
Instructions
- Chop dates into rough pieces and place in a heatproof bowl. Pour boiling water over them and let sit for 10 minutes to soften.
- Transfer soaked dates and reserved soaking water to a blender. Blend until a smooth, thick paste forms.
- In a large mixing bowl, whisk melted butter, brown sugar, eggs, and vanilla extract until smooth and pale.
- Stir in the date paste until fully incorporated.
- In a separate small bowl, whisk together flour, baking soda, and salt. Sprinkle over wet ingredients and fold gently with a spatula until just combined. Do not overmix.
- Preheat oven to 350°F (175°C). Pour batter into a greased 9×13 inch baking dish and spread evenly.
- Bake for 35-40 minutes until the top is set and a toothpick inserted comes out with moist crumbs.
- While the cake bakes, combine heavy cream, butter, brown sugar, and salt in a medium saucepan over medium heat.
- Stir constantly until the mixture bubbles, then simmer for 2-3 minutes until slightly thickened and glossy.
- Remove from heat and stir in vanilla extract.
- Let the cake cool for 5 minutes, then pour the hot caramel sauce evenly over the top.
- Let sit for 10 minutes to allow the sauce to soak in before serving warm.
Notes
Use Medjool dates for best texture and sweetness. If using Deglet Noor dates, soak them for an extra 15 minutes. Do not overbake the cake; it should remain moist. The sauce thickens as it cools, so don’t worry if it looks thin immediately after boiling. For a gluten-free version, use a 1:1 gluten-free flour blend. For a dairy-free option, substitute butter with coconut oil and heavy cream with full-fat coconut cream.
- Prep Time: 15 minutes
- Cook Time: 40 minutes
- Category: Dessert
- Cuisine: British
Nutrition
- Serving Size: 1 slice with sauce
- Calories: 480
- Sugar: 55
- Sodium: 280
- Fat: 22
- Saturated Fat: 14
- Carbohydrates: 65
- Fiber: 4
- Protein: 5
Keywords: sticky date pudding, caramel sauce, date cake, dessert recipe, easy baking, comfort food, gluten-free option, dairy-free option


