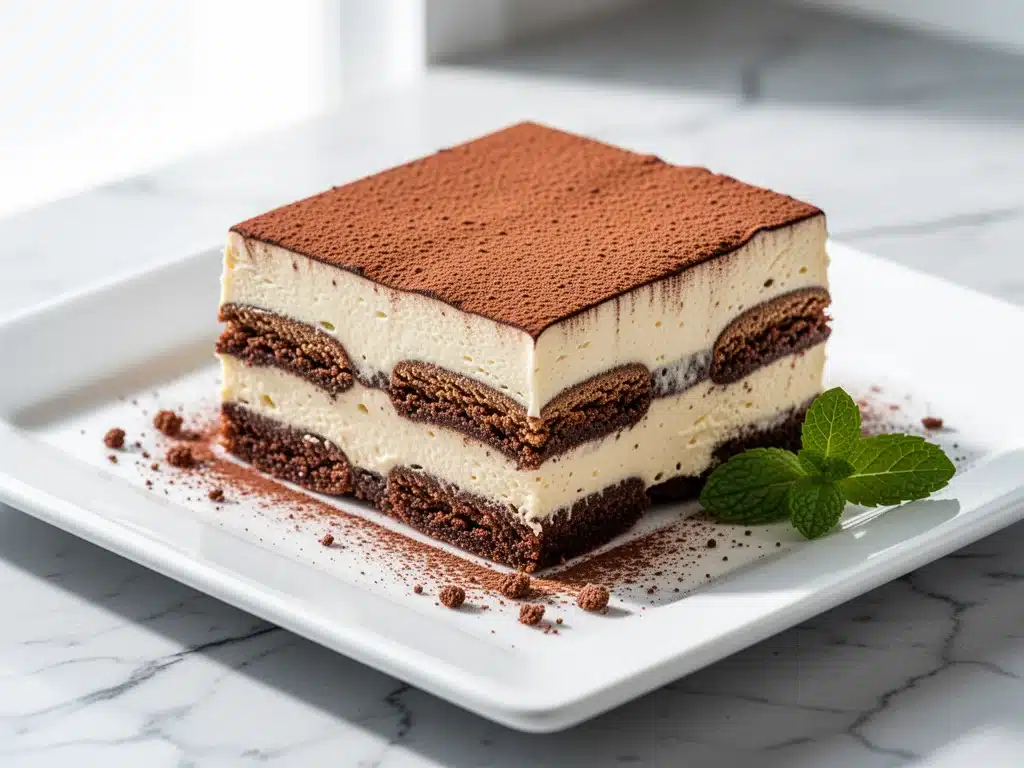
It was supposed to be a simple dessert for a last-minute dinner party. Just something quick, something I could throw together while my friends were still stuck in traffic. I had bought a box of ladyfingers because I was lazy, some mascarpone because it was on sale, and a jar of espresso I’d been meaning to use for months. I didn’t have time to bake. I didn’t have time to chill a cake for twelve hours. So I did the only thing I could think of: I layered them in a dish, poured the cream over them, and put it in the fridge while I went to pick up my guests.
I honestly forgot about it. In the rush of setting the table and opening wine, the dish sat on the counter, then the fridge, then the counter again. By the time I remembered it, it had been sitting for nearly sixteen hours. I was ready to scrape it into the trash. I figured the ladyfingers would be soggy mush and the cream would have separated into something gross.
I was wrong. So, so wrong.
I dug a spoon in, expecting disaster. Instead, I got a texture that was impossible to describe without sounding like a food critic. The ladyfingers had softened into something like a sponge cake, but with the distinct, coffee-soaked crunch still lingering in the edges. The mascarpone had melded with the espresso and sugar into a cloud-like filling that tasted exactly like tiramisu, but without the hassle of tempering eggs or standing over a double boiler for twenty minutes. It was cold, creamy, rich, and utterly addictive.
My guests ate three pieces each. Three. They asked me for the recipe before they even finished their coffee. That was the moment I realized I had stumbled onto the holy grail of lazy desserts. This creamy tiramisu icebox cake isn’t just a shortcut; it’s a revelation. It’s the dessert you make when you want to impress people but also want to sit down and enjoy the party yourself.
I’ve made this six-ingredient tiramisu icebox cake at least a dozen times since that night. I’ve tweaked the coffee strength, switched up the chocolate, and even tried it with different cookies. But the original? The simple, no-bake, fridge-set version? That’s the one that keeps coming back to my menu. It’s easy, it’s reliable, and it tastes like you spent hours in the kitchen (even though you spent about ten minutes active time).
Why You’ll Love This Recipe
There are about ten reasons I keep making this tiramisu icebox cake, but here are the big ones that keep me coming back to it week after week.
Zero Baking Required — Seriously. No oven, no mixer, no tempering eggs. If you can layer cookies and spread cream, you can make this. I’ve made this on nights when I was too tired to stand up, and it turned out perfect every single time.
Only Six Ingredients — I’m not exaggerating. You need mascarpone, heavy cream, sugar, espresso, ladyfingers, and cocoa powder. That’s it. You probably have most of these in your pantry or fridge right now. It’s the ultimate pantry-challenge winner.
Make-Ahead Magic — This is the ultimate party saver. You make it the day before, or even the morning of. It gets better as it sits. The flavors meld, the texture sets, and you walk into a party with a beautiful dessert already ready. No last-minute panic.
Texture That Actually Works — I know what you’re thinking. “Ladyfingers in cream? Won’t that be soggy?” Trust me. The icebox method is different from just dunking cookies in coffee. The cream acts as a barrier, and the ladyfingers soften just enough to become cake-like without turning to mush. It’s the perfect balance.
Feels Fancy, Costs Pennies — This looks like something you’d order at an Italian restaurant for $12. But it costs maybe $8 to make at home, and it tastes better because it’s fresher. It’s the kind of dessert that makes you look like a pro chef.
This is my go-to when I need a dessert that just works. No complicated techniques, no weird ingredients, just reliable, delicious food that makes everyone happy. And honestly? It’s easier than making those small batch fudgy brownies if you’re trying to avoid baking altogether.
Ingredients You’ll Need
Here’s the best part: you probably have most of this already. I’m particular about three ingredients here, and I’ll tell you exactly why, because they make the difference between “okay” and “oh my god.”
Mascarpone Cheese (16 oz / 450g) — This is the star. Do not substitute cream cheese. I’ve tried it. It’s tangy and wrong. Mascarpone is mild, buttery, and rich. It’s what gives the filling that luxurious, dense texture. Buy the good stuff, not the generic brand if you can help it. It’s worth the extra dollar.
Heavy Cream (2 cups / 480ml) — You need cold heavy cream to whip it properly. Half-and-half won’t hold its structure. Whole milk will turn into soup. If you’re using a stand mixer, make sure your bowl is chilled too. Cold cream = stiff peaks = beautiful layers.
Espresso (1 cup / 240ml, cooled) — You can use instant espresso powder mixed with hot water, or strong brewed coffee. But honestly? Real espresso makes a difference. It has that bitter punch that cuts through the sweet cream. If you’re a coffee snob like me, use fresh brew. If you’re lazy, dissolve two tablespoons of instant espresso in half a cup of hot water, then add half a cup of cold water to cool it down.
Ladyfingers (1 box / about 200g) — Standard Italian ladyfingers (savoiardi) are best. They’re dry and sturdy enough to hold up. Don’t use the soft, cake-like ladyfingers you see in some specialty stores; they’ll disintegrate. You want the dry, finger-shaped cookies that snap when you break them.
Sugar (¼ cup / 50g) — I use granulated white sugar. Some recipes use powdered sugar, but I find it dissolves better in the cream. If you prefer a darker, more molasses-y taste, you can use brown sugar, but it changes the flavor profile. Stick to white for the classic taste.
Cocoa Powder (2-3 tablespoons) — Unsweetened cocoa powder for dusting. I use Dutch-processed cocoa because it’s darker and has a richer flavor. It’s not just for looks; it adds that bitter chocolate finish that balances the sweetness.
Optional but Recommended:
- Vanilla Extract (1 teaspoon) — Adds depth to the cream. I always add this.
- Dark Chocolate Shavings — For extra texture and visual appeal. I grate a bar of 70% dark chocolate over the top before serving.
- Liqueur (2 tablespoons) — Marsala wine or Amaretto. If you want an adult version, add this to the espresso soak. I skip it for family gatherings but add it for date nights.
Shopping Shortcuts: I buy pre-made mascarpone in the tub, but block mascarpone is fresher. If you can’t find ladyfingers, you can technically use vanilla wafers in a pinch, but the texture will be different. For the best results, stick to the plan.
Equipment Needed
You don’t need fancy equipment for this. Here’s what I actually use.
9×13 Inch Baking Dish — A glass or ceramic dish works best. I use a Pyrex dish because I can see the layers forming. You can use a 9×9 dish if you want thicker layers, but it’ll be denser. Just make sure it’s deep enough so the cream doesn’t spill over.
Stand Mixer or Hand Mixer — You need to whip the cream and mascarpone together. A stand mixer is easiest, but a hand mixer works fine. You can do it by hand with a whisk, but it takes about ten minutes of arm work, and I’m not that brave.
Two Shallow Bowls — One for the espresso soak, one for the cocoa powder. I use pie plates or shallow casseroles. You need something wide so you can dip the ladyfingers quickly without soaking them too long.
Spatula — A rubber spatula is essential for folding the cream and scraping the bowl clean. Don’t use a spoon; you’ll leave chunks of unmixed mascarpone.
Serving Spoon — A large spoon for dolloping the cream. Or just use a ladle if you want even layers.
Grater — For the chocolate shavings. Or just chop a bar with a knife. I like the grater because it looks fancy.
That’s it. No special molds, no springform pans, no fancy tools. Just basic kitchen stuff. If you can make a sandwich, you have the tools for this.
How to Make It: Step-by-Step
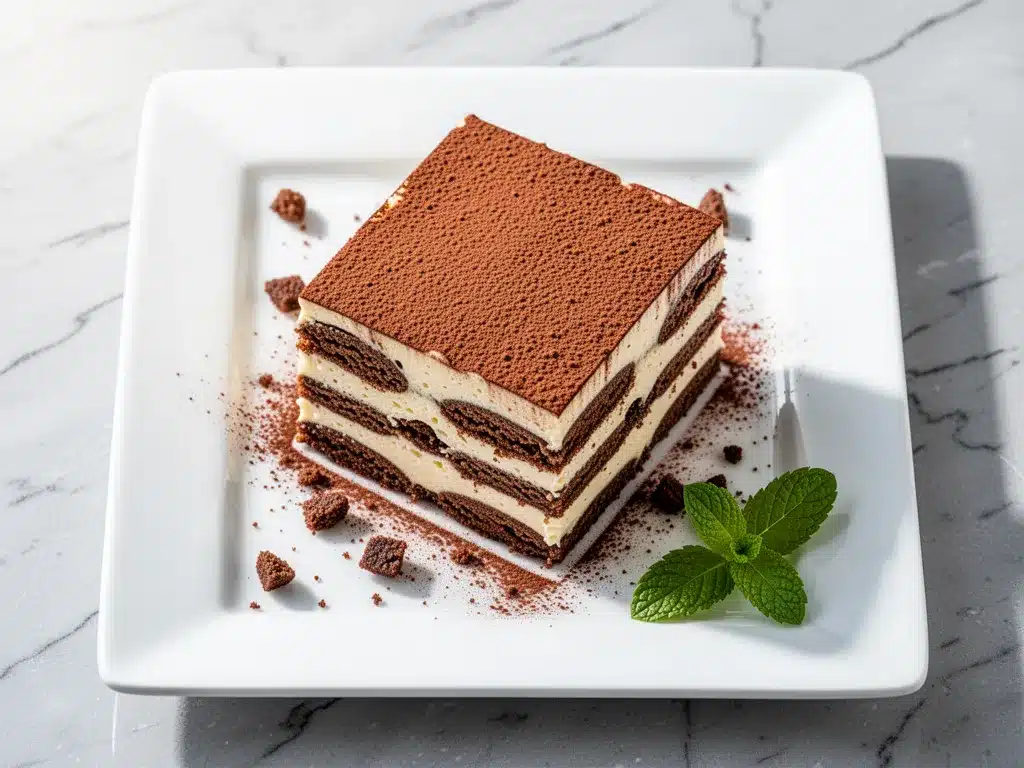
Alright, let’s make this! I’m walking you through exactly how I do it, including the little tricks I’ve picked up. This process is forgiving, but following these steps ensures you get that perfect texture.
Step 1: Prep Your Station (5 minutes)
Before you start, make sure your mascarpone is soft. Take it out of the fridge 15 minutes before you start. Cold mascarpone is hard to mix and will leave lumps. If you’re in a hurry, microwave it for 10 seconds. Also, brew your espresso and let it cool completely. Warm espresso will melt the cream and make a mess. Cold espresso is what you want.
Step 2: Whip the Cream (5 minutes)
In a large bowl, whip the heavy cream on medium-high speed until it forms soft peaks. This means when you lift the beaters, the cream should droop slightly but hold its shape. Don’t over-whip it into butter! You want it light and airy. This usually takes about 2-3 minutes.
Step 3: Mix the Mascarpone (3 minutes)
Add the softened mascarpone and sugar to the whipped cream. Beat on low speed just until combined. You don’t want to over-mix here. Stop when you see no streaks of mascarpone left. The mixture should be thick, smooth, and spreadable. If it looks too stiff, you can add a splash of milk, but usually, it’s perfect.
Step 4: The First Layer of Ladyfingers (2 minutes)
Dip each ladyfinger into the cooled espresso. Quick dip! Half a second on each side. You want them moist, not swimming. Lay them in a single layer in your 9×13 dish. You’ll need about half the box. If they break, just patch them together. No one will know.
Step 5: First Layer of Cream (3 minutes)
Spread half of the mascarpone cream over the ladyfingers. Use a spatula to get it into the corners. Smooth it out as best you can. It doesn’t need to be perfect; it’s going to be covered.
Step 6: The Second Layer (2 minutes)
Repeat the process. Dip the remaining ladyfingers in espresso and layer them on top of the cream. Then, spread the remaining cream over the top. This is your top layer, so take a little more care to smooth it out. It’s the face of the cake, after all.
Step 7: Chill and Set (6-8 hours or overnight)
Cover the dish tightly with plastic wrap. Put it in the fridge. This is the waiting game. The ladyfingers need time to absorb the moisture from the cream and the espresso. If you rush this, you’ll have crunchy cookies and runny cream. I usually make it the night before. But if you’re desperate, wait at least 4 hours.
Step 8: Dust and Serve
Just before serving, dust the top generously with cocoa powder. Use a fine-mesh sieve for an even coat, or just sprinkle it with your fingers if you’re feeling casual. Add chocolate shavings if you’re using them. Cut into squares and serve cold.
Total Time: About 15 minutes active, plus chilling time.
Expert Tips & Tricks
Here’s everything I’ve learned from making this dozens of times. These tips will save you from my mistakes.
Don’t Over-Soak the Ladyfingers
This is the #1 mistake. If you leave the ladyfingers in the espresso for more than a second, they’ll disintegrate. They should be damp, like a sponge, not wet like a dishrag. Dip and go. Quick, quick, done.
Keep Everything Cold
Your cream, your mascarpone (until mixing), and your espresso should all be cool. Warm ingredients make the cream break. If your kitchen is hot, put your mixing bowl in the fridge for 10 minutes before whipping.
Use a Sharp Knife
When you cut the cake, use a sharp knife dipped in hot water. Wipe it clean between cuts. This gives you clean, beautiful squares. If you use a dull knife, you’ll squash the layers and make a mess. Trust me on this.
Room Temperature Mascarpone
I said this before, but it bears repeating. Cold mascarpone is a nightmare to mix. If you try to mix it cold, you’ll get lumps that never go away. Soften it first, or your texture will be grainy.
The Cocoa Powder Trick
Mix a little sugar into your cocoa powder before dusting. It helps it spread evenly and prevents clumps. I add one teaspoon of sugar to the cocoa for every tablespoon of cocoa. It’s a small detail that makes a big difference.
Common Mistakes (and how to avoid them):
- Mistake: The cream is runny. Fix: You didn’t whip the heavy cream enough, or your mascarpone was too warm. Whip until stiff peaks form, and ensure mascarpone is room temp but not melted.
- Mistake: The ladyfingers are crunchy. Fix: You didn’t chill it long enough. Give it at least 6 hours. Overnight is best.
- Mistake: The top looks messy. Fix: Smooth the top layer carefully. Use a spatula dipped in hot water for a glossy finish.
Variations & Substitutions
Once you’ve nailed the basic version, here’s how you can mix it up. I’ve tried all of these.
Almond Tiramisu
Add 1 teaspoon of almond extract to the cream. Use Amaretto-soaked ladyfingers instead of espresso. It’s nutty and delicious. This pairs well with the flavors in my rosh hashanah pomegranate honey cheesecake bars if you’re looking for a similar nutty profile.
Chocolate Tiramisu
Add 2 tablespoons of cocoa powder to the cream mixture. Use chocolate-dipped ladyfingers if you can find them. Dust with chocolate shavings instead of cocoa powder. It’s like a tiramisu brownie.
Strawberry Tiramisu
Swap the espresso for strawberry juice or milk. Use strawberry ladyfingers if you can find them (or dip vanilla wafers in strawberry syrup). Layer fresh sliced strawberries between the cream. It’s pink, pretty, and summery.
Gluten-Free Version
Use gluten-free ladyfingers. They’re available in most grocery stores now. Just be careful not to over-soak them; gluten-free cookies absorb liquid faster. I’ve used Schär ladyfingers and they work great.
Dairy-Free Version
Replace mascarpone with a dairy-free cream cheese alternative (like Kite Hill). Use coconut cream instead of heavy cream. It’s richer and heavier, so you might need less. It’s not exactly the same, but it’s still tasty.
Coffee-Strong Version
For the caffeine addicts, double the espresso. Or add a shot of cold brew concentrate to the soak. I do this when I’m hosting a late-night party and need everyone to stay awake.
Serving & Storage
How to Serve:
I usually serve this straight from the dish, using a large spoon to scoop out squares. It looks rustic and stays cold. But here are other ways I’ve enjoyed it:
- With Whipped Cream — Add a dollop of plain whipped cream on top for extra fluffiness.
- With Berries — Fresh raspberries or strawberries cut the richness of the cream. It’s a nice contrast.
- With Coffee — Obviously. Serve with a hot espresso or Americano. The bitter coffee balances the sweet dessert perfectly.
Storage Instructions:
Refrigerator: Store in an airtight container or covered tightly with plastic wrap for up to 5 days. It actually gets better after day 2. The flavors meld and the texture sets further. I usually make it on Sunday for Wednesday night.
Freezing: Honestly, this doesn’t freeze well. The ladyfingers get icy and the cream separates when thawed. It’s best made fresh and eaten within a few days. Don’t risk it.
Reheating: Do not reheat. Serve cold. If it’s too cold straight from the fridge, let it sit on the counter for 10 minutes. That’s it.
Pro Tip: If you’re making this for a party, make it in a clear glass dish. People love seeing the layers. It’s Instagram-worthy and makes you look like you put in way more effort than you did.
Nutrition Information
I’m not a nutritionist, but here’s the breakdown if you’re tracking. Keep in mind, this is a rich dessert, so portions matter.
Per Serving (based on 12 servings):
- Calories: 380
- Protein: 6g
- Carbs: 35g
- Fiber: 1g
- Sugar: 22g
- Fat: 24g
- Saturated Fat: 14g
- Cholesterol: 65mg
- Sodium: 120mg
What’s Good:
– It’s lower in sugar than many cakes because the ladyfingers aren’t sweetened.
What to Know:
– High in fat and calories due to the dairy. It’s rich, so a little goes a long way.
– Contains dairy and gluten.
– Moderate sodium.
My Take:
Look, this is a dessert with heavy cream and cheese. It’s not a diet food. But it’s way better than store-bought cake, and you control the ingredients. When I want to make it lighter, I use less sugar and add more berries. But usually? I just eat a small square and enjoy it.
Final Thoughts
So that’s my creamy tiramisu icebox cake! I’ve probably talked your ear off at this point, but when you make a recipe this often, you have a lot to say about it. This has saved me from dessert disasters more times than I can count. It’s my answer to “what’s for dessert?” when I’m tired, don’t want to bake, and still want something that tastes really good. My guests are happy, my family is happy, and I’m happy because I’m not stressed about cooking.
Make it yours! Try different liqueurs, swap in your favorite cookies, adjust the coffee strength. The best recipes are the ones you adapt to your tastes. If you make this, drop a comment and let me know what you think! I love hearing how recipes turn out in your kitchen. And if something doesn’t work, tell me that too—I’m here to help troubleshoot.
Happy cooking! And I hope your kitchen smells half as good as mine does right now.
Frequently Asked Questions
Can I use milk instead of heavy cream?
You can, but the texture will be very different. The cream needs to be whipped to provide structure. If you use milk, the mixture will be runny and the ladyfingers will get soggy. If you must use milk, try adding a packet of unflavored gelatin to set it, but it won’t be the same creamy texture. Stick with heavy cream for the best results.
Why did my ladyfingers turn to mush?
You probably soaked them too long. Remember, a quick dip is all you need. They should be damp, not dripping. Also, make sure you’re using dry ladyfingers, not the soft cake-like ones. If they’re already soft, reduce the soaking time to just a half-second.
Can I make this ahead for a dinner party?
Yes! This is actually better made ahead. Make it 24 hours before you need it. Let it chill overnight. The flavors meld and the texture sets perfectly. It’s the ultimate make-ahead dessert. Just add the cocoa powder dusting right before serving so it doesn’t get soggy.
Can I use instant espresso powder?
Absolutely. I often use instant espresso powder because it’s convenient. Dissolve 2 tablespoons in ½ cup hot water, then add ½ cup cold water. Let it cool completely before using. It gives a strong coffee flavor without the hassle of brewing.
How do I store leftovers?
Store in an airtight container in the fridge for up to 5 days. It gets firmer as it sits, which I actually like. Just let it sit out for 10 minutes before serving to soften slightly. Do not freeze it.
Can I use a different cookie?
You can try vanilla wafers or even chocolate chip cookies, but the texture will be different. Ladyfingers are dry and absorb liquid quickly, which is key for this recipe. If you use a softer cookie, reduce the soaking time or skip it entirely.
Why is my cream grainy?
The mascarpone was probably too cold when you mixed it. Mascarpone needs to be room temperature to blend smoothly with the cream. If it’s cold, it clumps. Soften it first, or beat it briefly on its own before adding the cream.
Pin This Recipe!

Creamy Tiramisu Icebox Cake: 6-Ingredient Easy Dessert
- Total Time: 8 hours 15 minutes
- Yield: 12 servings 1x
Description
A no-bake, make-ahead dessert that layers espresso-soaked ladyfingers with a rich mascarpone cream filling. It offers the authentic taste of tiramisu with minimal active time and effort.
Ingredients
- 16 oz (450g) Mascarpone Cheese, softened
- 2 cups (480ml) Heavy Cream, cold
- 1 cup (240ml) Espresso, cooled
- 1 box (approx. 200g) Ladyfingers (savoiardi)
- ¼ cup (50g) Granulated White Sugar
- 2–3 tablespoons Unsweetened Cocoa Powder
- 1 teaspoon Vanilla Extract (optional)
- Dark Chocolate Shavings (optional)
- 2 tablespoons Liqueur like Marsala or Amaretto (optional)
Instructions
- Prep your station: Ensure mascarpone is softened to room temperature and espresso is completely cooled.
- In a large bowl, whip the heavy cream on medium-high speed until soft peaks form (about 2-3 minutes).
- Add the softened mascarpone and sugar to the whipped cream. Beat on low speed just until combined and smooth.
- Quickly dip each ladyfinger into the cooled espresso (about half a second per side) and lay them in a single layer in a 9×13 inch dish.
- Spread half of the mascarpone cream mixture over the first layer of ladyfingers.
- Repeat the process with the remaining ladyfingers and espresso, then spread the remaining cream on top.
- Cover the dish tightly with plastic wrap and refrigerate for at least 6-8 hours, or overnight, to allow the layers to set.
- Just before serving, dust the top generously with cocoa powder and add chocolate shavings if desired. Cut into squares and serve cold.
Notes
Do not over-soak the ladyfingers; they should be damp, not wet. Ensure mascarpone is at room temperature to avoid lumps. This dessert does not freeze well. For best results, make it the night before.
- Prep Time: 15 minutes
- Cook Time: 0 minutes
- Category: Dessert
- Cuisine: Italian
Nutrition
- Serving Size: 1 square
- Calories: 380
- Sugar: 22
- Sodium: 120
- Fat: 24
- Saturated Fat: 14
- Carbohydrates: 35
- Fiber: 1
- Protein: 6
Keywords: tiramisu, icebox cake, no-bake dessert, easy dessert, mascarpone, ladyfingers, make-ahead dessert, coffee dessert


