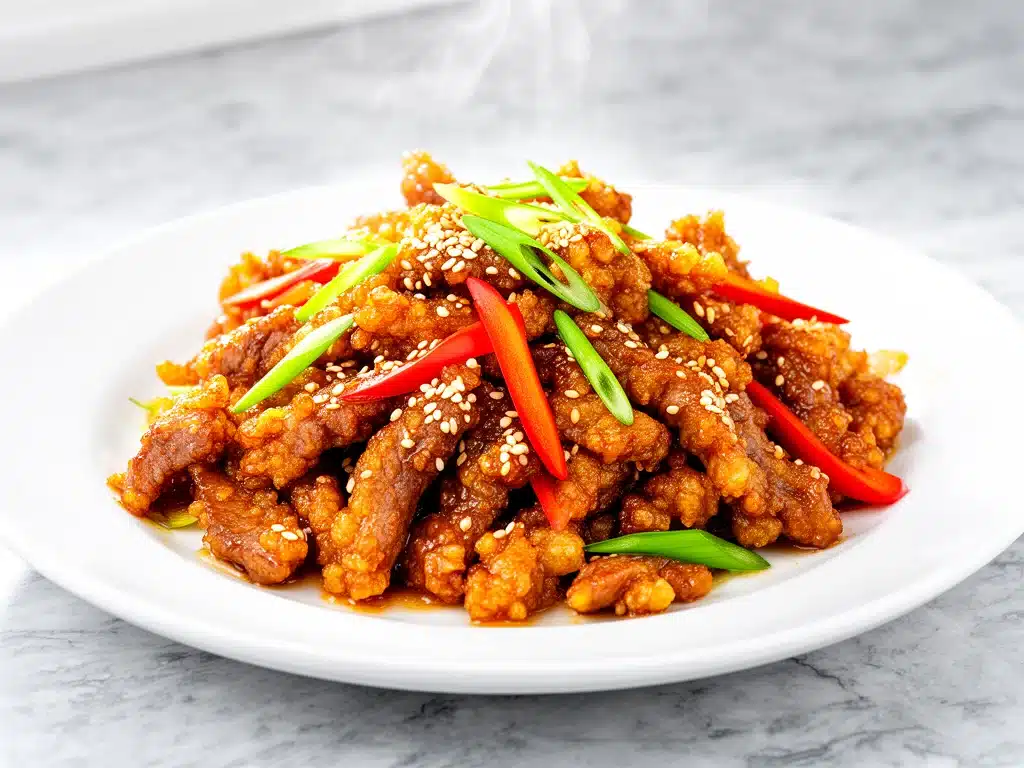
It was 7:30 PM on a Tuesday, and I was staring at my phone screen with the takeout menu open. My stomach was growling, my brain was fried from work, and the idea of chopping vegetables or washing a single pan felt physically impossible. I clicked “Place Order” for the third time this week, promising myself I’d cook next week. I’d tell myself I’d learn to make Crispy Sesame Beef that’s actually better than the restaurant version soon.
That “soon” turned into three months. And honestly? I was too stubborn to admit I’d been beaten by a beef stir-fry.
But last weekend, the takeout fatigue hit hard. I didn’t want anything fancy. I just wanted that specific, addictive flavor—the sweet, salty, garlicky punch that coats every piece of tender beef. I decided to finally tackle it. I wanted crispy edges, a sauce that clung perfectly, and enough beef to satisfy my family without breaking the bank. What I ended up making wasn’t just “good for homemade.” It was genuinely better than the place down the street.
This recipe has completely changed our weeknight routine. It’s no longer the dish I avoid because it’s too hard or takes too long. It’s now the dish I make when I want to impress myself. The secret isn’t some exotic ingredient you can’t find. It’s technique. It’s about understanding how to get that crunch without deep frying, and how to balance the sauce so it’s not just sugar and soy sauce. Once you make this Crispy Sesame Beef at home, you’ll never look at a takeout menu the same way again.
Why You’ll Love This Crispy Sesame Beef Recipe
There are about ten reasons I keep making this, but here are the big ones that will convince you to put down the phone and start cooking.
Actual Crunch (No Deep Fryer Needed) — Most homemade versions end up soggy because they try to rush the breading. This method uses a simple cornstarch slurry and a specific frying technique that gives you that restaurant-style shatteringly crisp exterior. I’ve tested this with an air fryer and a standard skillet, and while the skillet gives the best texture, even the air fryer version beats most takeout. It’s not just “okay” crunchy; it’s legitimately satisfying.
Sauce That Sticks — Have you ever gotten takeout where the beef is crispy but the sauce slides right off? Or worse, the sauce is so thin it pools at the bottom of the box? This sauce is cooked down to a glossy, clingy consistency. It coats every bite. I’ve had friends who are picky eaters (my teenage son included) ask for seconds specifically because the flavor is so intense and well-balanced.
Fast Enough for Weeknights — I know, I know. You think “crispy beef” means hours of marinating. It doesn’t. The beef only needs 15 minutes to marinate, which is mostly hands-off time while you prep veggies or set the table. The actual cooking takes about 15 minutes. It’s faster than waiting for a delivery driver to find your house.
Budget-Friendly — Takeout for four people runs us about $60-$70. This recipe feeds four generously for under $25, depending on the cut of beef you choose. I use flank steak because it’s flavorful and relatively affordable, but you can also use sirloin. The savings are huge, and the quality is noticeably higher.
Customizable Heat Level — I like my sesame beef with a gentle kick, but my husband prefers it mild. This recipe is incredibly forgiving. You control the heat. Add more chili flakes if you like it spicy, or leave them out if you’re cooking for kids. It’s crowd-pleasing without being boring.
This is my go-to when I need dinner to just work. No complicated techniques, no weird ingredients from a specialty store, just reliable, delicious food that makes everyone happy. It’s comfort food that doesn’t feel like a cheat day.
Ingredients You’ll Need
Here’s the best part: you probably have most of this already. The sauce uses pantry staples, and the beef is simple. I’m particular about three ingredients here, and I’ll tell you exactly why.
For the Beef and Breading
Beef (1.5 lbs / 680g) — I always use flank steak. It’s lean, flavorful, and slices beautifully against the grain. Sirloin works too, but it can be tougher if you don’t slice it thinly. Avoid ribeye or chuck for this—they’re too fatty and won’t crisp up the same way. Look for a cut that’s relatively thin and uniform.
Cornstarch (½ cup / 60g) — This is the secret weapon. Cornstarch creates that glass-like crunch that flour just can’t achieve. It’s light, it doesn’t get heavy or doughy, and it stays crispy even after tossing in the sauce. Don’t swap this for flour unless you want a thick, bready coating. I keep a box in the pantry specifically for this.
Egg White (1 large) — This acts as the glue for the cornstarch. Some recipes use whole eggs, but the white keeps the coating lighter and crispier. The yolk can make it a bit denser. Just whisk it until it’s frothy.
Neutral Oil (for frying) — I use avocado oil or vegetable oil. You need a high smoke point. Olive oil will burn at the temperatures required for this. Don’t skimp on the oil amount; you need enough to shallow fry the beef pieces.
For the Sauce
Soy Sauce (½ cup / 120ml) — I use low-sodium soy sauce so I can control the saltiness. Regular soy sauce works, but you might need to reduce the added salt in the marinade. Kikoman is my go-to brand, but any quality soy sauce is fine.
Dark Soy Sauce (2 tablespoons / 30ml) — This is optional but highly recommended. It adds that deep, rich color and a slightly molasses-like sweetness that regular soy sauce lacks. If you can’t find it, just use an extra 2 tablespoons of regular soy sauce and a teaspoon of brown sugar.
Chicken Broth (¼ cup / 60ml) — This adds volume and savory depth without making it too salty. Use low-sodium broth. Vegetable broth works for a vegetarian version, though the beef flavor will be less pronounced.
Rice Vinegar (2 tablespoons / 30ml) — Essential for balancing the sweetness. It cuts through the richness of the beef and the sugar. Do not substitute with white vinegar or apple cider vinegar; the flavor profile will be off. Look for the clear, mild kind, not the seasoned kind.
Brown Sugar (3 tablespoons / 45g) — I use light brown sugar for its molasses notes. It caramelizes beautifully in the sauce. White sugar works but lacks that depth.
Garlic (6 cloves, minced / about 2 tablespoons) — Yes, six cloves. Don’t skimp. Fresh only—no jarred garlic in this recipe. The flavor is too important to compromise. Minced fine so you get bits of garlic in every bite.
Ginger (1 tablespoon, freshly grated) — Fresh ginger is non-negotiable. It adds that bright, zesty kick that defines sesame beef. Pre-grated ginger in a tube is too earthy and lacks the punch. If you absolutely must, use 1 teaspoon of powdered ginger, but it won’t be the same.
Red Pepper Flakes (1 teaspoon) — Adjust to taste. I like a noticeable heat. If you’re sensitive to spice, start with ½ teaspoon.
For the Garnish
Sesame Seeds (2 tablespoons, toasted) — Toasting them is the difference between “okay” and “amazing.” Just dry toast them in a pan for 2 minutes until they’re fragrant and lightly golden. Don’t skip this step.
Green Onions (2 stalks, sliced) — For color and a fresh, oniony bite. I use the white parts for cooking if I’m adding them to the sauce, but usually, I just sprinkle the green tops on at the end.
Equipment Needed
You don’t need fancy equipment for this. Here’s what I actually use.
Large Skillet or Wok — I use a 12-inch stainless steel skillet. It needs to be wide enough so the beef pieces aren’t crowding each other. If you crowd the pan, the beef steams instead of frying. A wok is traditional and great, but a large skillet works perfectly.
Sharp Knife — For slicing the beef. A dull knife will tear the meat. I like a 6-inch chef’s knife for control.
Cutting Board — Any size works. I use a large plastic one for easy cleanup.
Small Bowls — For mixing the sauce. You’ll want to have this ready before you start cooking because it comes together fast.
Slotted Spoon or Tongs — For removing the beef from the oil. Tongs give you more control.
Mixing Bowl — For tossing the beef in the cornstarch mixture.
Optional but nice:
– Air Fryer — If you’re trying to reduce oil, an air fryer works well. Toss the coated beef in a little oil and air fry at 400°F for 10-12 minutes, shaking halfway through. It’s not quite as crispy as frying, but it’s easier and healthier.
How to Make It: Step-by-Step
Alright, let’s make this! I’m walking you through exactly how I do it, including the little tricks I’ve picked up. This process is straightforward, but timing is everything.
Step 1: Prep the Beef (15 minutes active, plus marinating)
First, slice your beef. This is crucial. You want to slice it against the grain into thin, bite-sized strips. Look for the direction the muscle fibers run, and cut perpendicular to them. This makes the beef tender. If you cut with the grain, it’ll be chewy and tough. Place the sliced beef in a bowl and add 1 tablespoon soy sauce, 1 teaspoon cornstarch, and a pinch of black pepper. Toss to coat. Let it sit for 15 minutes. This marinade helps tenderize the beef and adds initial flavor.
Step 2: Coat the Beef
After marinating, you’ll see some liquid in the bowl. Pat the beef dry with paper towels. This sounds tedious, but it’s important. Excess moisture prevents crisping. In a separate large bowl, whisk the egg white until frothy. Add the beef strips and toss to coat evenly. Then, add the remaining ½ cup of cornstarch. Toss gently until each piece is lightly coated. You want a light dusting, not a thick cake. If it’s too clumpy, add a tiny bit more egg white. If it’s too dry, add a sprinkle more cornstarch.
Step 3: Make the Sauce
While the beef rests, mix your sauce. In a small bowl, whisk together the soy sauce, dark soy sauce, chicken broth, rice vinegar, brown sugar, minced garlic, grated ginger, and red pepper flakes. Stir until the brown sugar is dissolved. Set aside. It should look glossy and slightly thickened. Taste it—it should be sweet, salty, and tangy. Adjust if needed.
Step 4: Fry the Beef
Heat about ½ inch of neutral oil in your large skillet over medium-high heat. The oil is ready when a piece of coated beef sizzles immediately upon contact. Carefully add the beef in a single layer. Do not overcrowd the pan. If you have a 12-inch skillet, you can probably fit half the beef at a time. Fry for 2-3 minutes per side, or until golden brown and crispy. Use tongs to turn the pieces. Remove with a slotted spoon and drain on a paper towel-lined plate. Repeat with the remaining beef. You want them crispy, not burnt. If they’re browning too fast, lower the heat slightly.
Step 5: Cook the Sauce and Combine
Wipe out the skillet or use a clean wok. Add 1 tablespoon of oil over medium heat. Pour in the sauce mixture. It will bubble and thicken quickly. Stir constantly for 2-3 minutes until the sauce is glossy and coats the back of a spoon. It should be syrupy, not watery. Immediately add the fried beef back into the sauce. Toss quickly and gently to coat every piece. The beef should be glossy and coated, not swimming in sauce. Remove from heat immediately.
Step 6: Serve
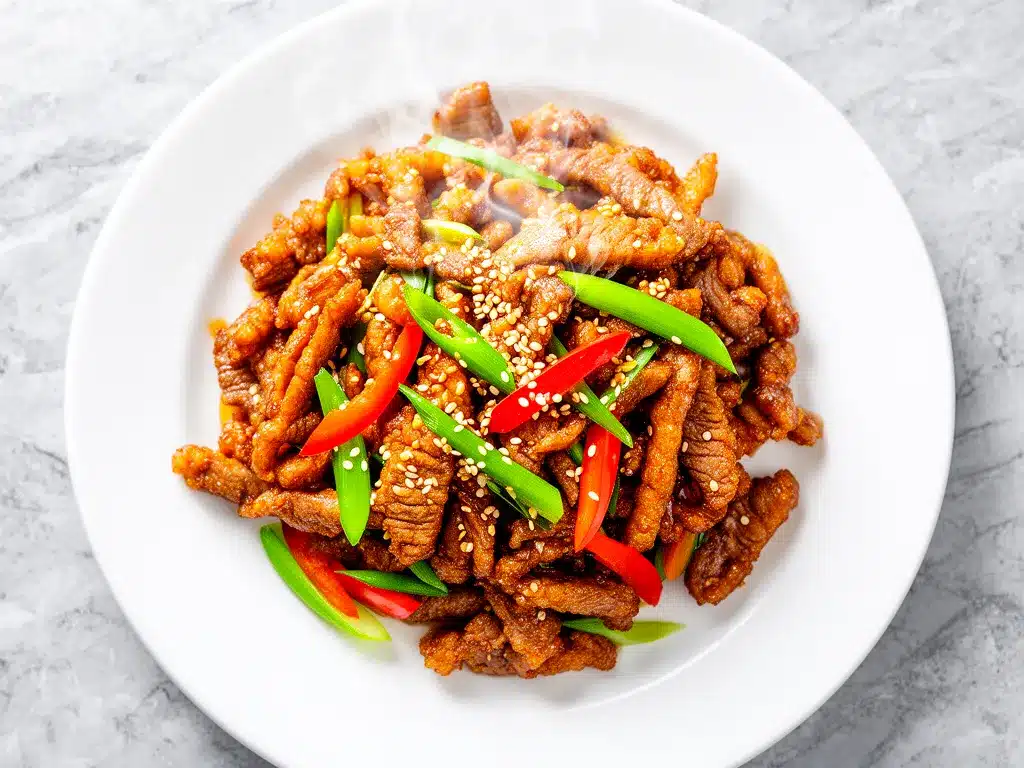
Transfer to a serving plate. Sprinkle generously with toasted sesame seeds and sliced green onions. Serve immediately over steamed jasmine rice or cauliflower rice. The beef will continue to crisp up slightly as it sits, so don’t let it sit too long in the sauce or it might soften.
Total Time: About 45 minutes (15 minutes prep, 15 minutes marinating, 15 minutes cooking)
Expert Tips & Tricks
Here’s everything I’ve learned from making this dozens of times. These tips will save you from my mistakes.
Slice Against the Grain
This is the #1 tip for tender beef. I’ve made the mistake of slicing with the grain before, and the result was chewy and unpleasant. Take a second to identify the grain direction. It’s easier if the beef is slightly frozen—slice it when it’s firm but not rock hard.
Don’t Crowd the Pan
If you put too many pieces of beef in the pan at once, the temperature drops, and the beef steams instead of frying. You’ll get soggy, greasy beef. Cook in batches. It’s worth the extra 5 minutes.
Toast Your Sesame Seeds
Raw sesame seeds are fine, but toasted ones add a nutty aroma and extra crunch. Just put them in a dry pan over medium heat for 2-3 minutes, shaking constantly. Watch them closely—they burn easily.
Thicken the Sauce Properly
The sauce needs to be thick enough to cling to the beef. If it’s too thin, the beef will slide out of the sauce. If it’s too thick, it’ll be gummy. Aim for a syrupy consistency, like warm honey. If it’s too thin, let it simmer a bit longer. If it’s too thick, add a splash of water.
Combine Off Heat
Always add the fried beef to the sauce off the heat. If you leave it on the heat, the beef will absorb the sauce and become soggy. Toss it quickly, plate it, and serve. The residual heat will warm everything through.
Common Mistakes (and how to avoid them):
- Mistake: Beef is tough. Fix: You didn’t slice against the grain, or you overcooked it. Slice thinly and fry quickly.
- Mistake: Sauce is too salty. Fix: Use low-sodium soy sauce and broth. Taste the sauce before adding it to the beef.
- Mistake: Beef is soggy. Fix: You crowded the pan, or you let the beef sit in the sauce too long. Cook in batches and serve immediately.
Variations & Substitutions
Once you’ve nailed the basic version, here’s how you can mix it up. I’ve tried all of these.
Chicken Version
You can use boneless, skinless chicken thighs instead of beef. Slice them into strips and follow the same steps. Chicken thighs stay juicier than breasts. Marinate for 15 minutes, coat in cornstarch, and fry until golden. The sauce works perfectly with chicken too.
Tofu Version (Vegetarian)
Use extra-firm tofu. Press it for 30 minutes to remove water, then cube it. Coat in cornstarch and fry until crispy. The sauce clings to tofu beautifully. It’s a great protein alternative.
Spicy Version
Add 1 tablespoon of chili crisp or sriracha to the sauce. Or add more red pepper flakes. If you like heat, this version is incredible. I sometimes add a pinch of Sichuan peppercorn for a numbing spice.
Vegetable Add-ins
I often toss in broccoli florets or bell pepper strips. Steam or blanch them separately, then add them to the skillet with the sauce and beef at the end. Just toss to coat. It adds color and nutrition.
Air Fryer Method
If you’re avoiding frying, toss the coated beef in 1 tablespoon of oil and air fry at 400°F for 10-12 minutes, shaking halfway. It’s less crispy than frying but still good. You’ll need to cook in batches.
Dietary Modifications:
- Gluten-Free Use tamari instead of soy sauce. Everything else is naturally gluten-free.
- Dairy-Free This recipe is naturally dairy-free. Just ensure your soy sauce is dairy-free (most are).
- Lower-Sugar Reduce brown sugar to 1 tablespoon and use a sugar substitute if needed. The flavor will be less sweet but still savory.
Serving & Storage
How to Serve:
I usually serve this straight from the skillet at the dinner table—it looks rustic and stays warm. But here are other ways I’ve enjoyed it:
Side Dishes:
- Steamed jasmine rice (essential for soaking up the sauce)
- Steamed broccoli or green beans
- Cauliflower rice for a low-carb option
- A simple cucumber salad with vinegar and sesame oil
Toppings Bar:
When I have guests, I put out: extra toasted sesame seeds, sliced green onions, chili crisp, and lime wedges. Everyone customizes their bowl.
Storage Instructions:
Refrigerator:
Store in an airtight container for up to 3 days. The beef will soften in the fridge, which is normal. The sauce will thicken.
Reheating:
Best method: Add a splash of water or broth to a skillet, add your leftover beef, and heat gently over medium heat, stirring frequently. This helps restore the sauce consistency.
Microwave method: Heat in 30-second intervals, stirring between. Add a splash of water to prevent drying out.
Avoid: Reheating in the oven—it dries out the beef.
Freezing:
Honestly, this doesn’t freeze well. The cornstarch coating breaks down and becomes mushy when thawed. The texture just isn’t the same. Make it fresh or store in the fridge for up to 3 days.
Meal Prep:
You can prep the beef and sauce ahead. Slice and marinate the beef, store in the fridge. Mix the sauce and store in the fridge. Cook the beef and assemble right before serving. This saves time on busy weeknights.
Nutrition Information
I’m not a nutritionist, but here’s the breakdown if you’re tracking.
Per Serving (based on 4 servings):
– Calories: 450
– Protein: 35g
– Carbs: 28g
– Fiber: 1g
– Sugar: 12g
– Fat: 22g
– Saturated Fat: 5g
– Cholesterol: 85mg
– Sodium: 800mg
– Calcium: 40mg
What’s Good:
– High protein from the beef
– Flavorful without being overly heavy
– Can be made lower-carb with cauliflower rice
What to Know:
– Higher in sodium due to soy sauce
– Contains some sugar from the brown sugar
– Moderate fat content from the beef and oil
My Take:
“Look, this is comfort food. It’s not a diet recipe. But it’s way better than takeout, costs less, and I know exactly what’s in it. When I want to make it lighter, I use leaner cuts of beef and reduce the oil in the frying process. But usually? I just eat a reasonable portion and enjoy it.”
Final Thoughts
So that’s my go-to Crispy Sesame Beef! I’ve probably talked your ear off at this point, but when you make a recipe this often, you have a lot to say about it.
This has saved weeknight dinners more times than I can count. It’s my answer to “what’s for dinner” when I’m tired, don’t want takeout, and still want something that tastes really good. My kids are happy, my husband’s happy, and I’m happy because I’m not stressed about cooking.
Make it yours! Try different add-ins, swap in your favorite vegetables, adjust the garlic (though more is always better in my opinion). The best recipes are the ones you adapt to your family’s tastes.
If you make this, drop a comment and let me know what you think! I love hearing how recipes turn out in your kitchen. And if something doesn’t work, tell me that too—I’m here to help troubleshoot.
Happy cooking! And I hope your kitchen smells half as good as mine does right now.
Frequently Asked Questions
Q: Can I use chicken instead of beef?
A: Absolutely. Chicken thighs work best because they stay juicy. Slice them into strips, marinate for 15 minutes, and fry until golden. The sauce is perfect for chicken too. It’s a great alternative if you’re not a beef eater.
Q: Why did my sauce turn out watery?
A: Usually means you didn’t simmer it long enough. The sauce needs to reduce to a syrupy consistency. Let it cook for 3-4 minutes after adding the ingredients. If it’s still thin, add a tiny cornstarch slurry (1 teaspoon cornstarch mixed with 1 tablespoon water) to thicken it.
Q: Can I make this ahead for a dinner party?
A: Sort of. Prep the beef and sauce ahead, but cook the beef and combine right before serving. The beef loses its crispiness if it sits in the sauce. I prep everything on Sunday and cook on Wednesday. It saves so much time.
Q: Why did my beef get soggy?
A: You probably crowded the pan while frying, or you let the beef sit in the sauce too long. Cook in batches to ensure even frying, and toss the beef in the sauce just before serving.
Q: Can I use an air fryer?
A: Yes. Toss the coated beef in a little oil and air fry at 400°F for 10-12 minutes, shaking halfway. It’s less crispy than frying but still good. You’ll need to cook in batches. The sauce preparation remains the same.
Q: How do I reheat leftovers without it getting dry?
A: Add a splash of water or broth to a skillet, add your leftover beef, and heat gently over medium heat, stirring frequently. The extra liquid brings back the sauce consistency. Microwave sort of works but tends to dry it out. If you do microwave, definitely add a splash of water first and heat in short bursts, stirring between.
Q: Can I double this recipe?
A: Absolutely! Double everything and use your biggest skillet. The cooking times stay the same. I do this when I’m meal-prepping or feeding a crowd. Just make sure your skillet is big enough for the beef—you might need to cook in more batches.
Pin This Recipe!
Crispy Sesame Beef: Better Than Takeout
- Total Time: 45 minutes
- Yield: 4 servings 1x
Description
A homemade version of crispy sesame beef that is faster, cheaper, and tastier than takeout. This recipe uses a cornstarch coating for a shatteringly crisp exterior and a balanced sweet-salty sauce, all made in under 45 minutes.
Ingredients
- 1.5 lbs flank steak, sliced against the grain into thin strips
- 1 tablespoon soy sauce (for marinade)
- 1 teaspoon cornstarch (for marinade)
- Pinch of black pepper
- 1 large egg white, whisked until frothy
- ½ cup cornstarch (for coating)
- Neutral oil (such as avocado or vegetable oil) for shallow frying
- ½ cup low-sodium soy sauce
- 2 tablespoons dark soy sauce
- ¼ cup low-sodium chicken broth
- 2 tablespoons rice vinegar
- 3 tablespoons light brown sugar
- 6 cloves garlic, minced
- 1 tablespoon fresh ginger, grated
- 1 teaspoon red pepper flakes (adjust to taste)
- 2 tablespoons sesame seeds, toasted
- 2 stalks green onions, sliced
Instructions
- Slice the flank steak against the grain into thin, bite-sized strips. Place in a bowl with 1 tablespoon soy sauce, 1 teaspoon cornstarch, and a pinch of black pepper. Toss to coat and let marinate for 15 minutes.
- Pat the marinated beef dry with paper towels to remove excess moisture. In a separate large bowl, whisk the egg white until frothy. Add the beef strips and toss to coat evenly.
- Add the remaining ½ cup of cornstarch to the beef and toss gently until each piece is lightly coated in a dusting. Avoid thick clumps.
- In a small bowl, whisk together the soy sauce, dark soy sauce, chicken broth, rice vinegar, brown sugar, minced garlic, grated ginger, and red pepper flakes until the sugar is dissolved. Set aside.
- Heat about ½ inch of neutral oil in a large skillet or wok over medium-high heat. Once the oil is hot, add the beef in a single layer, ensuring not to overcrowd the pan. Fry for 2-3 minutes per side until golden brown and crispy. Remove with a slotted spoon and drain on a paper towel-lined plate. Repeat with remaining beef.
- Wipe out the skillet or use a clean one. Add 1 tablespoon of oil over medium heat. Pour in the sauce mixture and stir constantly for 2-3 minutes until it thickens to a glossy, syrupy consistency.
- Immediately add the fried beef back into the skillet with the sauce. Toss quickly and gently to coat every piece, then remove from heat.
- Transfer to a serving plate and sprinkle generously with toasted sesame seeds and sliced green onions. Serve immediately over steamed jasmine rice or cauliflower rice.
Notes
Slice the beef against the grain for tenderness. Do not crowd the pan when frying to ensure crispiness rather than steaming. Toast sesame seeds in a dry pan for 2 minutes until fragrant. Combine the beef with the sauce off the heat to prevent sogginess. This recipe does not freeze well due to the cornstarch coating becoming mushy.
- Prep Time: 15 minutes
- Cook Time: 15 minutes
- Category: Main Course
- Cuisine: Chinese
Nutrition
- Serving Size: 1/4 of the recipe
- Calories: 450
- Sugar: 12
- Sodium: 800
- Fat: 22
- Saturated Fat: 5
- Carbohydrates: 28
- Fiber: 1
- Protein: 35
Keywords: crispy sesame beef, homemade takeout, beef stir fry, weeknight dinner, easy beef recipe, cornstarch beef, sesame beef sauce


