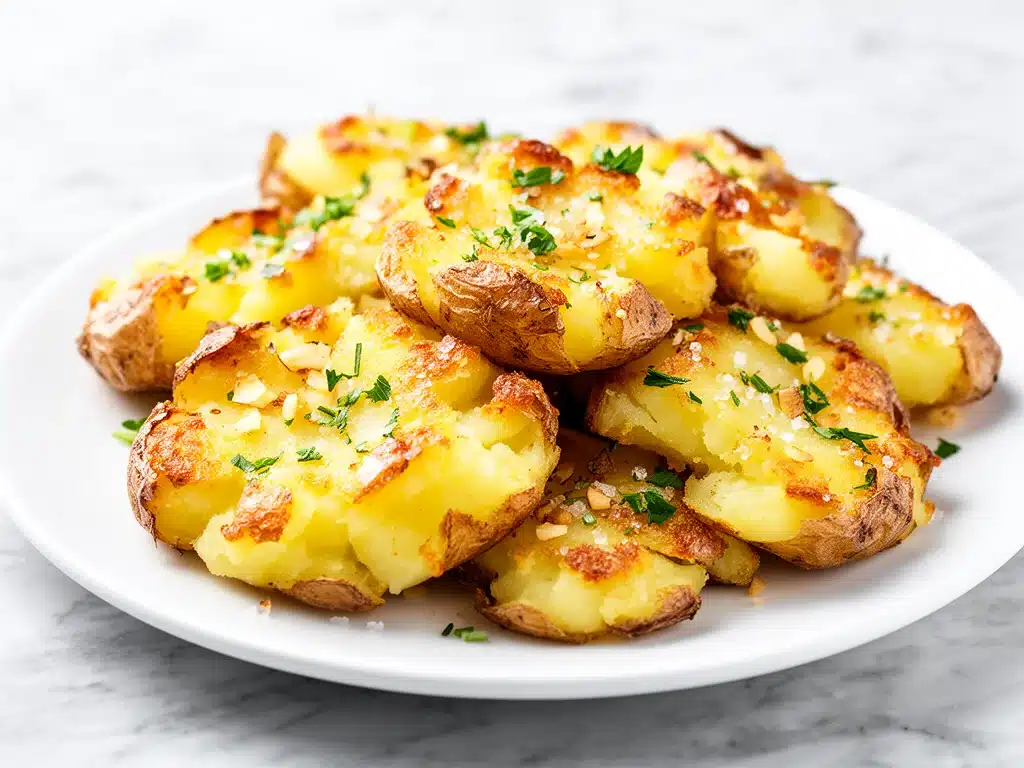
I have a confession to make: I used to think baby potatoes were just a fancy way of saying “tiny regular potatoes.” I’d buy them, boil them whole, and serve them with zero enthusiasm. They were bland, waxy, and frankly, a waste of good money. That changed last Tuesday, about an hour before my husband was supposed to walk through the door with takeout menus in hand.
I was staring at a mesh bag of small Yukon Golds, feeling that familiar weeknight panic. I didn’t have time for a complicated roast that took two hours, and I definitely didn’t want to deal with the cleanup of deep-frying fries. So, I did something reckless. I smashed them flat with the bottom of a heavy glass, tossed them in garlic-infused oil, and threw them under the broiler. I was making Crispy Smashed Garlic Baby Potatoes—a dish I’d seen on Instagram but never actually tried myself.
When I pulled the pan out, the kitchen smelled like a bakery mixed with a savory dream. The edges were shatteringly crisp, the centers fluffy, and every nook and cranny was coated in golden garlic butter. My husband took one bite, put down his takeout menu, and asked me to make these “every time.” That was six months ago. Now, this is my go-to side dish. It’s fast, it’s ridiculously cheap, and it turns the most humble ingredient into something that looks like it came from a high-end bistro.
If you’re tired of mushy boiled potatoes or burnt roast potatoes, you need to try this method. I’ve tested this Crispy Smashed Garlic Baby Potatoes recipe dozens of times—sometimes burning them, sometimes under-seasoning them—but I’ve finally nailed the perfect balance of crunch and flavor. It’s the kind of side dish that steals the show, even if you’re just serving it with simple grilled chicken or a salad.
Why You’ll Love This Recipe
There are a lot of potato recipes out there, but this one sticks. It’s not just about the taste; it’s about how easy it is to pull off when you’re exhausted. Here’s why this Crispy Smashed Garlic Baby Potatoes recipe has earned a permanent spot in my weekly rotation:
- Stupidly Simple Technique — You don’t need any fancy gadgets. Just a pot of boiling water and the bottom of a mug or a glass. I’ve made these while holding a crying baby, and they still came out perfect. If you can boil water, you can make this.
- Lightning Fast — From start to finish, you’re looking at about 20 minutes of active work, plus boiling time. Compared to roasting whole potatoes for an hour, this is a lifesaver on busy weeknights when dinner needs to be on the table ASAP.
- Maximum Crunch, Zero Oil Guilt — Because you’re smashing them flat, you get way more surface area for crisping. You use less oil than you think, yet they get that deep-fried texture. It’s the best of both worlds.
- Pantry-Friendly Ingredients — You already have everything you need. Potatoes, oil, garlic, salt, and pepper. No weird spices or hard-to-find items. It’s comfort food at its most accessible.
- Crowd-Pleaser Guaranteed — I’ve served these to my picky nine-year-old and my food-snobby sister-in-law. Both asked for the recipe. The garlic flavor is savory and aromatic without being overpowering, and the texture contrast is addictive.
- Perfect Leftovers — Unlike mashed potatoes that get weird in the fridge, these smashed potatoes actually reheat beautifully. I’ll toss them back in the oven or air fryer for five minutes, and they’re crispy again. Dinner for two nights, made once.
This is my answer to “what’s for a side dish?” when I want something that feels special but requires zero stress. It’s reliable, delicious, and always a hit.
Ingredients You’ll Need
Here’s the best part: you probably have most of this already. I’m particular about three things here—the type of potato, the quality of the oil, and the freshness of the garlic—but the rest is basic pantry stuff.
For the Potatoes
Baby Yukon Gold Potatoes (2 lbs / 900g) — These are non-negotiable for me. Yukon Golds have that perfect buttery flavor and waxy-yet-fluffy texture. Red potatoes work too, but they stay a bit denser. Avoid Russets; they’re too starchy and fall apart when you smash them. Look for small, uniform potatoes so they cook evenly.
Water (enough to cover) — Just good old tap water for boiling. Add a generous pinch of salt here; it seasons the potato from the inside out.
For the Garlic Oil Toss
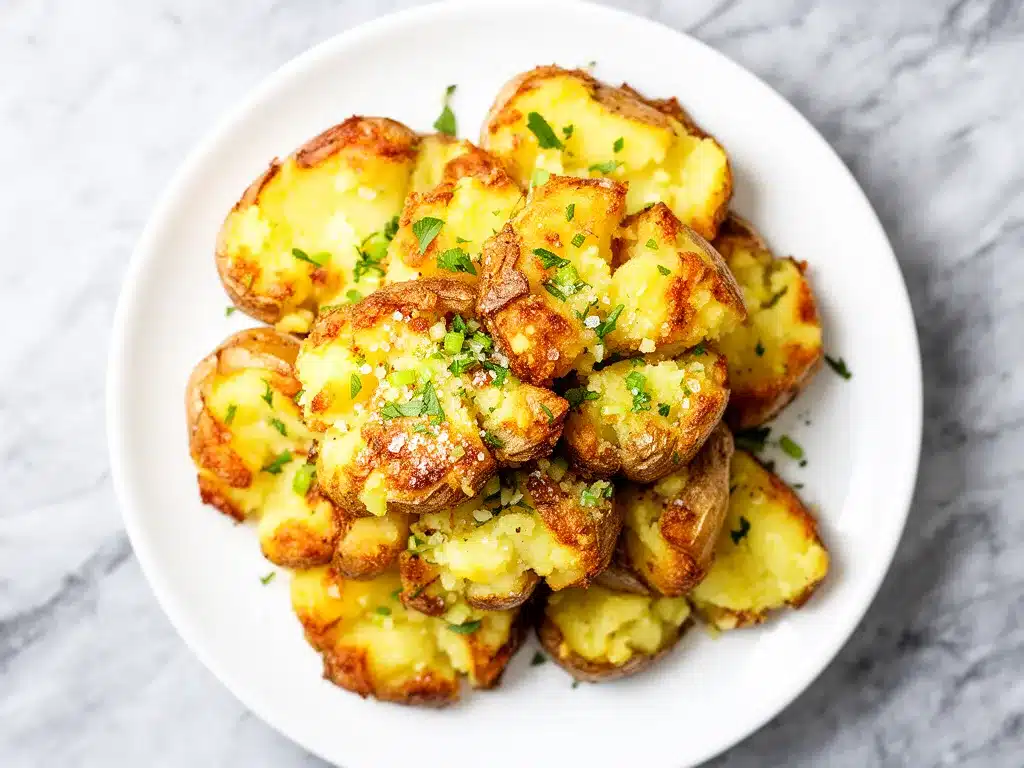
Extra Virgin Olive Oil (3 tablespoons / 45ml) — I use good quality EVOO here. It adds a fruity, grassy note that cuts through the starch. If you’re on a budget, a neutral oil like avocado or grapeseed works, but you’ll miss that rich flavor. Don’t use butter alone; it burns too fast under the broiler.
Garlic (4-5 cloves, minced / about 1 tablespoon) — Fresh garlic only. Please, for the love of all things holy, do not use jarred minced garlic. It has a metallic, sour taste that ruins the dish. Freshly minced gives you that sharp, aromatic punch that makes people ask what the secret ingredient is.
Garlic Powder (1 teaspoon) — This is my secret weapon. The fresh garlic gives the aroma, but the powder ensures every bite is seasoned. It’s a double-whammy of garlic flavor that is absolutely necessary.
Kosher Salt (1 teaspoon) — Or to taste. Kosher salt is easier to control than table salt. If you use table salt, use half the amount.
Freshly Cracked Black Pepper (½ teaspoon) — Adds a little heat and depth. Don’t skip this.
Optional Garnishes
Fresh Parsley or Chives (2 tablespoons, chopped) — Adds a pop of color and a fresh, grassy finish. It brightens up the rich, savory potatoes.
Grated Parmesan Cheese (2 tablespoons) — If you want to go full indulgent, a sprinkle of Parmesan adds a salty, umami kick. I do this when I have guests coming over.
Red Pepper Flakes (½ teaspoon) — For a little heat. I love the contrast of spicy and savory.
Common Substitutions
No Yukon Golds? Small red potatoes or fingerlings work well. Just adjust boiling time slightly if they’re larger.
Vegetarian/Vegan? This recipe is naturally vegan if you skip the Parmesan. Use olive oil exclusively.
Gluten-Free? Yes, naturally gluten-free. Just ensure your garlic powder doesn’t have any anti-caking agents with wheat (rare, but check labels if you’re sensitive).
Equipment Needed
You don’t need fancy equipment for this. Here’s what I actually use in my kitchen:
Large Pot with Lid — I use a 6-quart pot. It needs to be big enough to hold the potatoes with room for water to circulate. My heavy-bottomed stainless steel pot works perfectly.
Baking Sheet — A standard half-sheet pan (18×13 inches). I line it with parchment paper for easy cleanup, though it’s not strictly necessary. A rimmed baking sheet is best so the oil doesn’t spill over.
Parchment Paper — Optional but highly recommended. It catches the garlic bits so they don’t burn and stick to the pan. Makes cleanup a breeze.
Mug or Glass — For smashing the potatoes. I use a heavy-bottomed drinking glass. The flat bottom works best. You could also use a potato masher, but a glass gives more control and less mess.
Small Bowl — For mixing your garlic oil. Keeps your hands clean and ensures even coating.
Brush or Tongs — To toss the potatoes in the oil. I use tongs because they’re faster and less messy than a brush.
Broiler — Your oven’s broiler is essential for that final crispy step. If you don’t have a broiler, you can roast at 450°F (230°C) for 15-20 minutes, but the texture won’t be as shatteringly crisp.
Optional: Air Fryer — If you’re health-conscious, you can air fry these at 400°F for 10-12 minutes after smashing. They come out incredibly crispy with less oil. I’ve tested this, and it works great.
How to Make It: Step-by-Step
Alright, let’s make this! I’m walking you through exactly how I do it, including the little tricks I’ve picked up over the years.
Step 1: Prep the Potatoes (5 minutes)
Wash the baby potatoes thoroughly. You don’t need to peel them—the skin adds texture and nutrients. If any potatoes are significantly larger than others, cut them in half so they’re roughly uniform in size. This ensures even cooking. Set them aside.
Step 2: Boil Until Tender (10-12 minutes)
Fill your large pot with water and add a generous pinch of salt (it should taste like the ocean). Bring to a rolling boil. Add the potatoes. Cook for 10-12 minutes, or until they are fork-tender. You should be able to pierce the center of a potato with a fork with zero resistance. Do not overcook them to the point of mush; they need to hold their shape when you smash them.
Pro Tip: Drain the potatoes immediately. Leaving them in the hot water will make them waterlogged, and we want them dry for crisping.
Step 3: Smash Them Flat (5 minutes)
Line your baking sheet with parchment paper. Place the hot potatoes on the sheet. Let them cool for just 2-3 minutes—enough so you can handle them without burning your fingers, but still warm enough to smash easily.
Take your heavy glass or mug and gently press down on each potato. You want to flatten them to about ½-inch thickness. Don’t crush them into paste; you want them to stay in one piece with a rough, craggy surface. The rougher the surface, the crispier they’ll be. Arrange them in a single layer with a little space between each one.
Step 4: Season with Garlic Oil (2 minutes)
In a small bowl, whisk together the olive oil, minced fresh garlic, garlic powder, salt, and black pepper. The mixture will look like a golden, fragrant slurry.
Drizzle this mixture generously over the smashed potatoes. Use your hands or tongs to toss them, ensuring every potato is coated on both sides. The garlic will stick to the rough surface. Don’t be shy with the oil; it’s what creates the crust.
Step 5: Broil Until Golden (5 minutes)
Preheat your broiler on high. Slide the baking sheet under the broiler. Watch them closely! Broilers vary in intensity. You want the edges to turn golden brown and the garlic to become fragrant and slightly caramelized. This usually takes 3-5 minutes.
Warning: Garlic burns fast. If you see the garlic turning dark brown, pull them out immediately. Burnt garlic tastes bitter and ruins the dish.
Step 6: Garnish and Serve
Remove from the oven. Sprinkle with fresh parsley or chives if using. Serve immediately while hot and crispy.
Total Time: About 20-25 minutes (10 min prep/boil, 5 min smash/season, 5 min broil).
Expert Tips & Tricks
Here’s everything I’ve learned from making this dozens of times. These tips will save you from my mistakes.
The Smash Matters
Don’t just flatten them smoothly. Create ridges and cracks. Those textured surfaces are where the crisping happens. When I first made these, I pressed them too flat, and they came out more like fried pancakes than crispy potatoes. Rough edges = maximum crunch.
Dry Potatoes = Crispy Potatoes
After boiling, let the potatoes steam-dry in the colander for a minute. Any excess moisture will steam them in the oven instead of crisping them. If they’re wet, pat them dry with a towel before smashing. This is a small step that makes a huge difference.
Garlic Timing
Some recipes tell you to roast the garlic whole. I prefer mincing it into the oil because it distributes the flavor evenly. However, if you’re worried about burning, you can mix the fresh garlic with the oil right before tossing, or use more garlic powder and less fresh garlic. But honestly, fresh garlic is worth the risk if you watch the broiler.
Don’t Crowd the Pan
If you have a small oven, use two baking sheets. Crowding the potatoes will cause them to steam rather than broil. Give them space to breathe. If they’re touching, they won’t crisp up on the sides.
Common Mistakes
Mistake: Potatoes fall apart. Fix: You overcooked them in the boiling water. Test with a fork; they should be tender but firm. Also, let them cool slightly before smashing.
Mistake: Garlic is burnt and bitter. Fix: Your broiler is too hot, or you left them in too long. Keep the pan further from the heating element, or switch to a high-heat roast (450°F) if your broiler is unpredictable.
Mistake: Not crispy enough. Fix: You didn’t use enough oil, or the potatoes were too wet. Ensure they’re coated and dry before broiling.
Variations & Substitutions
Once you’ve nailed the basic version, here’s how you can mix it up. I’ve tried all of these.
Cheesy Smashed Potatoes
Sprinkle grated Parmesan or cheddar cheese over the potatoes after broiling. The residual heat will melt it slightly. This is my go-to when I want something extra indulgent.
Herb-Crusted
Add dried rosemary, thyme, or oregano to the garlic oil mixture. Rosemary pairs beautifully with garlic and potatoes. It adds an earthy, aromatic depth.
Spicy Smashed Potatoes
Add red pepper flakes or a dash of cayenne to the oil. Or, drizzle with hot sauce after broiling. Great if you like a kick.
Air Fryer Version
After smashing and seasoning, place in the air fryer basket in a single layer. Cook at 400°F (200°C) for 10-12 minutes, flipping halfway. They come out incredibly crispy with just a spray of oil. Perfect for small kitchens.
Dietary Modifications
Lower Fat: Reduce the oil to 1 tablespoon and use a cooking spray. They’ll still crisp, but less richly.
Gluten-Free: Naturally gluten-free. Just check your garlic powder label.
Vegan: Use olive oil and skip cheese. Add nutritional yeast for a cheesy flavor.
Serving & Storage
How to serve these bad boys:
I usually serve these straight from the baking sheet at the dinner table—it looks rustic and stays warm. They pair perfectly with grilled chicken, roasted salmon, or even a simple green salad. I also love them with crispy air fryer chicken wings for a game-day spread.
Side Dish Ideas:
- Grilled steak or chops
- Roasted vegetables (asparagus, broccoli)
- Fish tacos
- Simple Caesar salad
Storage Instructions:
Refrigerator: Store leftovers in an airtight container for up to 3 days. They will lose some crispiness, but they’re still delicious.
Reheating: The microwave is the enemy here. It will make them soggy. Instead, reheat in a hot skillet for 2-3 minutes, or in the oven/air fryer at 400°F for 5 minutes. They’ll regain their crunch.
Freezing: I don’t recommend freezing these. The texture of the potato changes significantly after freezing and thawing—it becomes grainy and watery. Make them fresh whenever possible.
Nutrition Information
I’m not a nutritionist, but here’s the breakdown if you’re tracking. Note that values are estimates based on standard ingredients.
Per Serving (based on 4 servings, with 1 tbsp oil per serving):
- Calories: 220
- Protein: 4g
- Carbs: 32g
- Fiber: 3g
- Sugar: 2g
- Fat: 9g
- Saturated Fat: 1g
- Sodium: 280mg
What’s Good:
- High in complex carbohydrates for energy
- Good source of Vitamin C and potassium from the potatoes
- Relatively low in saturated fat
What to Know:
- Calories can vary based on oil usage. Use less oil to reduce calories.
- Contains no gluten, dairy, or nuts (naturally).
My Take:
Look, these are potatoes with oil. They’re not a diet food, but they’re far healthier than deep-fried fries. They’re filling, satisfying, and made with real ingredients. When I want to make it lighter, I cut the oil in half and add more herbs. But usually? I just enjoy a reasonable portion and appreciate that I made dinner from scratch.
Final Thoughts
So that’s my go-to Crispy Smashed Garlic Baby Potatoes! I’ve probably talked your ear off at this point, but when you make a recipe this often, you have a lot to say about it.
This dish has saved weeknight dinners more times than I can count. It’s my answer to “what’s for a side?” when I’m tired, don’t want takeout, and still want something that tastes really good. My kids are happy, my husband’s happy, and I’m happy because I’m not stressed about cooking.
Make it yours! Try different herbs, add cheese, or serve them with a dollop of sour cream. The best recipes are the ones you adapt to your family’s tastes.
If you make this, drop a comment and let me know what you think! I love hearing how recipes turn out in your kitchen. And if something doesn’t work, tell me that too—I’m here to help troubleshoot.
Happy cooking! And I hope your kitchen smells half as good as mine does right now.
Frequently Asked Questions
Can I use Russet potatoes instead of Yukon Golds?
You can, but the texture will be different. Russets are very starchy and can fall apart when you smash them. If you use them, be very gentle and let them cool completely before smashing. Yukon Golds or red potatoes are much more forgiving and hold their shape better.
Why did my potatoes stick to the pan?
This usually happens if the pan wasn’t lined or if the potatoes were too wet. Always use parchment paper for easy release. Also, ensure the potatoes are dry after boiling before tossing them in oil. The oil acts as a release agent, but water and oil don’t mix well.
Can I make these ahead of time?
Yes! You can boil and smash the potatoes up to a day in advance. Store them in the fridge on a lined baking sheet. When you’re ready to cook, just drizzle with the garlic oil and broil. They might take a minute longer in the broiler since they’re cold.
Is it safe to eat raw garlic in the oil?
Yes, because the high heat of the broiler cooks the garlic quickly. However, if you’re sensitive to raw garlic bite, you can mince the garlic very finely so it cooks faster. Or, use more garlic powder and less fresh garlic.
Can I freeze these potatoes?
I don’t recommend it. Freezing makes the potato texture grainy and watery. They’re best enjoyed fresh. If you have leftovers, store them in the fridge and reheat in the oven or skillet.
How do I keep them crispy if I’m serving a crowd?
Keep them in a warm oven (200°F) on a wire rack set over a baking sheet. This allows air to circulate and keeps them crisp. Don’t cover them with foil, or they’ll steam and get soggy.
Can I use an air fryer instead of a broiler?
Absolutely. Air fryer smashed potatoes are fantastic. Toss them in oil, place in the basket in a single layer, and cook at 400°F for 10-12 minutes, flipping halfway. They come out incredibly crispy with less oil. Just watch them closely to prevent burning.
Pin This Recipe!
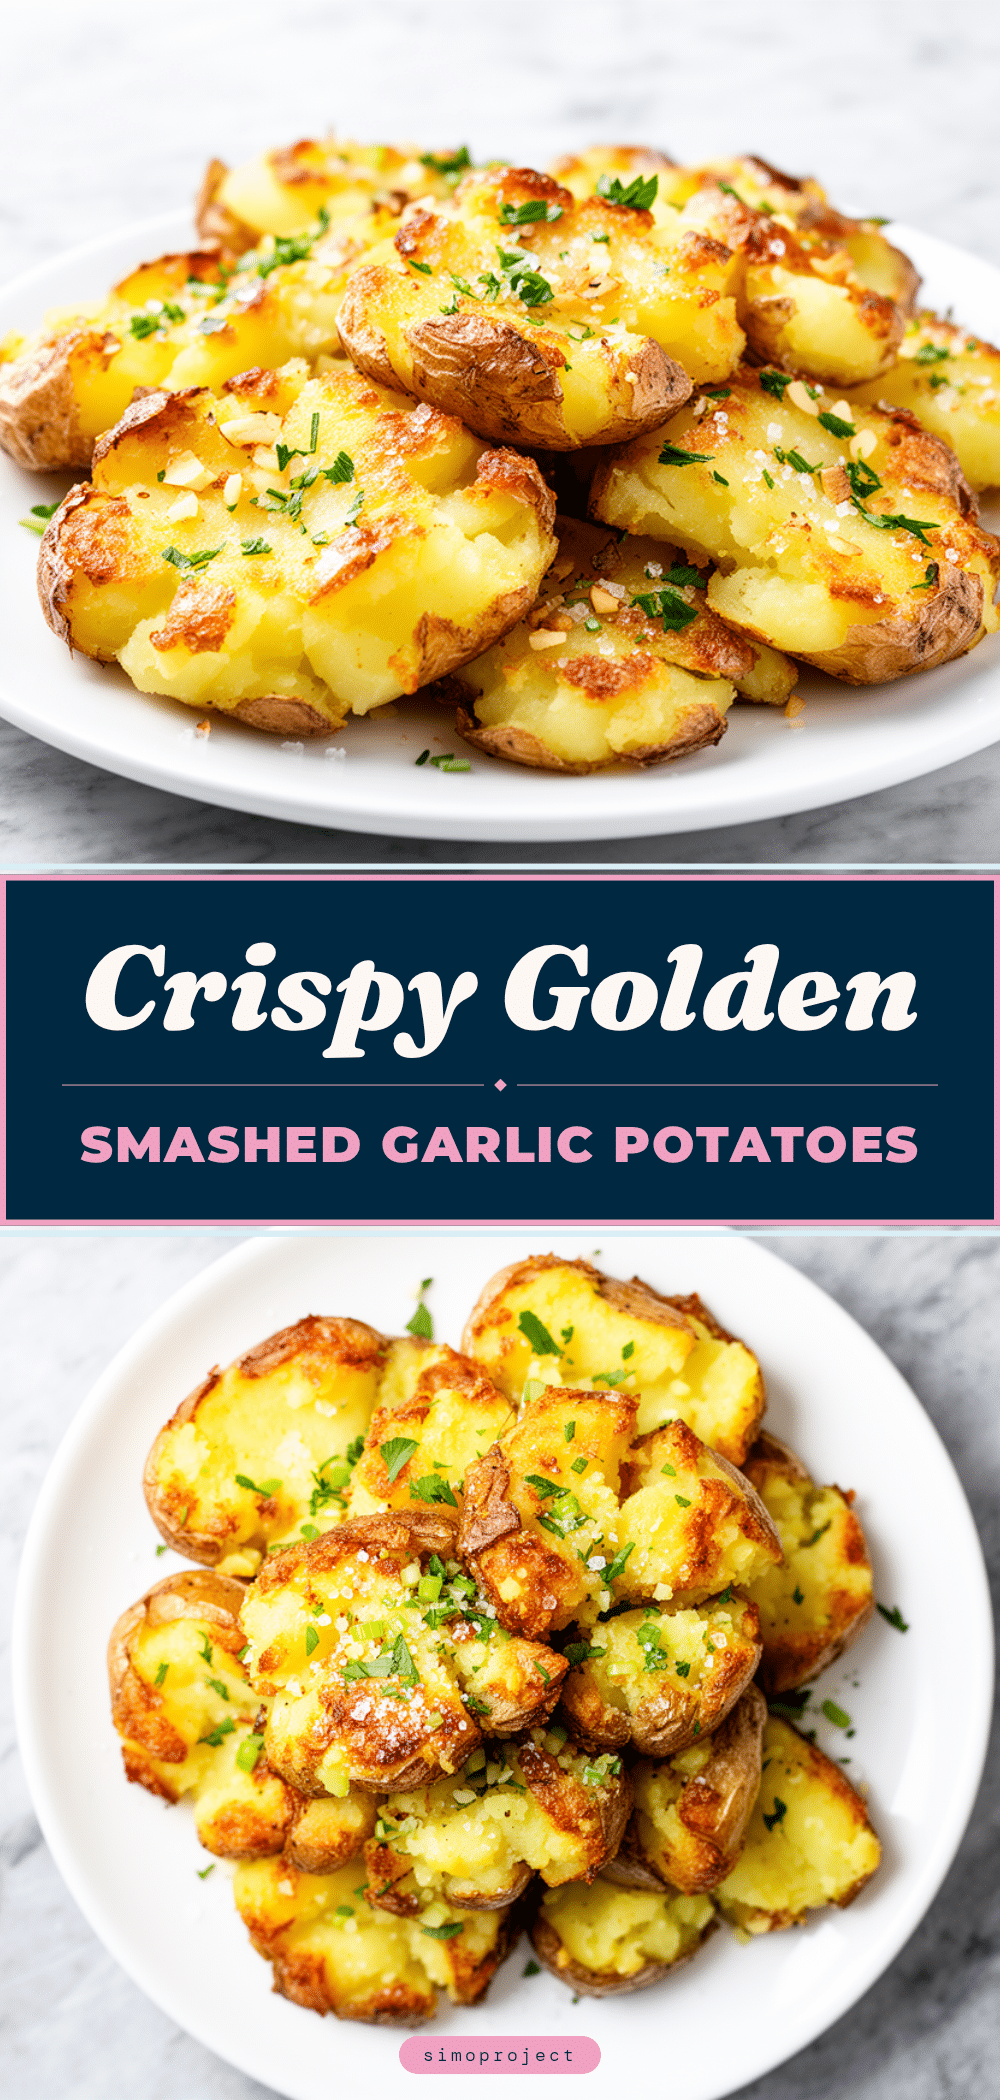

Crispy Smashed Garlic Baby Potatoes
- Total Time: 20-25 minutes
- Yield: 4 servings 1x
Description
A fast and easy side dish featuring baby Yukon Gold potatoes that are boiled, smashed flat, tossed in garlic-infused oil, and broiled until shatteringly crisp and golden.
Ingredients
- 2 lbs baby Yukon Gold potatoes
- Water (enough to cover)
- 3 tablespoons extra virgin olive oil
- 4–5 cloves garlic, minced
- 1 teaspoon garlic powder
- 1 teaspoon kosher salt
- 1/2 teaspoon freshly cracked black pepper
- 2 tablespoons fresh parsley or chives, chopped (optional garnish)
- 2 tablespoons grated Parmesan cheese (optional garnish)
- 1/2 teaspoon red pepper flakes (optional garnish)
Instructions
- Wash the potatoes thoroughly. If any are significantly larger, cut them in half to ensure uniform size. Set aside.
- Fill a large pot with water, add a generous pinch of salt, and bring to a rolling boil.
- Add potatoes to the boiling water and cook for 10-12 minutes until fork-tender but not mushy.
- Drain the potatoes immediately and let them steam-dry in a colander for a minute. Pat dry if necessary to remove excess moisture.
- Line a baking sheet with parchment paper. Place potatoes on the sheet and let cool for 2-3 minutes until handleable.
- Using the bottom of a heavy glass or mug, gently press each potato flat to about 1/2-inch thickness, creating a rough, craggy surface. Arrange in a single layer with space between them.
- In a small bowl, whisk together olive oil, minced garlic, garlic powder, salt, and black pepper.
- Drizzle the garlic oil mixture over the potatoes and toss to coat evenly on both sides.
- Preheat the oven broiler on high.
- Broil the potatoes for 3-5 minutes, watching closely, until edges are golden brown and garlic is fragrant. Remove immediately if garlic starts to burn.
- Garnish with fresh herbs, Parmesan, or red pepper flakes if desired. Serve immediately.
Notes
Do not use Russet potatoes as they are too starchy and will fall apart when smashed. Ensure potatoes are dry before smashing to maximize crispiness. Watch closely under the broiler as garlic burns quickly. For air fryer version, cook at 400°F for 10-12 minutes, flipping halfway.
- Prep Time: 5 minutes
- Cook Time: 15-20 minutes
- Category: Side Dish
- Cuisine: American
Nutrition
- Serving Size: 1 serving (approx. 4
- Calories: 220
- Sugar: 2
- Sodium: 280
- Fat: 9
- Saturated Fat: 1
- Carbohydrates: 32
- Fiber: 3
- Protein: 4
Keywords: smashed potatoes, garlic potatoes, baby potatoes, side dish, easy recipe, weeknight dinner, crispy potatoes, broiled potatoes, vegetarian, gluten-free


