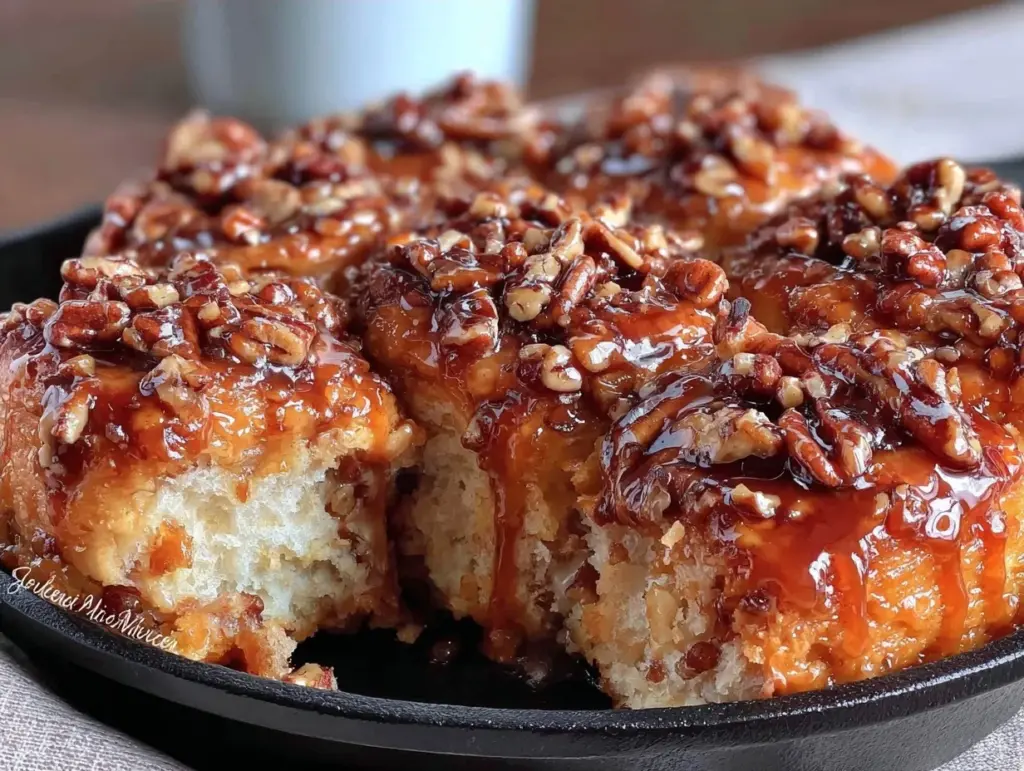
There is a specific kind of magic that happens when the air turns crisp and the leaves start to crunch underfoot. For me, that shift in seasons doesn’t just mean sweater weather; it means my kitchen becomes a laboratory for things that are warm, sweet, and slightly sticky. This past weekend, I decided to stop buying those sad, dry grocery store cinnamon rolls and actually commit to making them from scratch. I chose the Fall Maple Pecan Sticky Buns with Brown Butter Glaze because I wanted something that felt like a hug but looked like it came from a high-end bakery.
I’ve made sticky buns before. A lot of times. And let’s be honest, some were good, but most were just… okay. They were dense, the glaze was too sweet, or the dough didn’t rise properly. But this time? This time was different. I browned the butter first. I toasted the pecans until they were fragrant. And I used real maple syrup instead of that corn syrup nonsense. The result was so good that my partner asked if I was trying to get me fat on purpose. (I said yes.)
These Fall Maple Pecan Sticky Buns with Brown Butter Glaze are the best indulgent weekend recipe I’ve discovered in years. They’re not just breakfast; they’re an experience. They’re the kind of thing you make on a Saturday morning when you have nowhere to be, and the smell alone keeps you in the kitchen for an hour, just breathing it in. I’m sharing this because once you taste the difference that brown butter makes, you’ll never go back to plain butter again.
Why You’ll Make These on Repeat
Look, I know baking from scratch sounds like a lot of work. But hear me out. These buns are actually easier than you think, and the payoff is massive. Here’s why this recipe has permanently replaced my weekend routine:
The Brown Butter Glaze Changes Everything — Seriously, if you skip this step, you’re cheating yourself. Browning the butter gives it a nutty, toasty depth that regular melted butter just can’t match. It’s the secret ingredient that makes these buns taste expensive. I’ve tried making them with just butter, and the glaze is fine, but with brown butter, it’s transcendent.
Smells Like Autumn in a Jar — I’m not being dramatic. When these are baking, my entire house smells like a cozy cabin. My neighbors actually came over to ask what I was making. It’s that comforting blend of cinnamon, toasted nuts, and maple. It sets the mood for the entire day.
Perfect for Sharing (or Not) — These are incredibly shareable. I made a batch for a small brunch last month, and they disappeared in minutes. But let’s be real—they’re also perfect for a solo treat with a strong cup of coffee. They’re rich enough to satisfy a serious sweet tooth without feeling like you’ve eaten a whole cake.
Make-Ahead Friendly — Here’s the best part: you can assemble them the night before and let them rise in the fridge overnight. This means you can wake up, pop them in the oven, and have fresh, hot buns ready in under 45 minutes. It’s the ultimate lazy-but-impressive move.
This is my go-to when I want to feel fancy without the stress. No complicated techniques, no weird ingredients, just reliable, delicious food that makes everyone happy.
Ingredients You’ll Need
Here’s the best part: you probably have most of this already. The dough is simple, mostly pantry staples. But for the glaze and the filling, I’m particular about quality. Don’t skimp on the maple syrup. And definitely buy real butter.
For the Dough
All-purpose flour (3 ½ cups / 440g) — I use King Arthur Brand because it has a bit more protein, which helps the buns rise tall and stay soft. Bread flour works too, but it might make them chewier.
Active dry yeast (2 packets / 14g) — Make sure it’s fresh! If your yeast is old, your buns won’t rise. I usually keep two packets in my pantry just in case. Warm water activates it.
Warm milk (1 cup / 240ml) — Whole milk is best for richness. Warm it until it’s about 110°F (43°C). If it’s too hot, it kills the yeast. If it’s too cold, nothing happens. Test it on your wrist—it should feel like a warm bath.
Granulated sugar (¼ cup / 50g) — Feeds the yeast and adds sweetness. Don’t reduce this too much, or the dough won’t proof well.
Eggs (2 large) — Room temperature eggs mix better into the dough. I take them out of the fridge while the milk warms up.
Melted butter (¼ cup / 60g) — Unsalted is best so you can control the salt. Just let it cool slightly before adding.
Salt (1 teaspoon) — Essential for balancing the sweetness.
For the Filling
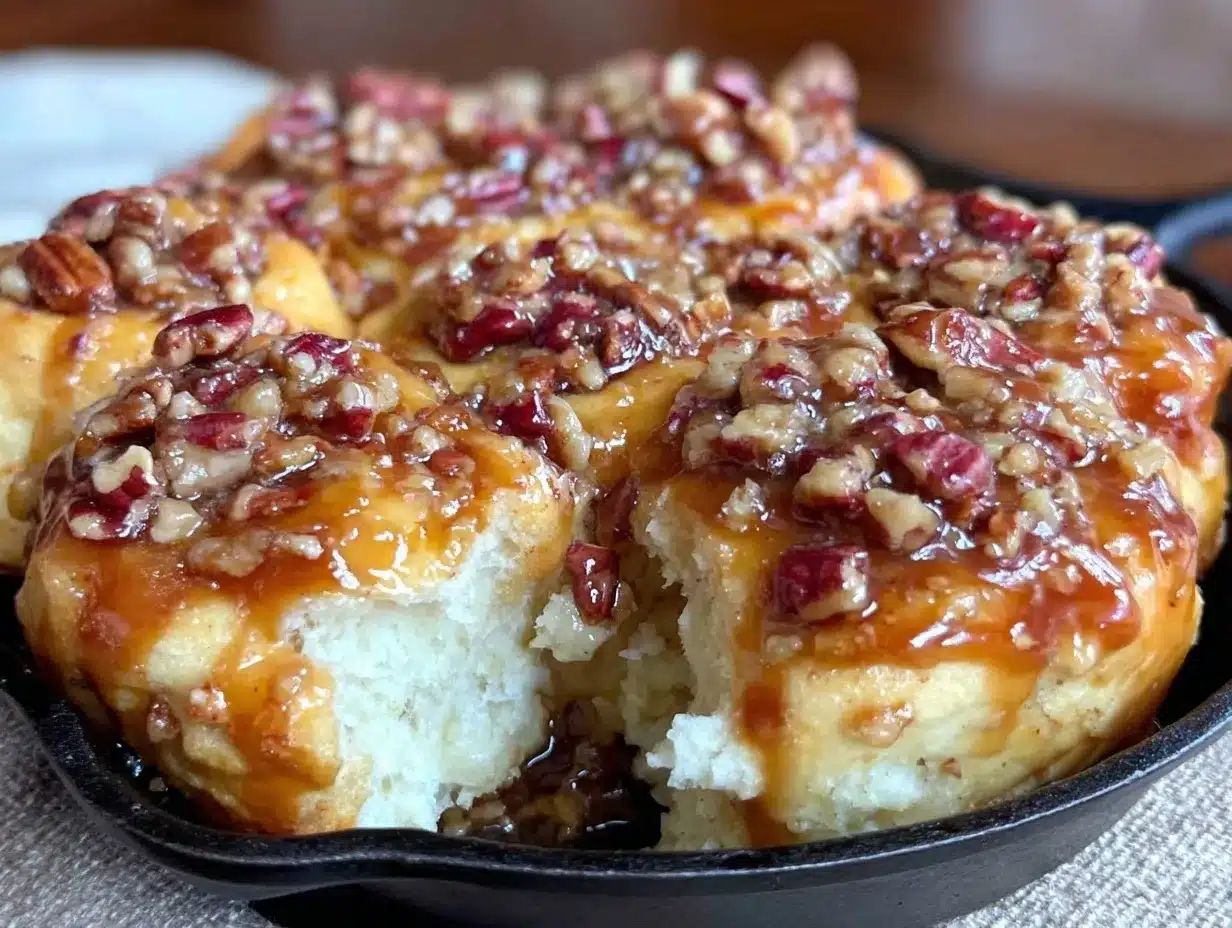
Unsalted butter (½ cup / 115g) — Softened to room temperature. This creates the sticky layer.
Brown sugar (1 cup / 200g) — Packed firmly. This gives that deep molasses flavor.
Ground cinnamon (2 tablespoons) — Use fresh cinnamon if you can. Old cinnamon tastes dusty. I keep mine in the fridge to preserve the flavor.
Pecans (1 cup / 100g, chopped) — Toasting them first is non-negotiable. It brings out the oils and makes them crunchier. I chop them roughly—they should be bite-sized, not dust.
For the Brown Butter Glaze
Unsalted butter (½ cup / 115g) — This is the star. You’ll watch it foam and turn golden brown.
Maple syrup (½ cup / 120ml) — Use Grade B or Grade Amber. Grade A is too light and subtle. You want that strong maple flavor to shine through.
Powdered sugar (2 cups / 240g) — Sifted! Lumps in glaze are the worst. Use a fine-mesh sieve.
Vanilla extract (1 teaspoon) — Pure vanilla, not imitation. It adds warmth.
Pinch of salt — Cuts the sweetness and ties all the flavors together.
Equipment Needed
You don’t need fancy equipment for this. Here’s what I actually use.
Large mixing bowl — I use a 6-quart glass bowl. It’s easy to see the dough rising and clean later.
Stand mixer with dough hook — Optional but highly recommended. Kneading this dough by hand takes about 10-15 minutes of arm work. I use my KitchenAid on low speed. If you don’t have one, hand kneading is fine, just be prepared for a workout.
9×13 inch baking dish — Glass or ceramic works best. Metal heats faster. I use a Pyrex dish because I can see the browning on the bottom.
Meat thermometer — Not strictly necessary, but it helps you get the milk and water temps right. If you don’t have one, use the wrist test.
Small saucepan — For browning the butter. A light-colored pan helps you see the color change better.
Whisk — For the glaze. A small balloon whisk is perfect for breaking up lumps in the powdered sugar.
Pastry brush — To spread the softened butter on the dough evenly.
How to Make It: Step-by-Step
Alright, let’s make this! I’m walking you through exactly how I do it, including the little tricks I’ve picked up.
Step 1: Activate the Yeast (5 minutes)
In the bowl of your stand mixer, combine the warm milk, warm water, and sugar. Sprinkle the yeast over the top and stir gently. Let it sit for 5-10 minutes. You’ll know it’s ready when it gets foamy and bubbly on top. If it doesn’t foam, your yeast is dead or the liquid was too hot. Start over.
Step 2: Make the Dough (10 minutes)
Add the melted butter, eggs, and salt to the yeast mixture. Switch to the dough hook and gradually add the flour, one cup at a time. Mix on low speed until a shaggy dough forms. Then, increase to medium-low and knead for 5-7 minutes. The dough should be smooth, elastic, and slightly tacky but not sticky. If it’s sticking to the sides, add a tablespoon of flour. If it’s too dry, add a splash of milk.
Step 3: First Rise (1-2 hours)
Transfer the dough to a lightly oiled bowl. Cover with plastic wrap or a damp towel. Let it rise in a warm spot until doubled in size. This takes about 1-2 hours depending on your kitchen temperature. I turn my oven on to 200°F for 2 minutes, then turn it off, and put the bowl inside. It creates the perfect warm environment.
Step 4: Prepare the Pan and Filling (10 minutes)
While the dough rises, toast your pecans in a dry skillet over medium heat for 3-4 minutes. Stir constantly until fragrant. Let them cool slightly, then chop them. In your 9×13 baking dish, dot the bottom with 2 tablespoons of the butter for the filling. You’ll use the rest later.
Step 5: Roll and Fill (10 minutes)
Punch down the risen dough. Turn it out onto a floured surface. Roll it into a large rectangle, about 12×18 inches. Spread the remaining ½ cup softened butter evenly over the dough, leaving a small border at the edges. Sprinkle the brown sugar and cinnamon evenly over the butter. Then, scatter the toasted pecans over the sugar layer. Starting from the long edge, roll the dough up tightly into a log. Pinch the seam to seal.
Step 6: Second Rise (30-45 minutes)
Cut the log into 12 equal slices. Place them cut-side up in the prepared baking dish. Cover loosely and let them rise again until puffy. This is the second rise. It only takes about 30-45 minutes. They should look jiggly and airy.
Step 7: Bake (25-30 minutes)
Preheat your oven to 350°F (175°C). Bake the buns for 25-30 minutes, or until they are golden brown and cooked through. If the tops start browning too quickly, tent them with foil for the last 10 minutes. The internal temperature should reach 190°F (88°C).
Step 8: Make the Brown Butter Glaze (10 minutes)
While the buns bake, make the glaze. Melt the ½ cup butter in a small saucepan over medium heat. Swirl it occasionally. It will foam, then settle. Watch closely as it turns from yellow to amber. You’ll see brown specks at the bottom and smell a nutty aroma. Remove from heat immediately and pour into a heat-proof bowl to cool slightly.
Whisk in the maple syrup, vanilla, and salt. Then, gradually whisk in the sifted powdered sugar until smooth. The glaze should be thick but pourable.
Step 9: Combine and Serve
Once the buns are out of the oven, let them cool in the pan for 5 minutes. Then, carefully invert them onto a serving platter. Pour the warm brown butter glaze over the hot buns. The glaze will melt into the cracks and make everything sticky and beautiful. Serve warm.
Expert Tips & Tricks
Here’s everything I’ve learned from making this dozens of times. These tips will save you from my mistakes.
Don’t Skip the Toast
Toasting the pecans before chopping them is crucial. Raw pecans can be bitter and bland. Toasting releases their oils and adds a crunch that contrasts with the soft bun. It’s a small step that makes a huge difference.
Brown Butter is a Learning Curve
Browning butter looks like nothing is happening for a while, then suddenly it’s burning. Watch it like a hawk. Once you see the brown specks and smell the nuts, get it out of the pan. The pan stays hot and will continue to cook the butter. If it smells like burnt toast, you’ve failed. Start over—it’s worth it.
The Glaze Should Be Warm
Don’t pour cold glaze over hot buns. It’ll just sit on top. Warm the glaze slightly if it’s too thick. It should pour easily and soak into the buns. This creates that sticky, caramelized layer that makes these “sticky” buns.
Use a Sharp Knife
When cutting the rolled dough, use a sharp serrated knife or even dental floss. A dull knife will squish the layers and make your buns misshapen. Clean cuts mean pretty buns.
Common Mistakes
Mistake: Buns are dense. Fix: You didn’t let them rise enough. Or you used old yeast. Or you over-kneaded the dough. Give them time.
Mistake: Glaze is too thin. Fix: You added too much syrup or didn’t sift the sugar. Add more powdered sugar.
Mistake: Glaze is too thick. Fix: Add a teaspoon of warm milk or more maple syrup.
Variations & Substitutions
Once you’ve nailed the basic version, here’s how you can mix it up. I’ve tried all of these.
Maple Bourbon Version
Add 1 tablespoon of bourbon to the brown butter glaze. It adds a sophisticated kick that’s perfect for adult brunches. My husband loves this twist.
Chocolate Chip Pecan
Throw in a handful of semi-sweet chocolate chips along with the pecans. The chocolate melts into the brown sugar, creating little pockets of goo. It’s like a dessert.
Pumpkin Spice
Add 1 teaspoon of pumpkin pie spice to the cinnamon-sugar filling. It enhances the fall vibe even more. Great for October.
Gluten-Free
Use a 1:1 gluten-free flour blend. The dough will be stickier, so you might need a bit less flour. The rise might not be as tall, but they still taste great.
Dairy-Free
Use coconut oil instead of butter in the dough and filling. For the glaze, use coconut milk and maple syrup. It’s nutty and rich, though the flavor profile shifts slightly.
Serving & Storage
How to Serve:
I usually serve these straight from the platter at the brunch table. They look rustic and stay warm. Pair them with strong coffee or hot cocoa. A simple green salad on the side cuts the richness if you’re serving a large group.
Storage:
Store leftovers in an airtight container at room temperature for up to 2 days. They’re best eaten fresh, but they do reheat well.
Reheating:
Microwave individual buns for 10-15 seconds. Or warm the whole batch in a 300°F oven for 10 minutes. They’ll be soft and gooey again. Don’t microwave them too long, or they get tough.
Freezing:
You can freeze the unbaked, risen buns. Bake them from frozen, adding 5-10 minutes to the bake time. Or freeze the baked buns, glaze them after thawing. The texture isn’t quite as good as fresh, but it’s still tasty.
Nutrition Information
I’m not a nutritionist, but here’s the breakdown if you’re tracking. These are indulgent, so enjoy in moderation!
Per Serving (1 bun with glaze):
- Calories: 380
- Protein: 6g
- Carbs: 52g
- Fiber: 2g
- Sugar: 32g
- Fat: 16g
- Saturated Fat: 9g
- Cholesterol: 45mg
- Sodium: 220mg
These are higher in sugar and fat because of the butter, brown sugar, and glaze. But they’re also satisfying, so one or two is usually plenty. If you want to lighten it up, reduce the glaze or skip the pecans.
Final Thoughts
So that’s my go-to Fall Maple Pecan Sticky Buns with Brown Butter Glaze! I’ve probably talked your ear off at this point, but when you make a recipe this often, you have a lot to say about it.
This has saved my weekends more times than I can count. It’s my answer to “what’s for breakfast” when I want to feel special but don’t want to leave the house. My family is happy, my guests are impressed, and I’m happy because I’m not stressed about cooking. It’s comfort food at its finest.
Make it yours! Try different nuts, add chocolate, or change the spice blend. The best recipes are the ones you adapt to your tastes. If you make this, drop a comment and let me know what you think! I love hearing how recipes turn out in your kitchen.
Happy baking! And I hope your kitchen smells half as good as mine does right now.
Frequently Asked Questions
Can I use instant yeast instead of active dry yeast?
Yes, you can! Just use the same amount. You can mix it directly with the flour instead of activating it in water first. It’s a bit more convenient, but active dry yeast gives a slightly better rise and flavor. I prefer active dry, but instant works fine.
Why did my buns turn out flat?
This usually happens if the yeast was dead (water too hot or old yeast), or if you didn’t let them rise enough. Make sure your kitchen is warm for the second rise. Also, don’t punch them down too hard after the first rise—just gently deflate them.
Can I make these ahead of time?
Absolutely. After shaping the buns and placing them in the pan, cover them tightly with plastic wrap and refrigerate overnight. In the morning, let them sit at room temperature for 30-60 minutes while the oven preheats, then bake as directed. This is my favorite way to make them for a weekend brunch.
Can I use maple flavoring instead of real maple syrup?
You can, but I don’t recommend it. Maple flavoring is artificial and lacks the depth of real maple syrup. Real maple syrup adds a complexity that enhances the brown butter. It’s worth the extra cost for the best flavor.
How do I store leftover glaze?
If you have extra glaze, store it in an airtight container in the fridge for up to a week. Reheat it gently in the microwave or on the stove to make it pourable again. It’s great for drizzling over pancakes or waffles too.
Can I freeze the baked buns?
Yes, freeze them in an airtight container or freezer bag for up to 2 months. Thaw at room temperature and reheat in the oven. The glaze might get a bit sticky, but they still taste delicious. I usually glaze them after thawing for the best texture.
What if I don’t have a stand mixer?
You can definitely make this by hand. Kneading the dough will take about 10-15 minutes. Just use the same ingredients and follow the steps. It’s a good workout, but the results are the same. Just be patient with the dough.
Pin This Recipe!

Fall Maple Pecan Sticky Buns with Brown Butter Glaze
- Total Time: 75 minutes
- Yield: 12 servings 1x
Description
Indulgent homemade sticky buns featuring a rich brown butter glaze, toasted pecans, and real maple syrup. These buns are perfect for a cozy weekend brunch or breakfast.
Ingredients
- 3 ½ cups all-purpose flour
- 2 packets active dry yeast (14g)
- 1 cup warm milk (whole milk, approx. 110°F)
- ¼ cup granulated sugar
- 2 large eggs (room temperature)
- ¼ cup melted unsalted butter
- 1 teaspoon salt
- ½ cup unsalted butter (softened, for filling)
- 1 cup packed brown sugar
- 2 tablespoons ground cinnamon
- 1 cup chopped pecans (toasted)
- ½ cup unsalted butter (for glaze)
- ½ cup maple syrup (Grade B or Amber)
- 2 cups powdered sugar (sifted)
- 1 teaspoon vanilla extract
- Pinch of salt (for glaze)
Instructions
- Activate the yeast: In a stand mixer bowl, combine warm milk, warm water (if using), and sugar. Sprinkle yeast on top and let sit for 5-10 minutes until foamy.
- Make the dough: Add melted butter, eggs, and salt to the yeast mixture. Switch to a dough hook and gradually add flour. Mix on low until shaggy, then knead on medium-low for 5-7 minutes until smooth and elastic.
- First rise: Transfer dough to an oiled bowl, cover, and let rise in a warm spot for 1-2 hours until doubled in size.
- Prepare pan and filling: While dough rises, toast pecans in a dry skillet until fragrant, then chop. Dot the bottom of a 9×13 inch baking dish with 2 tablespoons of softened butter.
- Roll and fill: Punch down dough and roll into a 12×18 inch rectangle. Spread remaining softened butter over the dough, leaving a border. Sprinkle with brown sugar and cinnamon, then scatter toasted pecans. Roll tightly into a log and pinch seam to seal.
- Second rise: Cut log into 12 equal slices. Place cut-side up in the prepared baking dish. Cover loosely and let rise for 30-45 minutes until puffy.
- Bake: Preheat oven to 350°F (175°C). Bake buns for 25-30 minutes until golden brown and internal temperature reaches 190°F. Tent with foil if browning too quickly.
- Make brown butter glaze: While buns bake, melt ½ cup butter in a saucepan over medium heat until it turns amber and smells nutty. Remove from heat. Whisk in maple syrup, vanilla, and pinch of salt. Gradually whisk in sifted powdered sugar until smooth.
- Combine and serve: Let buns cool in pan for 5 minutes. Invert onto a serving platter. Pour warm glaze over hot buns. Serve warm.
Notes
Toasting pecans is crucial for flavor and crunch. Brown butter requires close attention to prevent burning. For make-ahead, assemble buns and refrigerate overnight; let sit at room temperature for 30-60 minutes before baking. Use real maple syrup for best flavor.
- Prep Time: 45 minutes
- Cook Time: 30 minutes
- Category: Breakfast
- Cuisine: American
Nutrition
- Serving Size: 1 bun with glaze
- Calories: 380
- Sugar: 32
- Sodium: 220
- Fat: 16
- Saturated Fat: 9
- Carbohydrates: 52
- Fiber: 2
- Protein: 6
Keywords: sticky buns, maple pecan buns, brown butter glaze, weekend baking, fall recipes, homemade cinnamon rolls, brunch ideas


