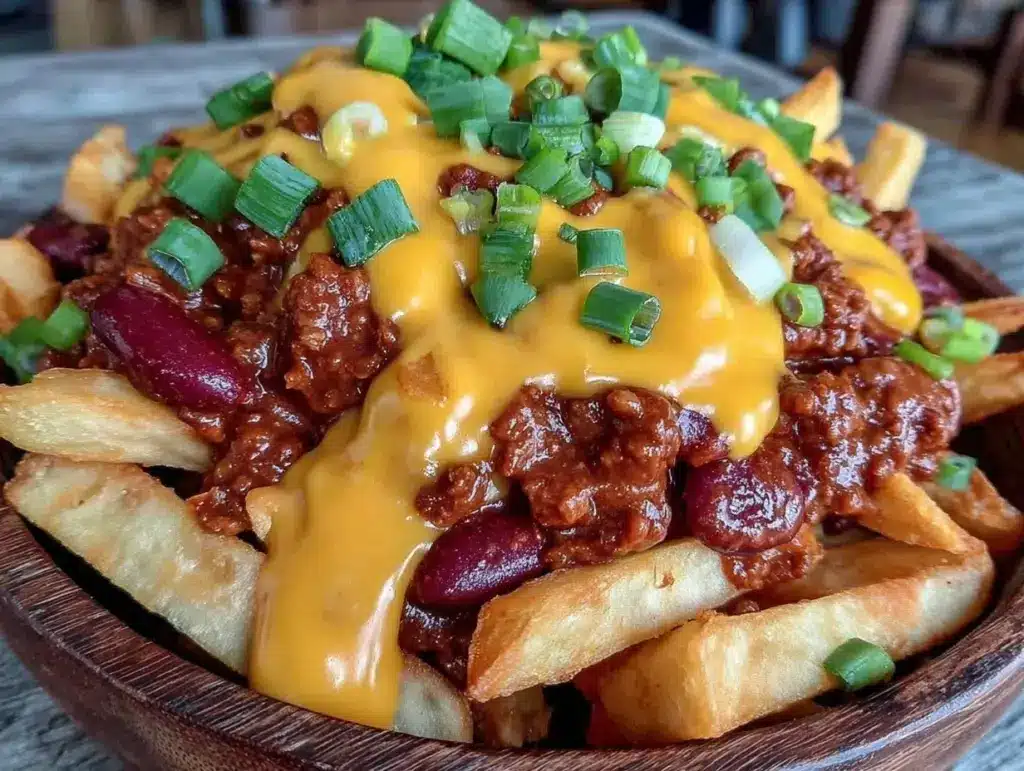
I still remember the first time I realized that football wasn’t just about the game. It was about the food. Specifically, it was about a tray of fries so loaded with chili and cheese that you couldn’t eat them with a fork. You had to use your hands, napkins, and a certain amount of shamelessness.
We were at my friend Dave’s house for the playoffs. The TV was loud, the beer was cold, and there was this giant platter of chili cheese fries sitting in the middle of the coffee table like a holy offering. I remember picking one up, the cheese stretching in a long, gooey string, and realizing that this was the best appetizer I had ever had. It wasn’t fancy. It wasn’t delicate. It was messy, salty, spicy, and absolutely perfect.
Since that night, I’ve been obsessed with making the ultimate Football Party Chili Cheese Fries. And I’ve made them a lot. Too many times to count. I’ve tried oven-baked, air-fried, and deep-fried methods. I’ve experimented with different chilies (from quick chili con carne to slow-cooked beef chili) and cheese blends (cheddar alone? No. Cheddar and American? Yes.).
After all these tests, I’ve finally nailed it. This version strikes the perfect balance between crispy potatoes, rich savory chili, and that melty, salty cheese pull that makes you stop talking during the commercial break. It’s the kind of dish that turns a casual watch party into an event. It’s indulgent, it’s shareable, and it’s honestly the best way to cheer for your team.
Whether you’re hosting a Super Bowl bash or just having a quiet night in with the remote, these fries will be the star of the show. Let’s get into why this recipe works, what you need, and how to make sure they turn out crispy, not soggy.
Why You’ll Love This Recipe
There are a hundred ways to make loaded fries, but this Football Party Chili Cheese Fries recipe is the one I keep coming back to. Here’s why it’s a game-changer:
The Crispy Base — The secret isn’t just the fry; it’s the texture. I use a specific method to ensure the potatoes stay crispy even after being smothered in hot chili and cheese. No soggy bottoms here. I’ve tested this with frozen fries, fresh-cut, and sweet potato, and this method wins every time.
The Chili Consistency — Most chili recipes are too watery for fries. If you pour thin chili over fries, you get soup. Not good. I’ve tweaked my chili recipe to be thick and hearty, with beans and ground beef that cling to the potatoes rather than sliding off. It’s the perfect coating.
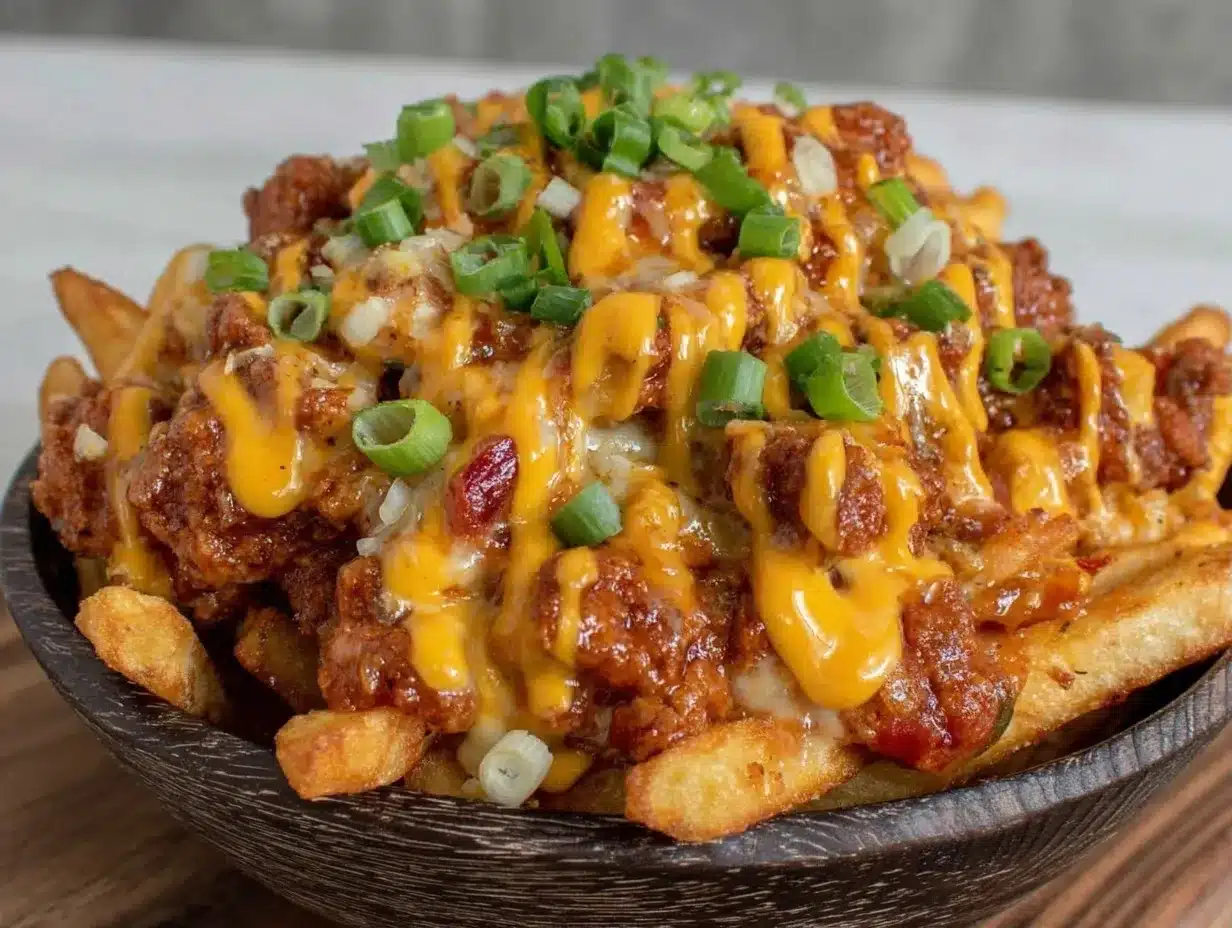
The Cheese Pull — This is the money shot. I use a blend of sharp cheddar for flavor and American cheese for meltability. The result? A golden, bubbly crust that stretches when you pull a fry away from the tray. It’s visually stunning and tastes even better.
Zero Stress Hosting — You can prep almost everything ahead of time. The chili can be made days in advance. The fries can be par-cooked. When game day hits, you just assemble and bake. You’re not stuck in the kitchen while everyone else is watching the pre-game show.
Customizable Toppings — Everyone has different tastes. This recipe is a blank canvas. Some people want jalapeños, some want sour cream, some want green onions. I set out a topping bar so everyone can build their own perfect fry. It’s interactive and fun.
This isn’t just a snack. It’s a centerpiece. It’s the dish that gets you invited back to the next party. And honestly? It’s just really, really good.
Ingredients You’ll Need
Here’s the best part: you probably have most of this already. This Football Party Chili Cheese Fries recipe uses simple, accessible ingredients. You don’t need anything fancy. Just good quality basics.
For the Fries
Yellow potatoes (3 pounds / 1.3 kg) — I use Yukon Golds because they hold their shape well and get crispy on the outside, fluffy on the inside. Russets work too, but they can get too dry. Avoid red potatoes—they’re waxy and don’t crisp up as nicely.
Vegetable oil (for frying or baking) — If you’re deep-frying, use a high-smoke point oil like peanut or canola. If baking, just a light spray. I prefer baking for less mess, but frying is tastier. Your call.
Sea salt (to taste) — Essential. Don’t skip the salt on the fries themselves. It brings out the potato flavor.
For the Chili
Ground beef (1 pound / 450g) — 80/20 blend is best. You want some fat for flavor. Lean beef will be dry and crumbly. Brown it well, then drain excess fat but leave a little for richness.
Yellow onion (1 medium, diced / about 150g) — Sweet and aromatic. Cook it until translucent before adding the beef. This builds the flavor base.
Garlic (4 cloves, minced / about 2 tablespoons) — Fresh only. Jarred garlic tastes metallic and will ruin the depth of the chili.
Chili powder (2 tablespoons) — Use a good quality blend. I like McCormick or a local spice blend. It’s the backbone of the flavor.
Ground cumin (1 teaspoon) — Adds earthiness. Don’t skip it. It’s what makes it taste like chili and not just spiced tomato sauce.
Smoked paprika (1 teaspoon) — This gives that smoky, BBQ-like depth. It’s the secret weapon. If you don’t have it, regular paprika works, but smoked is better.
Canned diced tomatoes (1 can, 14.5 oz / 411g) — Drain them slightly if they’re very watery. You want the chili thick, not soupy.
Tomato paste (2 tablespoons) — Concentrates the tomato flavor. Cook it in the pan for a minute before adding liquids to deepen the taste.
Beef broth (1 cup / 240ml) — Use low-sodium so you can control the salt. Adds body and richness.
Black beans (1 can, 15 oz / 425g, drained and rinsed) — Adds texture and heartiness. Some people hate beans in chili, but for fries, they’re perfect. They hold the chili together.
For the Toppings
Sharp cheddar cheese (2 cups / 200g, shredded) — Grate your own. Pre-shredded has anti-caking agents that prevent melting. Sharp cheddar has the best flavor.
American cheese slices (6 slices) — This is the melting agent. It creates that gooey, stretchy texture. Layer these on top of the shredded cheddar.
Sour cream (½ cup / 120g) — For cooling contrast. Use full-fat. Light sour cream is grainy and sad.
Green onions (3 stalks, sliced) — Adds a fresh, crisp bite. Essential for cutting through the richness.
Jalapeños (optional, sliced) — For heat. Fresh or pickled, your choice. I like pickled for a tangy kick.
Equipment Needed
You don’t need fancy equipment for this. Here’s what I actually use.
Baking sheet — I use two large half-sheet pans. You want space between the fries so they crisp up. Crowding them makes them steam. Two pans = crispy fries.
Large skillet or Dutch oven — For cooking the chili. A 12-inch skillet works if you’re making a single batch. A Dutch oven is better if you’re doubling for a crowd.
Wooden spoon — For stirring the chili. Prevents sticking and scratching non-stick surfaces.
Colander — For draining beans and tomatoes. Standard stuff.
Microplane or box grater — For grating cheese and onions. Freshly grated cheese melts so much better.
Oven — Obviously. Preheat to 425°F (220°C). Make sure it’s fully heated before putting the fries in.
Serving platter — A large, rustic wooden board or a big ceramic platter. Presentation matters. You want this to look impressive.
How to Make It: Step-by-Step
Alright, let’s make this! I’m walking you through exactly how I do it, including the little tricks I’ve picked up.
Step 1: Prep the Fries (15 minutes)
Wash and scrub the potatoes. You don’t need to peel them—the skins add texture and nutrients. Cut them into uniform sticks, about ¼-inch thick. Uniformity is key so they cook evenly. Soak the cut potatoes in cold water for 30 minutes. This removes excess starch, which helps them get crispy. Pat them completely dry with paper towels. Moisture is the enemy of crispiness.
Step 2: Cook the Fries (20-25 minutes)
Preheat your oven to 425°F (220°C). Line two baking sheets with parchment paper. Toss the dried potato sticks with 2 tablespoons of oil and salt. Spread them out in a single layer. Do not crowd the pan! If they’re touching, they’ll steam. Bake for 20-25 minutes, flipping halfway through, until golden and crispy. They should be firm to the touch. Remove from oven and keep warm.
Step 3: Make the Chili (20 minutes)
While the fries bake, start the chili. Heat 1 tablespoon of oil in a large skillet over medium heat. Add the diced onion and cook for 5 minutes until soft. Add the minced garlic, chili powder, cumin, and smoked paprika. Cook for 1 minute until fragrant. Add the ground beef and cook until browned, breaking it up with a spoon. Drain excess fat if needed.
Stir in the tomato paste and cook for 1 minute. Add the diced tomatoes (drained), beef broth, and black beans. Bring to a simmer. Reduce heat to low and let it cook for 10-15 minutes, stirring occasionally, until thickened. Taste and adjust salt and pepper. The chili should be thick enough to coat the back of a spoon, not runny.
Step 4: Assemble and Melt (5 minutes)
Spread the crispy fries on the serving platter. Ladle the hot chili over the fries, covering them evenly. Sprinkle the shredded cheddar cheese generously over the top. Then, place the American cheese slices on top of the cheddar. This layering ensures a perfect melt.
Place the platter under the broiler for 2-3 minutes, watching closely, until the cheese is bubbly and slightly browned. Do not walk away. Cheese burns fast.
Step 5: Garnish and Serve
Remove from the oven. Immediately drizzle with sour cream and sprinkle with sliced green onions and jalapeños. Serve immediately while hot and crispy. The contrast of the hot chili/cheese with the cool sour cream is everything.
Expert Tips & Tricks
Here’s everything I’ve learned from making this dozens of times. These tips will save you from my mistakes.
Don’t Skip the Soak — Soaking the potatoes removes surface starch. This is the #1 reason fries get soggy. If you’re in a hurry, skip the soak but expect softer fries. For maximum crisp, soak for 30 minutes.
Double the Baking Sheets — One pan is too crowded. Two pans ensure air circulation. If you only have one pan, bake in batches. Don’t try to fit too many fries on one sheet.
Thick Chili is Non-Negotiable — If your chili is watery, it will make the fries soggy. Simmer it longer or add a teaspoon of cornstarch mixed with water to thicken it. The chili should cling to the fries, not pool at the bottom.
Broil Carefully — The broiler is intense. Keep the oven rack in the middle position, not too close to the element. Watch it like a hawk. You want melted cheese, not burnt cheese.
Keep Fries Warm — If you’re assembling in batches, keep the first batch of fries warm in a low oven (200°F) while you make the chili. Cold fries = sad fries.
Grate Your Own Cheese — Pre-shredded cheese contains cellulose, which prevents melting. Grate a block of cheddar yourself. It melts smoother and tastes better.
Use a Broiler-Safe Platter — If you’re using a wooden board, don’t put it under the broiler. Use a ceramic or metal platter for the melting step, then transfer to the board for serving.
Variations & Substitutions
Once you’ve nailed the basic version, here’s how you can mix it up. I’ve tried all of these.
Turkey Chili Version — Swap ground beef for ground turkey. Use 93% lean for moisture. Add a splash of olive oil when browning. It’s lighter but still delicious.
Veggie Chili — Skip the meat. Use extra beans, diced mushrooms, and bell peppers. Use vegetable broth. It’s hearty and savory, perfect for vegetarian guests.
Buffalo Chicken Fries — Swap the chili for buffalo sauce and shredded chicken. Top with blue cheese crumbles and celery. A different vibe, but equally popular.
Bacon Jam Topping — Instead of chili, use bacon jam. It’s sweet, smoky, and rich. Top with cheddar and green onions. A bit more fancy, but amazing.
Spicy Jalapeño — Add diced jalapeños to the chili while cooking. Top with pickled jalapeños. For those who like it hot.
Sweet Potato Fries — Use sweet potatoes instead of yellow potatoes. They’re naturally sweeter and pair well with the savory chili. Bake at 400°F instead of 425°F to prevent burning.
Serving & Storage
How to serve and store these bad boys.
How to Serve
I usually serve this straight from the platter at the center of the table. It’s a communal dish. Set out small bowls of sour cream, green onions, and jalapeños so guests can customize. It’s interactive and fun.
Side Dishes — These are heavy, so keep sides light. A simple green salad with vinaigrette cuts the richness. Cornbread is a classic pairing. Or just serve with plenty of napkins.
Drinks — Cold beer is traditional. A crisp lager or IPA works well. For non-alcoholic, lemonade or iced tea with lime is refreshing against the spicy chili.
Storage Instructions
Refrigerator — Store leftovers in an airtight container for up to 3 days. The chili will thicken in the fridge. The fries will lose some crispiness.
Reheating — Best method: Oven or toaster oven. Reheat at 400°F for 10 minutes to restore crispiness. Microwave makes fries soggy. If you must microwave, do it in short bursts and let it rest.
Freezing — I don’t recommend freezing assembled chili cheese fries. The fries get mushy, and the cheese separates. Freeze the chili separately, then assemble and bake when ready to eat.
Nutrition Information
I’m not a nutritionist, but here’s the breakdown if you’re tracking. This is comfort food, so it’s indulgent.
Per Serving (based on 8 servings):
- Calories: 580
- Protein: 22g
- Carbs: 45g
- Fiber: 5g
- Sugar: 6g
- Fat: 32g
- Saturated Fat: 14g
- Cholesterol: 65mg
- Sodium: 850mg
What’s Good: High in protein from beef and cheese. Good fiber from beans and potatoes. Satisfying and filling.
What to Know: Higher in calories and saturated fat. Sodium can be high depending on broth and cheese. Use low-sodium broth and cheese to reduce sodium.
My Take: This is a treat. Enjoy it in moderation. It’s way better than takeout, and you control the ingredients. When I want to make it lighter, I use turkey, less cheese, and more veggies. But usually? I just eat a reasonable portion and enjoy it.
Final Thoughts
So that’s my go-to Football Party Chili Cheese Fries! I’ve probably talked your ear off at this point, but when you make a recipe this often, you have a lot to say about it.
This has saved game days more times than I can count. It’s my answer to “what do I bring?” when I’m hosting. It’s impressive, delicious, and brings people together. My kids are happy, my friends are happy, and I’m happy because I’m not stressed about cooking.
Make it yours! Try different toppings, swap in your favorite chili recipe, adjust the spice level. The best recipes are the ones you adapt to your family’s tastes.
If you make this, drop a comment and let me know what you think! I love hearing how recipes turn out in your kitchen. And if something doesn’t work, tell me that too—I’m here to help troubleshoot.
Happy cooking! And I hope your kitchen smells half as good as mine does right now.
Frequently Asked Questions
Can I make the chili ahead of time?
Absolutely. The chili actually tastes better the next day as the flavors meld. Make it up to 3 days ahead and store in the fridge. Reheat gently on the stove before assembling. This saves so much stress on game day.
Can I use frozen fries instead of fresh?
You can, but fresh-cut potatoes taste better and get crispier. If you use frozen fries, choose thick-cut steak fries. Bake them according to package directions, then top with chili and cheese. They won’t be as crispy, but they’re easier.
Why did my cheese separate?
This usually happens if the heat was too high. Cheese breaks when exposed to intense, direct heat. Always remove the platter from the broiler as soon as it’s melted. Don’t let it brown too much. Also, grating your own cheese helps it melt smoothly.
Can I make this in an air fryer?
You can cook the fries in an air fryer for a crispier result with less oil. Cook in batches to avoid crowding. Then assemble on a platter and broil the chili and cheese in the oven. Air frying the whole assembly isn’t practical due to size.
What’s the best cheese to use?
A blend of sharp cheddar for flavor and American for meltability is the gold standard. You can also use Monterey Jack or Gouda for different flavors. Avoid pre-shredded cheese—it doesn’t melt well.
Can I make this vegetarian?
Yes! Use a vegetable-based ground meat substitute or extra beans and mushrooms for the chili. Use vegetable broth instead of beef broth. Everything else stays the same.
How do I reheat leftovers without them getting soggy?
Never microwave assembled chili cheese fries. Reheat in a 400°F oven for 10-15 minutes. This restores the crispiness of the fries and melts the cheese again. If the fries are already soggy, they won’t get perfectly crispy, but the oven is your best bet.
Pin This Recipe!
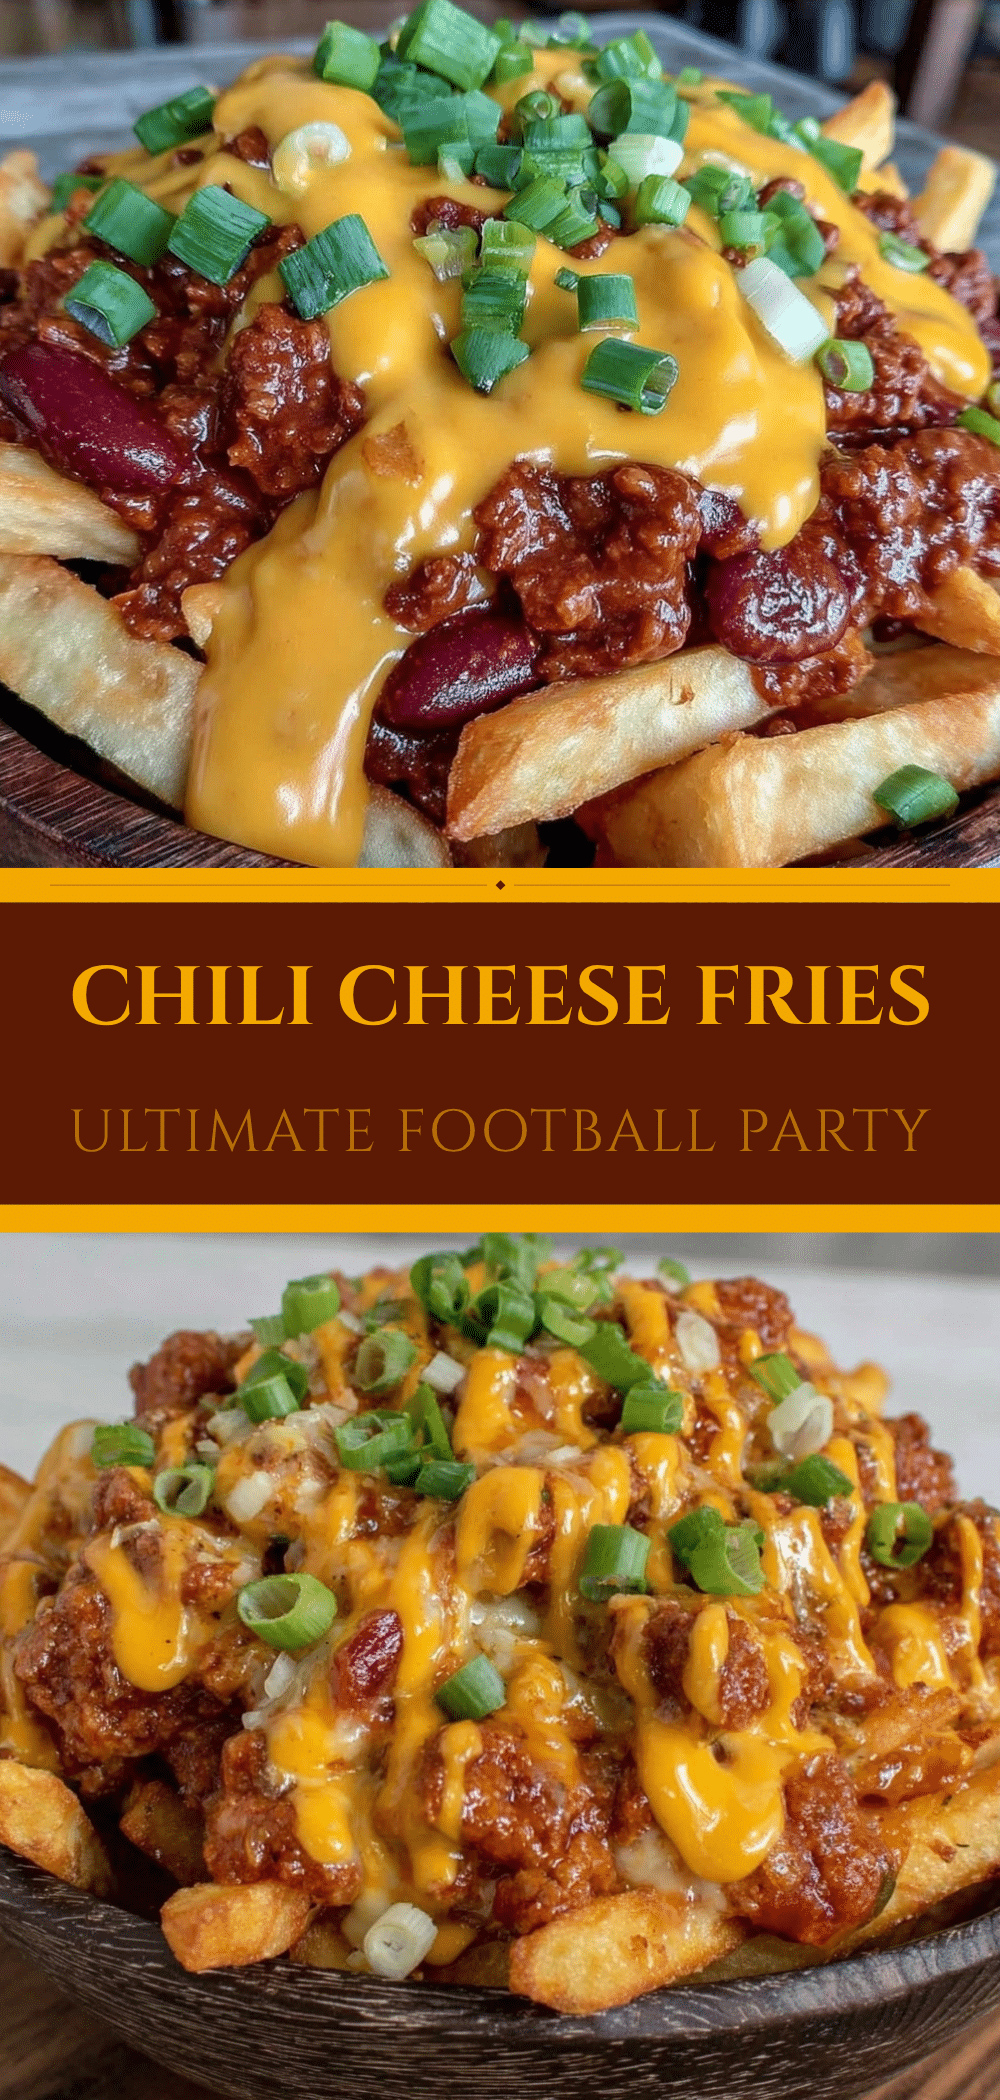

Football Party Chili Cheese Fries: 3-Step Game Day Appetizer
- Total Time: 60 minutes
- Yield: 8 servings 1x
Description
The ultimate game day appetizer featuring crispy baked potatoes topped with a thick, hearty beef chili and a melty blend of sharp cheddar and American cheese.
Ingredients
- 3 pounds yellow potatoes (Yukon Gold recommended)
- Vegetable oil (for tossing fries)
- Sea salt (to taste)
- 1 pound ground beef (80/20 blend)
- 1 medium yellow onion, diced
- 4 cloves garlic, minced
- 2 tablespoons chili powder
- 1 teaspoon ground cumin
- 1 teaspoon smoked paprika
- 1 can (14.5 oz) diced tomatoes, drained
- 2 tablespoons tomato paste
- 1 cup beef broth (low-sodium)
- 1 can (15 oz) black beans, drained and rinsed
- 2 cups sharp cheddar cheese, shredded
- 6 slices American cheese
- ½ cup sour cream
- 3 stalks green onions, sliced
- Jalapeños, sliced (optional)
Instructions
- Preheat oven to 425°F (220°C). Wash and scrub potatoes, cut into ¼-inch sticks, and soak in cold water for 30 minutes to remove starch.
- Pat potatoes completely dry and toss with 2 tablespoons of oil and salt. Spread in a single layer on two parchment-lined baking sheets.
- Bake fries for 20-25 minutes, flipping halfway, until golden and crispy. Remove and keep warm.
- While fries bake, heat 1 tablespoon of oil in a large skillet over medium heat. Cook diced onion for 5 minutes until soft.
- Add garlic, chili powder, cumin, and smoked paprika; cook for 1 minute until fragrant.
- Add ground beef and cook until browned, breaking it up. Drain excess fat if necessary.
- Stir in tomato paste and cook for 1 minute. Add diced tomatoes, beef broth, and black beans.
- Simmer on low heat for 10-15 minutes until the chili is thickened. Adjust seasoning to taste.
- Spread crispy fries on a broiler-safe serving platter. Ladle hot chili over the fries.
- Sprinkle shredded cheddar generously over the chili, then layer American cheese slices on top.
- Broil for 2-3 minutes until cheese is bubbly and slightly browned. Watch closely to prevent burning.
- Remove from oven and immediately drizzle with sour cream. Garnish with green onions and jalapeños. Serve immediately.
Notes
Soaking potatoes is crucial for crispiness. Ensure chili is thick, not watery, to prevent soggy fries. Use a blend of cheddar for flavor and American cheese for meltability. Do not crowd the baking sheet; use two pans if necessary. Reheat leftovers in the oven at 400°F to restore crispiness.
- Prep Time: 15 minutes
- Cook Time: 45 minutes
- Category: Appetizer
- Cuisine: American
Nutrition
- Serving Size: 1 serving (approx. 1
- Calories: 580
- Sugar: 6
- Sodium: 850
- Fat: 32
- Saturated Fat: 14
- Carbohydrates: 45
- Fiber: 5
- Protein: 22
Keywords: chili cheese fries, game day food, football party, super bowl snacks, loaded fries, easy appetizer, comfort food


