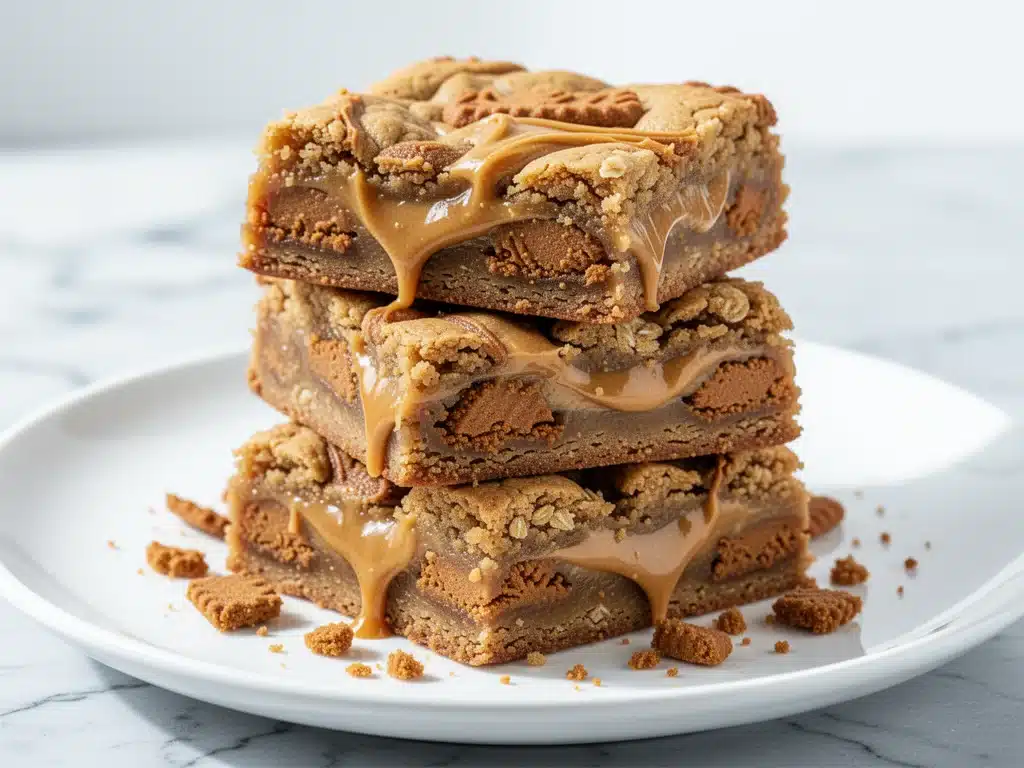
I still remember the exact moment I realized these bars were going to be the star of every gathering I hosted. It was last October, for a small dessert party at my house. I had planned to make a fancy fruit tart, something that looked impressive and tasted light. But then I saw a jar of Biscoff cookie butter sitting on my counter, and something just clicked. I needed something gooey. Something rich. Something that wouldn’t require thirty different components to assemble.
So, I improvised. I threw together a graham cracker crust, dumped in a mix of cream cheese, brown sugar, and that iconic spiced cookie butter, and topped it with a few crushed Biscoff cookies. I popped it in the oven, went to answer the door for a guest, and when I came back, the smell was intoxicating. Caramelized, buttery, spiced gingerbread perfection.
When I sliced that first piece, the center didn’t just hold its shape—it wobbled. That deep, molten center is what I’m talking about. The “gooey” factor is real, and it’s dangerous. I watched three people argue over who got the last piece from the corner of the pan. That’s the power of these Gooey Biscoff Cookie Butter Bars. They aren’t just a dessert; they’re a conversation starter.
I’ve made these bars at least a dozen times since that night. I’ve tweaked the ratios, tested different crusts, and even tried adding chocolate chips (spoiler: don’t do it, it overpowers the delicate spice). These bars have become my go-to for holiday parties, office potlucks, and those spontaneous “I need to bring a dessert” moments. They’re easier to make than a whole cake, but they look and taste like you spent hours in the kitchen. If you’re looking for 5 easy party desserts that actually impress, this is the one you need to pin right now.
Why You’ll Love This Recipe
There are about ten reasons I keep coming back to these Biscoff bars, but here are the big ones that make them a party lifesaver.
Zero Bake Required (Mostly) — Well, technically you bake the crust and the filling, but the assembly is basically zero effort. You don’t need to whip egg whites, temper chocolate, or make a custard. You mix, you spread, you bake. It’s foolproof. I’ve made these while half-asleep on a Sunday morning, and they still turned out perfect.
The Gooey Factor is Real — I’m not using buzzwords here. When you cut into these bars, that center is soft, chewy, and slightly molten. It’s that texture contrast between the crunchy crust, the firm edges, and the soft, gooey middle that makes people stop mid-chew and ask, “What is this magic?” It’s similar to the texture you get in my Oktoberfest soft pretzel cookie bars, but with a completely different flavor profile.
Pantry-Friendly Ingredients — You probably already have most of this. Graham crackers (or Oreos), butter, cream cheese, brown sugar, and a jar of Biscoff spread. If you have a jar of Biscoff in your cupboard, you’re halfway done. It’s a flavor people love but rarely cook with at home, so it feels special.
Makes Ahead Friendly — These bars actually taste better the next day. The flavors meld together, and the texture firms up just enough to make clean cuts. I love making these the night before a party. I can chill them, transport them, and just slice and serve. No last-minute stress.
Universal Appeal — I’ve served these to people who swear they don’t like “sweet” things, and they’ve asked for the recipe. The spice from the Biscoff cookies balances the sweetness perfectly. It’s not cloying; it’s warm and comforting. It pairs beautifully with a hot coffee or a glass of milk, just like a brown sugar pecan baked oatmeal does, but in bar form.
This is my answer to “what do I bring to the party?” when I want to look like a pro but spend less than an hour active. It’s reliable, delicious, and always disappears.
Ingredients You’ll Need
Here’s the best part: this recipe uses simple, accessible ingredients. You don’t need fancy vanilla beans or exotic spices. The star is definitely the Biscoff spread, but here’s what you need to build the perfect bar.
For the Crust
Graham Crackers (1.5 cups / 150g crushed) — This is the classic base. I use regular graham cracker crumbs. If you want a darker, richer crust, you can use chocolate graham crackers or even crushed Oreos (remove the cream first). I usually just crush a sleeve of regular graham crackers in a food processor, but putting them in a bag and smashing them with a rolling pin works too.
Unsalted Butter (6 tablespoons / 85g, melted) — You need good quality butter here. It binds the crust and adds richness. Melt it completely before mixing. Don’t use margarine; it won’t give you that buttery crunch.
Granulated Sugar (2 tablespoons / 25g) — Just a little bit to help the crust crisp up and caramelize slightly in the oven.
Salt (½ teaspoon) — Crucial. It cuts through the sweetness of the filling. Don’t skip it.
For the Gooey Filling
Softened Cream Cheese (8 ounces / 225g) — This is the body of the filling. It needs to be softened to room temperature. If you try to mix cold cream cheese, you’ll get lumps, and those lumps will survive the bake. I usually take it out of the fridge 30 minutes before I start.
Unsalted Butter (¼ cup / 57g, softened) — Adds extra richness and helps create that chewy, fudgy texture. Make sure it’s softened, not melted.
Biscoff Cookie Butter (½ cup / 140g) — This is the non-negotiable ingredient. I use Lotus Biscoff spread, the smooth kind. Do not use the crunchy version for the filling; it won’t mix evenly. You can find this in the cookie butter aisle or near the peanut butter at most grocery stores.
Brown Sugar (1 cup / 200g, packed) — Light or dark brown sugar both work. Dark brown sugar will give you a deeper, molasses-like flavor, which I love. It adds moisture and chewiness.
Vanilla Extract (1 teaspoon) — Pure vanilla. It rounds out the spices in the Biscoff spread. If you don’t have pure vanilla, skip it, but don’t use imitation.
Large Egg (1) — Just one egg. It binds the filling so it sets but stays gooey. Don’t add more, or it’ll turn into a cheesecake.
For the Topping
Crushed Biscoff Cookies (½ cup / 40g) — Crush a handful of the actual cookies. You want small pieces, not dust. Sprinkle them on top before baking so they toast slightly and add texture.
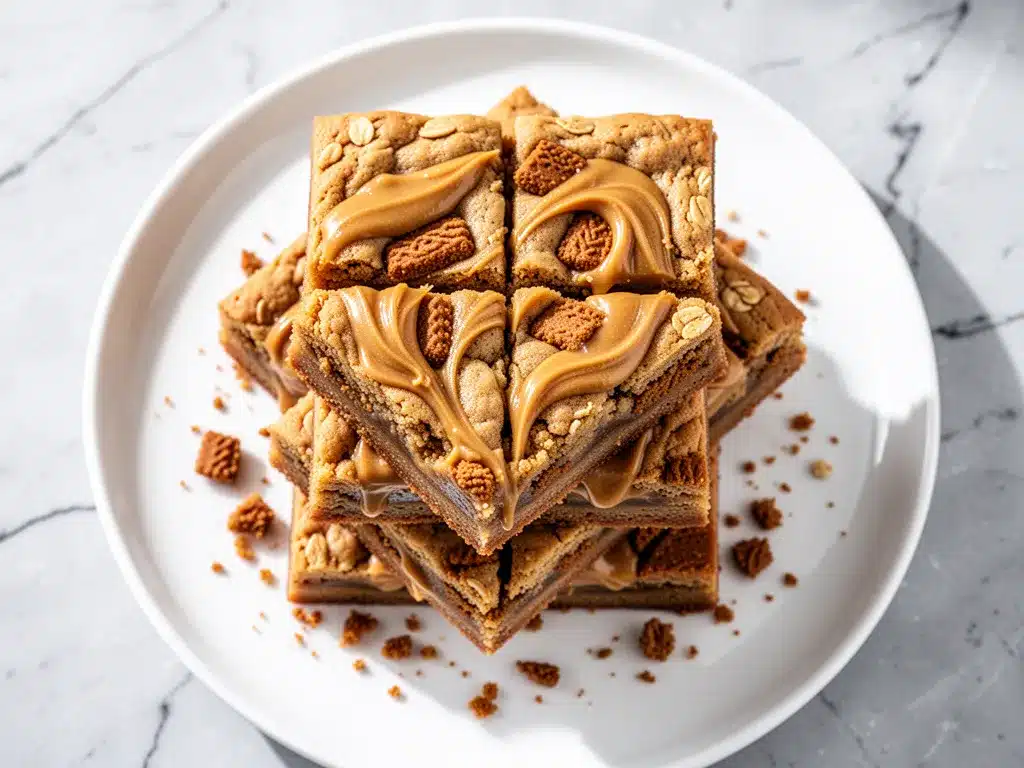
Extra Biscoff Spread (Optional) — For the ultra-indulgent version, swirl a teaspoon of extra spread into the top of each bar before serving. It’s pretty and adds a hit of flavor.
Pro Tip: If you can’t find Biscoff spread in your local store, check online. It’s worth the shipping cost if you’re a fan. I keep two jars in my pantry at all times. One for toast, one for baking.
Equipment Needed
You don’t need fancy equipment for this. Here’s what I actually use.
8×8 Inch Baking Pan — This is the perfect size for these bars. It gives you a good ratio of filling to crust. Line it with parchment paper, leaving an overhang on the sides. This is the #1 way to get the bars out cleanly without breaking them. I use Reynolds Parchment Paper; it’s reliable.
Food Processor or Blender — For crushing the graham crackers quickly. A ziplock bag and a rolling pin works too, but it takes more elbow grease.
Mixing Bowls — One medium bowl for the crust, one larger bowl for the filling.
Electric Mixer — Handheld or stand mixer. You need to beat the cream cheese and butter until smooth. Doing this by hand is possible but tiring. I use my handheld mixer; it’s faster and easier to clean.
Spatula — A silicone spatula is great for scraping the bowl and spreading the filling evenly.
Wire Cooling Rack — Essential. These bars need to cool completely before you cut them, or they’ll be too soft to handle.
Sharp Knife — For slicing. Wipe the knife between cuts for clean edges.
How to Make It: Step-by-Step
Alright, let’s make these gooey Biscoff bars! I’m walking you through exactly how I do it, including the little tricks I’ve picked up.
Step 1: Prep Your Pan and Oven (5 minutes)
Preheat your oven to 350°F (175°C). Line your 8×8 inch baking pan with parchment paper. I like to cross-hatch two sheets of parchment for extra coverage. Spray it lightly with non-stick spray. This ensures nothing sticks, even with all that butter and sugar.
Step 2: Make the Crust (5 minutes)
In a medium bowl, combine the crushed graham cracker crumbs, melted butter, granulated sugar, and salt. Mix until it looks like wet sand. Press this mixture firmly into the bottom of your prepared pan. Use the bottom of a measuring cup to pack it down tight. You want an even layer. Don’t worry about the sides; just keep it flat on the bottom.
Step 3: Bake the Crust (8 minutes)
Place the pan in the oven and bake the crust for 8 minutes. This pre-bakes it so it stays crunchy even when the wet filling is added. It also helps set the structure. Remove from the oven and let it cool slightly while you make the filling. You don’t need to turn off the oven.
Step 4: Make the Filling (5-7 minutes)
In a large bowl, beat the softened cream cheese and softened butter together until smooth and creamy. This should take about 2 minutes. If you see lumps, keep beating. Scrape down the sides of the bowl.
Add the brown sugar and Biscoff cookie butter. Beat until fully combined and smooth. The mixture will look a bit grainy at first, but keep mixing. It’ll come together.
Add the vanilla extract and the egg. Beat on low speed just until combined. Don’t overmix once the egg is in, or you’ll incorporate too much air, which can cause cracking. The batter should be thick, smooth, and glossy.
Step 5: Assemble and Top (2 minutes)
Pour the filling over the pre-baked crust. Use your spatula to spread it evenly to the edges. It should be a thick, creamy layer. Sprinkle the crushed Biscoff cookies evenly over the top. They’ll sink in slightly as they bake, which is perfect.
Step 6: Bake the Bars (25-30 minutes)
Return the pan to the oven. Bake for 25-30 minutes. Here’s the tricky part: you want the edges to be set and lightly golden, but the center to still look slightly jiggly. If you bake it until the center is firm, it won’t be gooey. I usually pull them out at 25 minutes and check. If the center still wobbles like Jell-O, that’s exactly what you want.
Step 7: Cool Completely (2+ hours)
Remove from the oven and place on a wire rack. Let them cool in the pan for at least 1 hour. Then, transfer the whole pan to the fridge. They need to chill for at least 2 hours, preferably overnight. This is the hardest part, but it’s essential for clean cuts. If you cut them warm, they’ll be a mess.
Expert Tips & Tricks
Here’s everything I’ve learned from making these dozens of times. These tips will save you from my mistakes.
Room Temperature Ingredients are Key
I can’t stress this enough. Your cream cheese and butter MUST be softened. If they’re cold, you’ll get lumps in your filling. I usually set them out on the counter 30-60 minutes before I start. If I forget, I microwave the cream cheese in 10-second bursts, checking frequently, until it’s soft but not melted. Melted cream cheese will separate from the butter.
Don’t Overbake
The “gooey” part comes from underbaking slightly. The bars continue to cook in the residual heat after you take them out of the oven. If you wait until the center is completely firm in the pan, it will be overdone once it cools. Look for a slight jiggle in the center when you shake the pan. It should move like a wave, not like water.
Parchment Paper is Your Best Friend
These bars are sticky. Sweet, buttery, sticky. If you don’t line your pan, you will be scraping bits out of the corners. The parchment overhang also gives you a “handle” to lift the entire block of bars out of the pan once they’re chilled. Then you can slice them on a cutting board.
Crush Your Cookies Properly
For the topping, don’t just throw whole cookies on. Crush them into small, pea-sized pieces. If they’re too big, they won’t adhere to the filling and might burn. If they’re too small (dust), they’ll just disappear into the surface. Aim for texture.
Storage Matters
These bars keep well in the fridge for up to 5 days. Store them in an airtight container. If you stack them, put parchment paper between layers so they don’t stick together. They actually taste better on day 2, as the flavors meld.
Variations & Substitutions
Once you’ve nailed the basic version, here’s how you can mix it up. I’ve tried all of these.
Chocolate Chip Biscoff Bars
Add ½ cup of semi-sweet chocolate chips to the filling before pouring it over the crust. The chocolate and Biscoff spices are a classic combination. It’s like a cookie in bar form. This is great if you’re feeding chocolate lovers too.
White Chocolate Biscoff Bars
Mix ½ cup of white chocolate chips into the filling. It adds extra sweetness and creaminess. I love this version for holidays because the white chocolate looks beautiful against the golden Biscoff.
Gluten-Free Version
Use gluten-free graham crackers for the crust. Most major brands make them now. The filling is naturally gluten-free (check your Biscoff spread label, though most are GF). Everything else is fine. The texture is almost identical.
Dairy-Free Option
Use vegan butter and vegan cream cheese. There are good brands available now (like Kite Hill or Miyoko’s). The texture might be slightly different—less creamy—but it still works. I’ve made this for a vegan friend, and she loved it.
Shortbread Crust
If you want a richer crust, replace the graham crackers with crushed shortbread cookies (like Walker’s Shortbread). It’s more buttery and delicate. It’s closer to the texture of a buttery raspberry white chocolate scone crust, but sweeter.
Mini Version
You can make these in a muffin tin! Use mini muffin tins for bite-sized treats. Reduce the bake time to 12-15 minutes. These are perfect for office parties or gift boxes.
Serving & Storage
How to serve these bars for maximum impact.
How to Serve
I usually serve these chilled, straight from the fridge. The cold temperature contrasts nicely with the soft, gooey center. I cut them into 12 squares. For a fancy touch, drizzle a little extra melted Biscoff spread over the top before serving. It looks professional and adds a hit of flavor.
Pairing Suggestions
These bars are rich, so they pair well with something acidic or bitter to cut through the sweetness. A hot black coffee is my go-to. A glass of cold milk is classic. If you’re hosting a dinner party, serve these with a spiced apple honey cider to tie in the warm spices. Or, for a richer experience, serve with a cup of espresso.
Side Dishes
Since these are dessert bars, they don’t need much. Maybe some fresh berries on the plate for color and acidity. Strawberries or raspberries look beautiful next to the golden bars. A dollop of whipped cream is optional, but I usually skip it because the bars are rich enough.
Storage Instructions
Refrigerator: Store in an airtight container for up to 5 days. They will firm up in the fridge, which is good for slicing.
Freezing: Yes, you can freeze these! Wrap individual bars in plastic wrap, then place them in a freezer-safe bag. They’ll last for 2 months. Thaw in the fridge overnight. The texture might be slightly softer after thawing, but still delicious. I don’t recommend freezing the whole block, as it can crack when you try to slice it after thawing.
Reheating: I don’t usually reheat these, but if you want a warm, gooey center, microwave a single bar for 10-15 seconds. Just be careful, it gets very hot!
Nutrition Information
I’m not a nutritionist, but here’s the breakdown if you’re tracking. Keep in mind, these are rich bars, so portion control is key.
Per Serving (based on 12 bars):
- Calories: 280
- Protein: 4g
- Carbs: 32g
- Fiber: 1g
- Sugar: 22g
- Fat: 16g
- Saturated Fat: 9g
- Cholesterol: 35mg
- Sodium: 180mg
What’s Good:
These bars provide a quick energy boost from the sugar and carbs. The graham crackers offer a small amount of fiber. They’re a great treat for special occasions.
What to Know:
They are high in sugar and saturated fat due to the cream cheese, butter, and cookie butter. If you’re watching your sugar intake, consider making mini versions or sharing them with friends. One bar is plenty for most people.
My Take:
Look, this is a dessert bar. It’s not a health food. It’s a rich, indulgent treat that’s perfect for parties and holidays. When I make these, I enjoy one square and pair it with a black coffee. That way, I get the flavor without overdoing it. It’s about balance and enjoying the moment.
Final Thoughts
So that’s my go-to Gooey Biscoff Cookie Butter Bars! I’ve probably talked your ear off at this point, but when you make a recipe this often, you have a lot to say about it.
This has saved my dessert game more times than I can count. It’s my answer to “what do I bring?” when I want to look impressive but don’t have hours to spare. My friends are obsessed, my family begs for them, and I’m happy because I’m not stressed about baking.
Make it yours! Try adding chocolate chips, switch up the crust, or experiment with different toppings. The best recipes are the ones you adapt to your tastes. But honestly? The classic version is hard to beat.
If you make these, drop a comment and let me know what you think! I love hearing how recipes turn out in your kitchen. And if something doesn’t work, tell me that too—I’m here to help troubleshoot.
Happy baking! And I hope your kitchen smells half as good as mine does right now.
Frequently Asked Questions
Can I use crunchy Biscoff spread?
You can, but I don’t recommend it for the filling. The crunchy pieces won’t mix evenly into the cream cheese, and you’ll get random crunches in what should be a smooth, creamy bar. Use smooth spread for the filling. You can use crunchy cookies for the topping if you want extra texture there.
Why did my bars crack on top?
Cracking usually happens if you overmix the batter after adding the egg, or if the oven temperature is too high. Overmixing incorporates too much air, which expands and then collapses. Also, make sure you’re not overbaking. If the center is too set, the bars will crack as they cool. Try baking for 2-3 minutes less next time.
Can I make these ahead of time?
Yes! These bars are actually better made ahead. You can make them up to 3 days in advance. Store them in the fridge in an airtight container. They will firm up, making them easier to cut and transport. This makes them perfect for party prep.
How do I cut clean slices?
The key is chilling. Make sure the bars are completely cool and chilled in the fridge for at least 2 hours. Use a sharp knife. Wipe the knife with a clean, damp paper towel between every cut. This removes any sticky residue and ensures a clean edge. For even cleaner cuts, you can dip the knife in hot water and dry it before each slice.
Can I substitute the graham crackers?
Absolutely. You can use crushed Oreos (remove the cream) for a chocolate crust. You can use crushed digestive biscuits for a more British-style flavor. You can even use crushed shortbread cookies for a richer, butterier crust. Just adjust the sugar in the crust if the cookie substitute is already sweet.
Why are my bars too soft to cut?
They probably need more chill time. These bars rely on the cream cheese and butter to set in the fridge. If you cut them warm, they’ll be gooey in a bad way. Let them chill for at least 4 hours, or overnight. If they’re still too soft, try adding an extra 15 minutes to the bake time next time, but be careful not to overbake.
Can I freeze the batter?
No, I don’t recommend freezing the batter. The cream cheese and butter can separate when thawed, leading to a grainy texture. It’s best to make the bars fresh, bake them, and then freeze the baked bars (wrapped tightly) if you want to save them for later.
Pin This Recipe!

Gooey Biscoff Cookie Butter Bars
- Total Time: 2 hours 48 minutes
- Yield: 12 servings 1x
Description
Rich, gooey, and easy-to-make dessert bars featuring a graham cracker crust, a creamy Biscoff cookie butter filling, and a crunchy cookie topping. Perfect for parties and holidays.
Ingredients
- 1.5 cups (150g) crushed graham crackers
- 6 tablespoons (85g) unsalted butter, melted
- 2 tablespoons (25g) granulated sugar
- 1/2 teaspoon salt
- 8 ounces (225g) softened cream cheese
- 1/4 cup (57g) unsalted butter, softened
- 1/2 cup (140g) smooth Biscoff cookie butter
- 1 cup (200g) packed brown sugar
- 1 teaspoon vanilla extract
- 1 large egg
- 1/2 cup (40g) crushed Biscoff cookies (for topping)
Instructions
- Preheat oven to 350°F (175°C). Line an 8×8 inch baking pan with parchment paper, leaving an overhang on the sides, and spray lightly with non-stick spray.
- In a medium bowl, combine crushed graham crackers, melted butter, granulated sugar, and salt. Mix until it resembles wet sand.
- Press the crust mixture firmly into the bottom of the prepared pan. Bake for 8 minutes, then remove and let cool slightly while keeping the oven on.
- In a large bowl, beat the softened cream cheese and softened butter together until smooth and creamy (about 2 minutes).
- Add the brown sugar and Biscoff cookie butter to the cream cheese mixture. Beat until fully combined and smooth.
- Add the vanilla extract and egg. Beat on low speed just until combined. Do not overmix.
- Pour the filling over the pre-baked crust and spread evenly. Sprinkle crushed Biscoff cookies evenly over the top.
- Bake for 25-30 minutes. The edges should be set and lightly golden, but the center should still look slightly jiggly.
- Remove from oven and place on a wire rack. Cool in the pan for at least 1 hour.
- Transfer the pan to the refrigerator and chill for at least 2 hours (preferably overnight) before slicing.
Notes
Ensure cream cheese and butter are at room temperature to avoid lumps. Do not overbake; the center should jiggle slightly. Chill completely before cutting for clean slices. Store in an airtight container in the fridge for up to 5 days.
- Prep Time: 15 minutes
- Cook Time: 33 minutes
- Category: Dessert
- Cuisine: American
Nutrition
- Serving Size: 1 bar
- Calories: 280
- Sugar: 22
- Sodium: 180
- Fat: 16
- Saturated Fat: 9
- Carbohydrates: 32
- Fiber: 1
- Protein: 4
Keywords: Biscoff, cookie butter, bars, dessert, party food, easy recipes, no bake, graham cracker crust, cream cheese


