I still remember the first Rosh Hashanah I hosted on my own. I was twenty-four, living in a tiny apartment with a kitchen that smelled perpetually of burnt toast and anxiety. I wanted to make a traditional honey cake, but every recipe I found was either a dense, brick-like monolith that required four hours of standing over a stove, or it tasted like nothing but sugar and regret. I panicked. I ended up buying a honey cake from the bakery down the street, and while it was fine, it lacked that warm, personal touch that makes holiday food special. It lacked love.
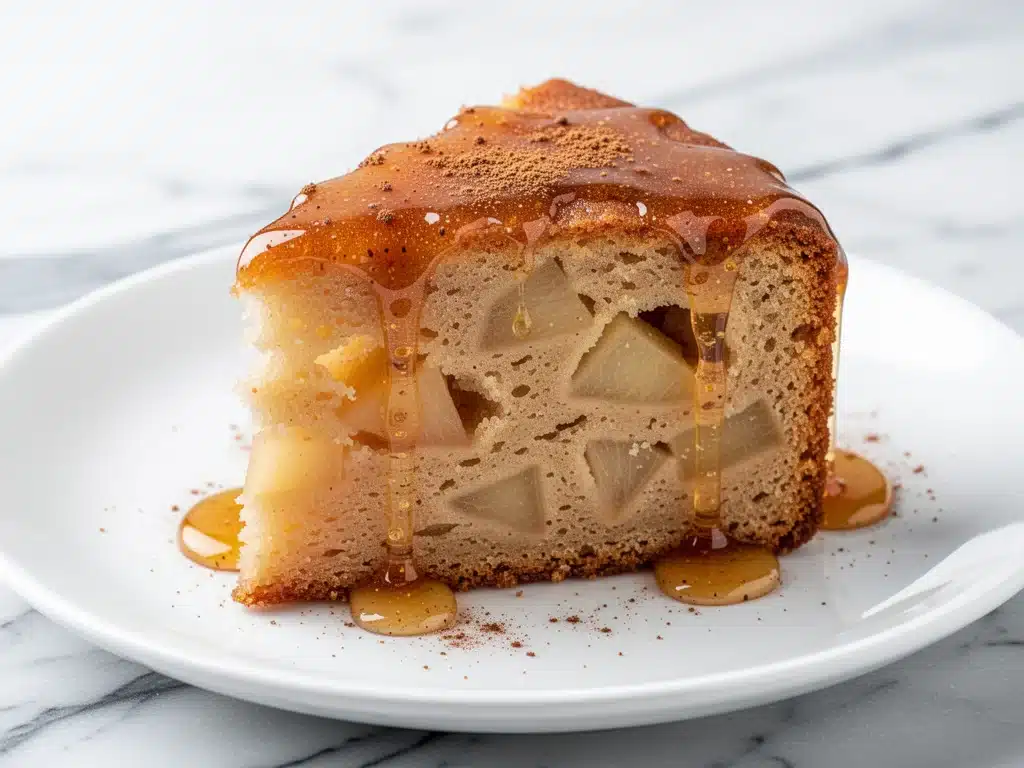
Fast forward ten years, and I’ve finally cracked the code. This Rosh Hashanah Honey Apple Cake with Warm Cinnamon Glaze is the result of a decade of tweaking, failing, and perfecting. It’s the cake I make when I want something that feels deeply traditional but actually respects my time. It’s moist, it’s spiced to perfection, and that warm cinnamon glaze? It’s the kind of topping that makes your guests stop mid-bite and ask for the recipe.
I’ve tested this recipe at least a dozen times—once with too much honey (too sweet), once with too little (too dry), and once with apples that were way too juicy (a soggy disaster). What you’re getting here is the sweet spot. It’s tender, fragrant, and ready in about 30 minutes of active time, with the rest being hands-off baking. It’s the perfect balance of nostalgia and practicality, making it ideal for holiday gatherings, potlucks, or just a quiet Tuesday when you want to feel festive.
There’s something magical about combining honey and apples during the High Holidays. The honey symbolizes a sweet new year, and the apples represent abundance and health. When you bake them together, you get this incredible depth of flavor that feels like a hug. This cake isn’t just dessert; it’s a tradition. And now, it can be yours, too.
Why You’ll Love This Holiday Honey Cake
Let’s be real: baking during the holidays can be stressful. You’re juggling main courses, sides, and decorations, and you don’t need a dessert that’s going to tie up the oven for hours or require a degree in chemistry to figure out. This Rosh Hashanah Honey Apple Cake is different. Here’s why it’s become my absolute go-to:
- Actually Moist, Not Dry — I’ve tried so many honey cakes that come out drier than sandpaper. This one uses applesauce and fresh apple chunks to keep it incredibly tender. It stays moist for days, which is huge for meal prep.
- 10-Minute Prep Time — Seriously. You can mix this batter in the time it takes to boil water for tea. I’ve made this on busy mornings before heading to synagogue, and it still turned out perfect. No complex techniques, just dump and stir.
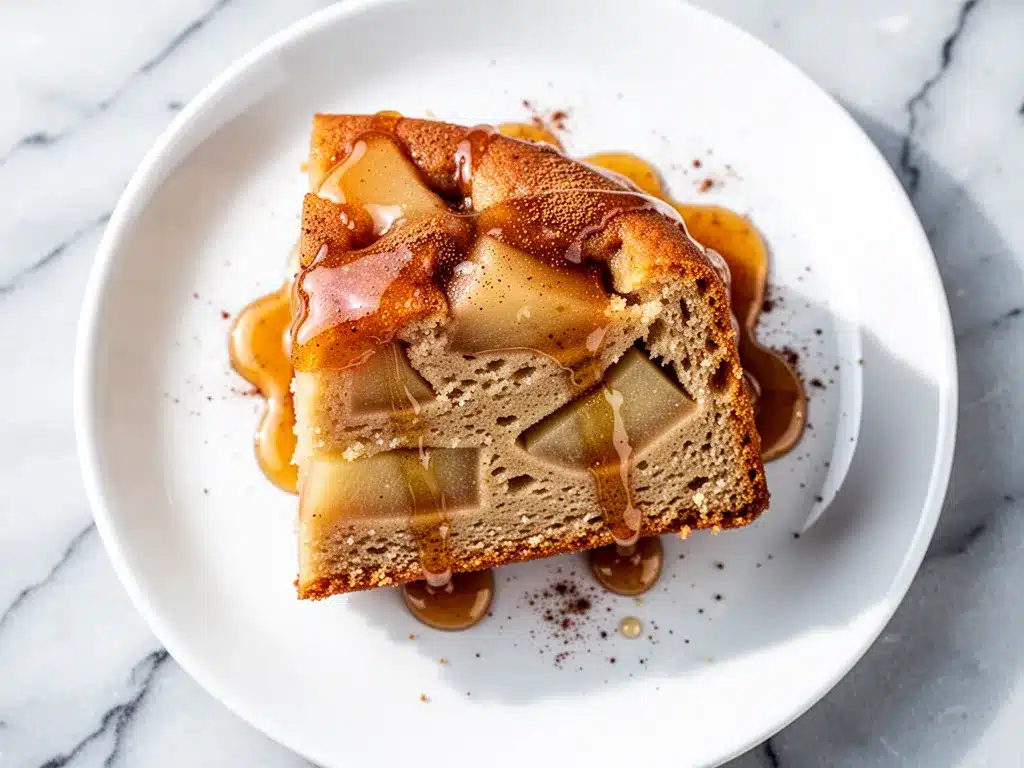
- Warm Cinnamon Glaze Magic — The glaze isn’t just an afterthought. It’s made warm and poured over the hot cake, soaking in and creating that sticky, cinnamon-sugar crust that reminds me of my grandmother’s kitchen. It’s the best part.
- Make-Ahead Friendly — This cake actually tastes better the next day. The flavors meld together, and the honey gets deeper. I often make it the night before, which saves me so much stress on the actual day of the holiday.
- Gluten-Free Option Built-In — I’ve tested this with a 1:1 gluten-free flour blend, and it works beautifully. No one will know the difference, which is a lifesaver when you have guests with dietary restrictions.
This cake brings everyone to the table. It’s sweet but not cloying, spiced but not overpowering. It’s the kind of dessert that people remember years later. And honestly? It’s just easier than buying one from the store.
Ingredients You’ll Need
One of the best things about this recipe is that the ingredients are simple, accessible, and likely already in your pantry. You don’t need exotic spices or hard-to-find flours. Here’s what you’ll need to make this Rosh Hashanah Honey Apple Cake with Warm Cinnamon Glaze:
For the Cake Base
All-purpose flour (2 cups / 250g) — I use regular all-purpose, but you can swap in a gluten-free 1:1 blend if needed. Don’t use cake flour; you need a little structure here.
Baking powder (2 teaspoons) — Make sure it’s fresh! Old baking powder is the #1 reason cakes don’t rise. If it’s been in your cabinet for more than six months, toss it.
Baking soda (½ teaspoon) — This reacts with the honey and applesauce to give the cake its lift and slight tang.
Salt (½ teaspoon) — Just enough to balance the sweetness. Don’t skip it.
Ground cinnamon (2 teaspoons) — This is the main spice. Use good quality cinnamon; it makes a huge difference in flavor depth.
Ground nutmeg (¼ teaspoon) — Just a pinch. It adds warmth without being detectable on its own.
Unsalted butter (½ cup / 115g, softened) — Room temperature butter creams better with sugar. If you’re rushing, microwave it for 10 seconds.
Granulated sugar (1 cup / 200g) — White sugar gives the right amount of sweetness and helps with browning.
Raw honey (½ cup / 170g) — This is the star. Use a mild honey like clover or orange blossom. Avoid strong buckwheat honey unless you love that robust, molasses-like taste.
Eggs (2 large) — Room temperature eggs mix more evenly into the batter. I take them out of the fridge 30 minutes before I start.
Vanilla extract (1 teaspoon) — Pure vanilla, please. The artificial stuff tastes chemical in baked goods.
Applesauce (½ cup / 120g) — Unsweetened applesauce keeps the cake moist. I use homemade or unsweetened store-bought. Sweetened applesauce will make it too sugary.
Granny Smith apples (2 medium, peeled and diced) — I use Granny Smith because they hold their shape and add a nice tartness that cuts the sweetness. You can use Fuji or Gala, but they’ll get mushier.
For the Warm Cinnamon Glaze
Butter (2 tablespoons / 30g) — Unsalted, melted.
Brown sugar (2 tablespoons / 25g) — Light or dark brown sugar both work. Dark has more molasses flavor.
Ground cinnamon (1 teaspoon) — For that classic cinnamon roll vibe.
Honey (1 tablespoon / 15g) — Just a drizzle to help the glaze stick and add shine.
Optional: Chopped walnuts or pecans — Sprinkle on top for crunch. I love the texture contrast.
Equipment Needed
You don’t need fancy gadgets for this. Here’s what I actually use:
9×9-inch square baking pan — This is the traditional size. You can use a round cake pan, but the baking time will change slightly. A square pan gives you those perfect crispy edges.
Mixing bowls — Two bowls. One for dry ingredients, one for wet. I use glass bowls because they’re easy to clean.
Whisk — For mixing the dry ingredients. A fork works in a pinch, but a whisk is faster.
Electric mixer or wooden spoon — You can mix this by hand, but an electric mixer makes it easier to cream the butter and sugar. I usually use my hand mixer for 2 minutes, then switch to a spoon for the rest.
Small saucepan — For melting the glaze ingredients together. A microwave-safe bowl works too, but the saucepan gives you more control.
Pastry brush — Optional, but nice for brushing the glaze evenly over the cake.
How to Make It: Step-by-Step
Alright, let’s bake! This is straightforward, but there are a few tricks to get it right.
Step 1: Prep Your Oven and Pan (5 minutes)
Preheat your oven to 350°F (175°C). Grease your 9×9-inch baking pan with butter or non-stick spray. I like to line the bottom with parchment paper for easy removal, but it’s not strictly necessary. Just make sure the sides are well-greased so the cake doesn’t stick.
Step 2: Mix the Dry Ingredients (2 minutes)
In a medium bowl, whisk together the flour, baking powder, baking soda, salt, cinnamon, and nutmeg. Set this aside. I usually do this while the oven is preheating to save time.
Step 3: Cream the Butter and Sugar (3 minutes)
In a large bowl, beat the softened butter and granulated sugar together until light and fluffy. This takes about 2-3 minutes with an electric mixer. If you’re doing it by hand, it’ll take a bit longer, but keep going until it looks pale and airy. This step adds air to the cake, which helps it rise.
Step 4: Add Wet Ingredients (2 minutes)
Add the honey, eggs, vanilla, and applesauce to the butter mixture. Beat until combined. The mixture might look a little curdled at first—that’s normal. Just keep mixing, and it’ll come together.
Step 5: Combine Wet and Dry (2 minutes)
Gradually add the dry ingredients to the wet ingredients, mixing on low speed or stirring with a spoon until just combined. Don’t overmix! Overmixing makes the cake tough. Stop as soon as you no longer see streaks of flour.
Step 6: Fold in the Apples (2 minutes)
Using a spatula, gently fold in the diced Granny Smith apples. Be careful not to break them up too much. You want chunks of apple in every bite.
Step 7: Bake (30-35 minutes)
Pour the batter into the prepared pan and smooth the top. Bake for 30-35 minutes, or until a toothpick inserted into the center comes out clean or with just a few moist crumbs. The top should be golden brown. If it starts browning too quickly, cover it loosely with foil after 20 minutes.
Step 8: Make the Glaze (5 minutes)
While the cake is baking, make the glaze. In a small saucepan over low heat, combine the butter, brown sugar, cinnamon, and honey. Stir constantly until the butter melts and the sugar dissolves. It should be a smooth, syrupy consistency. Don’t let it boil.
Step 9: Glaze the Cake (2 minutes)
As soon as the cake comes out of the oven, pour the warm glaze evenly over the top. Let it soak in for a minute. If you’re adding nuts, sprinkle them on now.
Step 10: Cool and Serve
Let the cake cool in the pan for 10 minutes, then transfer it to a wire rack to cool completely. You can serve it warm, but it’s easier to cut once it’s fully cooled. Cut into squares and enjoy!
Expert Tips & Tricks
Here’s everything I’ve learned from making this cake dozens of times. These tips will save you from my mistakes.
Don’t Overmix the Batter — This is the golden rule of baking. Once you add the flour, mix until *just* combined. Overmixing develops gluten, which makes the cake dense and chewy instead of tender and crumbly.
Use Room Temperature Ingredients — Cold eggs and butter won’t blend smoothly into the batter. Take your eggs and butter out of the fridge at least 30 minutes before you start. If you forget, put the eggs in a bowl of warm water for 5 minutes.
Choose the Right Apples — Granny Smith apples are my go-to because they’re tart and hold their shape. If you use too many sweet apples, the cake can get mushy. I usually use a mix of Granny Smith and a few chunks of Fuji for balance.
Glaze While Hot — Pour the glaze over the cake immediately after it comes out of the oven. The heat helps the glaze soak in and create that sticky, delicious crust. If you wait until the cake is cool, the glaze will just sit on top.
Storage Matters — Store the cake in an airtight container at room temperature for up to 3 days. It actually gets better on day 2 as the flavors meld. Don’t refrigerate it unless you have to; it can dry out the cake.
Variations & Substitutions
Once you’ve nailed the basic version, here’s how you can mix it up. I’ve tried all of these.
Gluten-Free Version — Use a 1:1 gluten-free flour blend (like Bob’s Red Mill or King Arthur). Add ½ teaspoon of xanthan gum if your blend doesn’t include it. The texture is almost identical to the original.
Vegan Version — Replace the butter with vegan butter or coconut oil. Use flax eggs (1 tablespoon ground flaxseed + 3 tablespoons water per egg) instead of regular eggs. Use maple syrup instead of honey. It’s delicious and still moist.
Add Nuts — I love adding ½ cup of chopped walnuts or pecans to the batter. It adds a nice crunch and pairs beautifully with the cinnamon. Toast the nuts first for extra flavor.
Spice It Up — Add a pinch of cardamom or allspice to the dry ingredients for a more complex spice profile. It’s a nice variation for the holidays.
Mini Cake Pans — If you’re making individual portions, use mini muffin tins. Bake for 15-18 minutes. These are perfect for party favors or lunchbox treats.
Serving & Storage
How to Serve: I usually serve this cake with a cup of tea or coffee. It’s also great with a dollop of whipped cream or a scoop of vanilla ice cream. The warm glaze pairs perfectly with cold ice cream.
Side Dishes: This cake stands on its own, but if you’re serving it as part of a larger meal, it pairs well with light fruit salads or a simple green salad. It’s rich, so you don’t need much else.
Storage: Store in an airtight container at room temperature for up to 3 days. For longer storage, wrap it tightly in plastic wrap and freeze for up to 2 months. Thaw at room temperature before serving.
Reheating: If you want to serve it warm, microwave individual slices for 15-20 seconds. The glaze will melt and become extra gooey.
Nutrition Information
I’m not a nutritionist, but here’s the breakdown if you’re tracking. This is a rich dessert, so enjoy in moderation.
Per Serving (based on 9 servings):
- Calories: 280
- Protein: 3g
- Carbs: 45g
- Fiber: 1g
- Sugar: 30g
- Fat: 10g
- Saturated Fat: 6g
- Cholesterol: 45mg
- Sodium: 180mg
Look, this is a sweet treat with honey and sugar. It’s not a health food. But it’s made with real ingredients, and it’s better than anything from a box. When I want to make it lighter, I reduce the sugar by ¼ cup and add more apples. But usually? I just enjoy a slice and appreciate the tradition.
Final Thoughts
So that’s my Rosh Hashanah Honey Apple Cake with Warm Cinnamon Glaze. It’s a recipe that’s close to my heart, and I hope it becomes part of your holiday traditions too. It’s simple, it’s delicious, and it brings that special warmth to the table. Whether you’re hosting a big gathering or just treating yourself, this cake is worth the effort.
Make it yours! Try different nuts, adjust the spices, or add a dash of rum to the glaze. The best recipes are the ones you adapt to your taste. If you make this, drop a comment and let me know how it turned out. I love hearing how recipes turn out in your kitchen.
Happy baking! And I hope your kitchen smells half as good as mine does right now.
Frequently Asked Questions
Can I use jarred applesauce?
Yes, absolutely. Just make sure it’s unsweetened. Sweetened applesauce will make the cake too sugary. I usually use the plain, unsweetened kind from a jar or pouch.
Why did my cake turn out dense?
This usually happens if you overmix the batter or use old baking powder. Make sure your baking powder is fresh, and mix the dry ingredients into the wet ingredients only until combined. Don’t overwork the batter.
Can I make this ahead of time?
Yes! This cake actually tastes better the next day. You can make it the night before and store it in an airtight container at room temperature. The flavors will meld together, making it even more delicious.
Can I freeze this cake?
Yes, you can freeze it. Wrap the cooled cake tightly in plastic wrap and then in aluminum foil. It will keep for up to 2 months. Thaw at room temperature before serving. The glaze might soften, but it’ll still be tasty.
What type of honey is best?
Use a mild honey like clover, orange blossom, or acacia. Avoid strong, dark honeys like buckwheat or manuka unless you love that robust flavor. The honey should be sweet and floral, not overpowering.
Can I use a round cake pan?
Yes, but the baking time will be shorter. Start checking at 25 minutes. The cake will be thicker in a round pan, so it might take a few minutes longer to bake in the center. Use the toothpick test to check for doneness.
Is this cake gluten-free?
The original recipe uses all-purpose flour, so it’s not gluten-free. However, you can easily make it gluten-free by using a 1:1 gluten-free flour blend. I’ve tested this, and it works beautifully.
Pin This Recipe!

Rosh Hashanah Honey Apple Cake with Warm Cinnamon Glaze
- Total Time: 45 minutes
- Yield: 9 servings 1x
Description
A moist, spiced honey apple cake with a warm cinnamon glaze that is ready in about 30 minutes of active time. This traditional holiday dessert is tender, fragrant, and perfect for Rosh Hashanah or any festive occasion.
Ingredients
- 2 cups (250g) all-purpose flour
- 2 teaspoons baking powder
- 0.5 teaspoon baking soda
- 0.5 teaspoon salt
- 2 teaspoons ground cinnamon
- 0.25 teaspoon ground nutmeg
- 0.5 cup (115g) unsalted butter, softened
- 1 cup (200g) granulated sugar
- 0.5 cup (170g) raw honey
- 2 large eggs, room temperature
- 1 teaspoon vanilla extract
- 0.5 cup (120g) unsweetened applesauce
- 2 medium Granny Smith apples, peeled and diced
- 2 tablespoons (30g) unsalted butter, melted (for glaze)
- 2 tablespoons (25g) brown sugar (for glaze)
- 1 teaspoon ground cinnamon (for glaze)
- 1 tablespoon (15g) honey (for glaze)
- Optional: Chopped walnuts or pecans
Instructions
- Preheat oven to 350°F (175°C). Grease a 9×9-inch square baking pan and line the bottom with parchment paper if desired.
- In a medium bowl, whisk together the flour, baking powder, baking soda, salt, cinnamon, and nutmeg. Set aside.
- In a large bowl, beat the softened butter and granulated sugar together until light and fluffy, about 2-3 minutes with an electric mixer.
- Add the honey, eggs, vanilla, and applesauce to the butter mixture. Beat until combined.
- Gradually add the dry ingredients to the wet ingredients, mixing on low speed or stirring with a spoon until just combined. Do not overmix.
- Gently fold in the diced Granny Smith apples using a spatula.
- Pour the batter into the prepared pan and smooth the top. Bake for 30-35 minutes, or until a toothpick inserted into the center comes out clean. If browning too quickly, cover loosely with foil after 20 minutes.
- While the cake is baking, make the glaze: In a small saucepan over low heat, combine the melted butter, brown sugar, cinnamon, and honey. Stir constantly until smooth and syrupy. Do not let it boil.
- As soon as the cake comes out of the oven, pour the warm glaze evenly over the top. Let it soak in for a minute. Sprinkle with nuts if using.
- Let the cake cool in the pan for 10 minutes, then transfer to a wire rack to cool completely before cutting into squares.
Notes
For a gluten-free version, use a 1:1 gluten-free flour blend. For a vegan version, substitute butter with vegan butter or coconut oil, eggs with flax eggs, and honey with maple syrup. The cake tastes better the next day as flavors meld. Store in an airtight container at room temperature for up to 3 days, or freeze for up to 2 months.
- Prep Time: 10 minutes
- Cook Time: 30-35 minutes
- Category: Dessert
- Cuisine: Jewish
Nutrition
- Serving Size: 1 square slice
- Calories: 280
- Sugar: 30
- Sodium: 180
- Fat: 10
- Saturated Fat: 6
- Carbohydrates: 45
- Fiber: 1
- Protein: 3
Keywords: Rosh Hashanah, honey cake, apple cake, holiday dessert, cinnamon glaze, gluten-free option, easy baking, traditional recipe


