It was 6:45 PM on a Tuesday. I was staring at a pile of unwashed dishes from lunch, a mountain of laundry that needed to be folded, and the terrifying silence of an empty kitchen. My husband had just texted: “Running 30 minutes late. What’s for dinner?” I didn’t have thirty minutes. I barely had fifteen. And I definitely didn’t have the mental energy to chop vegetables, manage multiple pans, and scrub a stove.
So I did what I always do when I’m overwhelmed: I opened the fridge, grabbed two chicken breasts, a jar of honey, and a head of broccoli, and I threw it all onto a single baking sheet. I drizzled it with a mixture of garlic, soy sauce, and more honey, popped it into the oven, and then—this is the best part—I actually sat down. I read a chapter of a book. I drank a glass of wine. I didn’t stand over the stove stirring. I didn’t watch the clock.
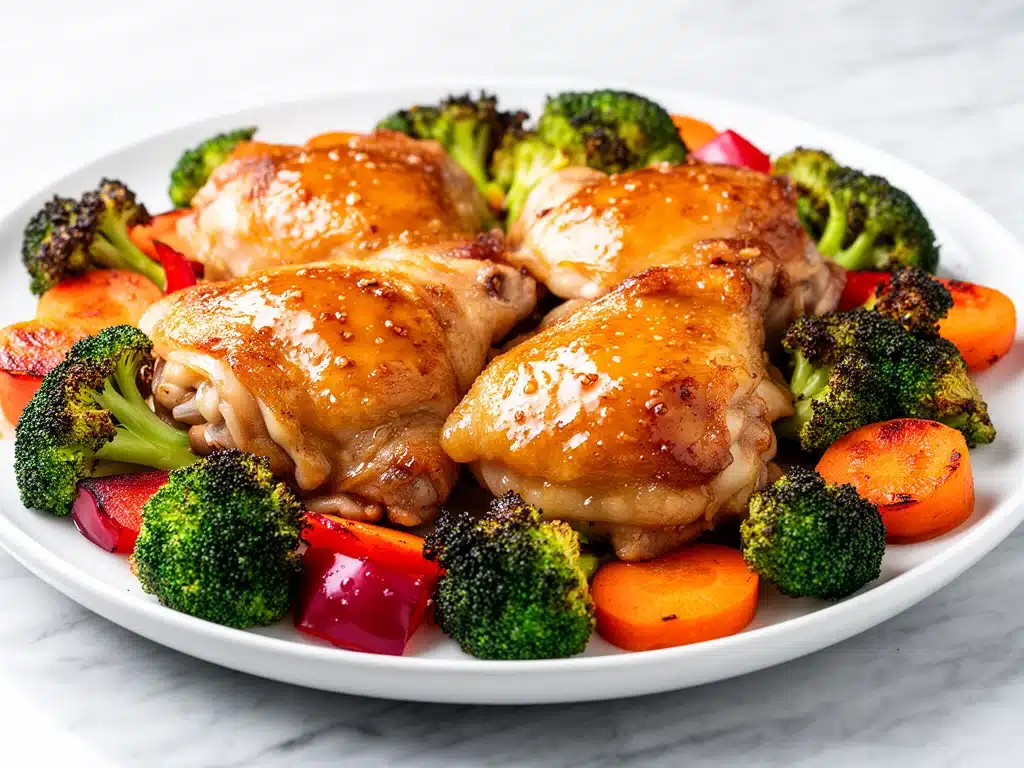
Thirty minutes later, the timer went off, and the house smelled like a Chinese takeout restaurant, but the good kind. The kind that doesn’t leave you feeling sluggish. That was the birth of my obsession with Sheet Pan Honey Garlic Chicken. It’s not just a recipe; it’s my peace treaty with chaos. It’s the dish I make when I’m tired, when I’m busy, or when I just want to spend less time cooking and more time eating.
Over the last two years, I’ve made this sheet pan meal at least a hundred times. I’ve tweaked the sauce, swapped the veggies, and even tried it with thighs instead of breasts. Every single time, it works. Every single time, it’s ready in 30 minutes flat. And every single time, it tastes like I spent hours in the kitchen, even though I barely lifted a finger. If you’re looking for a way to get a healthy, flavorful dinner on the table without the stress, this is it. This is hands-down the best method for busy weeknights.
Why You’ll Love This Sheet Pan Honey Garlic Chicken
There are about a dozen reasons I keep coming back to this recipe, but let’s be real: it’s mostly because it solves the biggest problem in modern cooking—the cleanup. But there’s more to it than just an easy wash-up. Here’s why this sheet pan honey garlic chicken has earned a permanent spot in our weekly rotation:
Zero Active Stress — Seriously. The only active time is the 10 minutes it takes to toss the chicken and veggies in the sauce. The rest is hands-off oven time. I’ve made this while helping my kids with homework, while on a work call (with the camera off), and while watching my favorite show. It’s that forgiving.
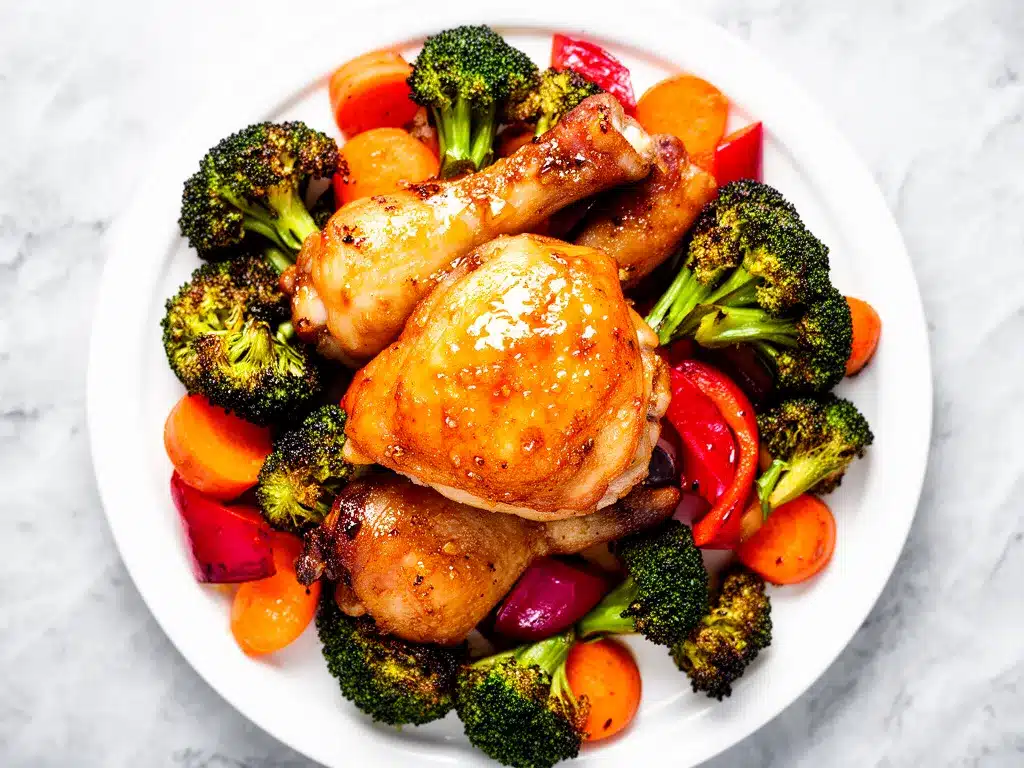
Flavor That Punches Above Its Weight — You’d think that honey and garlic would be a simple combo, but when you roast it at high heat, something magical happens. The honey caramelizes, creating little sticky, savory-sweet edges on the chicken. The garlic infuses everything, turning the broccoli and bell peppers into flavor bombs. It tastes like restaurant-quality stir-fry, but baked.
Healthy Without Being “Diet” Food — I hate it when healthy recipes taste like cardboard. This isn’t that. You’re getting lean protein from the chicken, complex carbs if you serve it over rice or quinoa, and a ton of fiber from the veggies. But because of the honey and the roasting process, it feels indulgent. It feels like a treat, not a punishment.
Customizable Chaos — Don’t like broccoli? Use asparagus. Hate bell peppers? Throw in zucchini or snap peas. This recipe is a template, not a rigid rulebook. I’ve made this with sweet potatoes instead of regular ones, and it was incredible. It’s the perfect way to use up whatever is about to go bad in your crisper drawer.
Budget-Friendly — Chicken breasts are usually one of the most affordable proteins at the grocery store. Veggies are cheap, especially if you buy them fresh or frozen. You can feed four people for under $20. That’s a win in my book.
This is my go-to when I need dinner to just work. No complicated techniques, no weird ingredients you have to hunt for, just reliable, delicious food that makes everyone happy. If you’ve been looking for a sheet pan honey garlic chicken recipe that actually delivers on the “easy” promise, you’re in the right place.
Ingredients You’ll Need
Here’s the best part: you probably have most of this already. The sauce is built on pantry staples, and the rest is just fresh basics. I’m particular about a few things here, though, so pay attention to the details.
For the Chicken
Chicken breasts (1.5 pounds / 700g) — Boneless, skinless. I prefer chicken breasts for the lean protein, but chicken thighs work too if you want something juicier. Just note that thighs will take a few minutes longer to cook. Cut them into even, bite-sized pieces. Uniformity is key so everything cooks at the same rate.
Avocado oil or olive oil (2 tablespoons) — I use avocado oil because it has a high smoke point, which is great for roasting. Olive oil works fine too, just don’t let it smoke. A little goes a long way to keep the chicken from sticking.
For the Honey Garlic Sauce
Minced garlic (6-8 cloves) — Yes, that many. Don’t be shy. Fresh garlic is non-negotiable here. Jarred garlic has a weird metallic aftertaste that really shows up in simple sauces. If you’re feeling lazy, buy pre-minced fresh garlic in the refrigerated section, but fresh is best. Mince it finely so it distributes evenly.
Honey (½ cup / 120ml) — This is the star. Use good quality honey if you can. Clover or wildflower adds a nice floral note. I’ve tried maple syrup as a substitute, and it’s okay, but it doesn’t caramelize quite the same way. Stick with honey for that sticky glaze.
Soy sauce (¼ cup / 60ml) — I use low-sodium soy sauce because I can control the salt level better. Regular soy sauce works, but you might want to cut back on any additional salt. For a gluten-free version, use tamari.
Rice vinegar (2 tablespoons) — This adds the necessary acidity to balance the sweetness of the honey. White wine vinegar works in a pinch, but rice vinegar is milder and more authentic to the flavor profile.
Sriracha or chili flakes (1 teaspoon) — Optional, but I highly recommend it. A little heat cuts through the richness of the honey and garlic. Start with less if you’re sensitive to spice, but a little kick makes this dish addictive.
Ground ginger (1 teaspoon) — Fresh ginger is great, but ground is easier to keep on hand and works perfectly here. It adds that warm, earthy depth that makes it taste like takeout.
Cornstarch (1 teaspoon) — This is the secret weapon. Whisked into the sauce, it helps it cling to the chicken and veggies as it roasts, creating that glossy, restaurant-style glaze.
For the Veggies
Broccoli florets (2 cups) — The classic pairing. Broccoli roasts beautifully and gets slightly charred, which adds a smoky flavor. Cut florets to be similar in size to the chicken pieces.
Red bell pepper (1 large, sliced) — Adds sweetness and color. Yellow or orange peppers work too. Slice them into strips so they roast evenly.
Onion (1 medium, sliced into wedges) — Red onion or yellow onion both work. Wedges hold up better than diced onions during roasting, so they don’t burn or turn to mush.
Sesame seeds (1 tablespoon) — For garnish. Toasted sesame seeds add a nice nutty crunch and make it look fancy. Not strictly necessary, but it’s the finishing touch.
Optional Add-Ins
Snap peas — Add these in the last 10 minutes of cooking so they stay crisp.
Water chestnuts — For that crunchy texture you love in Chinese food. Drain and rinse before adding.
Cilantro — Fresh chopped cilantro on top adds brightness. Skip it if your family hates it (mine does).
Equipment Needed
You don’t need fancy equipment for this. Here’s what I actually use:
Large Sheet Pan — I use a standard 18×13 inch rimmed baking sheet. If you have a half-sheet pan, perfect. If you’re cooking for four, you might need two pans so the chicken isn’t crowded. Crowding leads to steaming, not roasting, and we want caramelization.
Mixing Bowls — Two medium bowls. One for tossing the chicken in the sauce, one for the veggies. Keeps things organized.
Whisk — For mixing the sauce ingredients. A small whisk is fine.
Measuring Cups and Spoons — Standard stuff. Dollar store versions work fine.
Oven — Obviously. Preheated to 400°F (200°C).
Optional but nice:
- Parchment paper — Makes cleanup literally zero. Just toss the paper. I use this 90% of the time.
- Non-stick spray — For extra insurance against sticking, though the oil usually does the trick.
That’s it. No special knives, no blenders, no food processors. Just a sheet pan and an oven. If you can do that, you can make this.
How to Make It: Step-by-Step
Alright, let’s make this! I’m walking you through exactly how I do it, including the little tricks I’ve picked up over a hundred tries. This sheet pan honey garlic chicken comes together fast, but the order matters.
Step 1: Prep the Chicken (5 minutes)
Start by cutting your chicken breasts into bite-sized pieces. Aim for 1-inch cubes. If they’re too big, they’ll dry out before the inside is cooked. If they’re too small, they’ll burn. Place them in a medium bowl. This uniform size is crucial for even cooking.
Step 2: Make the Sauce (3 minutes)
In a small bowl, whisk together the minced garlic, honey, soy sauce, rice vinegar, sriracha (if using), ground ginger, and cornstarch. Whisk until the cornstarch is completely dissolved. The sauce should look glossy and slightly thickened. If it’s too thick, add a teaspoon of water. If it’s too thin, add a pinch more cornstarch.
Step 3: Toss the Chicken
Pour half of the sauce over the chicken pieces. Toss well with your hands or a spoon until every piece is coated. Let it sit for a minute while you prep the veggies. This gives the chicken a head start on flavor absorption.
Step 4: Prep the Veggies
Wash and chop your broccoli, bell peppers, and onions. Cut them into sizes that match the chicken pieces. Toss them in a separate bowl with the remaining sauce and a drizzle of oil. Season with black pepper. Do not add salt yet, as the soy sauce is salty enough.
Step 5: Arrange on the Sheet Pan
Line your baking sheet with parchment paper for easy cleanup. Spread the chicken pieces in a single layer. Spread the veggies in a single layer next to or around the chicken. Crucial tip: Do not overcrowd. If the pieces are touching, they’ll steam instead of roast. If you’re cooking for more than two people, use two pans. Give them space to breathe and get those beautiful brown edges.
Step 6: Roast
Preheat your oven to 400°F (200°C). Place the sheet pan in the center rack. Roast for 15-20 minutes. At the 10-minute mark, pull the pan out and give the veggies and chicken a gentle stir. This ensures even browning. The chicken is done when it reaches an internal temperature of 165°F (74°C) and the edges are caramelized. The sauce should be sticky and glossy.
Step 7: Garnish and Serve
Remove from the oven. Sprinkle with toasted sesame seeds and chopped green onions if you have them. Serve immediately over steamed rice, quinoa, or cauliflower rice. The sauce on the pan is liquid gold—spoon it over the top.
Total Time: About 30 minutes (10 minutes active, 20 minutes hands-off).
Expert Tips & Tricks
Here’s everything I’ve learned from making this dozens of times. These tips will save you from my mistakes.
Cut Uniformly — I can’t stress this enough. If your chicken pieces are different sizes, some will be dry and overcooked while others are raw. Take the extra minute to make them even.
Don’t Skip the Cornstarch — I tried leaving it out once to save a step, and the sauce just slid off the chicken. The cornstarch creates that sticky glaze that clings to everything. It’s the difference between “okay” and “amazing.”
Parchment Paper is Your Friend — I know, some people swear by silicone mats or just oiling the pan. But parchment paper makes cleanup instant. Just throw it away. No scrubbing. No soaking. It’s worth the small cost.
High Heat for Caramelization — 400°F is the sweet spot. Lower temperatures will dry out the chicken. Higher temperatures might burn the honey before the chicken cooks through. Stick to 400°F for that perfect balance of cooked meat and sticky glaze.
Toast Your Sesame Seeds — If you buy raw sesame seeds, toast them in a dry pan for 2 minutes before sprinkling them on top. It releases the oils and makes them nutty and fragrant. It’s a small step that makes a big difference in aroma.
Common Mistakes (and how to avoid them):
- Sauce is too thin: You didn’t use enough cornstarch, or you added too much liquid. Next time, whisk the cornstarch with a little cold water first to make a slurry, then add it to the sauce.
- Chicken is dry: You overcooked it or cut the pieces too small. Use a meat thermometer to check for 165°F. Pull it out as soon as it hits that temp.
- Veggies are mushy: They were overcrowded on the pan. Spread them out!
Variations & Substitutions
Once you’ve nailed the basic version, here’s how you can mix it up. I’ve tried all of these.
Chicken Thighs — Swap breasts for boneless, skinless thighs. They’re juicier and more flavorful. They might take 2-3 minutes longer to cook, so check them a bit later.
Shrimp Version — Shrimp cooks much faster. Toss raw shrimp in the sauce and roast at 400°F for only 8-10 minutes. They’ll turn pink and opaque. Don’t overcook them or they’ll get rubbery.
Tofu Version — For a vegetarian option, use extra-firm tofu. Press it first, cube it, and toss in the sauce. Roast for 20-25 minutes until crispy. It absorbs the flavor beautifully.
Sweet Potato Base — Swap broccoli for cubed sweet potatoes. Toss them in the sauce with the chicken. They take longer to cook, so add them first, then add the chicken halfway through.
Spicy Kick — Double the sriracha or add a diced jalapeño. If you like heat, this version is for you.
Gluten-Free — Simply use tamari instead of soy sauce. Everything else is naturally gluten-free.
Dairy-Free — This recipe is already dairy-free! Just make sure your honey is vegan-friendly if that’s a concern for you.
Serving & Storage
How to Serve:
I usually serve this straight from the sheet pan at the dinner table—it looks rustic and stays warm. But here are other ways I’ve enjoyed it:
Side Dishes:
- Steamed jasmine rice (the classic choice)
- Quinoa (for extra protein)
- Cauliflower rice (for a low-carb option)
- Simple green salad with sesame dressing
Storage Instructions:
Refrigerator:
Store leftovers in an airtight container for up to 4 days. The chicken stays moist, and the veggies hold up well. The flavors actually meld together nicely after a day.
Reheating:
Best method: Microwave in 30-second intervals, stirring in between. Add a splash of water or broth to help loosen the sauce if it’s thickened.
Oven method: Place on a sheet pan and reheat at 350°F for 10-15 minutes. This helps crisp up the edges again.
Freezing:
Honestly, this doesn’t freeze well. The veggies can get mushy when thawed, and the sauce might separate. I recommend eating it fresh or storing in the fridge for up to 4 days. If you must freeze, freeze the chicken and sauce separately from the veggies.
Meal Prep:
This is a meal prep superstar. Portion it out into containers on Sunday, and you have healthy lunches for the week. Just reheat gently.
Nutrition Information
I’m not a nutritionist, but here’s the breakdown if you’re tracking. This is per serving (based on 4 servings with rice).
Per Serving:
- Calories: 450
- Protein: 35g
- Carbs: 55g
- Fiber: 4g
- Sugar: 25g (from honey and veggies)
- Fat: 10g
- Sodium: 600mg
What’s Good:
High in protein, good source of fiber from veggies, and contains healthy fats from the oil. The honey provides quick energy, but if you’re watching sugar, you can reduce the honey to ¼ cup.
What to Know:
It’s higher in sodium due to the soy sauce. Use low-sodium soy sauce to cut that down. The sugar content is natural from honey and veggies, but still present. It’s a balanced meal, but not a “diet” food. It’s real food.
Final Thoughts
So that’s my sheet pan honey garlic chicken! I’ve probably talked your ear off at this point, but when you make a recipe this often, you have a lot to say about it.
This has saved weeknight dinners more times than I can count. It’s my answer to “what’s for dinner” when I’m tired, don’t want takeout, and still want something that tastes really good. My kids are happy, my husband’s happy, and I’m happy because I’m not stressed about cooking. It’s the perfect balance of flavor, health, and convenience.
Make it yours! Try different add-ins, swap in your favorite vegetables, adjust the garlic (though more is always better in my opinion). The best recipes are the ones you adapt to your family’s tastes. If you’re looking for other easy dinners, you might also enjoy trying my keto crispy air fryer chicken wings for a game day snack, or even these no-bake chocolate peanut butter energy balls for a quick treat.
If you make this, drop a comment and let me know what you think! I love hearing how recipes turn out in your kitchen. And if something doesn’t work, tell me that too—I’m here to help troubleshoot. Happy cooking! And I hope your kitchen smells half as good as mine does right now.
Frequently Asked Questions
Can I use chicken thighs instead of breasts?
Yes! Chicken thighs are juicier and more flavorful. They will take about 2-3 minutes longer to cook, so keep an eye on them. Just make sure they reach an internal temperature of 165°F.
Why did my sauce turn out watery?
This usually happens if you didn’t use enough cornstarch or if the chicken released too much water. Make sure to whisk the cornstarch thoroughly into the sauce before pouring it over the chicken. Also, don’t overcrowd the pan, which can cause steaming instead of roasting.
Can I make this ahead of time?
You can prep the chicken and sauce up to 24 hours in advance and store them in the fridge. Keep the veggies separate until you’re ready to cook. This saves even more time on weeknights.
What veggies can I substitute?
You can use almost any vegetable that roasts well. Asparagus, snap peas, zucchini, bell peppers, onions, and sweet potatoes all work great. Just cut them to a similar size as the chicken for even cooking.
Is this recipe gluten-free?
Yes, if you use tamari instead of regular soy sauce. Everything else is naturally gluten-free. Just double-check your honey and sriracha labels to ensure they’re certified gluten-free if that’s a strict requirement for you.
How do I reheat leftovers without drying them out?
Add a splash of water or broth when reheating. This helps loosen the sauce and keeps the chicken moist. Microwave in short intervals, stirring in between, or reheat in the oven at 350°F for 10-15 minutes.
Can I double this recipe?
Absolutely! Just use two sheet pans and make sure you don’t overcrowd them. You may need to rotate the pans halfway through cooking for even browning. The cooking time stays the same.
Pin This Recipe!
Sheet Pan Honey Garlic Chicken: Easy 30-Minute Dinner
- Total Time: 30 minutes
- Yield: 4 servings 1x
Description
A quick, hands-off weeknight dinner featuring chicken breasts and vegetables roasted on a single sheet pan with a sticky, savory-sweet honey garlic glaze.
Ingredients
- 1.5 pounds boneless, skinless chicken breasts, cut into 1-inch cubes
- 2 tablespoons avocado oil or olive oil
- 6–8 cloves garlic, minced
- 1/2 cup honey
- 1/4 cup low-sodium soy sauce (or tamari for gluten-free)
- 2 tablespoons rice vinegar
- 1 teaspoon sriracha or chili flakes (optional)
- 1 teaspoon ground ginger
- 1 teaspoon cornstarch
- 2 cups broccoli florets
- 1 large red bell pepper, sliced into strips
- 1 medium onion, sliced into wedges
- 1 tablespoon toasted sesame seeds (for garnish)
- Black pepper to taste
Instructions
- Preheat oven to 400°F (200°C). Line a large rimmed baking sheet with parchment paper.
- In a small bowl, whisk together minced garlic, honey, soy sauce, rice vinegar, sriracha, ground ginger, and cornstarch until smooth.
- Place chicken cubes in a medium bowl and pour half of the sauce over them. Toss to coat evenly.
- In a separate bowl, toss broccoli, bell peppers, and onions with the remaining sauce, a drizzle of oil, and black pepper.
- Arrange chicken and vegetables in a single layer on the prepared baking sheet, ensuring they are not crowded.
- Roast for 15-20 minutes, stirring gently at the 10-minute mark, until chicken reaches an internal temperature of 165°F and edges are caramelized.
- Remove from oven, sprinkle with toasted sesame seeds, and serve immediately over rice, quinoa, or cauliflower rice.
Notes
Cut chicken and vegetables into uniform sizes for even cooking. Do not overcrowd the pan to ensure roasting rather than steaming. Use tamari instead of soy sauce for a gluten-free version. Toast sesame seeds in a dry pan for 2 minutes before garnishing for enhanced flavor.
- Prep Time: 10 minutes
- Cook Time: 20 minutes
- Category: Main Course
- Cuisine: Asian Fusion
Nutrition
- Serving Size: 1/4 of the sheet pan
- Calories: 450
- Sugar: 25
- Sodium: 600
- Fat: 10
- Saturated Fat: 1.5
- Carbohydrates: 55
- Fiber: 4
- Protein: 35
Keywords: sheet pan dinner, honey garlic chicken, easy weeknight meals, healthy chicken recipes, gluten-free options, meal prep


