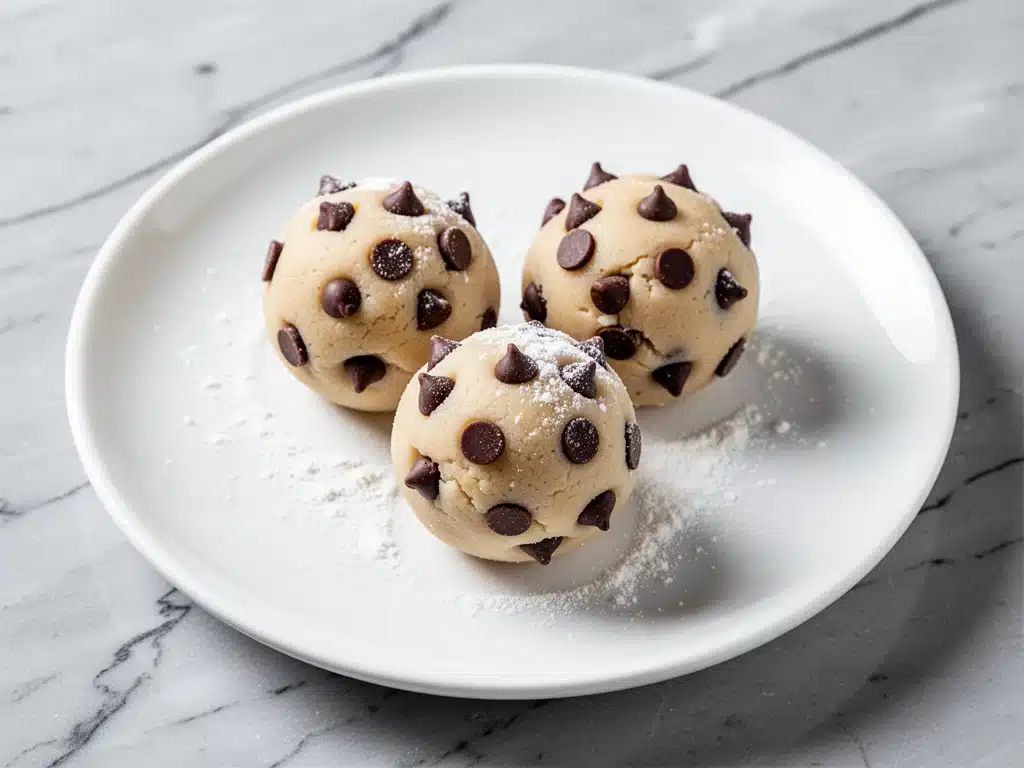
Last Tuesday, I was in a crisis. A real, legitimate crisis. My seven-year-old had just come home from school with a look on her face that said, “I need sugar, and I need it now,” while my husband was stuck in a traffic jam that wouldn’t end, and I had zero intention of turning on the oven. You know the feeling. The heat is off, the kids are restless, and the pantry is looking at you like it owes you money. I didn’t have time to bake a batch of brown butter chocolate chip cookies—though I will admit, those are my absolute favorite comfort bake. I needed something fast, safe, and ridiculously delicious.
So I threw together what I thought would be a mediocre, flour-heavy snack. Five minutes later, my daughter was licking the bowl, my husband texted from the car asking if I had any “magic snacks” ready, and I realized I had accidentally stumbled onto the perfect last-minute dessert hack. That’s how I discovered that sometimes the best recipes happen when you’re not overthinking it. These edible cookie dough bites have become our go-to for everything from after-school snacks to late-night movie cravings. I’ve made them at least a dozen times since that Tuesday, tweaking the ratios until they were perfectly chewy, safe to eat raw, and loaded with mini chocolate chips.
If you’ve ever been terrified of eating raw cookie dough (and rightfully so, because raw eggs are a no-go), this recipe is your salvation. It’s the taste of your favorite chocolate chip cookie, minus the wait, minus the oven, and minus the food safety worries. It’s sweet, buttery, and packed with those tiny chocolate chips that melt in your mouth. I’ve tested this recipe with different flours and sweeteners, but this specific combination of ingredients is the winner. It’s hands-down the best way to satisfy a sweet tooth in under five minutes.
Why You’ll Love This Recipe
There are about ten reasons I keep making these no-bake cookie dough bites, but here are the big ones that keep them in our regular rotation:
Stupid Simple — Seriously, if you can mix a bowl, you can make this. I’ve walked my teenage son through it over FaceTime while he was at college, and he nailed it on the first try. No baking skills required. No timers to set. No cleaning up a stand mixer.
Lightning Fast — 5 minutes from start to finish. Five. That’s it. I make these on weeknights when I get home at 7pm and realize I forgot to buy dessert. It’s faster than ordering delivery, and way healthier than what comes in the box.
Pantry-Friendly — You probably have 90% of these ingredients already. Flour, butter, sugar, chocolate chips, vanilla. I keep these stocked just so I can make these on a whim. It’s the ultimate “I need to feel better” snack.
Kid-Approved (and Adult-Approved) — I’ve served these to my vegetarian sister, my gluten-free neighbor (with oat flour), and my I-only-eat-savory dad (he tried one and didn’t complain, which is basically a compliment). Everyone loves them. My kids think they’re magic because they don’t have to wait for them to bake.
Safe to Eat Raw — This is the big one. By using heat-treated flour and skipping the eggs, you can eat this straight from the bowl without any guilt or risk. It’s safe, it’s creamy, and it tastes like dessert heaven.
Makes Amazing Leftovers — These actually taste better after sitting in the fridge for an hour. The flavors meld, the dough firms up, and they become these perfect little bite-sized treats. I deliberately make extra for lunch throughout the week because they’re so portable.
This is my go-to when I need dessert to just work. No complicated techniques, no weird ingredients, just reliable, delicious food that makes everyone happy. Plus, compared to baking a full batch of buttery raspberry white chocolate scones, this is a breeze when you’re short on time.
Ingredients You’ll Need
Here’s the best part: you probably have most of this already. This looks like a short list, but each ingredient plays a specific role in getting that perfect cookie dough texture. I’m particular about two things here: the flour treatment and the chocolate chips. I’ll tell you exactly why.
Flour (1 cup / 120g) — All-purpose flour is standard, but you can use gluten-free flour blends if needed. The key here is that raw flour can contain bacteria, so we need to treat it. I’ll show you how in the steps, but don’t skip this part. It’s the most important safety step.
Unsalted Butter (½ cup / 115g) — Room temperature is crucial. You want it soft enough to cream with the sugar, but not melted. If you’re in a hurry, cut it into cubes and microwave for 10 seconds. I use high-quality butter because it makes a huge difference in flavor. Salted butter works too, but reduce the added salt slightly.
Granulated Sugar (½ cup / 100g) — This provides the crunch and sweetness. I’ve tried brown sugar, and it makes the dough too soft and chewy in a way that’s not quite right for these bites. Granulated keeps them firm enough to roll. If you want a less sweet version, you can reduce to ⅓ cup, but don’t go lower.
Light Brown Sugar (½ cup / 110g) — This adds moisture and a hint of caramel flavor. It’s what gives the dough that rich, bakery-style taste. Pack it lightly into the cup.
Vanilla Extract (1 teaspoon) — Pure vanilla, please. I’ve used imitation vanilla before, and it tastes artificial in this simple recipe. If you have vanilla bean paste, even better. It adds those tiny specks that look fancy.
Salt (½ teaspoon) — Even though we’re using unsalted butter, the salt is necessary to balance the sweetness. Don’t skip it. It makes the chocolate chips pop.
Mini Chocolate Chips (½ cup / 85g) — I’m a huge fan of mini chips because they’re distributed more evenly throughout each bite. You get chocolate in every single mouthful. Regular chips work too, but they might be too big for the bite-sized format. Semi-sweet or milk chocolate both work—I prefer semi-sweet for a less cloying sweetness.
Optional: Sea Salt Flakes — For sprinkling on top after rolling. This adds a fancy touch and contrasts the sweetness. I do this when I’m feeling fancy or hosting guests.
Substitutions:
- Gluten-Free: Use a 1:1 gluten-free flour blend. Make sure it contains xanthan gum, or add ¼ teaspoon.
- Dairy-Free: Use a high-quality dairy-free butter stick (not tub margarine). Use dairy-free chocolate chips.
- Nut-Free: This recipe is naturally nut-free, but always check your chocolate chip brand for cross-contamination if you have severe allergies.
Equipment Needed
You don’t need fancy equipment for this. Here’s what I actually use:
Mixing Bowl — A medium-sized bowl works best. I use a ceramic bowl because it’s heavy and doesn’t slide around. Glass or plastic work fine too.
Fork or Stand Mixer — I usually just use a fork for this because it’s so quick. But if you have a hand mixer or stand mixer, use it on low speed to cream the butter and sugars. It saves your arm.
Measuring Cups and Spoons — Pretty standard stuff. Dollar store versions work fine. For the flour, I prefer weighing it if I have a kitchen scale, but spooning and leveling works too.
Baking Sheet — Optional. If you’re heating the flour, you’ll need a small baking sheet. If you’re microwaving it, a microwave-safe bowl works.
Cookie Scoop or Spoon — For portioning the dough into balls. A small ice cream scoop makes them uniform, but two teaspoons work perfectly.
Small Saucepan or Microwave-Safe Bowl — Only needed if you choose to heat-treat the flour in the microwave. I prefer the oven method for even heating, but the microwave is faster.
Storage Container — An airtight container or zip-top bag. These keep well in the fridge for up to a week.
Tool Tips:
- Don’t have a cookie scoop? Just use two teaspoons. It’s messy but effective.
- I’m obsessed with my silicone spatula for scraping the bowl. It gets every bit of dough.
How to Make It: Step-by-Step
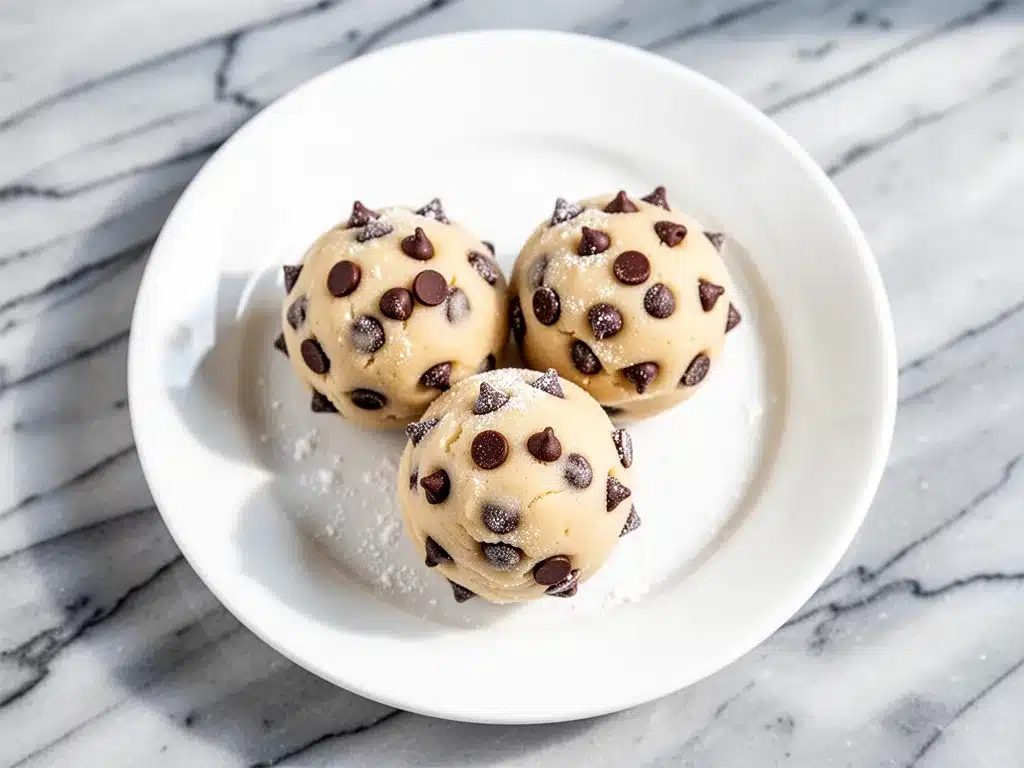
Alright, let’s make this! I’m walking you through exactly how I do it, including the little tricks I’ve picked up to ensure your dough is safe, creamy, and perfect.
Step 1: Heat-Treat the Flour (3-5 minutes)
This is the most important step. Raw flour can contain harmful bacteria like E. coli, so we need to kill any potential pathogens before eating it raw. You have two options. Option A (Microwave): Spread 1 cup of flour on a microwave-safe plate. Microwave on high for 60-90 seconds, stirring every 20 seconds, until it reaches 160°F (71°C). Option B (Oven): Spread flour on a baking sheet and bake at 350°F (175°C) for 5-7 minutes. Let it cool completely. This step takes care of food safety so you can eat the dough guilt-free. I learned this the hard way after reading a news article about raw flour outbreaks. Now I never skip it.
Step 2: Cream the Butter and Sugars (2 minutes)
In your mixing bowl, combine the softened unsalted butter, granulated sugar, and brown sugar. Use a fork or electric mixer to beat them together until the mixture is light, fluffy, and combined. This usually takes about 1-2 minutes. You want the butter to be well-incorporated so there are no lumps. If the butter is too cold, it won’t cream properly, and your dough will be gritty. If it’s too warm, the dough will be too soft to roll.
Step 3: Add Vanilla and Salt (30 seconds)
Stir in the vanilla extract and salt. Mix until just combined. The mixture should smell amazing. If you’re using vanilla bean paste, you’ll see those tiny black specks, which look beautiful in the dough. Don’t overmix here; you just want it distributed.
Step 4: Mix in the Flour (1-2 minutes)
Add the heat-treated flour to the butter mixture. If using a fork, stir until just combined. If using a mixer, use the lowest speed. Be careful not to overmix. Once the flour is incorporated, the dough will come together into a cohesive ball. It should look like thick, sticky cookie dough. If it’s too dry, add a teaspoon of milk. If it’s too wet, add a tablespoon more flour. It should be pliable and hold its shape.
Step 5: Fold in Chocolate Chips (1 minute)
Gently fold in the mini chocolate chips. Use a spatula or your hands to distribute them evenly. You want chocolate chips in every bite. If you’re using regular chips, chop them slightly so they’re smaller. The dough will look chunky and delicious at this stage.
Step 6: Roll into Bites (3 minutes)
Using a cookie scoop or two teaspoons, portion the dough into balls. Roll them between your palms to make them smooth and round. Aim for 1-inch balls. If the dough is too sticky, chill it in the fridge for 10 minutes first. Place the balls on a parchment-lined baking sheet. This step is fun and therapeutic. I usually blast some music while I roll these.
Step 7: Chill and Serve (10-30 minutes)
Place the baking sheet in the fridge for at least 10 minutes to firm up the dough. This makes them easier to handle and gives that perfect “bite” texture. Once chilled, they’re ready to eat! Sprinkle with sea salt flakes if desired. Store in an airtight container in the fridge for up to a week.
Total Time: About 15 minutes (5 minutes active, 10 minutes chilling/heating)
Built-in Troubleshooting:
- Dough too sticky? Chill for 10 minutes or add 1 tbsp flour.
- Dough too dry? Add 1 tsp milk or cream.
- Flour not hot enough? Use a food thermometer to ensure 160°F.
Expert Tips & Tricks
Here’s everything I’ve learned from making this dozens of times. These tips will save you from my mistakes.
Don’t Skip the Flour Treatment
This is non-negotiable. I’ve seen recipes that say “just use pasteurized flour,” but that’s hard to find and expensive. Heat-treating it yourself is easy and safe. I forgot once and felt guilty eating it. Now I set a timer before I start so I don’t forget.
Room Temperature Butter is Key
Cold butter won’t cream with the sugar, and melted butter will make the dough greasy. Aim for soft, pliable butter. If you’re in a hurry, cut it into cubes and microwave for 10 seconds. It should leave an indent when you press it.
Use Mini Chocolate Chips
I cannot stress this enough. Mini chips distribute evenly. Regular chips create large chunks that make the bites uneven. If you only have regular chips, pulse them in a food processor for 5 seconds to chop them.
Chill Before Rolling
If your kitchen is warm, the butter might soften too much. Chill the dough for 10 minutes before rolling. This makes them hold their shape and gives a better texture. It’s worth the wait.
Storage is Simple
These keep well in the fridge for up to a week. For longer storage, freeze them in an airtight container for up to 3 months. Thaw in the fridge overnight. They taste just as good frozen as they do fresh.
Common Mistakes (and how to avoid them):
- Mistake: Dough is too crumbly Fix: You didn’t cream the butter and sugar enough, or the butter was too cold. Cream longer or warm the butter slightly.
- Mistake: Dough is too wet Fix: You added too much liquid or didn’t measure the flour correctly. Add flour 1 tbsp at a time until it’s right.
- Mistake: Flour tastes raw Fix: You didn’t heat-treat it long enough. Use a thermometer to check.
Pro Tricks I’ve Learned:
- For Extra Flavor Add a pinch of cinnamon or nutmeg to the dough for a warm, spiced flavor.
- For Better Texture Roll the balls in coarse sugar before chilling for a crunchy exterior.
- Make-Ahead Strategy Make the dough up to 3 days ahead. Store in the fridge. Roll into balls right before serving.
Variations & Substitutions
Once you’ve nailed the basic version, here’s how you can mix it up. I’ve tried all of these:
Peanut Butter Cookie Dough
Replace ¼ cup of the butter with creamy peanut butter. Add 2 tablespoons of peanut butter to the dough. My husband loves this version—it’s richer and more savory.
White Chocolate Macadamia
Swap mini chocolate chips for white chocolate chips and macadamia nuts. It’s tropical and sweet. I make this for summer parties.
Red Velvet
Add 1 tablespoon cocoa powder and 1 teaspoon red food coloring. It looks festive and tastes like red velvet cake. Great for Valentine’s Day.
Matcha Green Tea
Add 1 teaspoon matcha powder to the flour. It’s earthy and slightly bitter, which balances the sweetness. I won’t lie—it’s an acquired taste, but my tea-loving friend requested this version.
Cookie Butter Speculoos
Add 2 tablespoons cookie butter to the dough. It’s spicy and caramel-like. Amazing with apple slices on the side.
Gluten-Free
Use a 1:1 gluten-free flour blend. Everything else is naturally gluten-free. I’ve used Bob’s Red Mill blend, and it works great.
Dairy-Free
Replace butter with dairy-free butter sticks. Use dairy-free chocolate chips. It’s different but still tasty. My lactose-intolerant friend requests this version.
Nut-Free
This recipe is naturally nut-free, but always check your chocolate chip brand for cross-contamination if you have severe allergies.
Different Flavors:
- Stir in ¼ teaspoon almond extract for a marzipan-like flavor.
- Add 2 tablespoons crushed pretzels for a sweet-and-salty twist.
- Mix in ¼ cup crushed graham crackers for a s’mores vibe.
Serving & Storage
How to Serve
I usually serve these straight from the fridge—they’re best cold and firm. But here are other ways I’ve enjoyed them:
- As a topping for ice cream (crumble them over vanilla bean ice cream)
- With a glass of cold milk (classic combo)
- As a snack during movie nights (portable and mess-free)
- As a gift (package in a cute jar with a ribbon)
Side Pairings
- Cold milk (obviously)
- Hot coffee (the contrast is great)
- Fresh fruit (strawberries or apples)
- Yogurt (crumble on top)
Storage Instructions
Refrigerator: Store in an airtight container for up to 1 week. They will firm up in the fridge—totally normal.
Freezer: Freeze in an airtight container for up to 3 months. Thaw in the fridge overnight. They taste just as good frozen.
Room Temperature: Not recommended. The butter can soften and spoil faster. Keep them chilled.
Pro Tip: If leftovers are drying out, add a slice of bread to the container. The bread releases moisture and keeps the dough soft.
Nutrition Information
I’m not a nutritionist, but here’s the breakdown if you’re tracking.
Per Serving (based on 12 bites):
- Calories: 180
- Protein: 2g
- Carbs: 22g
- Fiber: 1g
- Sugar: 14g
- Fat: 10g
- Saturated Fat: 6g
- Cholesterol: 20mg
- Sodium: 120mg
What’s Good:
– Quick energy source
– Portable snack
– Can be made gluten-free or dairy-free
What to Know:
– Higher in sugar from butter and chocolate chips
– Contains dairy and gluten (unless modified)
– Moderate calories per bite
My Take:
Look, this is a treat. It’s sweet, it’s rich, and it’s meant to be enjoyed. It’s way better than store-bought snacks, costs less, and I know exactly what’s in it. When I want to make it lighter, I reduce the sugar and use dark chocolate chips. But usually? I just eat 2-3 bites and enjoy it.
Final Thoughts
So that’s my go-to edible cookie dough bites! I’ve probably talked your ear off at this point, but when you make a recipe this often, you have a lot to say about it.
This has saved dessert time more times than I can count. It’s my answer to “what’s for dessert?” when I’m tired, don’t want to bake, and still want something that tastes really good. My kids are happy, my husband’s happy, and I’m happy because I’m not stressed about cooking.
Make it yours! Try different add-ins, swap in your favorite chips, adjust the sweetness. The best recipes are the ones you adapt to your family’s tastes. If you’re looking for more easy no-bake treats, check out my no-bake chocolate almond date bars or my oktoberfest soft pretzel cookie bars for more creative ideas.
If you make this, drop a comment and let me know what you think! I love hearing how recipes turn out in your kitchen. And if something doesn’t work, tell me that too—I’m here to help troubleshoot. Happy snacking!
Frequently Asked Questions
Can I use brown sugar instead of granulated sugar?
You can, but the dough will be softer and chewier, which might make it harder to roll into balls. If you want to try it, use a 50/50 mix of brown and granulated sugar. It’s a personal preference, but I like the crunch of granulated sugar.
Why is my dough too crumbly?
Usually means the butter was too cold or you didn’t cream it enough. Make sure your butter is soft and pliable before mixing. Cream the butter and sugars for a full 2 minutes to incorporate air and soften the mixture.
Can I make this ahead for a party?
Absolutely! Make the dough up to 3 days ahead. Store in the fridge. Roll into balls right before serving. They’ll hold their shape well and taste fresh. I do this all the time for gatherings.
Can I freeze these?
Yes! Freeze the dough balls in an airtight container for up to 3 months. Thaw in the fridge overnight. They taste just as good frozen as they do fresh. Perfect for meal prepping.
Can I use regular chocolate chips?
You can, but they’re bigger and might make the bites uneven. If you only have regular chips, pulse them in a food processor for 5 seconds to chop them. Mini chips are ideal for even distribution.
How do I know if the flour is heat-treated properly?
Use a food thermometer to check that it reaches 160°F (71°C). If you don’t have a thermometer, microwave for 60-90 seconds, stirring every 20 seconds, until it’s hot to the touch. Let it cool completely before using.
Can I add nuts to the dough?
Yes! Chopped pecans, walnuts, or macadamia nuts work great. Add ¼ cup of chopped nuts along with the chocolate chips. Just make sure to check for nut allergies if you’re serving others.
Pin This Recipe!


Edible Cookie Dough Bites: 5-Min No-Bake Recipe
- Total Time: 15 minutes
- Yield: 12 servings 1x
Description
A safe, no-bake edible cookie dough recipe that is ready in just 5 minutes. Made with heat-treated flour and no raw eggs, these bites are perfect for a quick, kid-approved snack or dessert.
Ingredients
- 1 cup (120g) all-purpose flour (heat-treated)
- 1/2 cup (115g) unsalted butter, room temperature
- 1/2 cup (100g) granulated sugar
- 1/2 cup (110g) light brown sugar, packed
- 1 teaspoon vanilla extract
- 1/2 teaspoon salt
- 1/2 cup (85g) mini chocolate chips
- Sea salt flakes (optional, for topping)
Instructions
- Heat-treat the flour by microwaving it on high for 60-90 seconds (stirring every 20 seconds) until it reaches 160°F, or baking it on a sheet at 350°F for 5-7 minutes. Let it cool completely.
- In a mixing bowl, cream the softened butter, granulated sugar, and brown sugar together until light and fluffy (about 1-2 minutes).
- Stir in the vanilla extract and salt until just combined.
- Add the cooled, heat-treated flour to the butter mixture and mix until a cohesive dough forms. If too dry, add 1 tsp milk; if too wet, add 1 tbsp flour.
- Gently fold in the mini chocolate chips until evenly distributed.
- Portion the dough into 1-inch balls using a cookie scoop or two teaspoons. Roll between palms to smooth.
- Place balls on a parchment-lined sheet and chill in the refrigerator for at least 10 minutes to firm up.
- Serve chilled. Sprinkle with sea salt flakes if desired. Store in an airtight container in the fridge for up to a week.
Notes
It is crucial to heat-treat the flour to kill potential bacteria like E. coli, as this recipe contains no eggs. Room temperature butter is essential for proper creaming. For a gluten-free version, use a 1:1 gluten-free flour blend. For dairy-free, use dairy-free butter sticks and chocolate chips. These bites can be frozen for up to 3 months.
- Prep Time: 5 minutes
- Cook Time: 5 minutes
- Category: Dessert
- Cuisine: American
Nutrition
- Serving Size: 1 bite
- Calories: 180
- Sugar: 14
- Sodium: 120
- Fat: 10
- Saturated Fat: 6
- Carbohydrates: 22
- Fiber: 1
- Protein: 2
Keywords: edible cookie dough, no-bake, quick dessert, kid-friendly snack, safe raw dough, 5-minute recipe, chocolate chip bites


