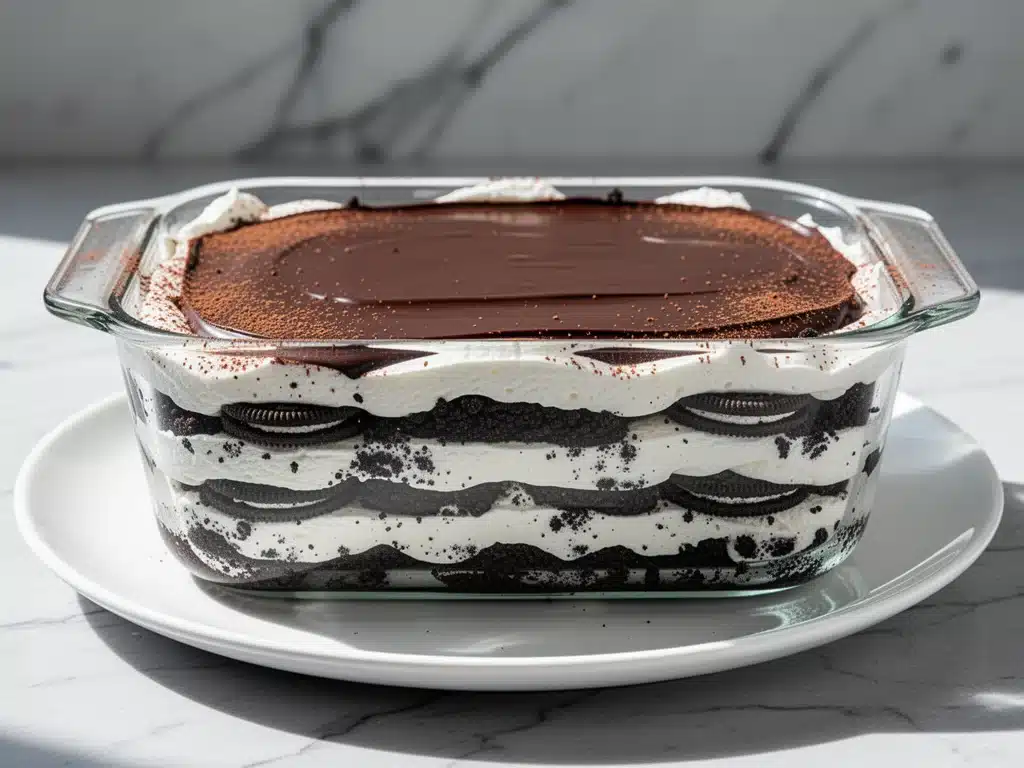
It was one of those suffocatingly hot July afternoons where the air conditioner was running at full blast but the kitchen still felt like a sauna. I had promised my neighbor’s kids a treat for their sleepover, and I was staring at my oven thinking, “Absolutely not. I am not turning on that thing.” My oven is already a beast, but in August, it’s basically an enemy combatant. I needed something cold, something sweet, and something that didn’t require standing over a hot stove for an hour.
That’s when I remembered my grandma’s old icebox cake trick. Back in the day, before everyone had fancy stand mixers or access to every flavor of cookie in the world, people used ladyfingers and vanilla pudding. But I was feeling rebellious. I grabbed a family-sized pack of Oreos, some heavy cream, chocolate pudding mix, and a few other pantry staples. I threw it together in about 10 minutes flat. Then I forgot about it. And forgot about it again.
When I pulled it out the next evening, the magic happened. The cookies had softened into a cake-like texture, the cream had set firm, and the chocolate layers were rich and indulgent. My neighbor’s kids devoured it in seconds, asking if I could make it every weekend. (I said no, but I made it again the following week anyway.)
This creamy Oreo icebox cake with whipped chocolate layers is now my go-to no-bake dessert. It’s incredibly easy, it feeds a crowd, and it tastes like a dessert from a high-end bakery without the effort. I’ve made this at least a dozen times since that hot July day, tweaking the ratios until I got it perfectly right. If you’re tired of complicated baking projects or just want a dessert that practically makes itself, you need to try this. It’s the ultimate crowd-pleaser for summer parties, potlucks, or just because you deserve a treat.
Why You’ll Love This No-Bake Dessert
There are about ten reasons I keep making this Oreo icebox cake, but here are the big ones that keep it in my regular rotation.
Zero Baking Required — Seriously. No oven, no preheating, no waiting for cakes to cool. This is perfect for hot weather or when you just don’t want to deal with kitchen chaos. It’s one of the easiest no-bake desserts you can make.
Minimal Active Time — You only need about 15 minutes of hands-on time to layer everything up. The rest is just waiting in the fridge. I can throw this together while helping my kids with homework or while watching TV. It’s that simple.
Make-Ahead Friendly — This is actually better the next day. The flavors meld together, the cookies soften perfectly, and the texture becomes incredibly smooth. I usually make it the night before a party, which takes all the stress out of hosting.
Insanely Creamy — The combination of whipped heavy cream, chocolate pudding, and the moisture from the Oreos creates a texture that’s almost like a mousse. It’s rich and decadent without feeling too heavy.
Customizable — While Oreos are classic, you can swap in different cookies or flavors. I’ve made versions with mint Oreos for holidays and peanut butter cookies for a twist. But the original chocolate version is unmatched.
Budget-Friendly — You don’t need expensive ingredients. Most of this is pantry staples and cookies you can get at any grocery store. It’s way cheaper than buying a fancy cake from the bakery.
This recipe has saved me more times than I can count. It’s my answer to “what’s for dessert?” when I’m tired, hot, or just want something delicious without the fuss. My family asks for it regularly, and it’s always a hit at gatherings.
Ingredients You’ll Need
Here’s the best part: you probably have most of this already. This recipe uses simple, accessible ingredients that come together to create something magical. I’m particular about a few things here, so pay attention to the details.
For the Cookie Layer
Chocolate Sandwich Cookies (Oreos) (24-28 cookies, approx. 450g) — I use regular Oreos, not the reduced-fat or “Thins” versions. You need the full cookie with the cream filling for the right texture. If you can’t find Oreos, generic chocolate sandwich cookies work too, but Oreos have the best flavor and structure. You’ll need about two family-sized packages.
For the Whipped Cream Layer
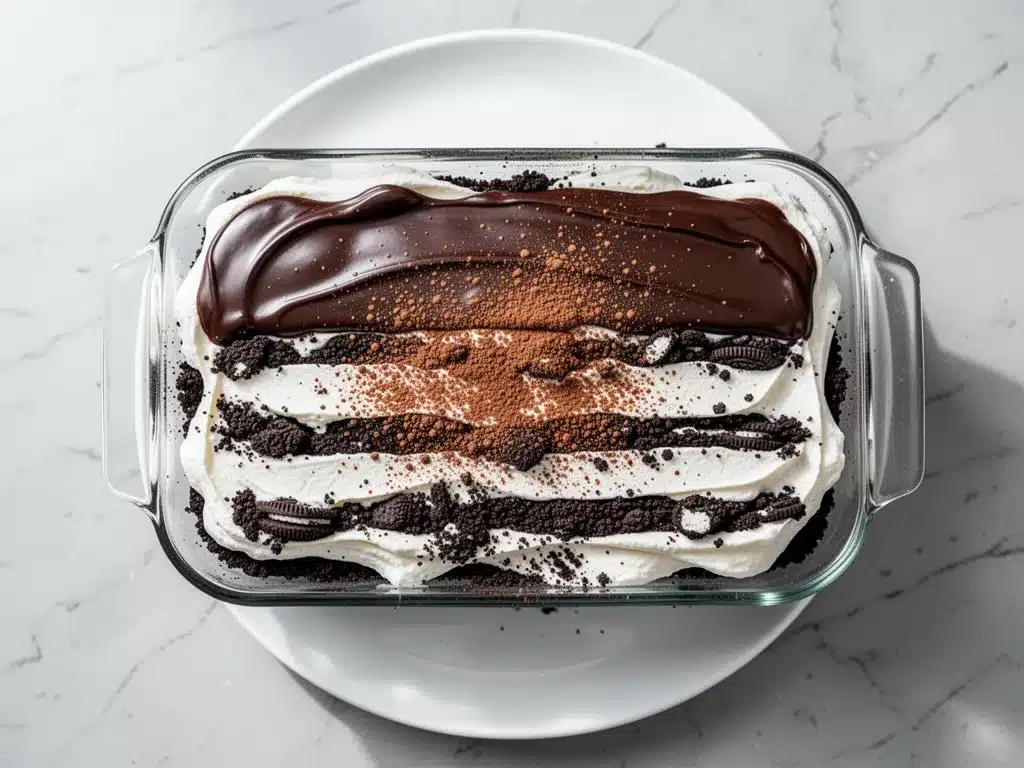
Heavy Whipping Cream (2 cups / 480ml) — This needs to be cold heavy cream, at least 35% fat. Lighter creams won’t whip up properly. I keep my heavy cream in the fridge until the last minute. If it’s warm, it won’t whip.
Granulated Sugar (¼ cup / 50g) — Just a little bit to sweeten the cream. You can reduce this to 2 tablespoons if you prefer less sweetness, since the cookies are already sweet.
Vanilla Extract (1 teaspoon) — Pure vanilla extract makes a big difference. Skip the imitation stuff if you can. It adds a nice depth to the cream.
For the Chocolate Pudding Layer
Instant Chocolate Pudding Mix (2 boxes, approx. 176g total) — I use Jell-O or a similar brand. Do not use the “light” or “low-fat” versions; they don’t set right. The full-fat version gives you that rich, dense chocolate layer. You’ll need two 3.4 oz boxes.
Whole Milk (4 cups / 960ml) — Cold whole milk is essential. Skim milk will make the pudding too thin. Whole milk gives it the creamy, custard-like texture we want.
Chocolate Syrup or Hot Fudge (½ cup / 120ml) — I use Hershey’s chocolate syrup for drizzling between layers. It adds a glossy, fudgy touch. You can also use Nutella if you want a hazelnut twist.
Optional Toppings
Extra Oreos — Crushed or whole, for garnish.
Whipped Cream — For serving dollops on top.
Chocolate Shavings — For a fancy finish.
Strawberries — Fresh strawberries cut in half add a nice tart contrast to the sweet cream and chocolate. I love adding these for color and balance.
Pro Tips for Ingredients
Cold is Key: Make sure your heavy cream, bowl, and beaters are cold. If you’re in a hurry, pop them in the freezer for 10 minutes. Warm cream won’t whip.
Don’t Skimp on Fat: This is a dessert, not a diet meal. Use full-fat milk and full-fat cream. Low-fat versions will result in a watery, disappointing texture. Trust me, I’ve made this mistake.
Quality Matters: While this is a simple recipe, good ingredients make a difference. Use real vanilla extract and good-quality chocolate syrup. It’s worth the small extra cost.
Equipment Needed
You don’t need fancy equipment for this. Here’s what I actually use.
Large Mixing Bowl — I use a 4-quart stainless steel bowl for whipping the cream. A glass bowl works too, but metal stays colder.
Electric Hand Mixer or Stand Mixer — Whip the cream by hand if you want a workout, but a mixer is much faster and gives you stiffer peaks. I use a hand mixer because it’s easier to clean.
Medium Mixing Bowl — For mixing the instant pudding. Any size works as long as it’s big enough to whisk.
9×13 Inch Baking Dish — Glass or ceramic is best because you can see the layers. A metal pan works too, but glass looks nicer for serving.
Spatula — A rubber spatula is perfect for spreading the cream and pudding evenly. I love my silicone spatulas because they’re flexible and easy to clean.
Measuring Cups and Spoons — Standard stuff. Dollar store versions work fine for this.
Whisk — For mixing the pudding. A regular spoon works, but a whisk makes it smoother.
Knife — For slicing the cake. A sharp knife makes clean cuts.
Plastic Wrap — To cover the dish while it chills. This prevents the cake from absorbing fridge odors.
Tool Tips
No Stand Mixer? No problem. Hand-whipping the cream takes about 5-7 minutes, but it’s totally doable. Just be prepared for a little arm workout.
Wrong Size Pan? If you don’t have a 9×13 dish, you can use a 9×9 pan for a taller cake, or two 8-inch round pans for individual cakes. Adjust the chilling time if you change the depth.
How to Make It: Step-by-Step
Alright, let’s make this! I’m walking you through exactly how I do it, including the little tricks I’ve picked up.
Step 1: Prep Your Workspace (5 minutes)
Before you start, make sure your heavy cream is cold. Take it out of the fridge about 10 minutes before you plan to whip it, but keep it chilled until the last second. Place your mixing bowl and beaters in the freezer for 10 minutes if you have time. This helps the cream whip faster and hold its shape. Measure out your milk for the pudding and have your cookies ready. I usually leave them in the package until I’m ready to layer, then count them out.
Step 2: Make the Instant Pudding (5 minutes)
In a medium bowl, whisk together the instant chocolate pudding mix and cold whole milk. Use a whisk, not a spoon, to get rid of lumps. Whisk vigorously for about 2 minutes until the mixture thickens and looks smooth. It should be quite thick, almost like a custard. Set this aside. It will continue to thicken slightly as it sits.
Step 3: Whip the Heavy Cream (5 minutes)
Pour the cold heavy cream into your chilled mixing bowl. Add the sugar and vanilla extract. Using an electric mixer on medium-high speed, whip the cream until you see stiff peaks. This means when you lift the beaters, the cream stands up straight without drooping. Be careful not to over-whip, or it’ll turn into butter. You want it light, fluffy, and smooth. This should take about 3-4 minutes.
Step 4: Layer the First Cookie Row
Take your 9×13 baking dish. Arrange a single layer of whole Oreos at the bottom. You’ll need about 8-10 cookies to cover the bottom completely. If there are gaps, break a cookie to fill them. Don’t worry about perfection; the layers will hide any unevenness. This is your foundation.
Step 5: Spread the Pudding
Spoon half of the chocolate pudding mixture over the first layer of cookies. Use a spatula to spread it evenly to the edges. Make sure you cover all the cookies completely. If you leave gaps, the cream will seep in and make the cookies soggy in the wrong way. Aim for an even, smooth layer.
Step 6: Spread the Whipped Cream
Spoon half of the whipped cream over the pudding layer. Spread it evenly with your spatula. Try to keep the layers distinct, but it’s okay if they blend a little at the edges. The goal is to have a thick, creamy layer that covers the pudding completely.
Step 7: Drizzle Chocolate Syrup
Drizzle half of the chocolate syrup over the whipped cream. Zigzag it back and forth across the surface. You don’t need to spread it; just let it sit on top. This adds pockets of fudgy flavor in every bite.
Step 8: Repeat the Layers
Add another layer of cookies on top of the cream. Again, about 8-10 cookies, covering the surface. Then spread the remaining pudding, followed by the remaining whipped cream. Drizzle the rest of the chocolate syrup on top. You should now have three layers of cookies, two layers of pudding, two layers of cream, and two drizzles of syrup.
Step 9: Top and Chill
For the top layer, you can add a few extra cookies, crushed Oreos, or just leave it with the whipped cream and syrup. I like to add a few whole cookies on top for presentation. Cover the dish tightly with plastic wrap. Place it in the refrigerator for at least 4 hours, but overnight is best. This chilling time is crucial for the cookies to soften and the layers to set.
Step 10: Serve
Once chilled, remove the plastic wrap. Slice the cake into squares using a sharp knife. For clean cuts, wipe the knife between slices. Serve cold. You can add extra whipped cream, chocolate shavings, or fresh strawberries on top if you want to be fancy. But honestly, it’s perfect as is.
Total Time: About 15 minutes active, plus 4+ hours chilling.
Troubleshooting:
- Cream won’t whip? Your cream or bowl was too warm. Chill them and try again.
- Layers are messy? That’s okay. It’s a rustic dessert. Just make sure you’re covering the cookies completely to prevent sogginess.
- Too sweet? Reduce the sugar in the cream to 2 tablespoons and use less syrup.
Expert Tips & Tricks
Here’s everything I’ve learned from making this dozens of times. These tips will save you from my mistakes.
Chill Your Equipment
This is the #1 tip. Cold cream whips better and holds its shape. I keep a dedicated bowl in the fridge just for whipping cream. If you’re in a rush, freeze your bowl and beaters for 10 minutes. It makes a huge difference.
Don’t Over-Whip
It’s easy to go from perfect peaks to butter. Watch the cream closely once it starts thickening. Stop as soon as you see stiff peaks. Over-whipped cream looks grainy and won’t spread smoothly.
Use Full-Fat Ingredients
I know, I said this before, but it bears repeating. Low-fat milk and cream will make your cake watery. This is a dessert, not a health food. Embrace the richness.
Let It Chill Overnight
You can eat it after 4 hours, but it’s so much better after 8-12 hours. The cookies become cake-like, and the flavors marry together. I always make it the night before.
Prevent Soggy Cookies
Make sure you spread the pudding and cream all the way to the edges. If cookies are exposed, they’ll get soggy from the fridge air. Cover them completely.
Pro Trick: Add a Crunch Layer
For extra texture, sprinkle a layer of crushed nuts or additional crushed cookies between the pudding and cream. It adds a nice crunch that contrasts with the soft cake.
Variations & Substitutions
Once you’ve nailed the basic version, here’s how you can mix it up. I’ve tried all of these.
Mint Chocolate Chip
Swap the chocolate pudding for vanilla pudding. Use mint Oreos. Drizzle with mint syrup or green food coloring mixed into the chocolate syrup. Perfect for St. Patrick’s Day or summer.
Peanut Butter Oreo
Use vanilla pudding. Drizzle with peanut butter syrup or Nutella. Use regular Oreos. The peanut butter and chocolate combo is incredible.
Red Velvet
Use red velvet Oreos. Make red velvet pudding (or add red food coloring to vanilla pudding). Drizzle with white chocolate syrup. Beautiful for Valentine’s Day.
Strawberry Shortcake Style
Use vanilla pudding. Add a layer of sliced fresh strawberries between the cream and cookies. Drizzle with strawberry syrup. Fresh and fruity.
Dietary Modifications:
- Gluten-Free: Use gluten-free chocolate sandwich cookies. Most major brands make GF Oreos now.
- Dairy-Free: Use coconut cream instead of heavy cream, and dairy-free milk for the pudding. Use dairy-free cookies. It’s not exactly the same, but it works.
- Lower Sugar: Use sugar-free pudding mix and reduce the sugar in the cream. Use unsweetened syrup. It’s less sweet but still tasty.
Serving & Storage
How to Serve:
I usually serve this straight from the dish with a nice slice. It looks rustic and homemade. Here are some ideas for presentation:
- Garnish: Crushed Oreos, chocolate shavings, or fresh berries.
- Side: A dollop of extra whipped cream on each slice.
- Drink Pairing: Cold milk or coffee goes great with this rich dessert.
Storage Instructions:
Refrigerator: Store covered in the fridge for up to 3 days. It actually gets better on day 2. After that, the cookies may get too soft.
Freezing: I don’t recommend freezing this. The whipped cream and pudding don’t freeze well; they become grainy when thawed. Make it fresh or store in the fridge.
Leftovers: If you have leftovers, keep them covered. They’re great for lunch or a late-night snack.
Nutrition Information
I’m not a nutritionist, but here’s the breakdown if you’re tracking. This is a rich, indulgent dessert, so portion control is key.
Per Serving (based on 12 servings):
- Calories: 380
- Protein: 6g
- Carbs: 42g
- Fiber: 2g
- Sugar: 28g
- Fat: 22g
- Saturated Fat: 13g
- Cholesterol: 65mg
- Sodium: 280mg
My Take:
Look, this is cream, chocolate, and cookies. It’s not a diet food. But it’s way better than store-bought desserts, and you control the ingredients. When I want to make it lighter, I use less syrup and add more berries. But usually? I just enjoy a reasonable slice and savor it.
Final Thoughts
So that’s my creamy Oreo icebox cake with whipped chocolate layers! I’ve probably talked your ear off at this point, but when you make a recipe this often, you have a lot to say about it.
This has saved me more times than I can count. It’s my answer to “what’s for dessert?” when I’m tired, hot, or just want something delicious without the fuss. My family loves it, and it’s always a hit at parties. It’s the perfect no-bake dessert for summer.
Make it yours! Try different cookies, swap the flavors, or add your favorite toppings. The best recipes are the ones you adapt to your family’s tastes.
If you make this, drop a comment and let me know what you think! I love hearing how recipes turn out in your kitchen. And if something doesn’t work, tell me that too—I’m here to help troubleshoot.
Happy cooking! And I hope your kitchen smells half as good as mine does right now.
Frequently Asked Questions
Can I use whipped topping (like Cool Whip) instead of whipped cream?
Yes, you can. It’s easier and doesn’t require whipping. Just thaw the Cool Whip and fold it into the pudding layer. It’s less rich than homemade whipped cream, but it works well and saves time. I’ve used both, and both are delicious.
Why did my cake turn out watery?
This usually happens if the cream was too warm or if you used low-fat milk. Make sure your cream is very cold and use whole milk for the pudding. Also, don’t skip the chilling time. The cake needs at least 4 hours to set properly.
Can I make this ahead for a party?
Absolutely! This is actually better made ahead. Make it the night before and let it chill overnight. It’s ready to serve the next day. I often make it 2 days in advance for big parties.
Can I use thin Oreos?
You can, but the texture will be different. Thins are smaller and thinner, so you’ll need more of them. The cake will be less substantial. I recommend using regular Oreos for the best texture and structure.
How long does this last in the fridge?
It lasts up to 3 days in the fridge. After that, the cookies get too soft and the texture changes. It’s best eaten within 2 days for optimal quality.
Can I freeze this cake?
I don’t recommend it. The whipped cream and pudding don’t freeze well. They become grainy and separate when thawed. It’s best to make it fresh or store it in the fridge.
What kind of knife should I use to cut it?
Use a sharp, thin-bladed knife. Wipe the knife clean between cuts for clean slices. A serrated knife can also work well if you’re worried about squishing the layers.
Can I add alcohol to this?
Yes! Add a tablespoon of bourbon or rum to the whipped cream for a grown-up version. It pairs beautifully with the chocolate and cookies. Just be sure to mix it in well.
Pin This Recipe!
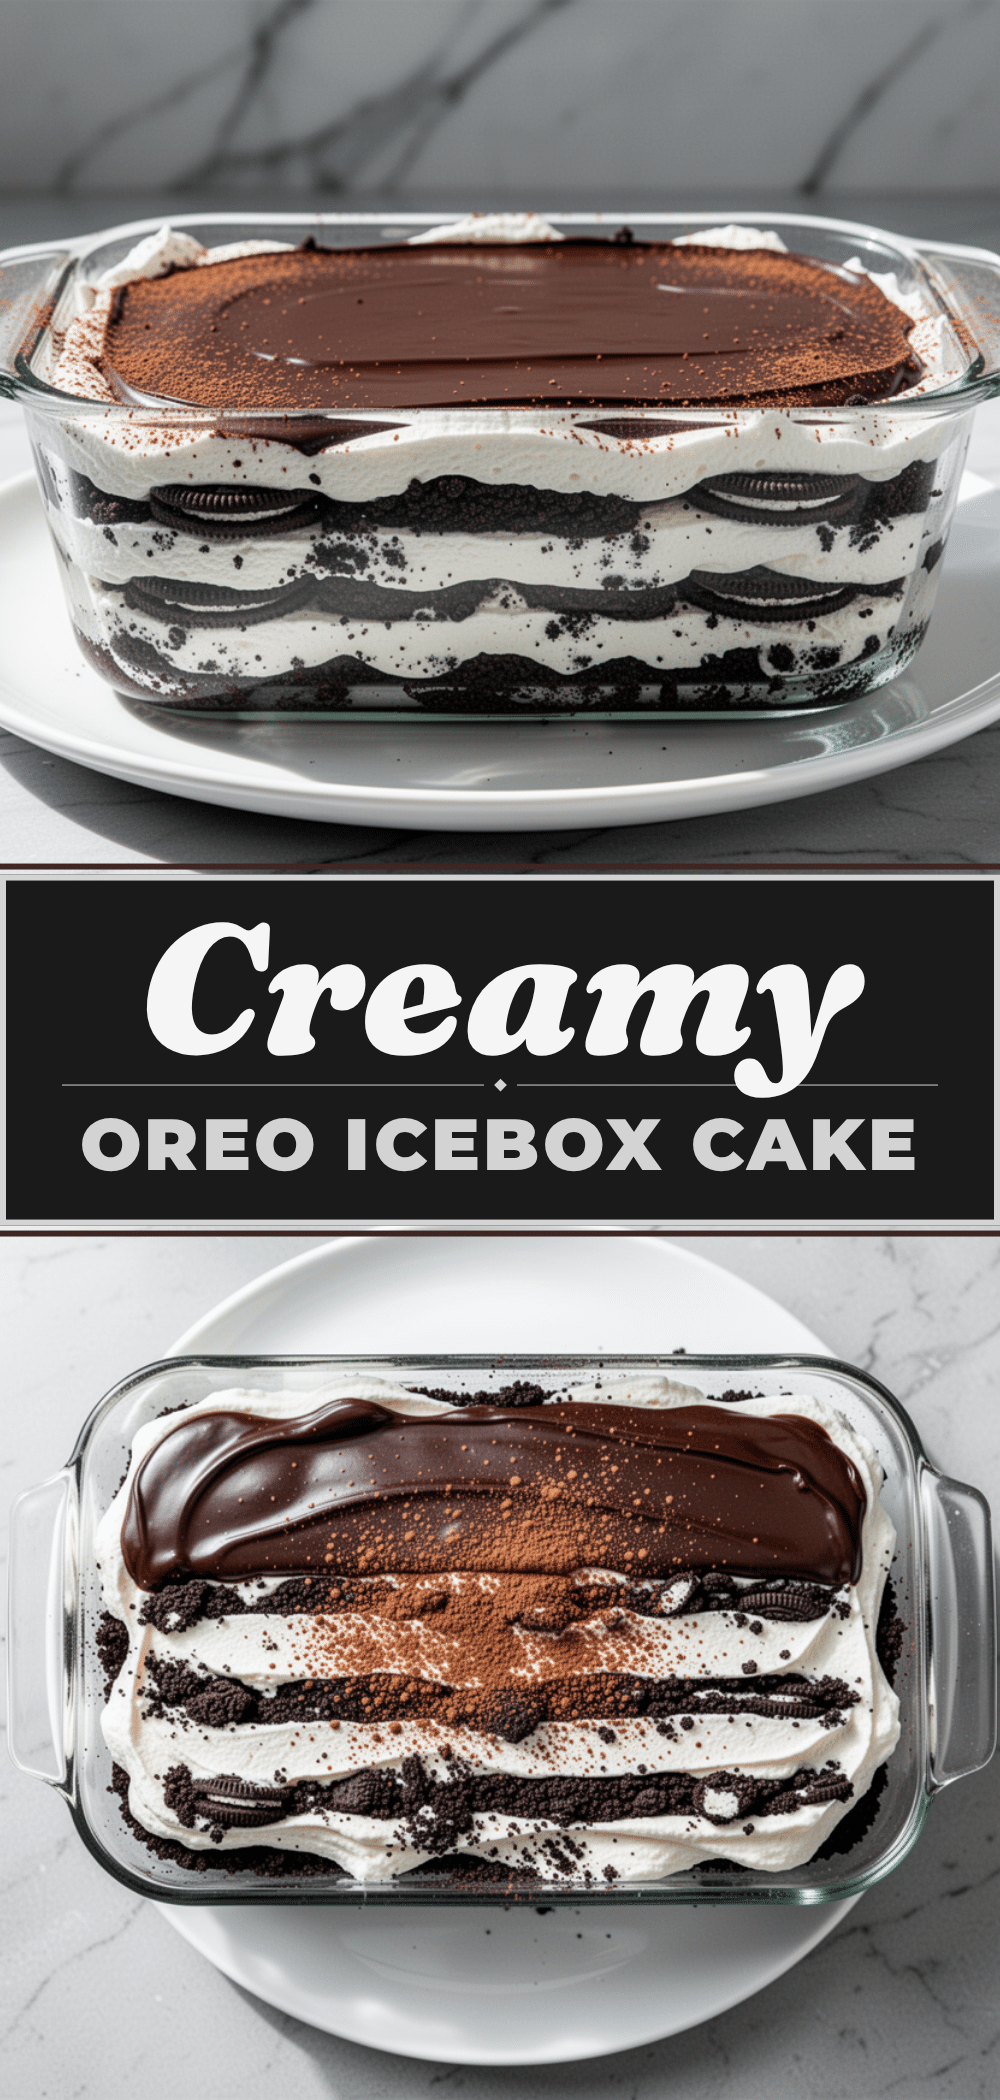
Creamy Oreo Icebox Cake: Easy No-Bake Dessert
- Total Time: 4 hours 15 minutes
- Yield: 12 servings 1x
Description
A rich, no-bake dessert featuring layers of Oreos, chocolate pudding, and whipped cream. This easy-to-make cake requires minimal active time and is perfect for summer parties or hot days when you don’t want to use the oven.
Ingredients
- 24–28 Chocolate Sandwich Cookies (Oreos), approx. 450g
- 2 cups (480ml) Heavy Whipping Cream, cold
- ¼ cup (50g) Granulated Sugar
- 1 teaspoon Vanilla Extract
- 2 boxes (approx. 176g total) Instant Chocolate Pudding Mix
- 4 cups (960ml) Whole Milk, cold
- ½ cup (120ml) Chocolate Syrup or Hot Fudge
- Optional: Extra Oreos, Whipped Cream, Chocolate Shavings, Strawberries
Instructions
- Chill heavy cream, mixing bowl, and beaters in the freezer for 10 minutes.
- In a medium bowl, whisk instant chocolate pudding mix and cold whole milk vigorously for 2 minutes until thick and smooth. Set aside.
- Pour cold heavy cream into the chilled bowl. Add sugar and vanilla extract. Whip on medium-high speed until stiff peaks form (about 3-4 minutes). Do not over-whip.
- Arrange a single layer of whole Oreos (8-10 cookies) at the bottom of a 9×13 inch baking dish.
- Spoon half of the chocolate pudding over the cookie layer and spread evenly to the edges.
- Spoon half of the whipped cream over the pudding and spread evenly.
- Drizzle half of the chocolate syrup over the whipped cream in a zigzag pattern.
- Repeat layers: add another layer of cookies, remaining pudding, remaining whipped cream, and remaining chocolate syrup.
- Top with extra cookies or garnish if desired. Cover tightly with plastic wrap.
- Refrigerate for at least 4 hours, preferably overnight, until cookies are soft and layers are set.
- Slice with a sharp knife and serve cold.
Notes
Ensure all ingredients, especially the heavy cream and bowl, are very cold for best whipping results. Use full-fat milk and cream for the proper texture; low-fat versions will result in a watery cake. This dessert is best made the night before to allow flavors to meld and cookies to soften. Do not freeze, as the texture of the whipped cream and pudding will become grainy upon thawing.
- Prep Time: 15 minutes
- Cook Time: 0 minutes
- Category: Dessert
- Cuisine: American
Nutrition
- Serving Size: 1 slice
- Calories: 380
- Sugar: 28
- Sodium: 280
- Fat: 22
- Saturated Fat: 13
- Carbohydrates: 42
- Fiber: 2
- Protein: 6
Keywords: no-bake dessert, Oreo cake, icebox cake, summer dessert, easy dessert, chocolate pudding, whipped cream, crowd-pleaser


