I have a confession to make: I used to think brown butter was just a fancy chef’s trick. You know the kind—something you see in high-end pastry shops or those intimidating baking shows where everyone wears pristine white aprons. I assumed it was complicated, time-consuming, and probably required a degree in culinary arts just to get it right without burning my kitchen down.
Then, last October, I made the mistake of skipping it. I was baking a batch of simple vanilla blondies for a neighborhood potluck. I used regular melted butter, tossed in some pecans, and sent them off. They were fine. Edible. Good, even. But when I saw the plates coming back, I noticed something. The brown butter blondies from next door—the ones that smelled like nutty toffee and comfort—were completely gone. The vanilla ones? Half left. And not because people didn’t like them, but because they just didn’t *need* them.
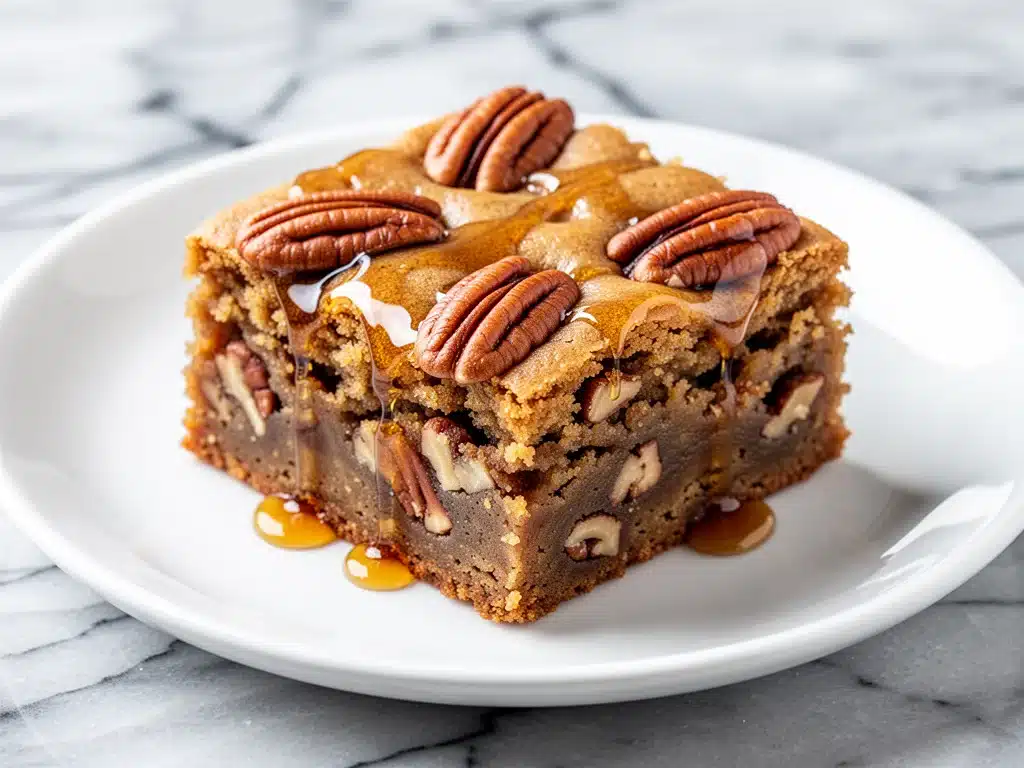
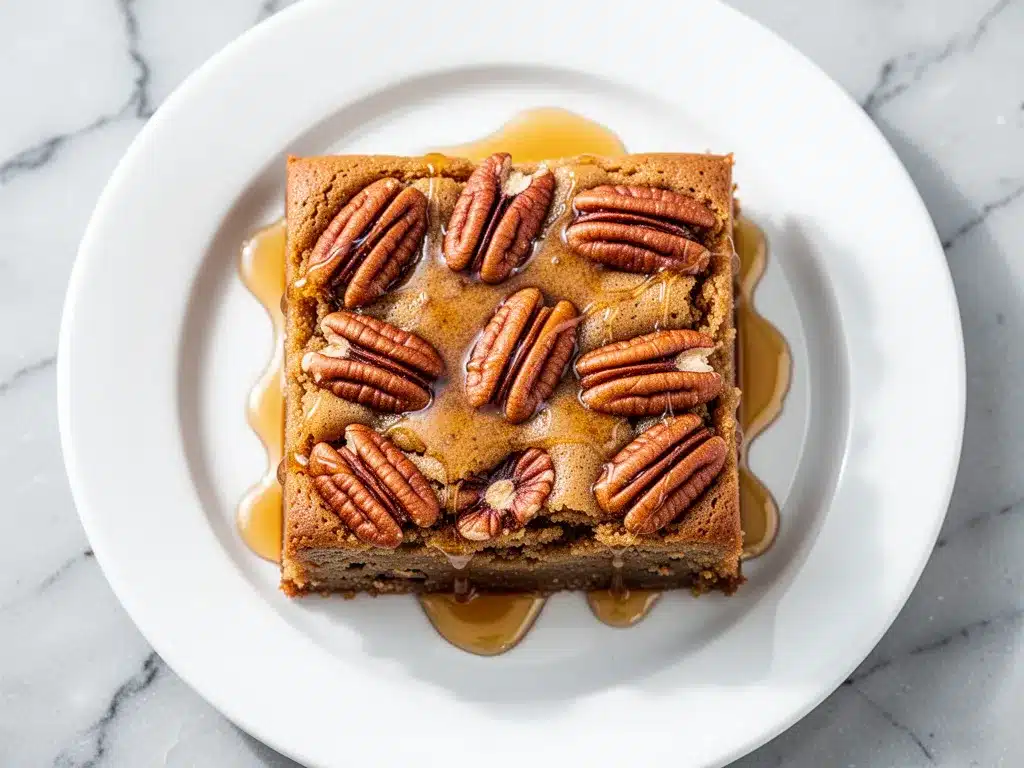
That was the moment I decided to stop being lazy. I spent the next three weekends experimenting with browning butter. I burned it twice. Once, I was distracted by a phone call and came back to find a smoking pan that smelled like regret. But the third time? Perfect. Golden, nutty, aromatic perfection. I folded that brown butter into a simple blondie batter, added a generous amount of toasted pecans, and drizzled it with a quick maple glaze. The result? These Fall Brown Butter Pecan Blondies.
They are the kind of dessert that makes people stop talking at the dinner table. They’re chewy, rich, and deeply flavorful, with that complex nutty taste that regular butter just can’t achieve. I’ve made this recipe at least a dozen times since that October day—sometimes for holiday gatherings, sometimes just because I needed a hug in dessert form. And let me tell you, they are incredibly impressive, yet surprisingly easy to make. If you’ve ever been intimidated by brown butter, this is your invitation to try it. Trust me, once you taste it, you’ll never go back to regular butter for baking again.
Why You’ll Love This Recipe
There are about ten reasons I keep making these blondies, but here are the big ones. This isn’t just another bar cookie; it’s a flavor experience that hits all the right notes for fall baking.
Nutty, Complex Flavor — Brown butter changes everything. By cooking the butter until it foams and turns amber, you develop nutty, toasty notes that add a depth of flavor regular melted butter just can’t match. It makes the blondies taste like they came from a high-end bakery, even though you made them in your home kitchen.
Chewy Texture Perfection — I’ve tested this batter with different flours and ratios, and this specific combination gives you that perfect chew. Not cakey, not hard, not crumbly. Just the right amount of chew with a slightly crisp edge. It’s the same satisfaction you get from brown butter chocolate chip cookies, but in a bar format.
Crispy, Toasted Pecans — Raw nuts are fine, but toasted pecans? That’s the game-changer. Toasting them in the oven before adding them to the batter releases their essential oils and adds a crunchy contrast to the soft, chewy interior. It’s a texture combo that keeps people coming back for seconds.
Impressive Yet Easy — You don’t need a stand mixer. You don’t need fancy equipment. You just need a saucepan and a few minutes of attention. These look and taste like a sophisticated dessert, but they’re actually one of the easiest things I bake. Perfect for bringing to a potluck, a dinner party, or just keeping in the pantry for a midnight snack.
Perfect for Fall Gatherings — The warm spices of the pecans and the rich brown butter make these ideal for autumn. They pair beautifully with a cup of coffee or a glass of spiced cider. I often serve these alongside spiced apple honey cider for a cozy fall afternoon treat.
Make-Ahead Friendly — These blondies actually improve in flavor after sitting for a day or two. The flavors meld together, and the chewiness sets in perfectly. I often make them on Sunday and have them ready for the week. They store beautifully at room temperature, making them a hassle-free option for busy weeks.
This recipe has become my go-to when I want to impress without stressing. It’s reliable, delicious, and always a crowd-pleaser. Whether you’re a baking novice or a seasoned pro, these blondies will quickly become a staple in your rotation.
Ingredients You’ll Need
Here’s the best part: you probably have most of this already. The beauty of blondies is their simplicity. You don’t need exotic ingredients or hard-to-find items. Just good-quality basics and a little patience.
Unsalted Butter (1 cup / 226g) — This is the star of the show. You’ll be browning it, so use good quality. I prefer European-style butter like Kerrygold or Plugra because they have a higher fat content, which gives better browning results. But standard unsalted butter works fine too. Just make sure it’s unsalted so you can control the saltiness.
Pecans (1 ½ cups / 170g, chopped) — Use raw, unsalted pecans. I buy them in the shell sometimes for freshness, but pre-chopped works if you’re in a hurry. Toasting them is crucial—I’ll explain why in the steps, but trust me, it’s worth the extra five minutes.
Brown Sugar (2 cups / 400g) — Light or dark brown sugar? I use a mix, but dark brown gives a deeper, molasses-like flavor that complements the brown butter perfectly. Light brown is fine if that’s all you have, but dark is my preference for fall flavors.
Granulated Sugar (½ cup / 100g) — This helps with the chewiness and the slight crispness on the edges. Don’t skip it, or the texture will be too soft.
Large Eggs (2 large) — Room temperature eggs are best. They emulsify better with the sugar and butter, creating a smoother batter. If you forget, just drop them in a bowl of warm water for five minutes.
Vanilla Extract (2 teaspoons) — Use real vanilla, not imitation. It makes a noticeable difference in the flavor profile. I keep a bottle of Nielsen-Massey on hand because it’s consistent and potent.
All-Purpose Flour (2 cups / 250g) — Spoon and level your flour. Don’t scoop it directly from the bag, or you’ll pack it down and end up with dense, dry blondies. I use Gold Medal all-purpose flour—it’s reliable and gives a tender crumb.
Baking Powder (1 teaspoon) — Just a little bit to help them rise slightly. You don’t want cake-like blondies; you want dense and chewy.
Salt (1 teaspoon) — Fine sea salt or table salt. Salt enhances the nuttiness of the brown butter and balances the sweetness. Don’t skip it.
For the Glaze (Optional but Recommended):
Maple Syrup (¼ cup / 60ml) — Use pure maple syrup, not pancake syrup. The flavor is much richer and more authentic.
Heavy Cream (2 tablespoons / 30ml) — Helps thin out the glaze so it pours easily.
Powdered Sugar (1 cup / 120g) — Sifted to remove lumps. You want a smooth, silky glaze.
Pinch of Salt — Balances the sweetness of the powdered sugar.
Pro Tip: I always measure my ingredients before I start browning the butter. Once the butter is browned, you need to cool it slightly before mixing, so having everything ready goes a long way.
Equipment Needed
You don’t need fancy equipment for this. Here’s what I actually use.
Saucepan (Medium, light-colored) — I use a light-colored stainless steel saucepan. This is important because you need to see the color change of the butter as it browns. A dark pan makes it hard to judge when it’s done.
Wooden Spoon or Heat-Proof Spatula — For stirring the butter and mixing the batter. Wooden spoons are great because they don’t conduct heat, so they stay cool.
Baking Dish (8×8 inch or 9×9 inch) — I prefer an 8×8 for thicker, chewier blondies. If you use a 9×9, they’ll be thinner and cook faster, so keep an eye on them.
Parchment Paper — Essential for easy removal. Line your baking dish with parchment, leaving an overhang on the sides. This acts as a sling so you can lift the blondies out cleanly after cooling.
Measuring Cups and Spoons — Standard stuff. Dollar store versions work fine.
Cutting Board and Knife — For chopping the pecans. A sharp knife makes this easier and safer.
Small Saucepan — For making the glaze. A small one is perfect for just ¼ cup of syrup.
Whisk — For mixing the glaze until smooth.
Oven — Obviously. Preheat it to 350°F (175°C).
Tool Tip: If you don’t have a light-colored saucepan, you can still brown the butter, but you’ll need to be extra careful. Watch the foam and smell for the nutty aroma. Once it smells like toasted nuts, pull it off the heat immediately.
How to Make It: Step-by-Step
Alright, let’s make this! I’m walking you through exactly how I do it, including the little tricks I’ve picked up.
Step 1: Prep Your Pan and Oven (5 minutes)
Preheat your oven to 350°F (175°C). Line an 8×8 inch baking dish with parchment paper, leaving an overhang on the sides for easy removal. Grease the parchment lightly with butter or cooking spray. This ensures the blondies don’t stick and come out cleanly.
Step 2: Toast the Pecans (5-7 minutes)
Spread the chopped pecans on a baking sheet. Toast them in the oven for 5-7 minutes, watching closely. You want them to turn golden and smell nutty. Be careful—they can go from perfect to burnt very quickly. Once done, remove from the oven and let them cool. This step intensifies their flavor and adds a nice crunch.
Step 3: Brown the Butter (5-8 minutes)
This is the most important step. Place the unsalted butter in your light-colored saucepan over medium heat. Stir constantly with a wooden spoon. The butter will melt, then foam up, then start to subside. Watch for little brown bits forming at the bottom of the pan. The butter will smell like toasted nuts. As soon as you see that amber color and smell that nutty aroma, remove it from the heat immediately. Pour it into a heat-proof bowl to stop the cooking. Let it cool for 10 minutes. It should be warm, not hot.
Step 4: Mix the Wet Ingredients (2 minutes)
Once the brown butter has cooled slightly, add the brown sugar and granulated sugar to the bowl. Whisk vigorously for about 2 minutes. The mixture should look glossy and smooth. This step helps dissolve the sugar and creates that chewy texture. Add the eggs one at a time, whisking well after each addition. Stir in the vanilla extract.
Step 5: Combine Dry Ingredients (1 minute)
In a separate bowl, whisk together the flour, baking powder, and salt. You want to distribute these evenly so you don’t get pockets of baking powder in your blondies.
Step 6: Make the Batter (2 minutes)
Gently fold the dry ingredients into the wet ingredients using a spatula. Mix until just combined—do not overmix. Overmixing develops gluten, which leads to tough blondies. Once the flour disappears, fold in the toasted pecans. The batter will be thick and sticky.
Step 7: Bake (25-30 minutes)
Pour the batter into the prepared baking dish and spread it evenly. Bake for 25-30 minutes. The edges should be golden brown and slightly crisp, and the center should be set but still slightly soft. A toothpick inserted into the center should come out with a few moist crumbs, not wet batter. If you insert it and it’s clean, they might be overbaked.
Step 8: Cool and Glaze (30 minutes +)
Let the blondies cool completely in the pan on a wire rack. This is crucial—if you cut them while warm, they’ll fall apart. Once cool, make the glaze. In a small saucepan, heat the maple syrup and heavy cream over low heat until warm. Whisk in the powdered sugar and pinch of salt until smooth. Drizzle over the cooled blondies. Let the glaze set for 15 minutes before cutting.
Step 9: Cut and Serve
Use the parchment overhang to lift the blondies out of the pan. Cut into squares or bars. Serve with coffee or tea. Enjoy!
Expert Tips & Tricks
Here’s everything I’ve learned from making these dozens of times. These tips will save you from my mistakes.
Don’t Burn the Butter
Brown butter can go from perfect to burnt in seconds. Once you see the foam subside and smell the nutty aroma, pull it off the heat. The residual heat will continue to cook it slightly. If it smells bitter, start over. It’s better to under-brown than over-brown.
Cool the Butter Slightly
You don’t want to cook the eggs with hot butter. Let the brown butter cool for 10 minutes before adding the sugars and eggs. It should be warm to the touch, not hot.
Whisk the Sugars Well
This step is often skipped, but it’s key for chewiness. Whisking the brown butter and sugars together for 2 minutes helps dissolve the sugar and creates a glossy, fudgy texture. Don’t rush this.
Toast Your Pecans
I can’t stress this enough. Raw pecans are fine, but toasted pecans add a depth of flavor and crunch that elevates the entire recipe. It’s a small step with a huge payoff.
Don’t Overbake
Blondies continue to cook in the pan after you take them out of the oven. Pull them when the center looks slightly underdone. They should be set but still soft. Overbaking leads to dry, crumbly blondies.
Cool Completely
It’s tempting to cut into them warm, but resist. They need to cool completely to set properly. If you cut them warm, they’ll be mushy and fall apart.
Glaze Consistency
If your glaze is too thick, add a teaspoon of milk or cream. If it’s too thin, add more powdered sugar. You want it to drizzle easily but not run off the edges completely.
Variations & Substitutions
Once you’ve nailed the basic version, here’s how you can mix it up. I’ve tried all of these.
White Chocolate Chip Version
Add 1 cup of white chocolate chips along with the pecans. This is a classic combination and adds extra sweetness and gooeyness.
Pumpkin Spice Version
Add 1 teaspoon of pumpkin pie spice to the dry ingredients. Reduce the brown butter slightly and add 2 tablespoons of pumpkin puree to the wet ingredients. It’s a fun fall twist.
Maple Glaze Variation
Instead of maple syrup, use honey for a floral sweetness. Or add a pinch of cinnamon to the glaze for extra warmth.
Nut-Free Option
If you have nut allergies, you can substitute the pecans with toasted sunflower seeds or just omit them. The brown butter flavor will still shine.
Gluten-Free Option
Use a 1:1 gluten-free flour blend. Make sure it contains xanthan gum, or add ½ teaspoon to the dry ingredients. The texture will be similar, though slightly more delicate.
Dairy-Free Option
Use dairy-free butter (like Miyoko’s) and dairy-free chocolate chips if adding them. The maple glaze is naturally dairy-free if you omit the heavy cream and use water instead.
Serving & Storage
How to Serve:
I usually serve these at room temperature. They pair beautifully with a hot cup of coffee or a glass of apple challah bread pudding for a decadent dessert spread. They’re also great for potlucks because they’re easy to grab and eat.
Storage Instructions:
Store in an airtight container at room temperature for up to 5 days. They stay chewy and moist this way. If your kitchen is very hot, you might want to refrigerate them, but let them come to room temperature before serving for the best texture.
Freezing:
These freeze well! Wrap individual bars in plastic wrap and place them in a freezer-safe bag. They’ll keep for up to 3 months. Thaw at room temperature before eating. The glaze might soften, but the flavor remains intact.
Reheating:
If you want them warm, microwave a bar for 10-15 seconds. It brings back that fresh-baked softness.
Nutrition Information
I’m not a nutritionist, but here’s the breakdown if you’re tracking. These are rich, indulgent treats, so enjoy in moderation.
Per Serving (based on 16 bars):
- Calories: 280
- Protein: 4g
- Carbs: 38g
- Fiber: 1g
- Sugar: 28g
- Fat: 14g
- Saturated Fat: 8g
- Cholesterol: 35mg
- Sodium: 180mg
What’s Good:
– Contains healthy fats from pecans
– Provides some protein and fiber
– Made with real ingredients
What to Know:
– High in sugar due to brown sugar and glaze
– Contains gluten and dairy
– Calorie-dense, so a little goes a long way
My Take:
Look, these are a dessert. They’re rich, sweet, and indulgent. They’re not a health food. But they’re made with real ingredients and are way better than store-bought bars. When I make them, I enjoy one or two and savor every bite. That’s the beauty of homemade baking—you control the quality.
Final Thoughts
So that’s my go-to Fall Brown Butter Pecan Blondies! I’ve probably talked your ear off at this point, but when you make a recipe this often, you have a lot to say about it.
This recipe has saved my dessert game more times than I can count. It’s my answer to “what should I bring to the party” when I want to impress but don’t have hours to bake. The brown butter adds that sophisticated touch, and the toasted pecans make it feel rustic and homey. My family loves them, my friends request them, and I just love making them.
Make it yours! Try different nuts, swap the glaze, or add chocolate chips. The best recipes are the ones you adapt to your tastes. But start with this base—it’s foolproof and delicious.
If you make this, drop a comment and let me know what you think! I love hearing how recipes turn out in your kitchen. And if something doesn’t work, tell me that too—I’m here to help troubleshoot.
Happy baking! And I hope your kitchen smells half as good as mine does right now.
Frequently Asked Questions
Q: Can I use salted butter instead of unsalted?
A: You can, but reduce the added salt in the recipe to ½ teaspoon. Salted butter varies in salt content, so it’s hard to control. Unsalted is best for baking so you can manage the flavor precisely.
Q: Why did my brown butter burn?
A: Brown butter burns easily because the milk solids at the bottom of the pan can scorch quickly. Always use medium heat and stir constantly. Once you smell the nutty aroma, pull it off the heat immediately. The residual heat will finish the browning process.
Q: Can I make these ahead of time?
A: Absolutely! Make them up to 3 days ahead. Store in an airtight container at room temperature. They actually taste better after a day as the flavors meld. You can also freeze them for up to 3 months.
Q: Can I use walnuts instead of pecans?
A: Yes! Walnuts work great in this recipe. Toast them the same way. They add a slightly more bitter, earthy flavor that pairs well with the sweet brown butter.
Q: How do I know when the blondies are done?
A: The edges should be golden brown and pulling away slightly from the sides of the pan. The center should be set but still slightly soft. A toothpick inserted into the center should come out with moist crumbs, not wet batter. If it’s clean, they’re likely overbaked.
Q: Can I skip the glaze?
A: Yes, the blondies are delicious without it. The glaze adds extra sweetness and a nice visual appeal, but it’s not necessary. If you prefer less sweet, skip it or drizzle just a little.
Q: Can I double this recipe?
A: Yes, but you’ll need a 9×13 inch baking dish. The baking time will increase to about 30-35 minutes. Keep an eye on them to avoid overbaking.
Pin This Recipe!

Fall Brown Butter Pecan Blondies
- Total Time: 45 minutes
- Yield: 16 servings 1x
Description
Chewy, rich blondies made with nutty brown butter and toasted pecans, finished with a sweet maple glaze for an impressive yet easy homemade dessert.
Ingredients
- 1 cup (226g) unsalted butter
- 1 ½ cups (170g) raw unsalted pecans, chopped
- 2 cups (400g) brown sugar (light or dark)
- ½ cup (100g) granulated sugar
- 2 large eggs, room temperature
- 2 teaspoons vanilla extract
- 2 cups (250g) all-purpose flour
- 1 teaspoon baking powder
- 1 teaspoon salt
- ¼ cup (60ml) pure maple syrup (for glaze)
- 2 tablespoons (30ml) heavy cream (for glaze)
- 1 cup (120g) powdered sugar, sifted (for glaze)
- Pinch of salt (for glaze)
Instructions
- Preheat oven to 350°F (175°C). Line an 8×8 inch baking dish with parchment paper, leaving an overhang on the sides, and grease lightly.
- Spread chopped pecans on a baking sheet and toast in the oven for 5-7 minutes until golden and nutty. Remove and let cool.
- Melt unsalted butter in a light-colored saucepan over medium heat. Stir constantly until it foams, subsides, and turns amber with a nutty aroma. Remove from heat immediately and pour into a heat-proof bowl. Let cool for 10 minutes.
- To the cooled brown butter, add brown sugar and granulated sugar. Whisk vigorously for 2 minutes until glossy and smooth.
- Add eggs one at a time, whisking well after each addition. Stir in vanilla extract.
- In a separate bowl, whisk together flour, baking powder, and salt.
- Gently fold dry ingredients into wet ingredients until just combined. Do not overmix. Fold in toasted pecans.
- Pour batter into prepared baking dish and spread evenly. Bake for 25-30 minutes until edges are golden and center is set but slightly soft.
- Let blondies cool completely in the pan on a wire rack.
- For the glaze, heat maple syrup and heavy cream in a small saucepan over low heat until warm. Whisk in powdered sugar and pinch of salt until smooth.
- Drizzle glaze over cooled blondies and let set for 15 minutes before cutting into squares.
Notes
Ensure butter is cooled slightly before adding eggs to avoid cooking them. Toasting pecans is crucial for flavor and texture. Do not overbake as blondies continue to cook in the pan. Store in an airtight container at room temperature for up to 5 days or freeze for up to 3 months.
- Prep Time: 15 minutes
- Cook Time: 30 minutes
- Category: Dessert
- Cuisine: American
Nutrition
- Serving Size: 1 bar
- Calories: 280
- Sugar: 28
- Sodium: 180
- Fat: 14
- Saturated Fat: 8
- Carbohydrates: 38
- Fiber: 1
- Protein: 4
Keywords: brown butter, pecan blondies, fall dessert, maple glaze, chewy blondies, homemade bars, easy baking


