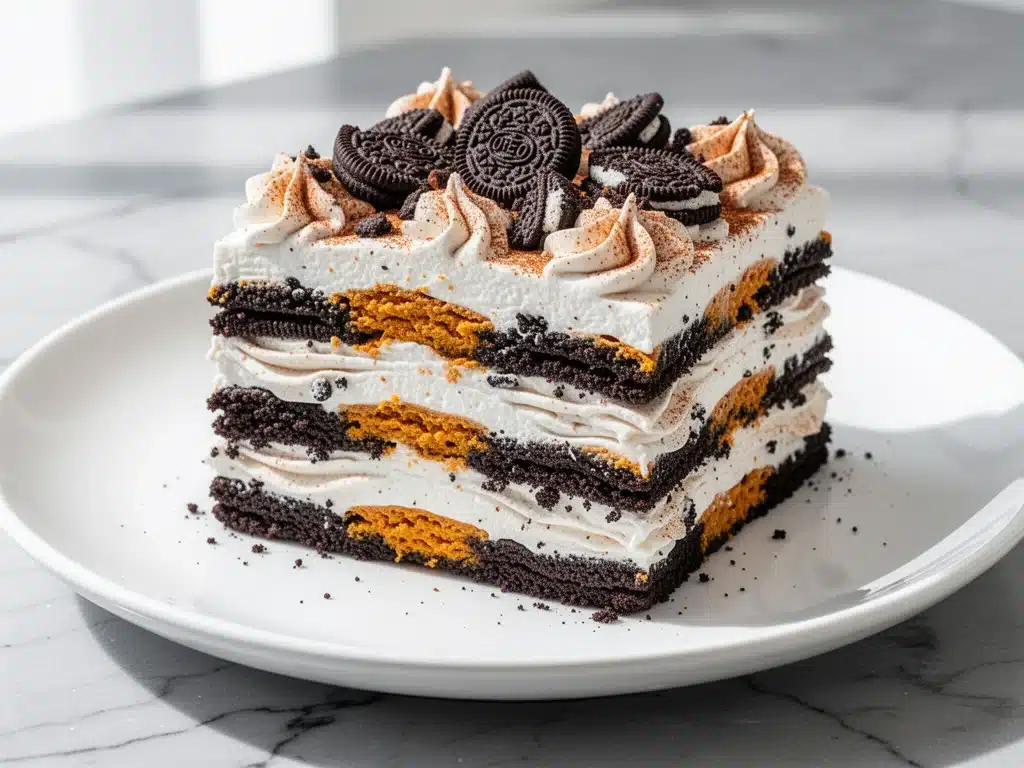
Last week, I was staring at a stack of Oreos in my pantry and a half-empty can of pumpkin puree, wondering if I had lost my mind. It was 5:30 PM on a Tuesday, my energy was nonexistent, and the idea of turning on the oven felt like climbing Mount Everest. I didn’t want takeout, but I definitely didn’t want to spend an hour scrubbing pots. So, I did what any desperate home cook would do: I threw something together with zero expectations.
What came out of the fridge the next morning wasn’t just edible; it was spectacular. This Fall Pumpkin Oreo Icebox Cake with Whipped Cinnamon Layers has since become my secret weapon for busy weeknights and last-minute hosting. It’s the dessert that looks like you spent hours crafting intricate layers, but honestly? It’s just a few minutes of assembly and some patience.
I’ve tested this pumpkin Oreo cake at least seven times in the last month alone. I’ve tweaked the cinnamon ratios, experimented with different whipped cream consistencies, and even tried using different cookie brands (spoiler: standard Oreos are best for structural integrity). The result is a no-bake dessert that captures all the cozy flavors of autumn—pumpkin spice, warm cinnamon, and sweet cream—without the stress. If you’re looking for an easy fall dessert that actually tastes homemade, this is it.
Why You’ll Love This Recipe
There are about ten reasons I keep making this pumpkin icebox cake, but here are the big ones that will win you over immediately.
Zero Oven Required — Seriously, if you can open a package of cookies and whip cream, you can make this. I make this on nights when I’m exhausted, when the power goes out, or when I just don’t want my kitchen to smell like burnt sugar for three days. No baking means no heating up the house, which is a huge plus in late September.
Make-Ahead Magic — This is the ultimate stress-reliever. You assemble it in the morning, toss it in the fridge, and forget about it. By dinner time, it’s perfectly set. I love that I can plan my dessert while I’m cooking dinner, rather than rushing around after everyone is full. It actually gets better the longer it sits, so making it a day ahead is ideal.
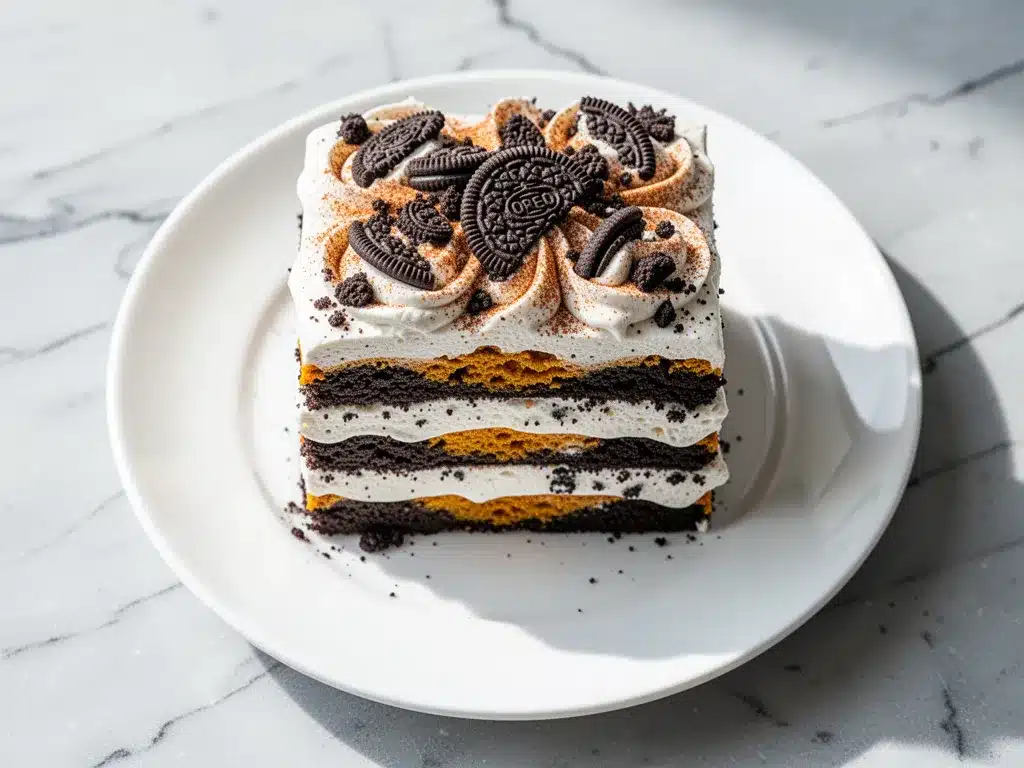
Texture Paradise — The magic here is in the transformation. The cookies soften into a cake-like layer, and the whipped cream stays light and airy. You get that contrast between the slightly chewy cookie bits and the fluffy, spiced cream. It’s not heavy like a traditional cheesecake; it’s light, creamy, and incredibly satisfying.
Flavor That Smells Like Autumn — The moment you mix the pumpkin puree with the cinnamon and cream, your kitchen will smell like a pumpkin spice latte. It’s cozy, warm, and inviting. My kids think it’s just a “special treat,” but I know they’re getting a little kick of actual pumpkin fiber. Win-win.
Crowd-Pleaser — I’ve served this to my picky eater cousin, my wine-loving aunties, and my kids’ friends. Everyone loves it. It feels fancy enough for a holiday gathering but simple enough for a Tuesday night family movie night. It’s the dessert that makes you look like a culinary genius without the work.
This is my go-to when I need a dessert to just work. No complicated techniques, no weird ingredients you can’t find, just reliable, delicious fall food that makes everyone happy.
Ingredients You’ll Need
Here’s the best part: you probably have most of this already. This recipe relies on pantry staples with a few specific additions to get that perfect pumpkin flavor. I’m particular about three ingredients here, and I’ll tell you exactly why.
For the Cookie Base
Original Oreos (2 packages, 14.3 oz each) — I know, I know, Oreos are processed sugar. But for an icebox cake, they are perfect. They hold their shape when layered but soften beautifully in the cream. Do not use Double Stuf; it makes the layers too sweet and heavy. Do not use gluten-free Oreos if you can avoid it; they tend to get mushy too fast. Regular Oreos are the gold standard here.
Vanilla Wafers (1 package, 14.7 oz) — I mix in vanilla wafers to break up the chocolate. The vanilla flavor pairs better with pumpkin than the chocolate does, and it adds a nice texture contrast. If you hate chocolate, you can use all vanilla wafers, but I find the combo essential.
For the Pumpkin Whipped Cream
Heavy Whipping Cream (3 cups / 720ml) — This is non-negotiable. You need high fat content to get stiff peaks. Half-and-half will not work. Make sure your bowl and beaters are cold; I keep mine in the freezer for 15 minutes before whipping. It makes a huge difference in how fast the cream stiffens.
Full-Fat Cream Cheese (8 oz / 225g) — This adds stability to the whipped cream so it doesn’t deflate over time. It also gives that tangy cheesecake-like flavor that balances the sweet pumpkin. Let it soften at room temperature for 10 minutes before mixing, or you’ll get lumps.
Pumpkin Puree (15 oz / 425g can) — Look for “100% Pure Pumpkin,” not “Pumpkin Pie Filling.” The filling is already sweetened and spiced, which will mess up the balance. You want plain puree so you control the sweetness and spice.
Powdered Sugar (1 cup / 120g) — Icing sugar dissolves instantly in the cream. Granulated sugar will leave gritty bits in your final dessert. Sift it if it’s clumpy.
Pumpkin Pie Spice (2 tablespoons) — This is your flavor powerhouse. If you don’t have a blend, mix 1 tbsp cinnamon, 1 tsp ginger, ½ tsp nutmeg, ½ tsp allspice, and ¼ tsp cloves. Freshly grated nutmeg is best if you have it.
Cinnamon (1 tablespoon) — Extra cinnamon for that warm, spicy kick. Don’t skip this. It’s fall in a bowl.
Vanilla Extract (1 teaspoon) — Pure vanilla, not imitation. It rounds out the pumpkin flavor.
Equipment Needed
You don’t need fancy equipment for this. Here’s what I actually use.
9×13 Inch Baking Dish — Glass or ceramic works best. It needs to be deep enough to hold two layers of cookies and cream. I use a Pyrex dish because I can see the layers forming.
Electric Hand Mixer or Stand Mixer — Whipping 3 cups of cream by hand is possible, but it’s an arm workout. A hand mixer is perfect for this. If you’re doing stand mixer, use the whisk attachment.
Large Mixing Bowl — Make sure it’s big enough to hold the cream without splattering. A bowl with a wide base is easier for whipping.
Rubber Spatula — For folding the pumpkin puree into the cream gently. You want to keep the air in the mixture.
Plastic Wrap — To cover the dish while it chills. This prevents the cake from absorbing fridge odors.
How to Make It: Step-by-Step
Alright, let’s make this! I’m walking you through exactly how I do it, including the little tricks I’ve picked up over the years.
Step 1: Prep Your Cream (10 minutes)
Take your heavy cream and cream cheese out of the fridge. Let the cream cheese sit for about 10-15 minutes to soften slightly. Put your mixing bowl and beaters in the freezer while you prep the cookies. Cold equipment is the secret to fluffy whipped cream.
Step 2: Whip the Cream (5 minutes)
Pour the cold heavy cream into the chilled bowl. Beat on medium-high speed until you see soft peaks—when you lift the beaters, the cream should mound but fall over. This usually takes 2-3 minutes. Don’t over-whip at this stage, or you’ll end up with butter.
Step 3: Add the Flavor (3 minutes)
Add the softened cream cheese, powdered sugar, pumpkin puree, pumpkin pie spice, extra cinnamon, and vanilla extract. Beat on medium-high speed until stiff peaks form. The mixture should be thick, smooth, and hold its shape when you lift the beaters. If it looks grainy, you didn’t soften the cream cheese enough. Just keep beating gently until it’s smooth.
Pro Tip: Taste the cream now. If you want it sweeter, add another tablespoon of sugar. If you want more spice, add another teaspoon of cinnamon. This is your chance to customize it.
Step 4: Layer the First Base (5 minutes)
Take your Oreos and vanilla wafers. You’re going to layer them in the bottom of your 9×13 dish. I like to break the cookies in half to fit them snugly, but whole cookies work too. Create a single, even layer covering the entire bottom. Don’t leave gaps; the cream needs to penetrate every cookie to soften it.
Step 5: Add the First Cream Layer
Spread half of the pumpkin whipped cream over the cookie layer. Use your spatula to smooth it out evenly, getting into the corners. You don’t need to be perfect; the next layer will hide any mistakes.
Step 6: Layer the Second Base
Add another layer of cookies on top of the cream. Again, try to cover the entire surface. If you have leftover crumbs, sprinkle them over the top for texture.
Step 7: Add the Final Cream Layer
Spread the remaining whipped cream over the top. Smooth it out as nicely as you can. This is the face of the cake, so make it look good. If you want to be fancy, pipe some rosettes on top, but a smooth layer is perfectly fine.
Step 8: Chill and Set (4 hours minimum)
Cover the dish tightly with plastic wrap. Put it in the fridge for at least 4 hours, but overnight is best. This is the hard part—waiting. But this time allows the cookies to absorb the moisture from the cream and turn into a soft, cake-like texture. If you cut into it too soon, it’ll be soggy and messy.
Expert Tips & Tricks
Here’s everything I’ve learned from making this dozens of times. These tips will save you from my mistakes.
Keep Everything Cold
The #1 mistake people make is warm cream. If your cream is warm, it will never whip up. Keep your bowl and beaters cold. If your kitchen is hot, work quickly or put the bowl back in the fridge for 10 minutes if it starts to get warm.
Don’t Skip the Cream Cheese
You might be tempted to just use whipped cream, but the cream cheese adds body. Without it, the pumpkin puree can make the cream too loose, and the cake won’t hold its shape when you slice it. It’s essential for structure.
Use Fresh Pumpkin Puree if You Can
Canned is fine and convenient, but if you roast your own pumpkin, the flavor is deeper and less watery. If you use canned, make sure to stir it well before measuring, as it can separate in the can.
Be Gentle When Folding
Once you’ve whipped the cream to stiff peaks, be careful not to deflate it when adding the pumpkin mixture. Fold it in gently or beat on low speed just until combined. You want to keep as much air in there as possible for a light texture.
Chill Overnight for Best Results
I know you want to eat it immediately. Don’t. The cookies need time to soften. If you cut it after 2 hours, it will be crunchy and disjointed. After 4 hours, it’s good. After 8 hours, it’s perfect. The flavors meld together beautifully overnight.
Common Mistakes (and how to avoid them):
Mistake: Cream didn’t stiffen.
Fix: Your cream was too warm, or your bowl wasn’t cold. Next time, chill everything first. Also, check the expiration date on your cream; old cream doesn’t whip well.
Mistake: Cake is too sweet.
Fix: Pumpkin puree is bland, but Oreos are sweet. If you find it too sweet, reduce the powdered sugar to ¾ cup, or use a pinch of salt in the cream to balance the flavors.
Mistake: Cookies didn’t soften.
Fix: You didn’t chill it long enough, or you didn’t have enough cream. Make sure you’re using a generous amount of cream between layers. If you’re in a rush, you can microwave individual slices for 10 seconds to soften them, but it’s not ideal.
Variations & Substitutions
Once you’ve nailed the basic version, here’s how you can mix it up. I’ve tried all of these.
Graham Cracker Version
Swap the Oreos and vanilla wafers for graham crackers. This makes it taste more like a traditional pumpkin pie. I like to crush the graham crackers slightly before layering for a crumbly texture.
Chocolate Chip Cookie Dough
Use chocolate chip cookies instead of Oreos. The chocolate chips melt slightly into the cream, creating little pockets of goo. It’s like a dessert pizza.
Spiced Latte Flavor
Add 1 tablespoon of instant espresso powder to the cream mixture. It enhances the chocolate and pumpkin flavors without making it taste like coffee. It’s a subtle but amazing depth.
Whipped Cream Cheese Frosting
Instead of pumpkin spice, mix cream cheese, powdered sugar, vanilla, and a little milk to make a classic frosting. Layer it with Oreos for a classic icebox cake. It’s richer and tangier.
Gluten-Free Option
Use gluten-free vanilla wafers and Oreos. Most GF cookies work well in icebox cakes, but check the texture; some GF cookies get mushy faster. Let it chill for a full 24 hours to ensure softening.
Dairy-Free Version
Use coconut cream (the hard part from a can of full-fat coconut milk) instead of heavy cream, and dairy-free cream cheese. Use coconut oil in the cookies if needed. It’s less fluffy but still delicious and rich.
Serving & Storage
How to Serve
I usually serve this straight from the fridge. It’s best when it’s cold and firm. Here are some ways I like to present it:
Simple Slices
Use a sharp knife dipped in hot water to get clean cuts. Wipe the knife between cuts. Dust the top with a little extra pumpkin spice or cinnamon before serving.
Toppings Bar
When I have guests, I put out: whipped cream, crushed Oreos, pumpkin seeds (pepitas) for crunch, and caramel sauce. Everyone customizes their slice.
Pairing Suggestions
This pairs beautifully with a warm cup of coffee or a glass of cold milk. For a more adult evening, serve it with a glass of dessert wine or a spiced apple cider. It also goes great with rosh hashanah spiced apple honey cider if you want to lean into the autumn theme.
Storage Instructions
Refrigerator:
Store in an airtight container or covered tightly with plastic wrap for up to 5 days. It actually tastes better on day 2 and 3 as the flavors meld.
Freezing:
You can freeze this, but the texture of the whipped cream might change slightly upon thawing. It will still be edible, but it might be a bit icier. If you must freeze, wrap the whole dish in plastic wrap and then foil. Thaw in the fridge overnight.
Meal Prep:
This is the ultimate meal prep dessert. Assemble it on Sunday, and you have dessert for the entire week. Just make sure you have a large enough dish.
Nutrition Information
I’m not a nutritionist, but here’s the breakdown if you’re tracking. Keep in mind that this is a rich dessert, so portion control is key.
Per Serving (based on 12 servings):
– Calories: 380
– Protein: 4g
– Carbs: 42g
– Fiber: 1g
– Sugar: 28g
– Fat: 22g
– Saturated Fat: 13g
– Cholesterol: 55mg
– Sodium: 250mg
What’s Good:
It’s a no-bake option, so you avoid the extra calories from butter in baked goods. The pumpkin adds a tiny bit of vitamin A.
What to Know:
It’s high in sugar and saturated fat due to the Oreos, cream cheese, and heavy cream. It’s a treat, not a health food. Enjoy it in moderation.
Final Thoughts
So that’s my go-to Fall Pumpkin Oreo Icebox Cake! I’ve probably talked your ear off at this point, but when you make a recipe this often, you have a lot to say about it.
This has saved weeknight desserts more times than I can count. It’s my answer to “what’s for dessert” when I’m tired, don’t want to bake, and still want something that tastes really good. My kids are happy, my husband’s happy, and I’m happy because I’m not stressed about cooking.
Make it yours! Try different cookies, adjust the spice, or add different toppings. The best recipes are the ones you adapt to your family’s tastes. If you make this, drop a comment and let me know what you think! I love hearing how recipes turn out in your kitchen. And if something doesn’t work, tell me that too—I’m here to help troubleshoot.
Happy cooking! And I hope your kitchen smells half as good as mine does right now.
Frequently Asked Questions
Can I use whipped topping (like Cool Whip) instead of making whipped cream?
You can, but the texture won’t be as rich or stable. Cool Whip is lighter and airier, but it doesn’t hold up as well in the fridge over several days. If you use it, I’d recommend adding the pumpkin puree and spices directly to the Cool Whip before spreading. It’s easier, but not as delicious as fresh whipped cream.
Why did my cake turn out soupy?
This usually happens if you didn’t use enough cream between the layers, or if you didn’t chill it long enough. The cookies need time to absorb the moisture. If it’s soupy now, you can try refrigerating it for another 12 hours. If it’s still too loose, you might have used low-fat cream cheese or heavy cream that didn’t whip properly. Next time, ensure you’re using full-fat ingredients and chilling your bowl.
Can I make this in a different size dish?
Yes, but you’ll need to adjust the layers. This recipe makes enough for a 9×13 dish. If you use a 9×9 dish, you’ll have extra filling, so you can make a third layer or just have leftovers. If you use a springform pan, it works great too, and you can make individual slices easily.
Is this recipe safe for people with nut allergies?
Yes, this recipe is naturally nut-free. Oreos and vanilla wafers do not contain nuts, and the cream ingredients are dairy-based. Always check the labels on your specific brands, as manufacturing processes can change, but generally, this is a safe option for nut allergies.
Can I add other spices to the pumpkin cream?
Absolutely! I love adding a pinch of cardamom or allspice for extra depth. You can also add a tablespoon of brown sugar instead of powdered sugar for a caramel-like flavor. Get creative with the spices; that’s the fun part of fall baking.
How do I cut the cake without it falling apart?
Use a sharp knife. Dip the knife in hot water and wipe it dry before each cut. This ensures clean slices. Also, make sure the cake has chilled for at least 4 hours, preferably overnight. A firm cake cuts much more cleanly than a soft one.
Pin This Recipe!
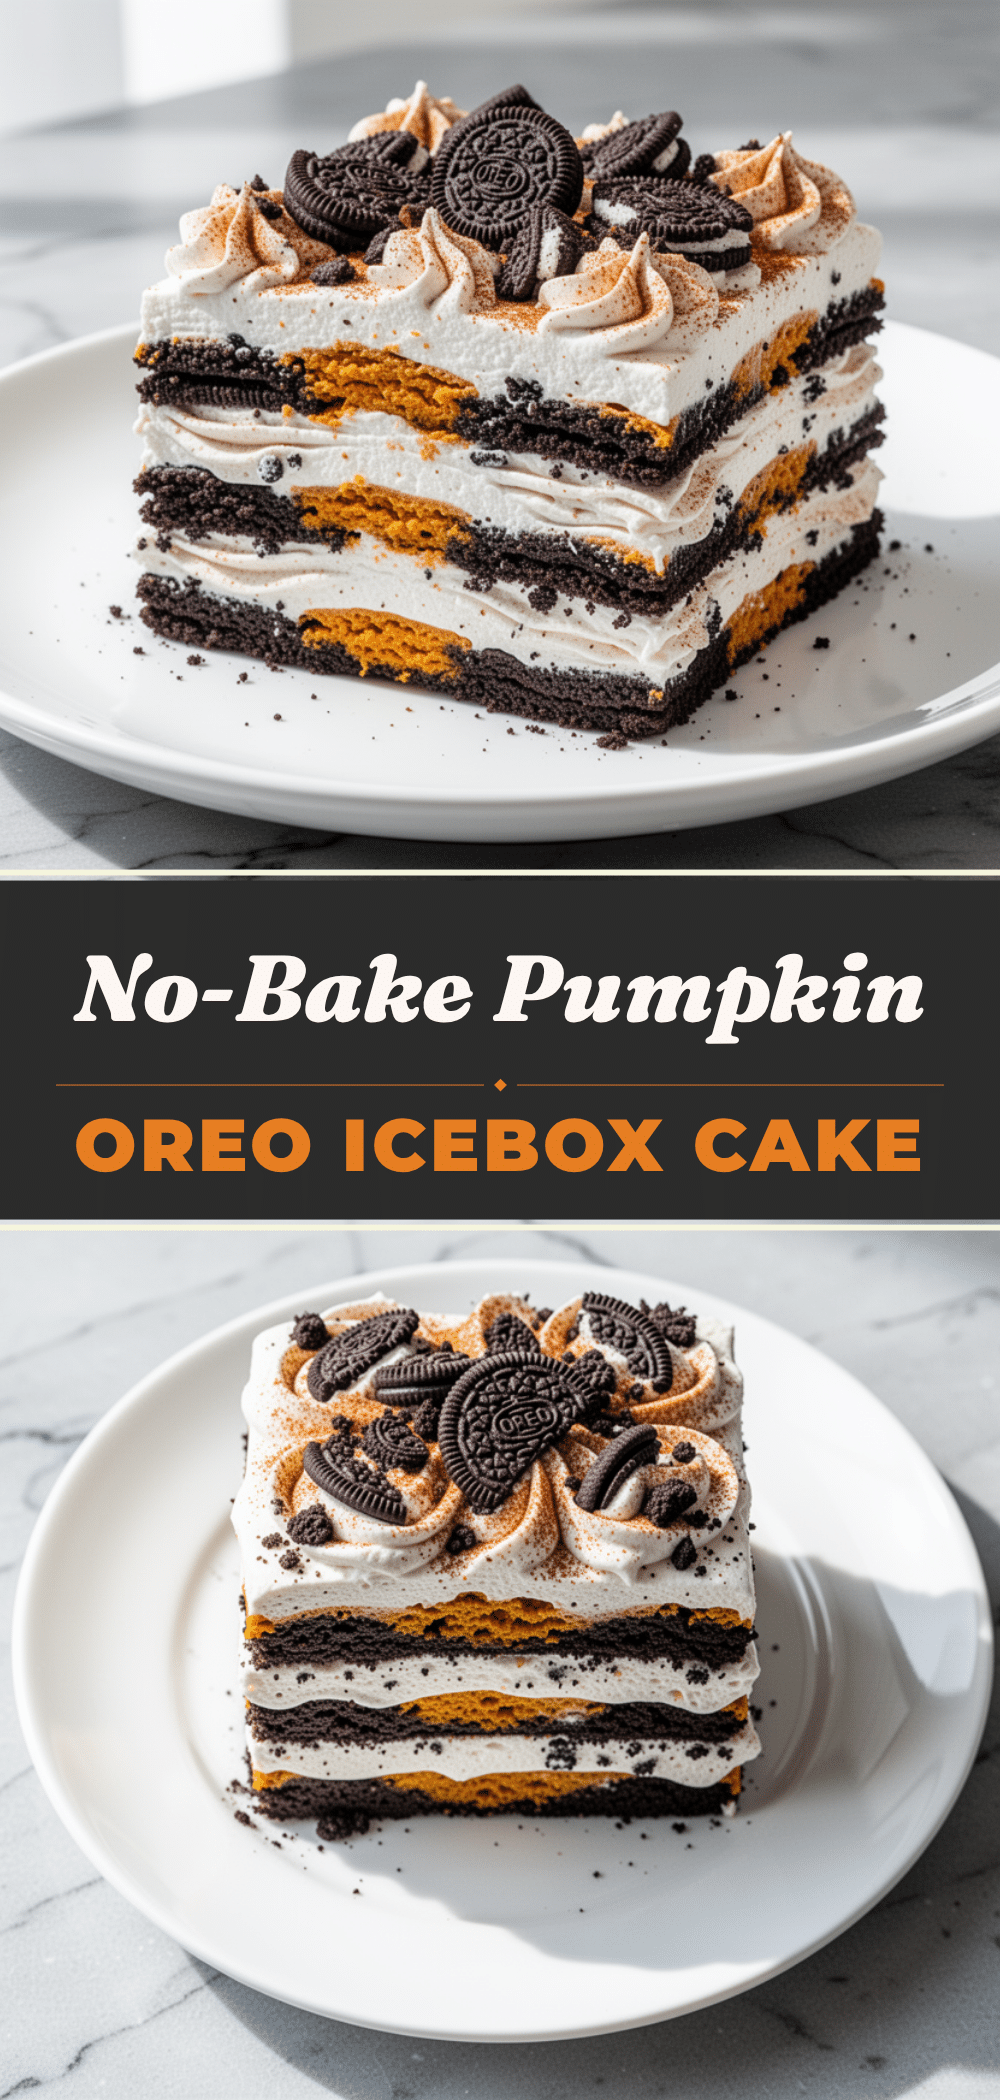
Fall Pumpkin Oreo Icebox Cake: Easy Fall Dessert
- Total Time: 4 hours 23 minutes
- Yield: 12 servings 1x
Description
A no-bake, make-ahead dessert featuring layers of Oreos, vanilla wafers, and spiced pumpkin whipped cream. This easy fall treat captures cozy autumn flavors without heating up the kitchen.
Ingredients
- 2 packages (14.3 oz each) Original Oreos
- 1 package (14.7 oz) Vanilla Wafers
- 3 cups (720ml) Heavy Whipping Cream
- 8 oz (225g) Full-Fat Cream Cheese, softened
- 15 oz (425g) can 100% Pure Pumpkin Puree
- 1 cup (120g) Powdered Sugar
- 2 tablespoons Pumpkin Pie Spice
- 1 tablespoon Cinnamon
- 1 teaspoon Vanilla Extract
Instructions
- Chill a large mixing bowl and beaters in the freezer for 15 minutes.
- Let cream cheese soften at room temperature for 10-15 minutes.
- Pour cold heavy cream into the chilled bowl and beat on medium-high speed until soft peaks form (2-3 minutes).
- Add softened cream cheese, powdered sugar, pumpkin puree, pumpkin pie spice, cinnamon, and vanilla extract.
- Beat on medium-high speed until stiff peaks form and the mixture is smooth.
- Break cookies in half if necessary and create a single even layer of Oreos and vanilla wafers in the bottom of a 9×13 inch dish.
- Spread half of the pumpkin whipped cream over the cookie layer.
- Add a second layer of cookies on top of the cream.
- Spread the remaining whipped cream over the top layer of cookies.
- Cover tightly with plastic wrap and refrigerate for at least 4 hours, preferably overnight, until cookies are soft.
- Slice with a sharp knife dipped in hot water for clean cuts.
Notes
Ensure all equipment is cold for best whipping results. Do not use Double Stuf Oreos or gluten-free Oreos as they may affect texture. Use 100% pure pumpkin puree, not pie filling. The cake improves in flavor if made a day ahead.
- Prep Time: 23 minutes
- Cook Time: 0 minutes
- Category: Dessert
- Cuisine: American
Nutrition
- Serving Size: 1 slice
- Calories: 380
- Sugar: 28
- Sodium: 250
- Fat: 22
- Saturated Fat: 13
- Carbohydrates: 42
- Fiber: 1
- Protein: 4
Keywords: fall dessert, pumpkin recipe, no bake dessert, oreo icebox cake, easy fall treats, make ahead dessert, pumpkin spice


