I have to confess something. For years, I was the person who bought the sugar-free candy bars at the checkout line, convinced I was being “good.” I’d pop one in my mouth, chew thoughtfully, and then feel a weird sense of disappointment. They tasted like wax and artificial sweetener, with a texture that was either too gritty or too rubbery. I didn’t feel indulged; I felt tricked.
That changed last weekend. I was hosting a small dinner party for some friends who are watching their sugar intake but still have a serious sweet tooth. I wanted to serve dessert, but I didn’t want to bring out a whole cake that everyone would feel guilty about eating. So, I decided to make these sugar-free dark chocolate peanut butter cups from scratch. I expected them to be… okay. Maybe a nice little nibble.
What I didn’t expect was for my friend Sarah to close her eyes, take a bite, and say, “Wait, is this the store-bought kind?” When I told her they were homemade, sugar-free, and took less than 30 minutes to throw together, she actually looked offended. In a good way.
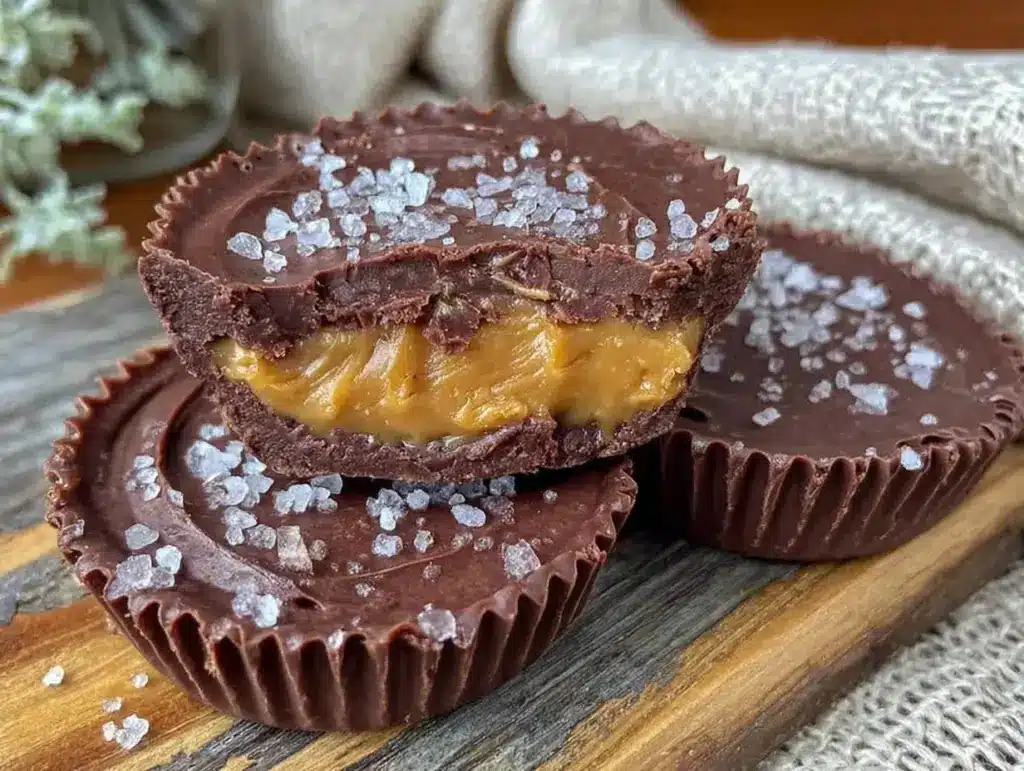
That’s the magic of this recipe. It’s not just a “diet” snack. It’s genuinely rich, deeply chocolatey, and has that perfect salty-sweet crunch that makes you want to hide the rest of the batch in your purse. These sugar-free dark chocolate peanut butter cups are my new secret weapon for impressing guests who think they can’t have dessert. They’re elegant enough for a dinner party table but simple enough to make on a Tuesday night when you’re craving something sweet.
I’ve tested this recipe at least a dozen times, tweaking the chocolate ratios and the peanut butter consistency until it was absolutely perfect. The result is a cup that snaps cleanly when you bite it, with a filling that’s creamy but firm enough to hold its shape. It’s indulgent without the sugar crash, and honestly? It tastes better than anything you’ll find in a health food aisle.
Why You’ll Love These Sugar-Free Dark Chocolate Peanut Butter Cups
There’s a specific kind of joy that comes from making something that looks and tastes expensive, but is actually incredibly simple. Here’s why these cups have taken over my kitchen (and my guests’ dessert plates):
- They Look Like a Gift — Seriously, they’re so pretty. Wrapped in little foil cups, they look like a boutique chocolate shop item. I love setting them out on a platter with some fresh raspberries or mint leaves. They feel special, like you put real effort into the evening.
- Only Five Ingredients — You don’t need a chemistry degree or a trip to a specialty store. Just dark chocolate, peanut butter, a sugar-free sweetener, coconut oil, and a pinch of sea salt. That’s it. If you have these in your pantry, you’re good to go.
- Zero Compromise on Taste — This is the big one. Because we’re using real dark chocolate and natural peanut butter, the flavor is deep and complex. The sweetness comes from a high-quality sugar-free alternative that doesn’t have that weird aftertaste. It tastes like a treat, not a compromise.
- Perfect for Sharing (Or Not) — I make these in a standard mini-muffin tin, which gives you about 12-15 little cups. They’re the perfect size for a post-dinner bite. Not too heavy, not too light. Just right. And because they’re sugar-free, I don’t feel bad eating three of them while I’m cleaning up the kitchen.
- They Keep for Weeks — I make a batch on Sunday, and they last in the fridge for up to two weeks. They’re also great for meal prep if you need a quick, satisfying snack that won’t spike your blood sugar. I keep a container in the office fridge, and my coworkers are always asking where I got them.
Whether you’re hosting a cozy movie night, a holiday gathering, or just want to treat yourself to something luxurious without the guilt, these cups are the answer. They’re the kind of dessert that makes people ask for the recipe, which is always the highest compliment.
Ingredients You’ll Need
The beauty of this recipe is how few ingredients you need, but the quality of each one matters. Since there’s no sugar to mask flavors, you want the best chocolate and peanut butter you can find. Here’s what you’ll need:
For the Chocolate Shell
Dark Chocolate Chips (1 cup / 170g) — This is the most important part. Look for chocolate that is at least 70% cocoa and labeled sugar-free. Brands like Lily’s Sweets or Guittard Sugar-Free work really well. They melt smoothly and have a rich, bittersweet flavor. Avoid chocolate with added oils if you can help it—it makes the shell softer.
Coconut Oil (1 tablespoon / 15ml) — This helps the chocolate melt more evenly and gives it a slight sheen. It also helps the chocolate snap when it’s chilled. Use refined coconut oil if you don’t want any coconut flavor, or unrefined if you like a hint of tropical sweetness.
Sea Salt (a pinch) — Just a tiny pinch in the chocolate layer enhances the chocolate flavor. Don’t skip this.
For the Peanut Butter Filling
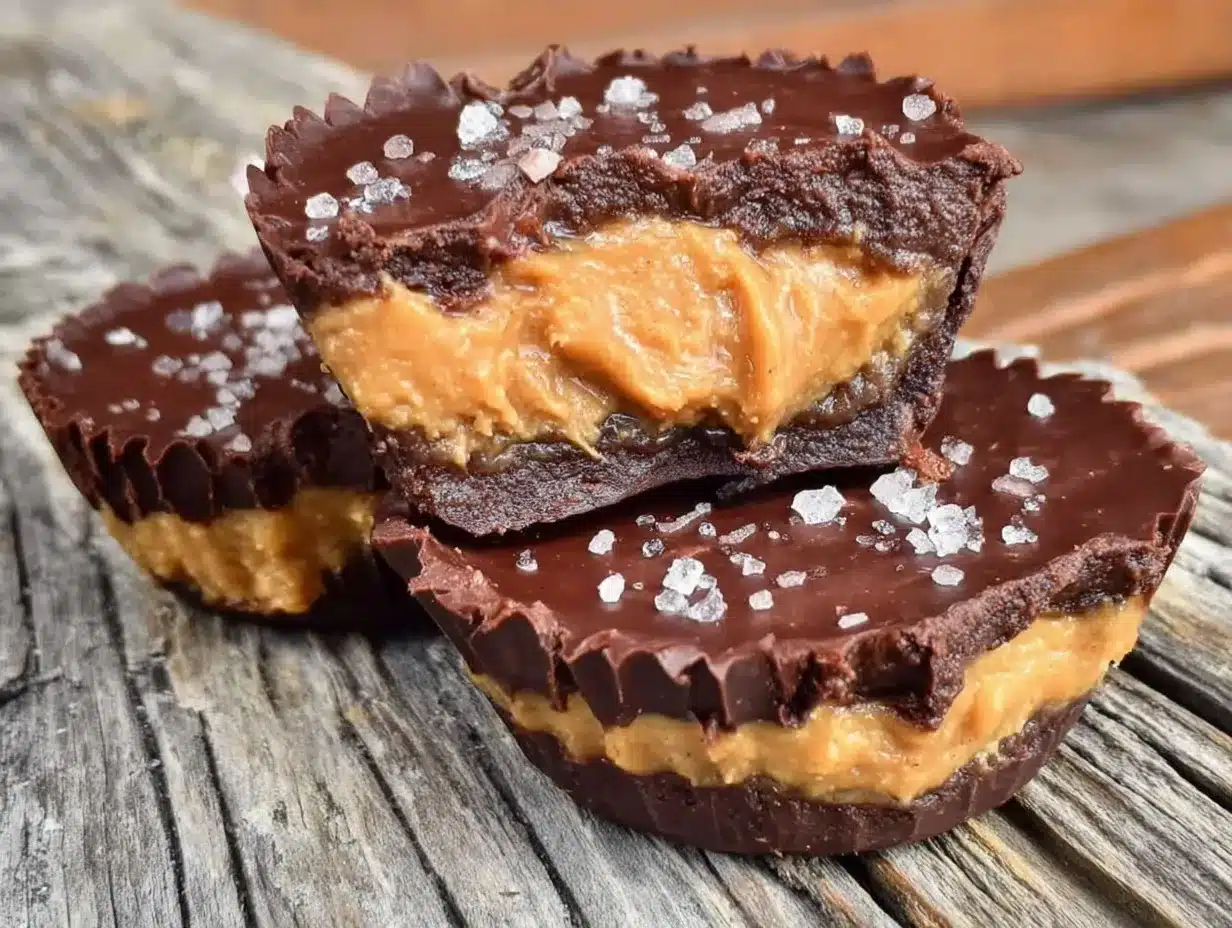
Natural Peanut Butter (½ cup / 125g) — I use creamy natural peanut butter. Look for one with just peanuts (and maybe a little salt) in the ingredients. Avoid the ones with added hydrogenated oils, as they can make the filling greasy. If your peanut butter is very runny, you might need to chill it a bit before mixing.
Sugar-Free Sweetener (2-3 tablespoons / 25-35g) — I prefer powdered erythritol or monk fruit sweetener because it dissolves better than granular sweeteners. Granular sweeteners can make the filling gritty. If you only have granular, pulse it in a blender first. Adjust the amount based on how sweet you like it.
Heavy Cream or Coconut Cream (1-2 teaspoons) — This is the secret ingredient. It adds moisture and helps bind the peanut butter and sweetener together, creating a smooth, fudgy texture. Heavy cream adds richness; coconut cream keeps it dairy-free.
Vanilla Extract (½ teaspoon) — Just a splash to round out the flavors. Use pure vanilla, not imitation.
Optional Toppings
Flaky Sea Salt — A few crystals on top right before the chocolate sets looks gorgeous and adds a nice crunch.
Crushed Peanuts — For extra texture and visual appeal.
Equipment Needed
You don’t need any fancy gadgets for this. Here’s what I actually use:
- Mini Muffin Tin — A standard mini muffin tin is perfect. It makes about 12-15 cups. If you don’t have one, you can use a regular muffin tin and make bigger cups, but the timing will be longer.
- Foil Candy Cups — These are optional but recommended. They make the cups look professional and make them easy to handle. You can buy them at most craft or baking stores.
- Microwave-Safe Bowl — For melting the chocolate. I use a glass bowl because it heats evenly.
- Small Mixing Bowl — For the peanut butter filling.
- Spatula — A small silicone spatula is great for scraping the chocolate into the cups and mixing the filling.
- Freezer — You’ll need space in your freezer to set the chocolate quickly.
Pro tip: If you don’t have foil cups, you can just grease the muffin tin lightly with coconut oil spray. But the foil cups make them so much easier to remove and look much nicer.
How to Make Sugar-Free Dark Chocolate Peanut Butter Cups
Alright, let’s make these! It’s a simple two-part process: making the shells, making the filling, and assembling. I’m walking you through exactly how I do it to ensure you get that perfect snap.
Step 1: Prep the Molds (2 minutes)
Place the foil candy cups into the mini muffin tin. If you’re not using foil cups, lightly grease the muffin tin with coconut oil spray. Set the tin aside. Having your molds ready before you start melting chocolate saves time and stress.
Step 2: Make the Chocolate Shells (10 minutes)
Melt the dark chocolate chips and coconut oil in a microwave-safe bowl. Heat in 30-second intervals, stirring well between each interval, until smooth. Be careful not to overheat—the chocolate can seize if it gets too hot. Stir in the pinch of sea salt.
Using a teaspoon or a small piping bag, add about 1 teaspoon of chocolate to the bottom of each foil cup. Use the back of the spoon to spread it up the sides, creating a thin, even shell. You want to cover the bottom and go about halfway up the sides. Try to keep the edges neat.
Place the muffin tin in the freezer for 5 minutes to set the chocolate. This step is crucial—it ensures the shell is firm enough to hold the filling without breaking.
Step 3: Make the Peanut Butter Filling (5 minutes)
While the shells are setting, make the filling. In a small mixing bowl, combine the natural peanut butter, powdered sweetener, vanilla extract, and heavy cream (or coconut cream). Whisk or stir vigorously until smooth and creamy. If the mixture is too thick, add another teaspoon of cream. If it’s too runny, add a little more sweetener.
The consistency should be like thick frosting—spreadable but not liquid. Taste it and adjust sweetness if needed. Remember, it will taste sweeter once it’s combined with the chocolate.
Step 4: Assemble the Cups (5 minutes)
Remove the muffin tin from the freezer. The chocolate shells should be firm. Spoon or pipe about 1 teaspoon of the peanut butter filling into each chocolate shell. Don’t overfill—you want to leave a little space at the top for the second layer of chocolate.
Smooth the top of the filling with the back of a spoon or a small offset spatula. If you’re feeling fancy, you can add a flake of sea salt or a few crushed peanuts on top now.
Step 5: Seal with Chocolate (5 minutes)
Melt the remaining chocolate if you haven’t already (you might need a little extra, so have a spare quarter cup on hand). Spoon or pipe another teaspoon of chocolate over the peanut butter filling, sealing it completely. Use a toothpick or small knife to smooth out any bumps. You want a flat, even top.
Place the muffin tin back in the freezer for at least 15-20 minutes, or until the chocolate is completely hard. If you’re in a hurry, you can put them in the fridge, but the freezer gives a better snap.
Total Time: About 30 minutes (mostly hands-off freezing time).
Expert Tips & Tricks
Here’s everything I’ve learned from making these dozens of times. These tips will save you from my early mistakes.
Don’t Skip the Freezer
I know it’s tempting to rush, but chilling the chocolate shells before adding the filling is non-negotiable. If the shell is soft, the filling will sink into it, and you’ll end up with a messy cup. The 5-minute freeze ensures the shell is sturdy.
Use Powdered Sweetener
Granular sweeteners like erythritol can leave a gritty texture in the peanut butter filling. Powdered sweetener dissolves completely, giving you a smooth, creamy result. If you only have granular, pulse it in a blender or food processor until it’s a fine powder.
Watch the Heat
Chocolate is sensitive. If you melt it too quickly or at too high a temperature, it can seize up and become grainy. Always melt in short intervals and stir frequently. If it does seize, you can sometimes save it by adding a tiny bit more coconut oil, but prevention is better.
Adjust for Humidity
If you live in a humid climate, the chocolate might not set as hard. Make sure your freezer is cold enough, and consider adding an extra teaspoon of coconut oil to the chocolate to help it harden faster.
Storage is Key
Store these in an airtight container in the fridge or freezer. They’ll last up to two weeks in the fridge or three months in the freezer. If you’re bringing them to a party, keep them chilled until serving time.
Variations & Substitutions
Once you’ve mastered the basic version, here are some fun ways to mix it up. I’ve tried all of these, and they’re all delicious.
Almond Butter Cups
Swap the peanut butter for almond butter. It has a slightly more delicate flavor that pairs beautifully with dark chocolate. Use the same measurements.
Marble Swirl
Before adding the top layer of chocolate, add a few drops of white chocolate or caramel sauce (sugar-free) on top of the peanut butter filling and swirl with a toothpick. It looks gorgeous and adds a bit of extra flavor.
Coconut Layer
Add a thin layer of shredded coconut between the peanut butter filling and the top chocolate layer. It adds a nice texture contrast and a tropical twist.
Nut-Free Version
Use sunflower seed butter or soy nut butter instead of peanut butter. The texture and flavor are slightly different, but still creamy and delicious. Just make sure the butter is natural and not too oily.
Extra Crunchy
Mix in some crushed sugar-free candy cane pieces, chopped pistachios, or even a few mini chocolate chips into the peanut butter filling before spooning it into the shells.
Serving & Storage
How to Serve: I love serving these on a small plate with a few fresh raspberries or a sprig of mint. They look elegant and the bright red berries contrast beautifully with the dark chocolate. They’re perfect for a post-dinner dessert, a holiday gift, or a treat to bring to an office party.
Storage: Store in an airtight container in the refrigerator for up to two weeks. If you’re freezing them, place them in a single layer in a freezer-safe container, separated by parchment paper. They’ll keep for up to three months. Thaw in the fridge for 10 minutes before serving.
Pro Tip: If you’re bringing them to a party, keep them in a cooler or insulated bag until you’re ready to serve. Warm chocolate can get messy, and you want them to stay firm and beautiful.
Nutrition Information
I’m not a nutritionist, but here’s the breakdown if you’re tracking. Keep in mind that nutrition values can vary based on the specific brands of chocolate and sweetener you use.
Per Serving (based on 1 cup):
- Calories: 120
- Protein: 3g
- Carbs: 4g
- Fiber: 2g
- Sugar: 1g (from natural sources)
- Net Carbs: 2g
- Fat: 10g
- Saturated Fat: 5g
- Cholesterol: 2mg
- Sodium: 15mg
What’s Good: High in healthy fats from the peanut butter and coconut oil, low in net carbs, and no refined sugar. It’s a satisfying snack that won’t spike your blood sugar.
What to Know: It’s still calorie-dense due to the nuts and chocolate, so portion control is key if you’re watching calories. But honestly, one or two cups is usually enough to satisfy a sweet craving.
Final Thoughts
So that’s my go-to sugar-free dark chocolate peanut butter cups! I’ve probably talked your ear off at this point, but when you make a recipe this often, you have a lot to say about it. These cups have saved my dessert game more times than I can count. They’re my answer to “what can I bring that’s sweet but healthy?” when I’m hosting friends or just want to treat myself.
My kids are happy because they taste like chocolate, my husband’s happy because they’re not full of sugar, and I’m happy because I know exactly what’s in them. Plus, they’re so easy to make that I don’t feel stressed about the effort.
Make it yours! Try different nut butters, add different toppings, or adjust the sweetness to your liking. The best recipes are the ones you adapt to your family’s tastes. If you make these, drop a comment and let me know what you think! I love hearing how recipes turn out in your kitchen. And if something doesn’t work, tell me that too—I’m here to help troubleshoot.
Happy cooking! And I hope your kitchen smells half as good as mine does right now.
Frequently Asked Questions
Can I use milk chocolate instead of dark chocolate?
You can, but you’ll need to make sure it’s sugar-free milk chocolate. Most regular milk chocolate has sugar, which will change the entire point of this recipe. If you use sugar-free milk chocolate, the flavor will be milder and sweeter. I prefer dark chocolate for its richer flavor and lower carb count.
Why did my chocolate shells crack?
Cracking usually happens if the chocolate was too hot when you poured it, or if the shells were chilled too quickly. Try melting the chocolate more gently and ensuring the shells are at room temperature before adding the filling. Also, don’t overfill the shells—leave a little space at the top.
Can I make these ahead for a party?
Absolutely! In fact, making them a day or two ahead is best. It gives the flavors time to meld and the chocolate to fully set. Store them in the fridge until you’re ready to serve. They’ll keep well for up to two weeks.
Why did my peanut butter filling get grainy?
This usually happens if you used granular sweetener instead of powdered. Granular sweeteners don’t dissolve completely in peanut butter. To fix this next time, pulse your sweetener in a blender first. If your filling is already grainy, you can try warming it slightly and stirring vigorously, but it might not be completely smooth.
Can I freeze these peanut butter cups?
Yes! They freeze beautifully. Place them in a single layer in a freezer-safe container, separated by parchment paper. They’ll keep for up to three months. Thaw in the fridge for 10 minutes before serving. Don’t thaw at room temperature, as the chocolate can sweat and look dull.
What if I don’t have a mini muffin tin?
You can use a regular muffin tin and make larger cups. You’ll need to double the filling and chocolate amounts, and chill them for longer (about 20-30 minutes). You can also use small silicone molds if you have them.
Can I use a different sweetener?
You can use any sugar-free sweetener you prefer, as long as it’s powdered. Stevia, monk fruit, and allulose all work well. Just be aware that some sweeteners have a different sweetness level, so adjust the amount to taste.
Pin This Recipe!

Sugar-Free Dark Chocolate Peanut Butter Cups: 5-Ingredient Indulgence
- Total Time: 30 minutes
- Yield: 12-15 servings 1x
Description
Rich, deeply chocolatey, and creamy peanut butter cups made with only five ingredients. These sugar-free treats snap cleanly when bitten and are perfect for impressing guests or satisfying a sweet tooth without the guilt.
Ingredients
- 1 cup (170g) sugar-free dark chocolate chips (at least 70% cocoa)
- 1 tablespoon (15ml) coconut oil
- Pinch of sea salt
- 1/2 cup (125g) natural creamy peanut butter
- 2–3 tablespoons (25-35g) powdered sugar-free sweetener (erythritol or monk fruit)
- 1–2 teaspoons heavy cream or coconut cream
- 1/2 teaspoon pure vanilla extract
- Optional: Flaky sea salt or crushed peanuts for topping
Instructions
- Place foil candy cups into a mini muffin tin. If not using foil cups, lightly grease the tin with coconut oil spray.
- Melt dark chocolate chips and coconut oil in a microwave-safe bowl in 30-second intervals, stirring well between each, until smooth. Stir in the pinch of sea salt.
- Add about 1 teaspoon of chocolate to the bottom of each foil cup, spreading it up the sides to create a thin shell.
- Freeze the muffin tin for 5 minutes to set the chocolate shells.
- While shells are setting, whisk natural peanut butter, powdered sweetener, vanilla extract, and heavy cream (or coconut cream) in a small bowl until smooth and creamy.
- Remove muffin tin from freezer. Spoon about 1 teaspoon of peanut butter filling into each chocolate shell, smoothing the top.
- Melt remaining chocolate if needed. Spoon or pipe another teaspoon of chocolate over the filling to seal it completely.
- Freeze for at least 15-20 minutes, or until the chocolate is completely hard.
- Store in an airtight container in the refrigerator or freezer.
Notes
Use powdered sweetener to avoid grittiness. Ensure chocolate shells are fully set before adding filling to prevent sinking. Store in the fridge for up to two weeks or freezer for up to three months.
- Prep Time: 10 minutes
- Cook Time: 0 minutes
- Category: Dessert
- Cuisine: American
Nutrition
- Serving Size: 1 cup
- Calories: 120
- Sugar: 1
- Sodium: 15
- Fat: 10
- Saturated Fat: 5
- Carbohydrates: 4
- Fiber: 2
- Protein: 3
Keywords: sugar-free, dark chocolate, peanut butter cups, keto dessert, low carb, gluten-free, healthy snacks, 5-ingredient recipe


